
Hi
I have been waiting in all day for the sump pan to arrive and got on with some of the little jobs while I was waiting.
A few jobs on the back bulkhead needed finishing off, the fire boards that had the damaged holes came first. I had ordered a box of over 500 stainless steel self tapping screws and they were all to small for the 4mm holes drilled for the rivet so I tapped out the holes 5mm and used stainless bolts with penny washes to secure the boards.
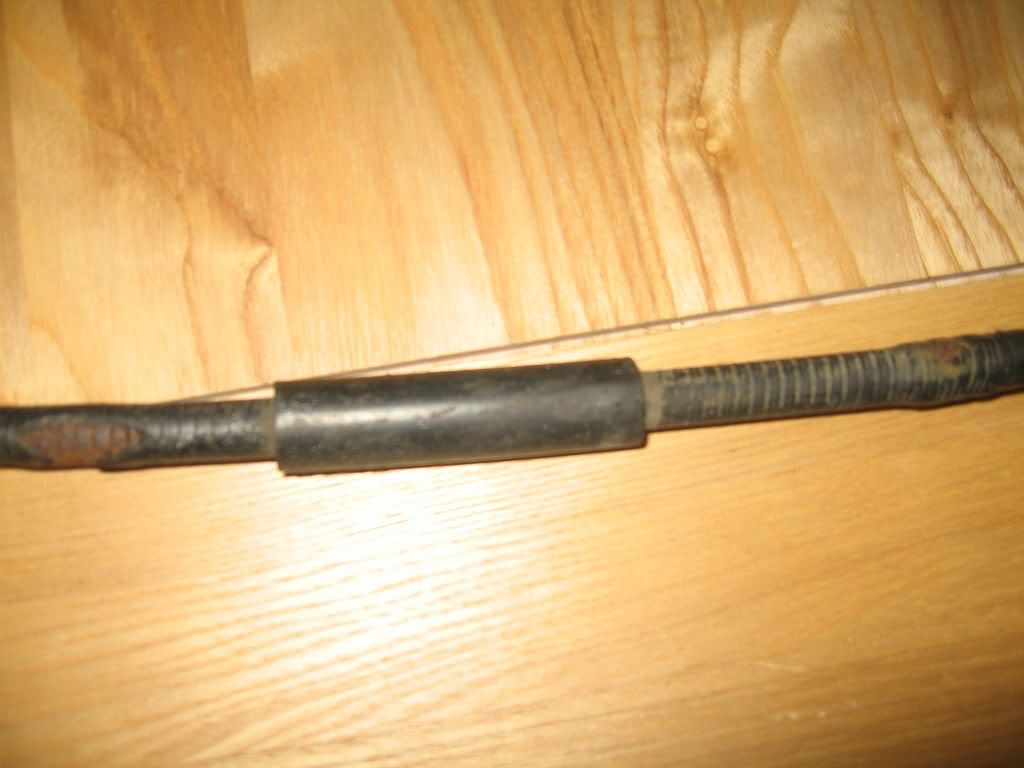
I had also ordered a clutch cable from Burton Power which cost around £15, I ordered this when I was away and was unsure about the length although I new the one fitted was so excessively long that even if I ordered one to short it would still be ok. Not only was it short by 100mm but also the end that fits to the pedal mechanism was different, the one I ordered was for a Mk2 Granada but instead of a button on the end it had a ring which was to big for the connection. I have looked on eBay at cables for a Capri, Granada and Cortina and these all have the ring ends, so unless you know exactly which one to order you may also end up with a different cable than fitted.
It really wasn't a problem all I had to do was to modify the holder on the cable and file out the hole on the clip..
The original cable had some damage to the exterior, whether or not the inside was damaged was a chance I didn't want to take so it was on the list of replacement parts from the beginning.
Just in case anyone is in the same boat I have taken a few photos of what I did
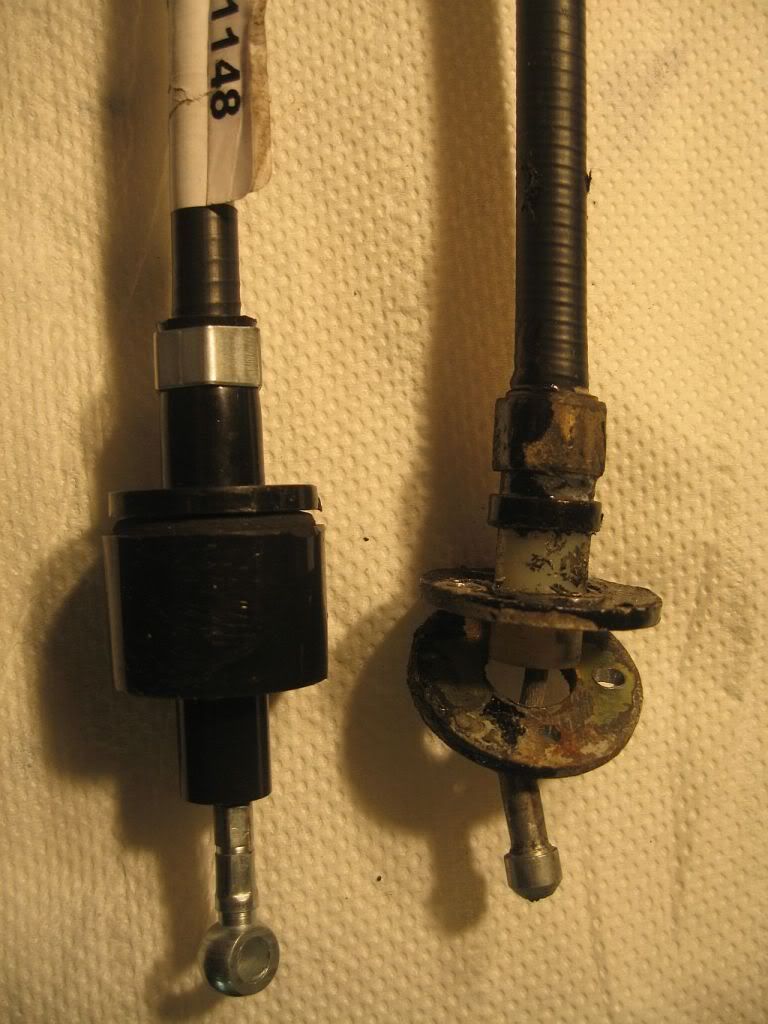
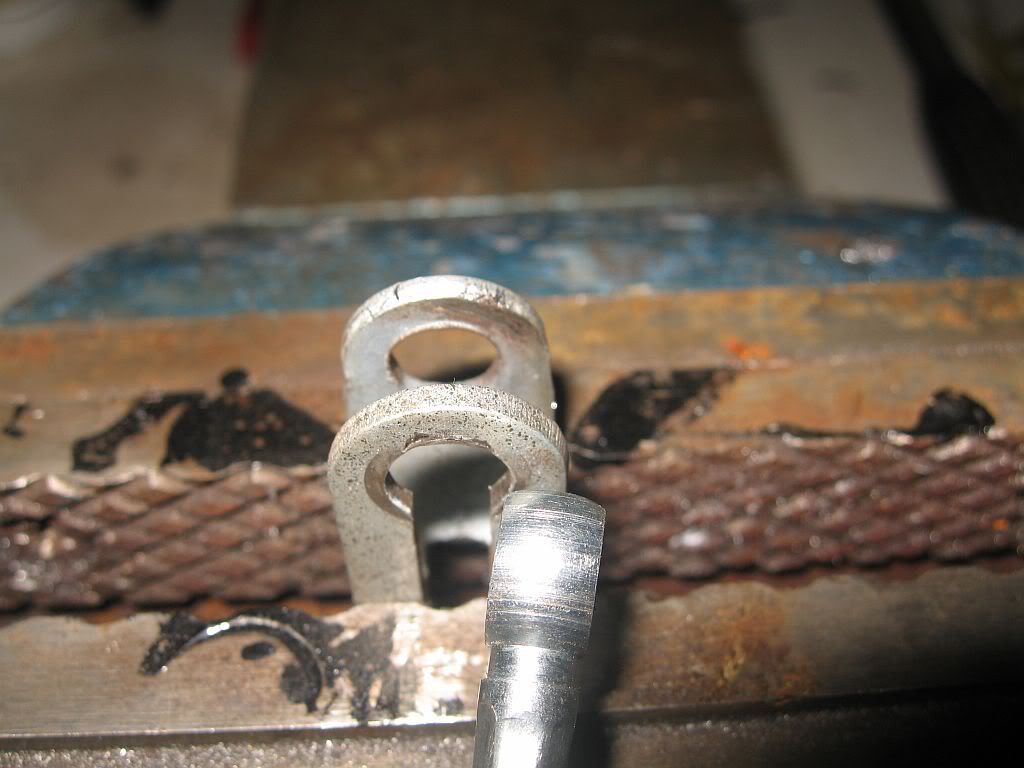
As you can see the ends have different stoppers fitted.
The flange ends also need to be altered, to remove the black tube end I used a small hacksaw to cut around the end and pulled it off.
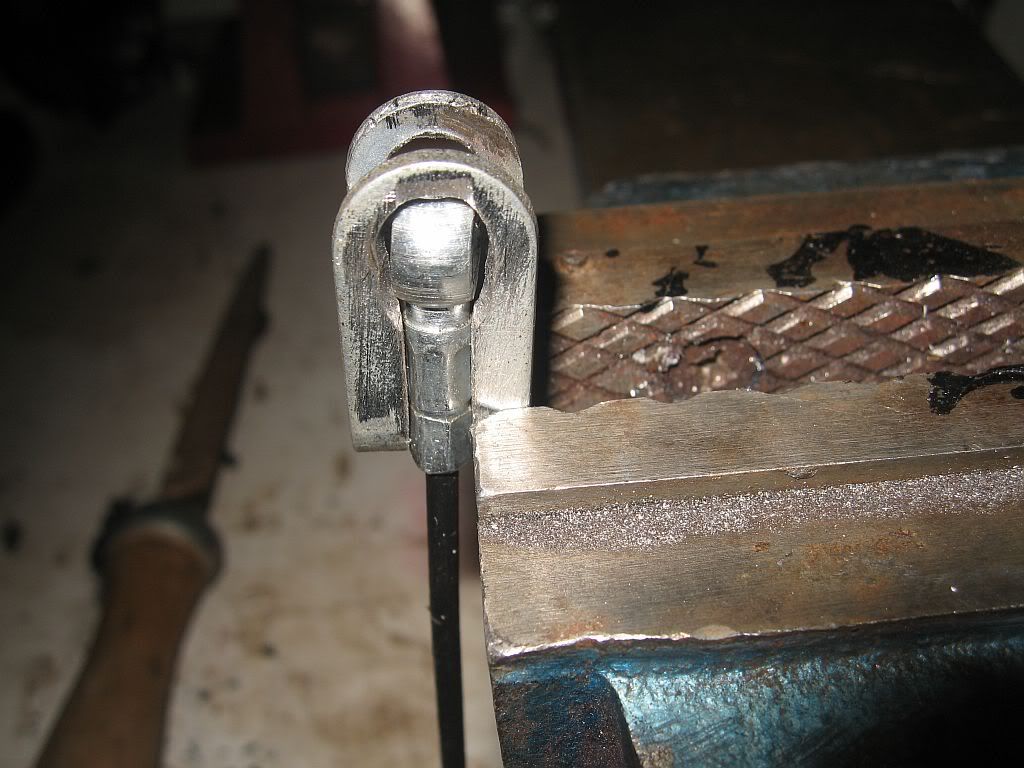
The steel washer flange on the original needs to be re-fitted, this is for strength and also for the holes to be drilled through to match the holes in the bulkhead.
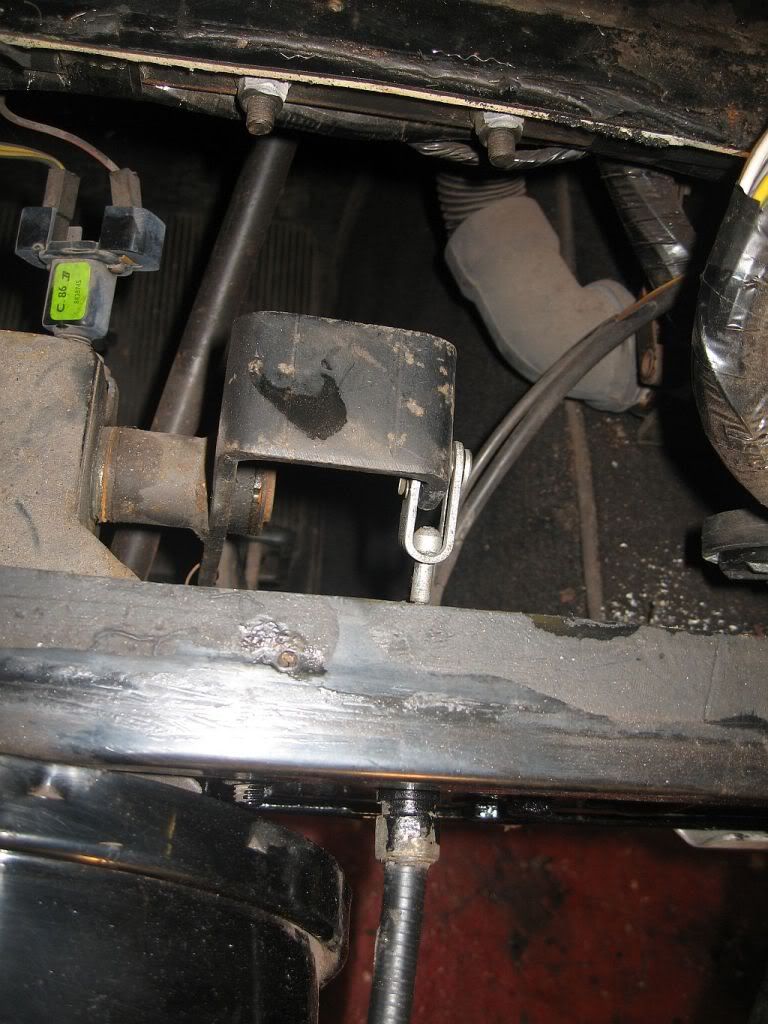
To remove the old one is a simple matter of drilling out the pop rivets and removing the clip, this can be done either by removing the screws from the fuse box plate and lifting for access or squeezing into the footwell and pulling the clip.
You can see that the ring of the new cable is larger than the hole in the clip.
To remove the old one is a simple matter of drilling out the pop rivets and removing the clip, this can be done either by removing the screws from the fuse box plate and lifting for access or squeezing into the footwell and pulling the clip.
The rivets are drilled out.
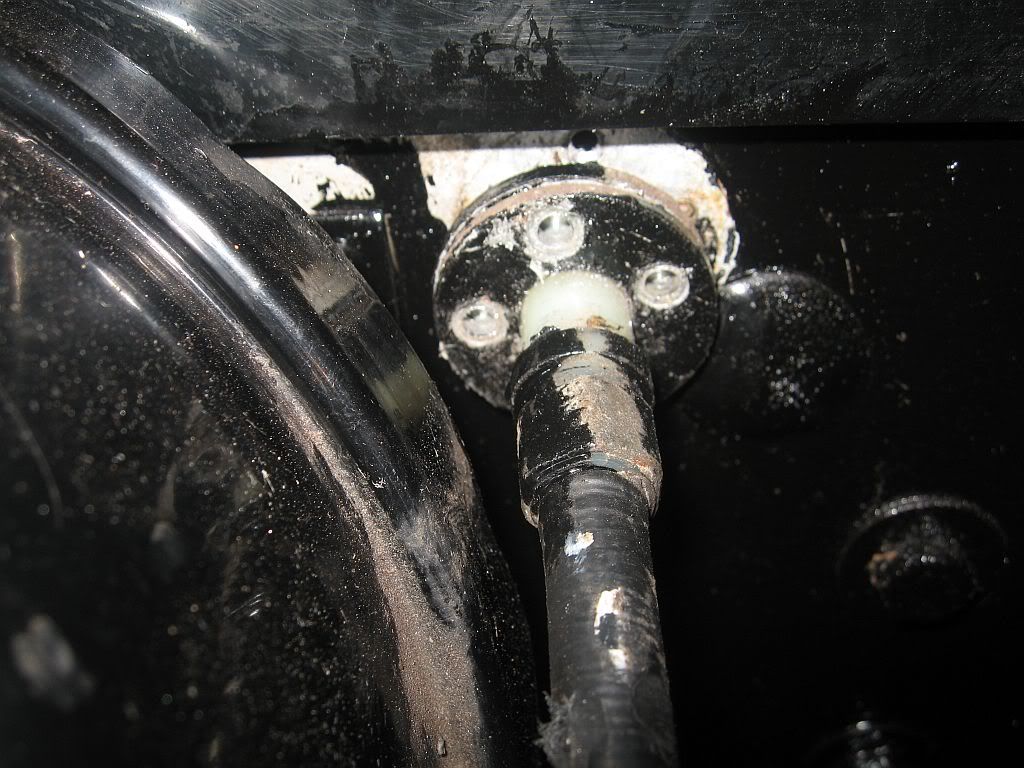
A little bit of work with the file and it will just slip in nicely.
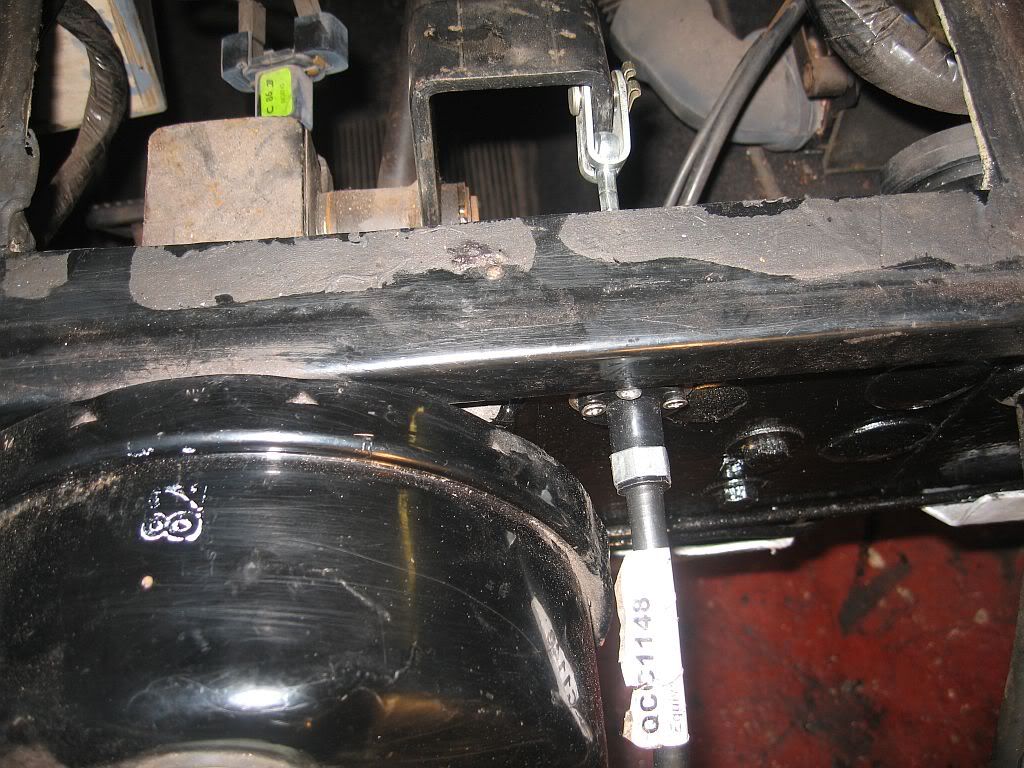
The cable can now be slipped through the hole, the clip can be connected to the ring and the pin positioned. The flange is attached to the bulkhead, I have used self tapping screws to do this instead of rivets for the easy removal and changing in the future.
And that's about it
The sump arrived at around 1345 which is excellent service from Tickover as I only phoned around 1100 yesterday and here it is.
As you can imagine a sump pan from a 30 plus year old Capri would be in a bit of a state, it had a number of dings and dints from speed bumps and was very dirty inside, Clive at Tickover had bashed these dints out and carried out a water test, he assures me that it is water tight, soon see.
First job was in the blasting cabinet and it came out a different sump, a little sanding on the rough parts and then a test fit.
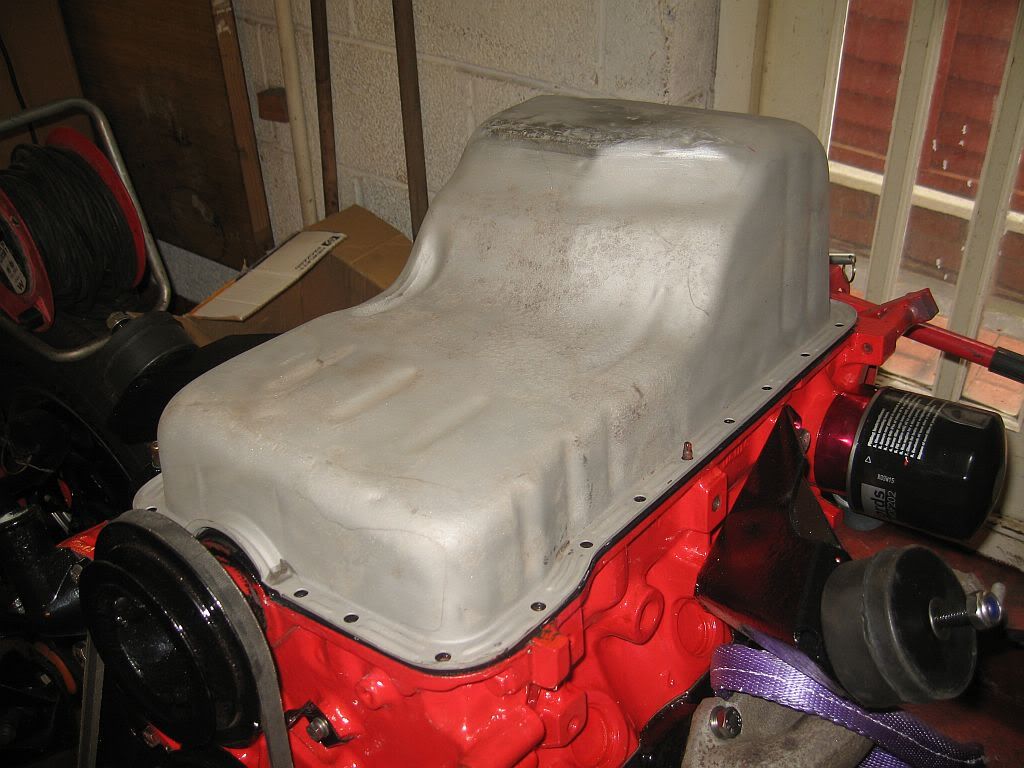 This is the early sump pan and is supposed to be fitted using a cork gasket set but as I have paid a lot for the later rubber gasket I am going to give it a chance. The reason for not fitting the rubber to these pans is that they don't have the buttons on the sump flange that fit into the gasket to prevent it squeezing out so I have used most of a tube of Hylomar on the flanges just to make sure. Before fitting I gave it a coat of etch primer then 2 coats of stone chip, I used a heat gun between coats as I am still hopefull of fitting the engine tomorrow or Thursday or Friday etc etc.
I bolted the pan down nice and evenly, I have also used the support flanges that were fitted to the original sump in the hope that it will spread the torque evenly and prevent to much squishing of the rubber gasket.
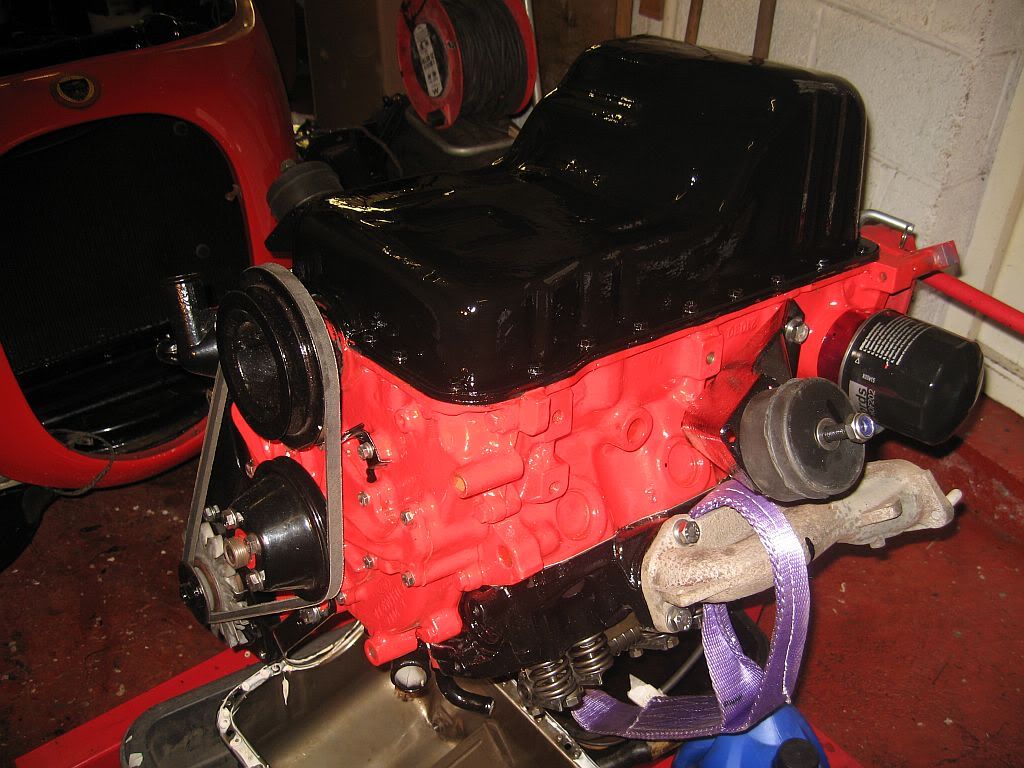 It only squeezed out a little so fingers crossed, Once all tight I have given it a coat of gloss black to match up with the other parts and a little more protection.
Well I'll see how far I get tomorrow.
see ya Paul
The sump arrived at around 1345 which is excellent service from Tickover as I only phoned around 1100 yesterday and here it is.
As you can imagine a sump pan from a 30 plus year old Capri would be in a bit of a state, it had a number of dings and dints from speed bumps and was very dirty inside, Clive at Tickover had bashed these dints out and carried out a water test, he assures me that it is water tight, soon see.
First job was in the blasting cabinet and it came out a different sump, a little sanding on the rough parts and then a test fit.
I bolted the pan down nice and evenly, I have also used the support flanges that were fitted to the original sump in the hope that it will spread the torque evenly and prevent to much squishing of the rubber gasket.
Well I'll see how far I get tomorrow.
see ya Paul
No comments:
Post a Comment