
Well another day and another mistake, yesterday that is.
I received an email from Terry B and the reason the clutch cable was different from fitted was, as many of you reading this will all ready know, is that the Kallista does not use a Ford cable. Silly of me thinking that it would be that easy, anyway I am putting in an order with Bruno for other parts next month and will order one to fit. The reason for changing is that the proper one just slides out of the flange and is easier to replace as I have been told that they are prone to breaking.
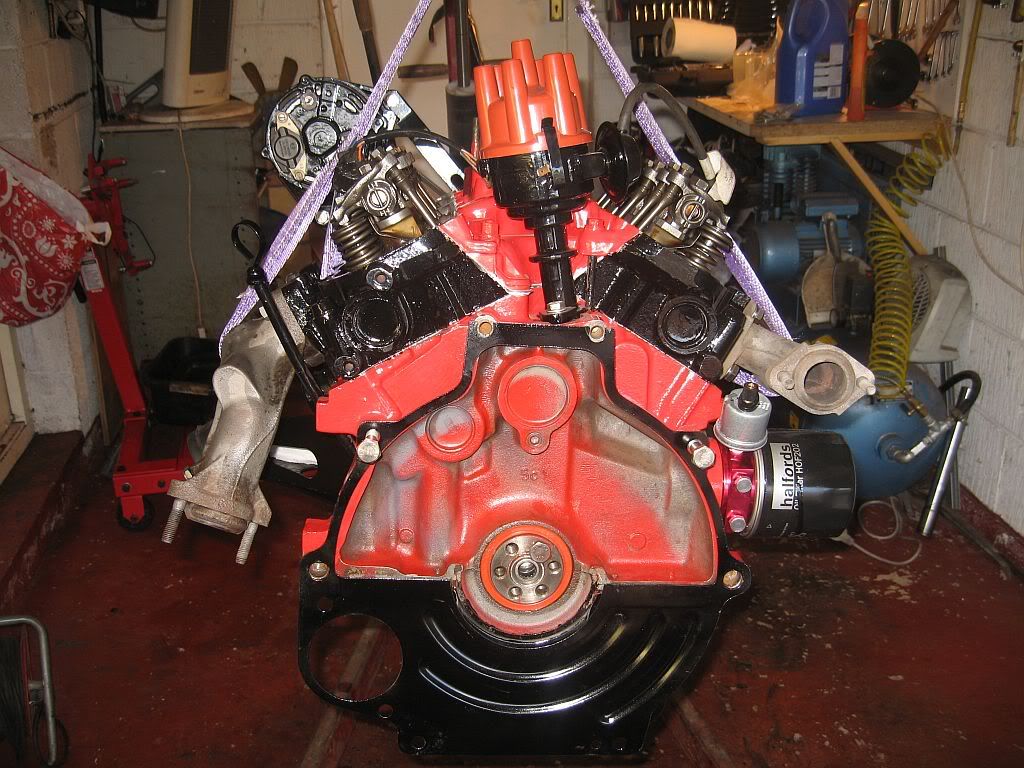
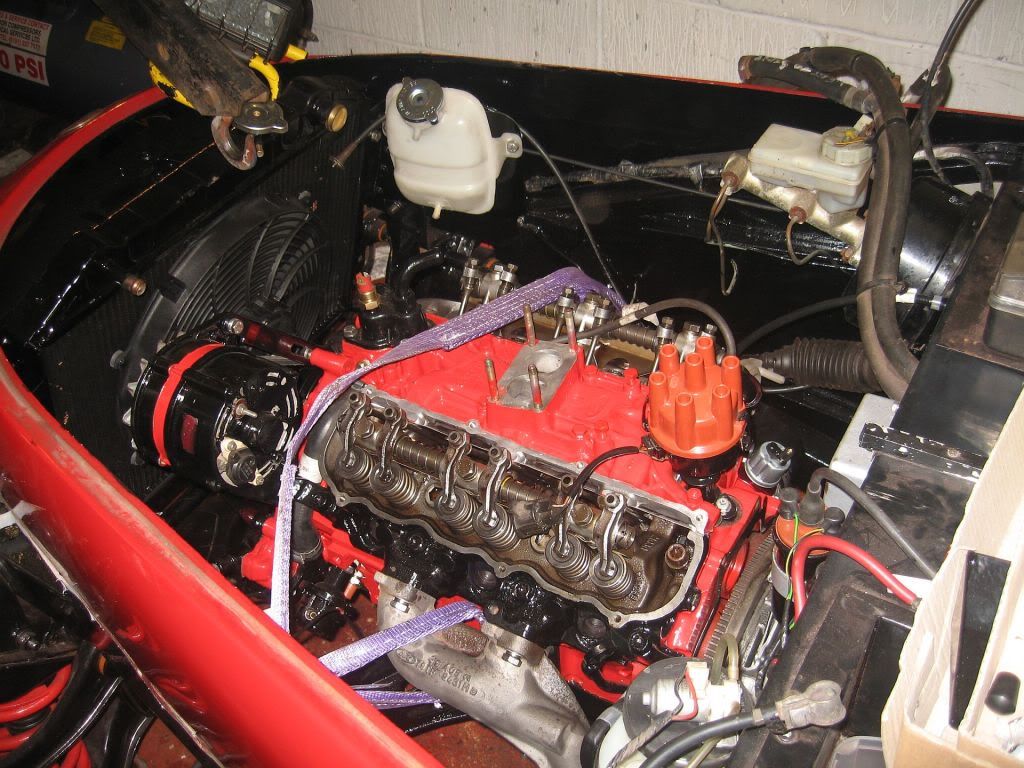
Today was engine fitting day and this was not without its own problems.
Luckily it was a nice and sunny day again so the car went outside, the crane hoist was rebuilt and I got the engine off the stand again. First job was to top up the sump with oil and so far so good no drips to be seen.
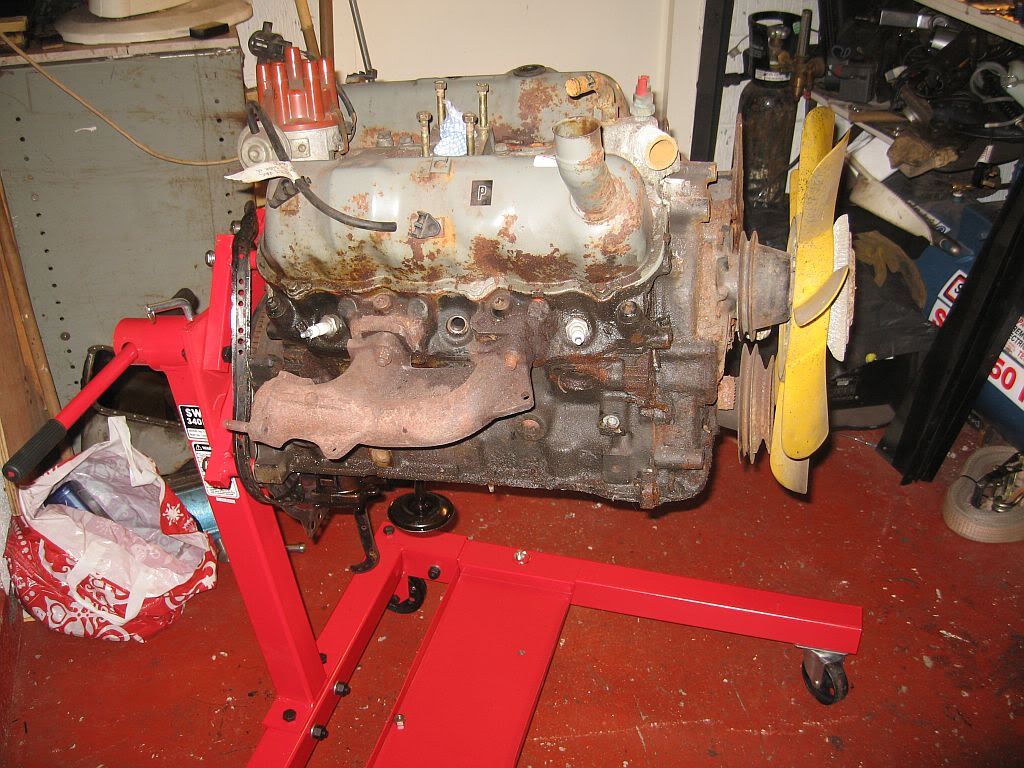
I first needed to fit the sandwich plate onto the engine, to hold it in place the gearbox locating dowels need to be fitted unfortunately these were still in the bell housing and were so tight I could not remove them with out damaging them so I left them in the housing. For the time being I have held it in place by fitting two of the bell housing bolts but will tie it in position so as to remove the bolts before fitting the gearbox.
Next came the flywheel, I had marked the position it was originally in so as the balance drilling's would be in the same place. The torque for the flywheel is as stated in the Haynes manual around 69Nm, tightening to this takes some doing when the engine wants to turn with you.
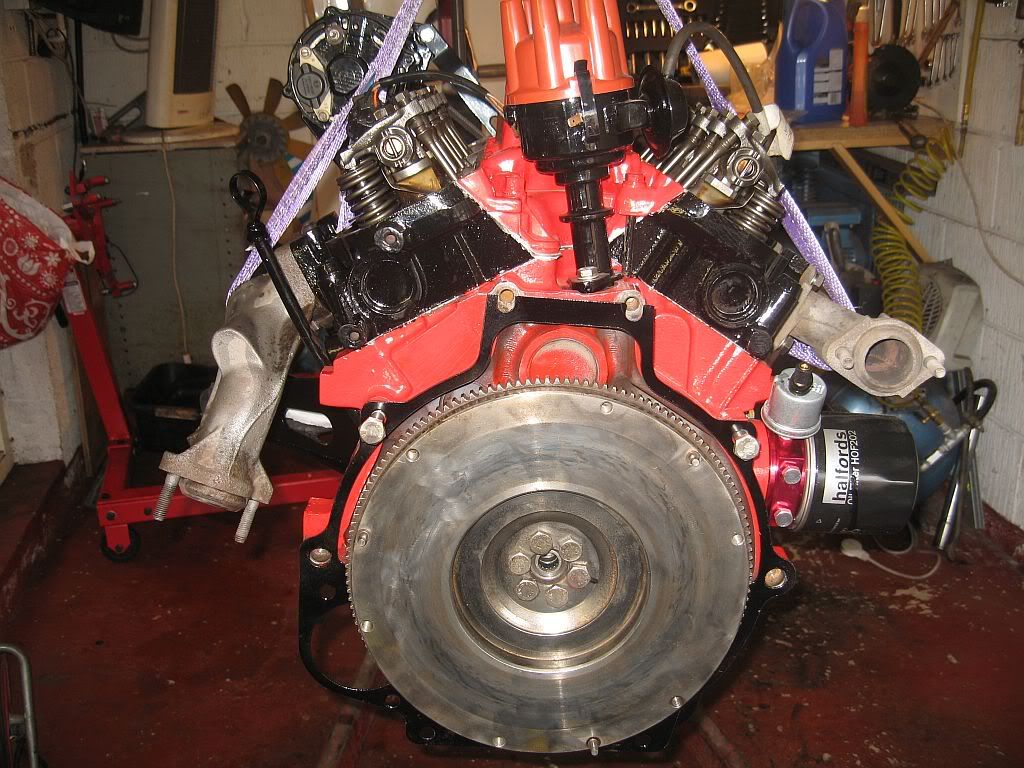
I went round evenly and alternately to fit it nice and square.
The clutch was next in line and the pressure plate and flywheel got a good clean with brake cleaner to remove any grease or oily fingerprints. The friction plate was put into position with the alignment tool keeping it central.
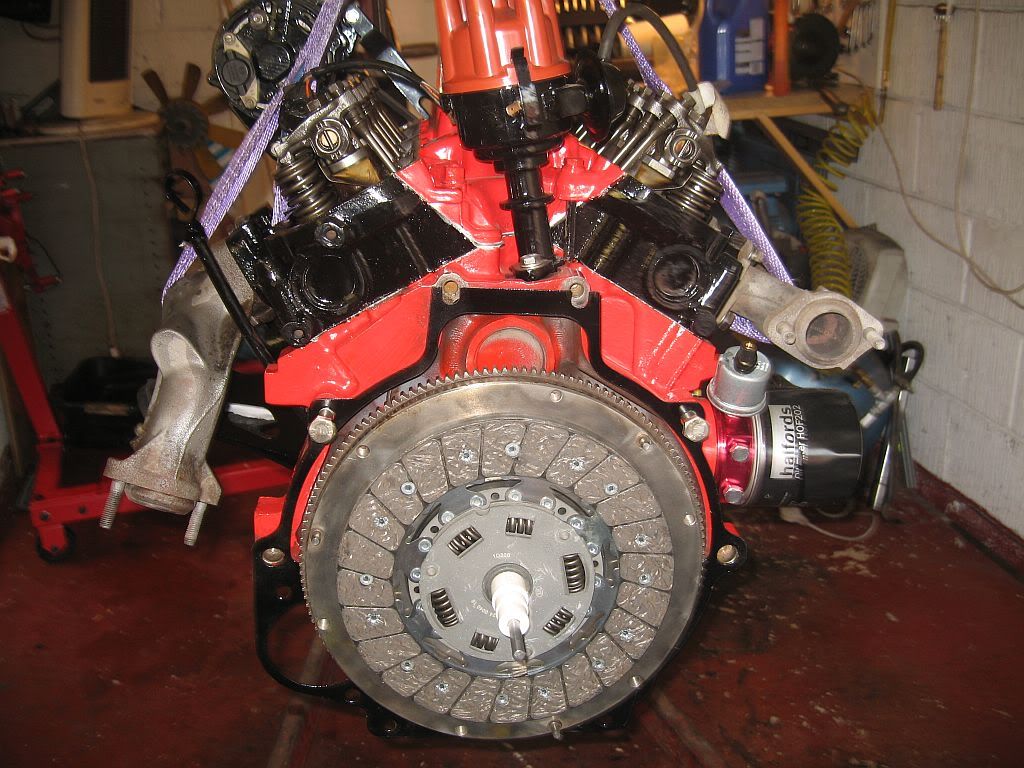
I had forgotten to buy new stainless bolts so I cleaned up of the old one's and used these, the pressure plate was positioned and the bolts tightened evenly and diagonally to a torque of 20Nm as stated in the Haynes manual.
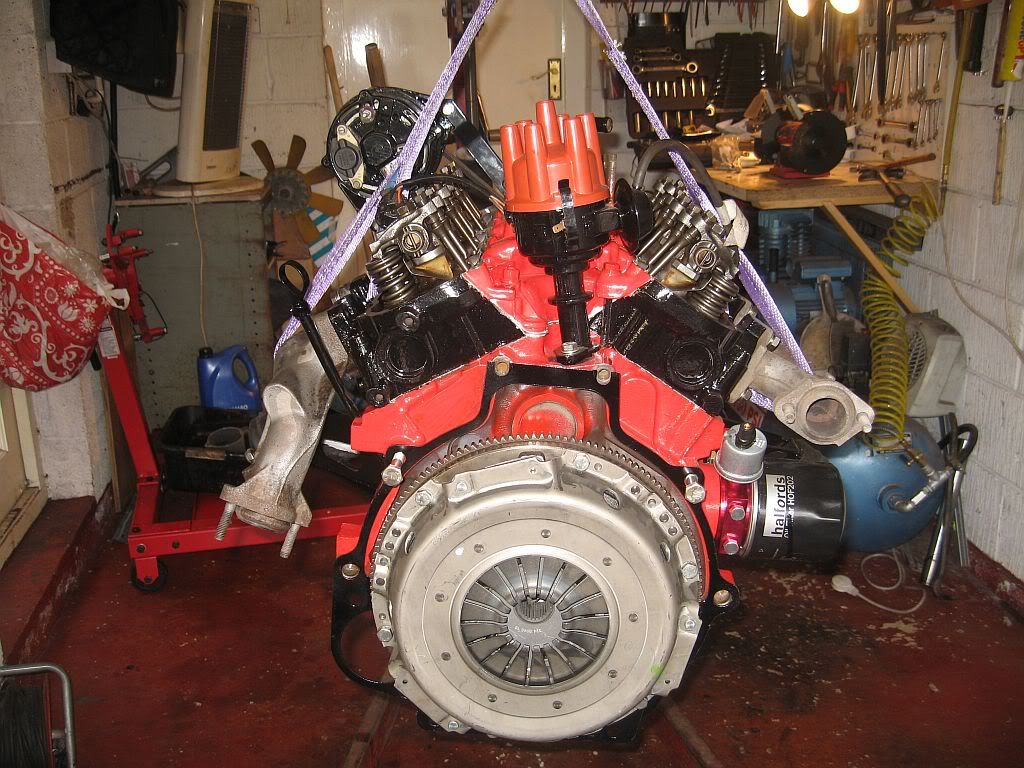
Now it was ready to go in.
Just a reminder of what came out.
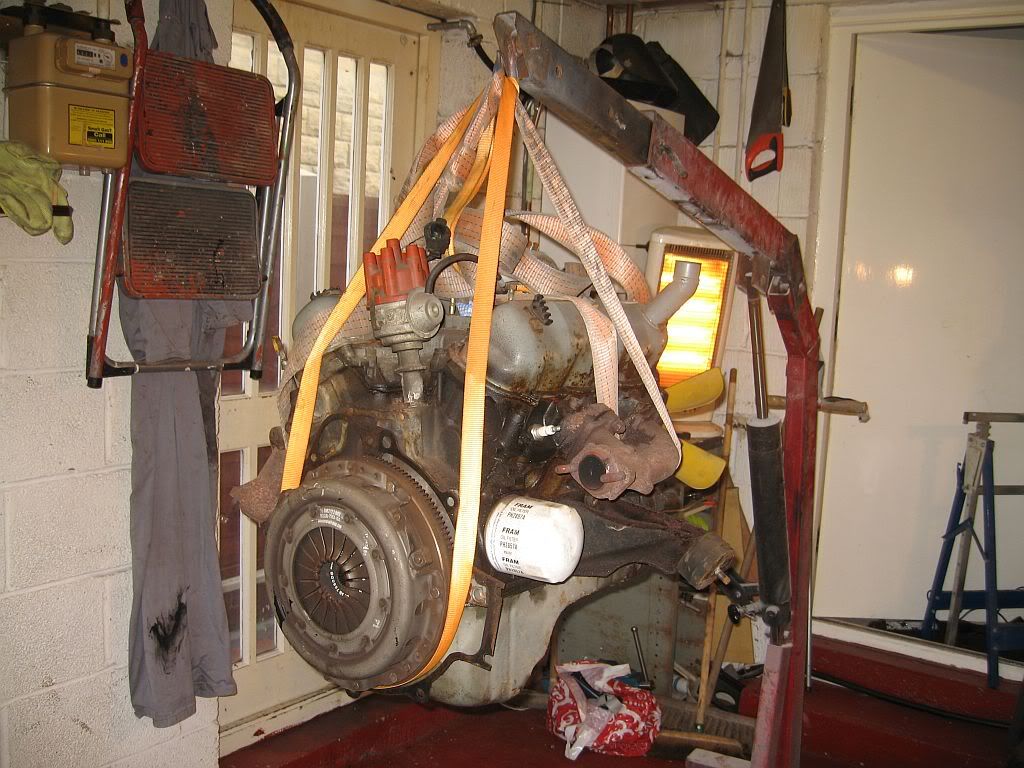
Then slowly and carefully lowered it down, I soon realised that with the engine mounts in position it was going to be to wide so I removed these and lowered away. Surprisingly I got it into position with only a bit of paint scrapped from the radiator; amazing.
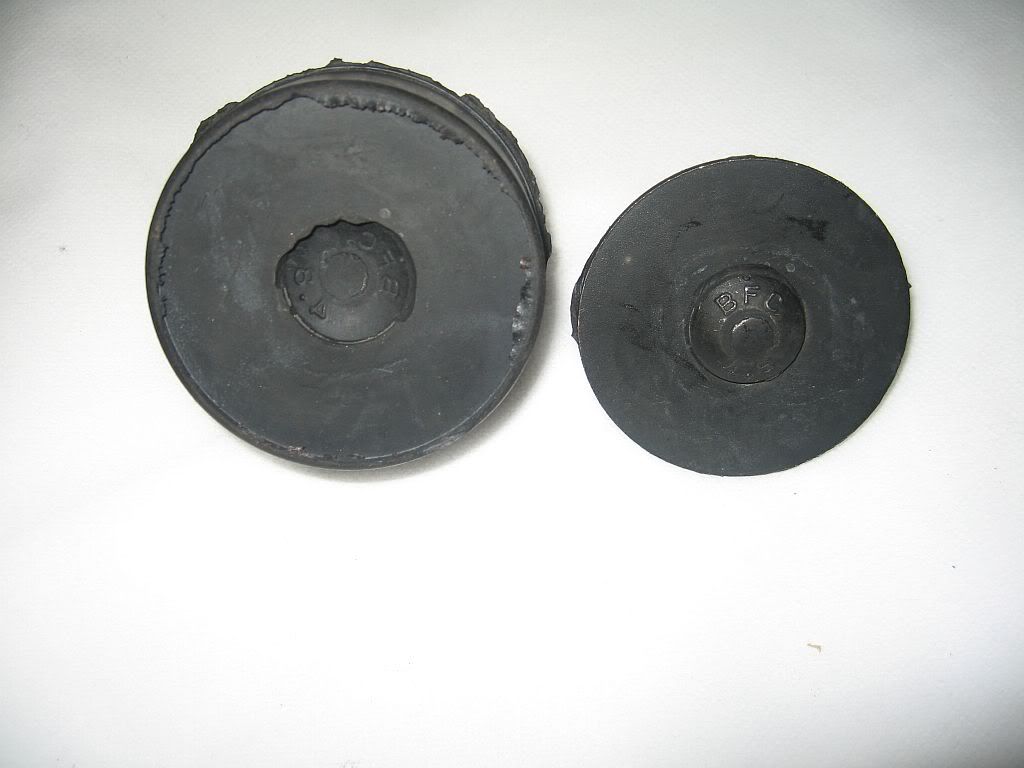
This is where the problems started, firstly the drivers side rubber mount was lowered into its hole in the mounting bracket then I tried to do the same on the pass side, unfortunately because of the angle of the brackets in relation to the fitment on the engine this is not possible so the mount had to be unbolted again. I first fitted the rubber mount then re-bolted the bracket to the engine, lowered a little until in the correct position and tightened it all up. Great I thought all done; until I took some off the weight from the hoist and surprisingly the new rubber mounting fell to pieces.
The mounts I bought were made by QH and looked very good quality but the molding of the bolt was only surface deep.
I have been in contact with the supplier who wants me to return it so he can contact QH as he says this item is one of his best sellers and he wants to find out what the problem is.
Luckily the whole of the car was in the garage so I was able to get out and find new mounts, no joy, the only manufacture of these mounts is QH, the guy at my local auto shop went through every spares book he had and searched on his computer but could only find the QH mounts I already had so I was a bit stuck.
So I decided the only option I had was to re-use my old ones, but as I had to cut one of them out to remove it I had a bit of a problem, so I decided to drill right through and fit a new stainless bolt.
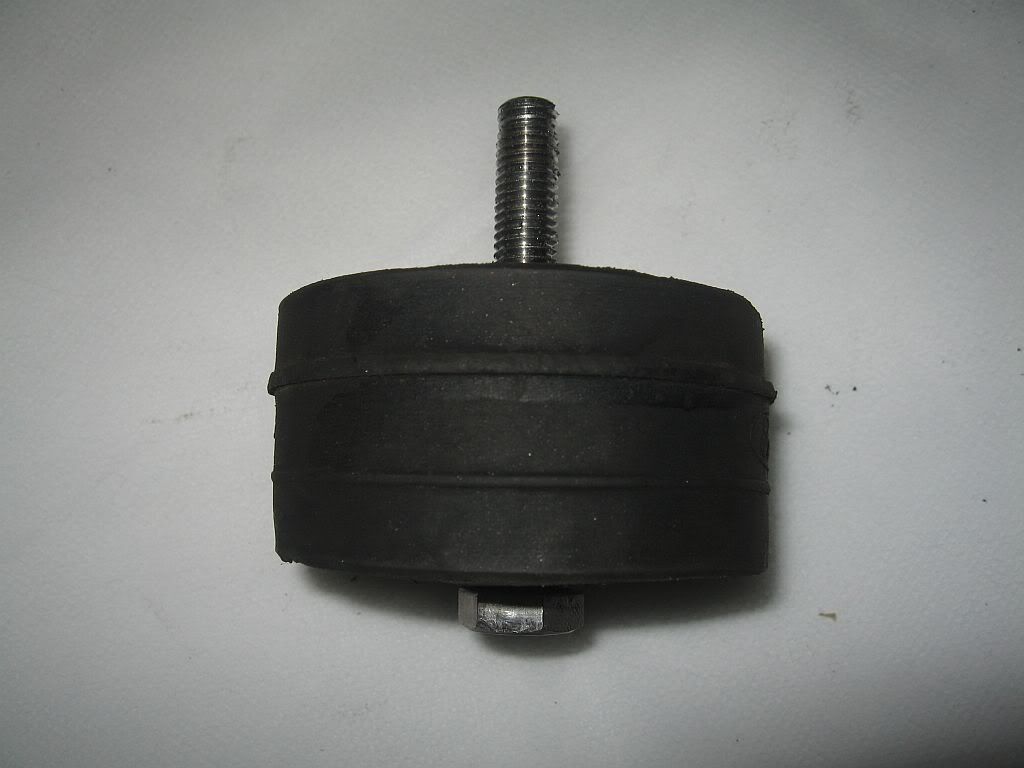
I cleaned up all the rust and replaced both sides as I did not trust the other QH mount even though it may have just the one that was dodgy.
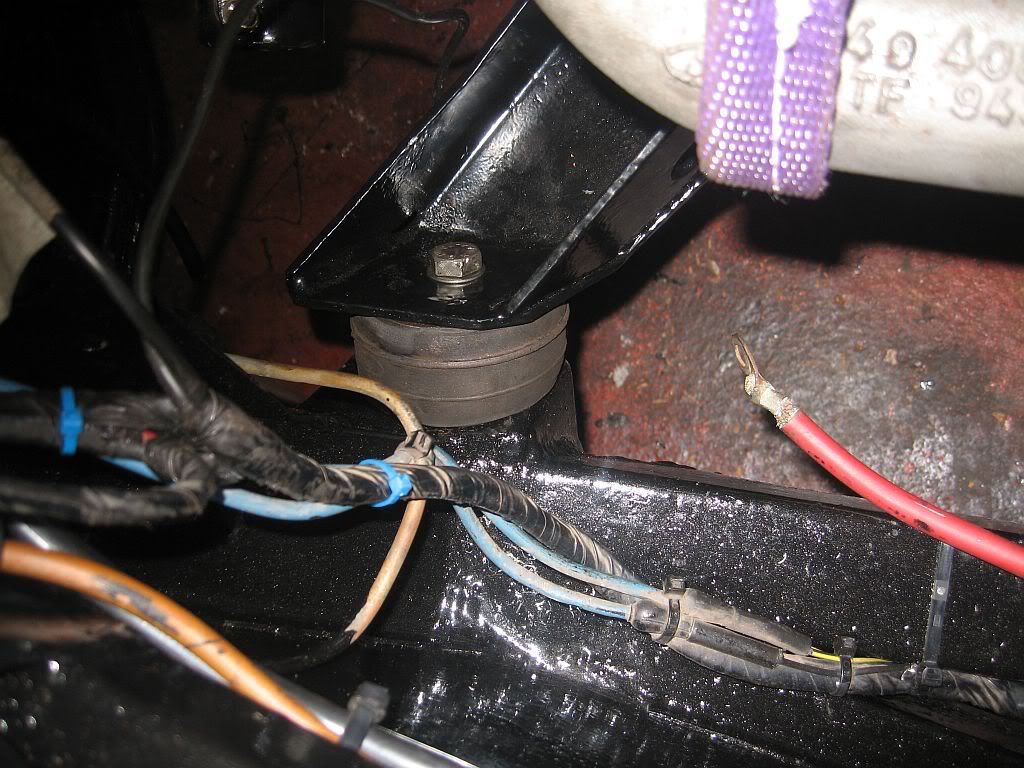
Well that's the engine fitted, I have the jack underneath to hold it in position until the gearbox is attached, next I shall re-position the crane to the flywheel end to position the clutch into the correct position for sliding in the gearbox input shaft.

Unfortunately I have been told that I have to go clothes shopping tomorrow as we are off to my nephews wedding on Saturday and I'm not allowed to go in jeans and tee shirt. Hopefully I'll get some work in during the afternoon.
No comments:
Post a Comment