Sunday, 12 February 2012

Sunday 12/02/2012

Hi
Well a bit of a busy weekend and most of it based around these Mustang heads I have bought. 
There are 2 different points of view on the heads.
On the one hand it was a pretty big mistake and on the other they are the best things for this engine out there.
Both camps have good and valid arguments and in the end I have gone with the person who has given me sound advise since day one and the heads have gone.
The person who sold them say's they will fit perfectly and that in the 80's these heads from the Mk2 Mustang were worth more than their weight in gold and that fights had broken out over them; and the people who have just been round to pick them up seem to be of the same mind.
The other camp say that I would have big problems with them and the tuning would be a nightmare and quite possibly I may need American cams to suit.
The person who sold them is adamant that all cams and everything else will match perfectly.
Obviously I would need new inlet & exhaust gasket of which I sourced in 2 minutes and these are of the shelf stock, the big problem comes with the carb and this is a problem. I have been through the web tracking down the carb which I now believe is a Motorcraft 2150-2v or possibly a Holly 5200 of which the USA eBay site is teeming with, but the big crunch is my ability to do the job.

So, as I have said before this is all new to me and you are reading the chronicles of a beginner, although I am learning each time I put a spanner to the car. At the moment I have an engine that runs with the correct carb and that the future may be a lot easier if it stays that way. So I decided yesterday morning to re-list the heads on eBay, within 30mins I had 2 watchers 5 hours later 7 and 6 hours later they were sold; basically for what I paid for them, Ok I lost £30 mostly the cost I paid for delivery but I'll put that down to a very steep learning curve.
The 2 guys who bought the heads live local, around 10ml away in Washington and came cash in hand this lunchtime, only in they early 20's and have already restored a 66 Beetle, a Sierra XR4 and are now restoring a Mk3 Cortina fitting a 2.8 Cologne Injected engine and are converting that to a carb. They are having Specialist engines re-build the engine and have already contacted them about the suitability of these heads and have the thumbs up that they are good, so it looks like they will be skimmed and ported and made new again. Best of luck, best thing is they don't have a garage and do all this at the side of a house. Brrr

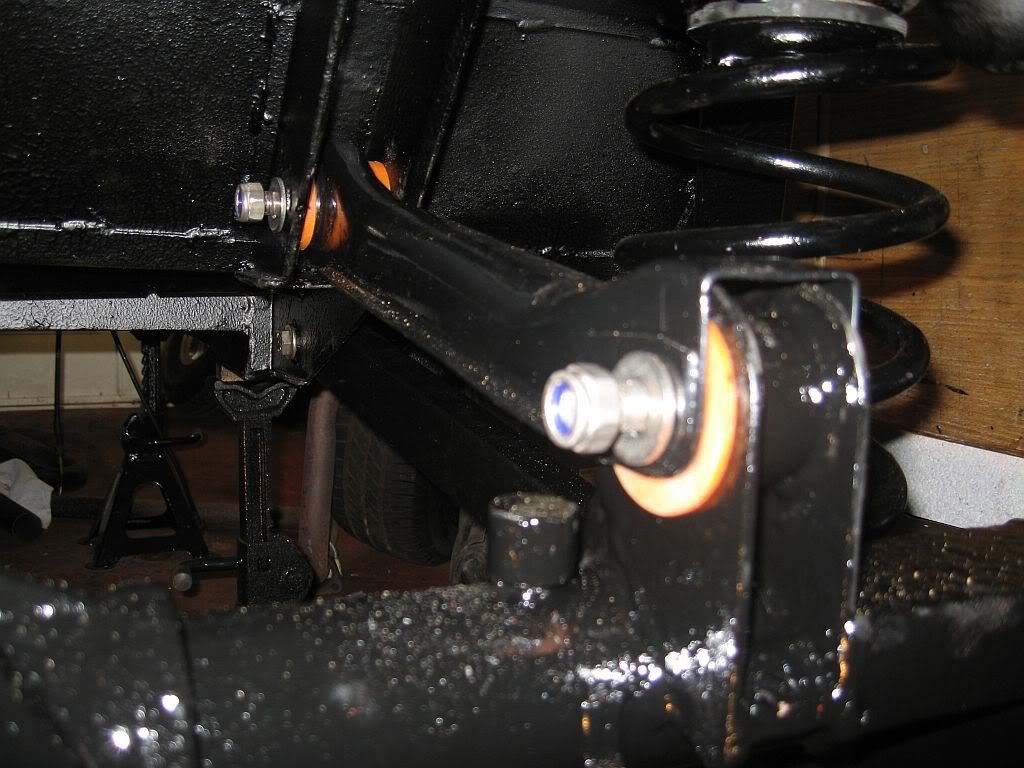
With all this going on I have still managed to get some work done and the good news of the weekend is that the Battle of the Bush is over. Floflex delivered on Friday, it was Lynne's day off but luckily I managed to be in for the delivery. Now that I know the pitfalls of bush alteration it went without a hitch and fit perfectly so all finished.
After this came the fitting of the fuel tank, this really is a 2 handed job but with the use of my jack I managed to get it into position only to find that I could not get the inside brackets to bolt on as the holes didn't line up. I remember when I removed the tank that both brackets were a bit twisted and very tight against the tank so out came the junior hacksaw and drill and I slotted the holes, after that it went straight in.
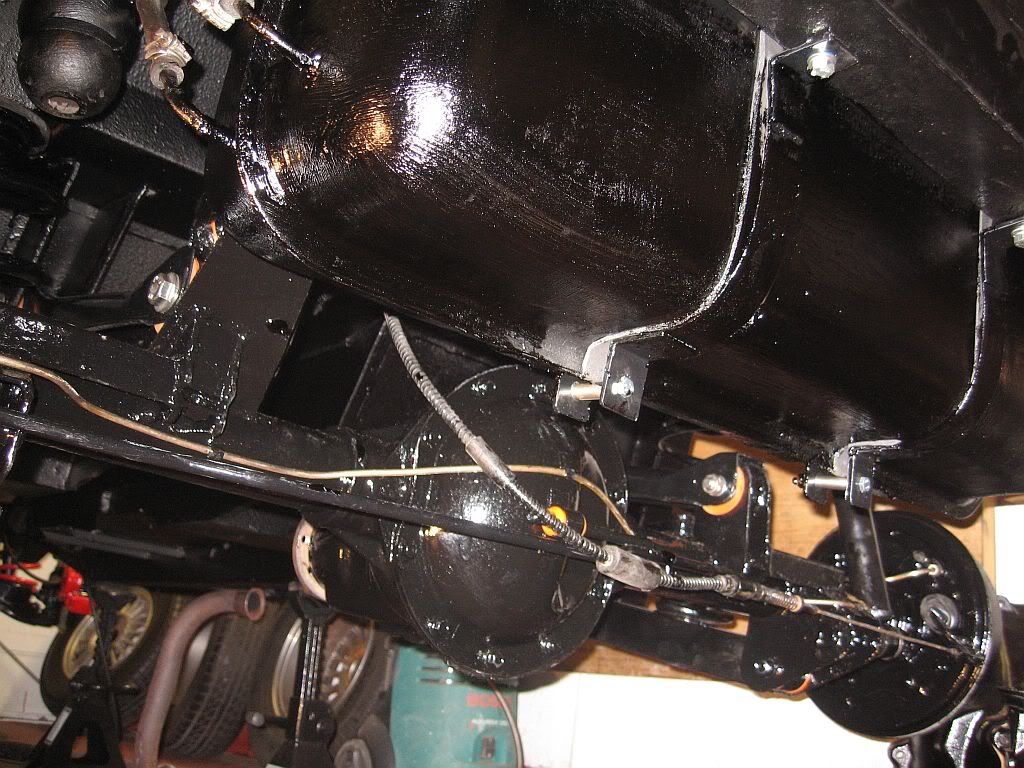
After it was in I painted it with a coat of Tetra shutz, I didn't want to spray it on in case it went everywhere but on looking at the photo I think tomorrow I shall mask up and the spray gun will be out, I'll make sure I get the bits I missed plus the spotted spray pattern looks a whole lot better.
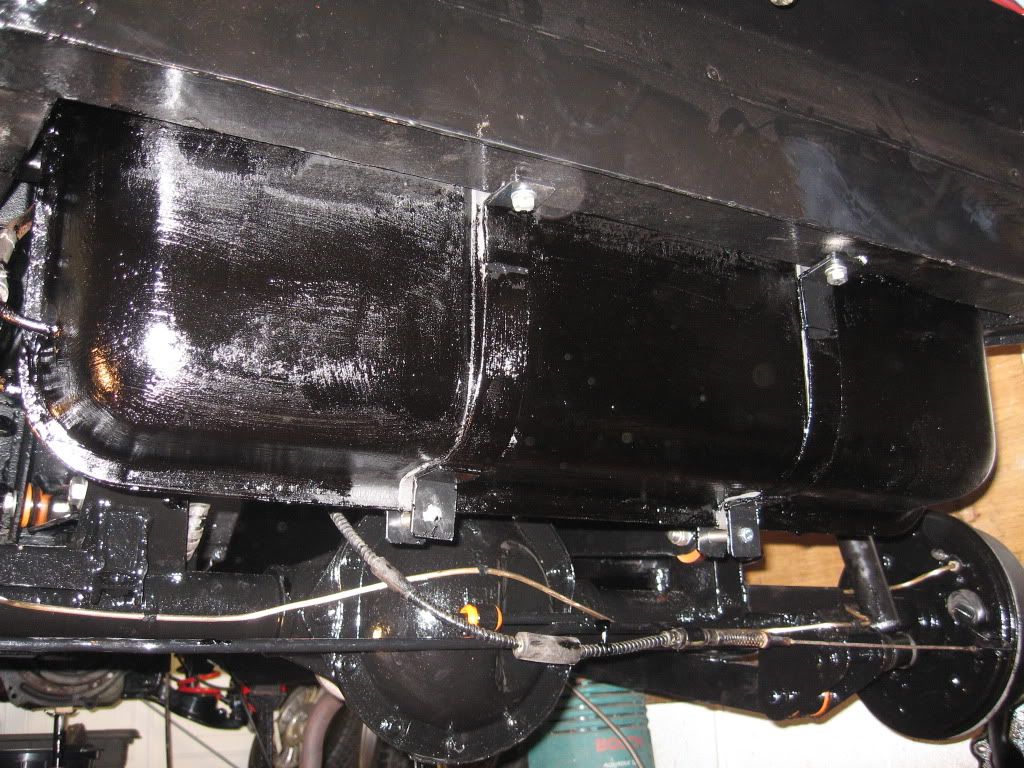
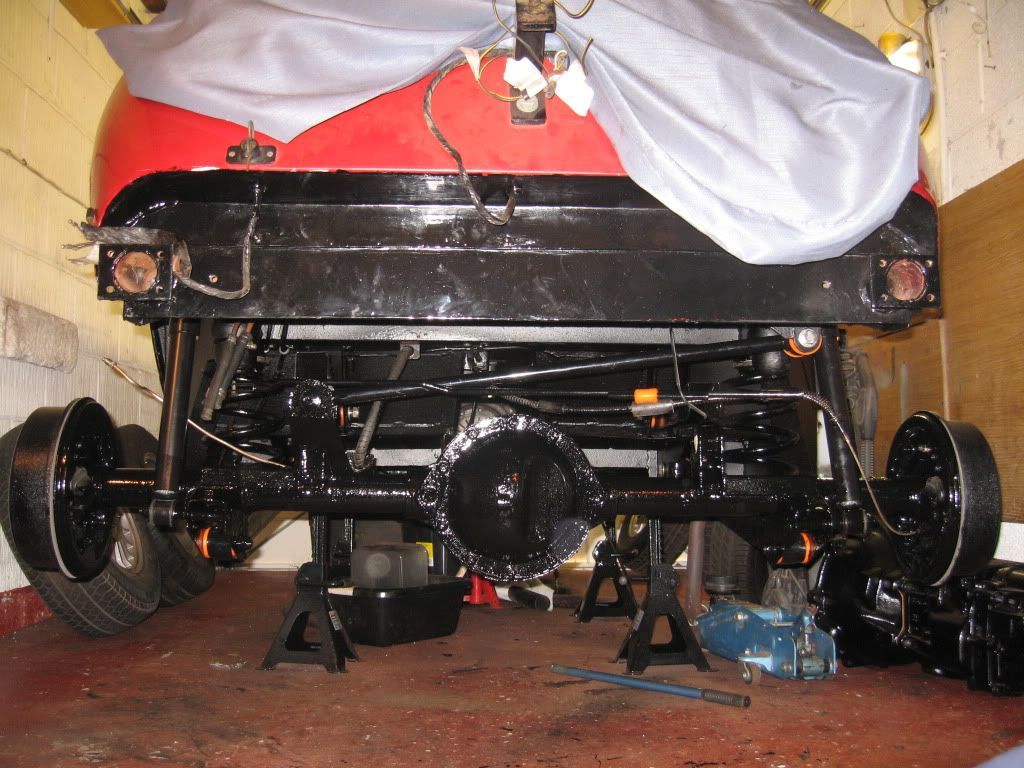
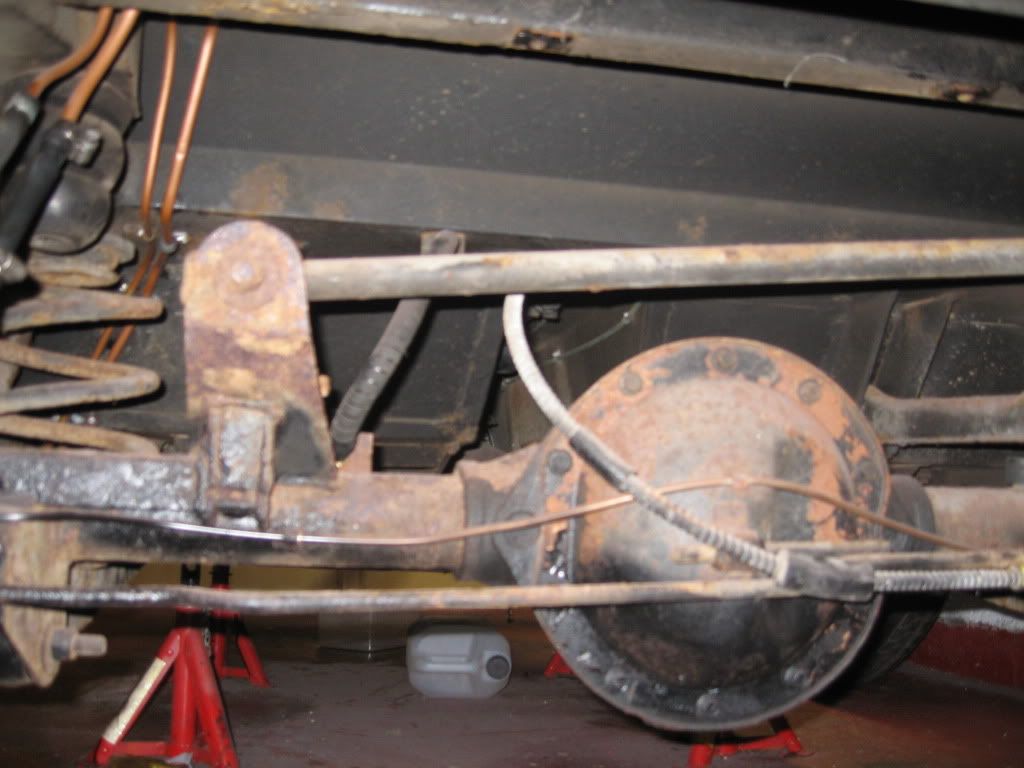
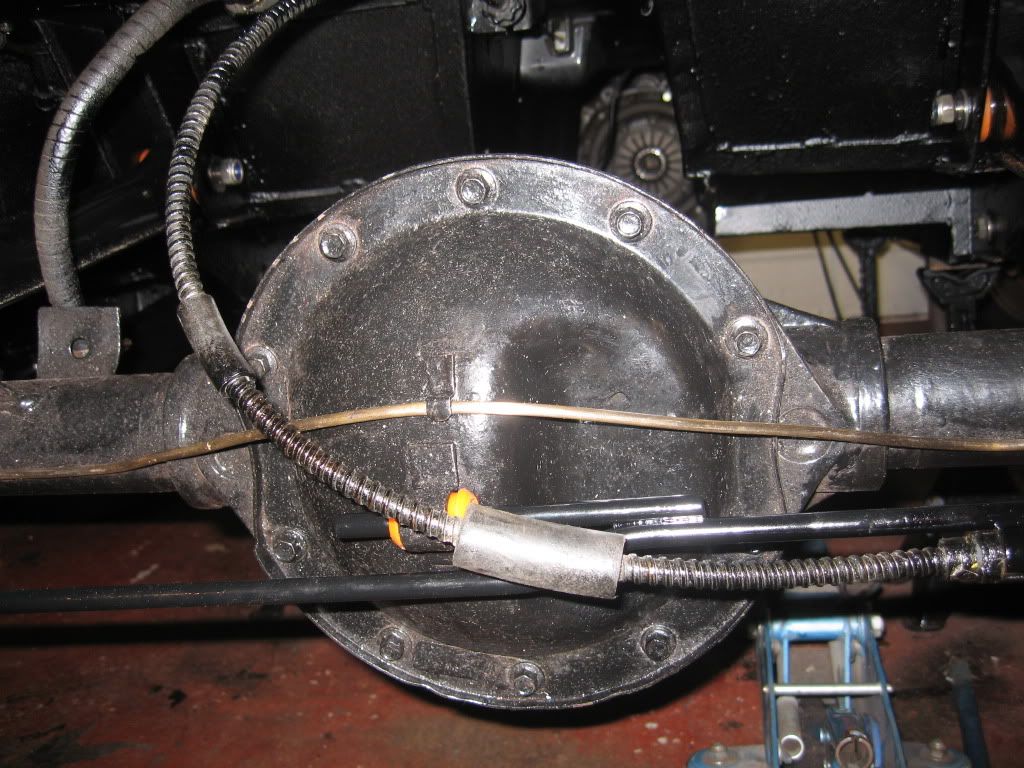
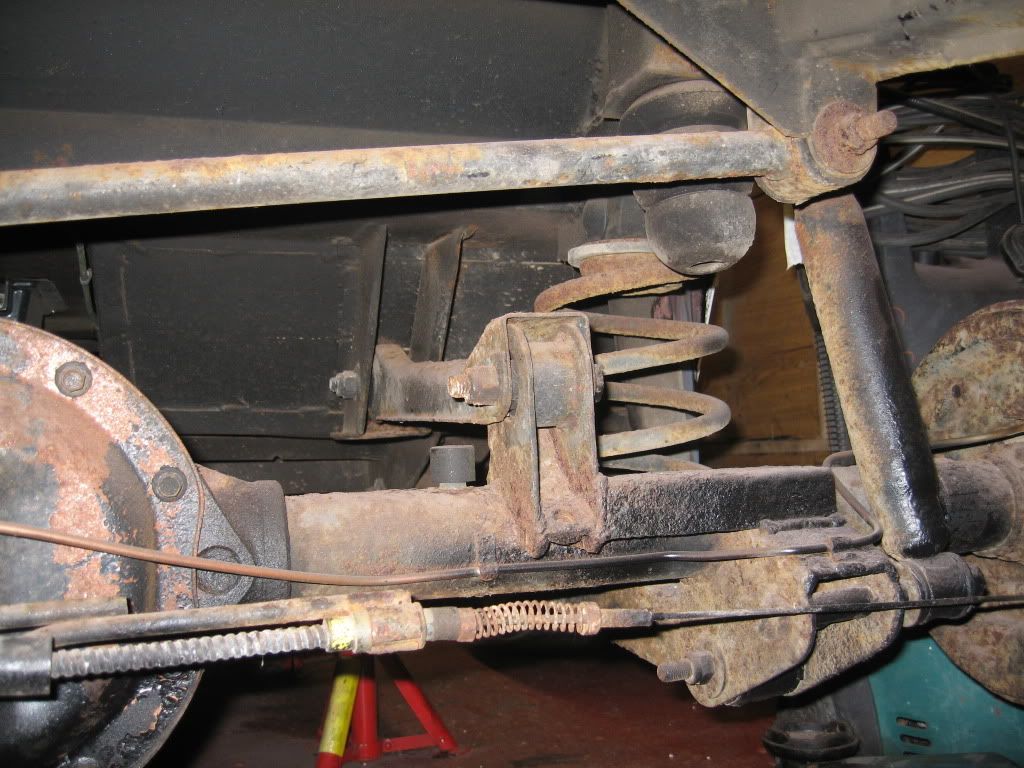
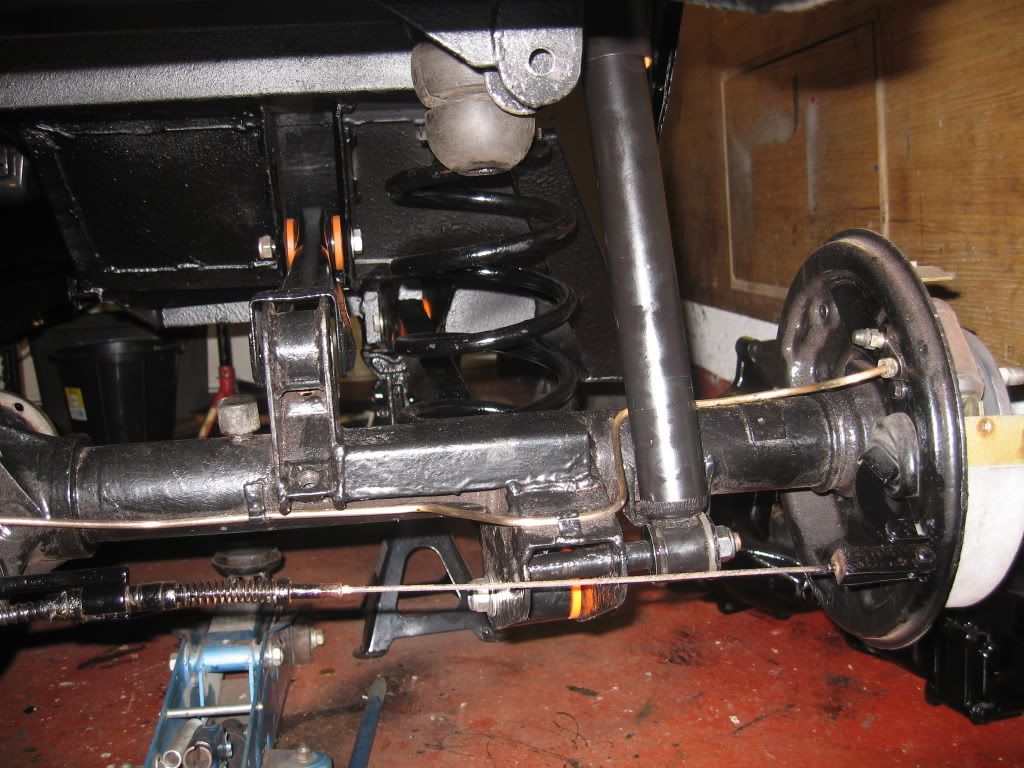
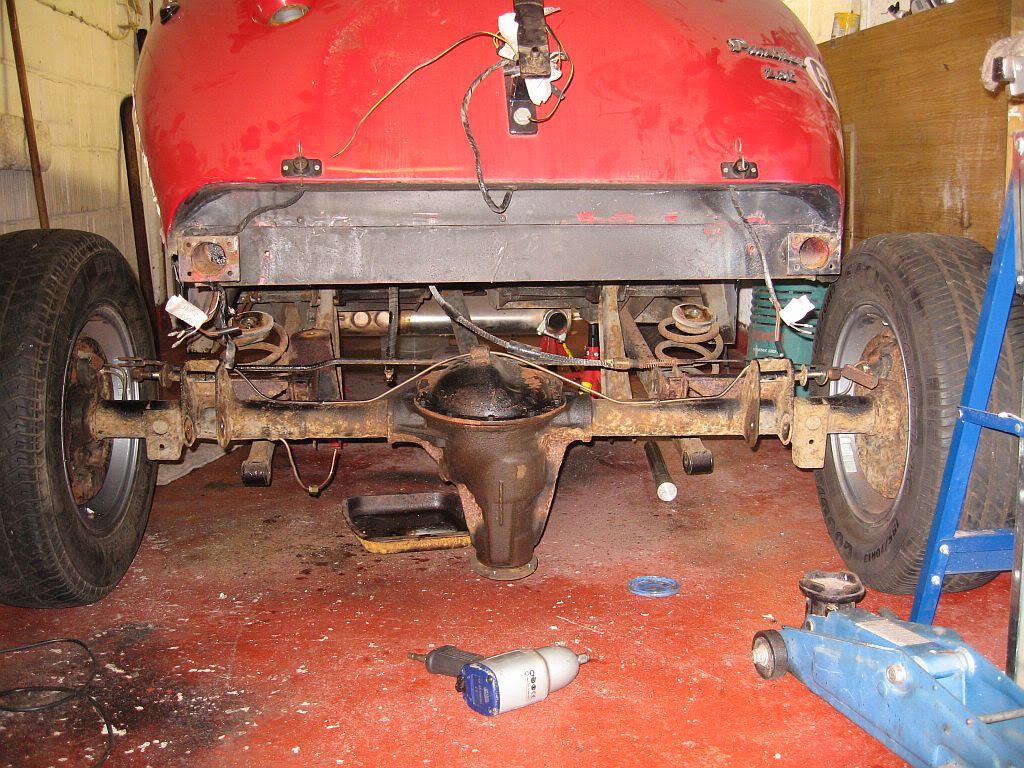
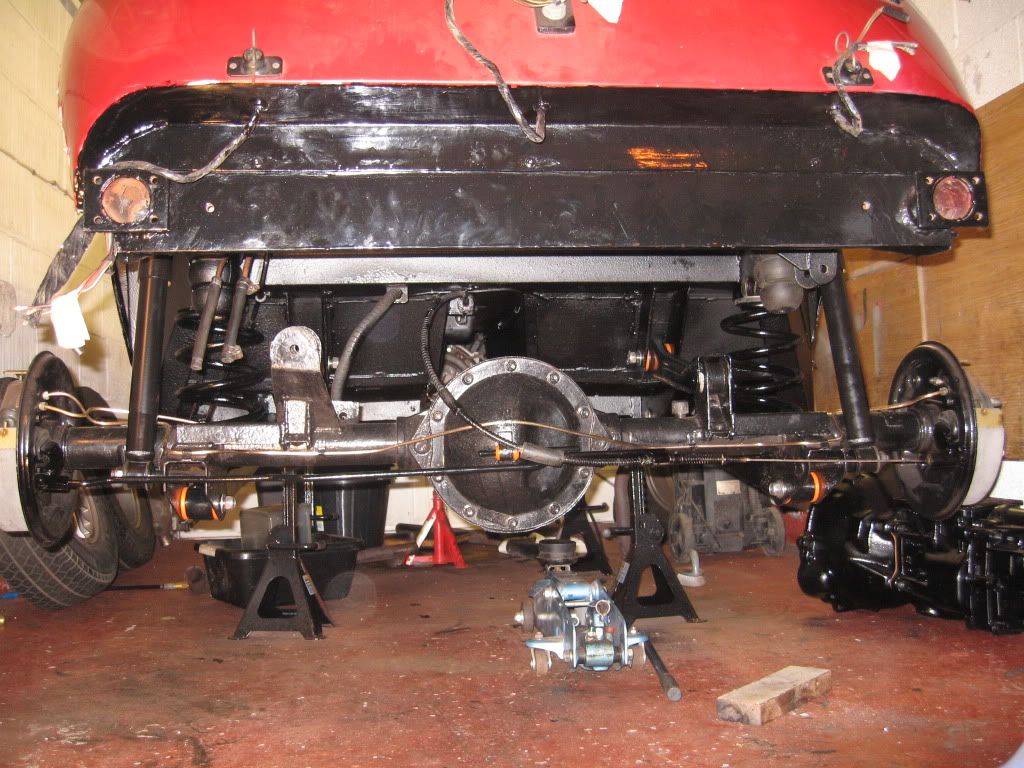
So basically that is the underside all finished, I've stripped everything apart, sanded, rust proofed, painted and Tetra Shutzed the underside, sent what parts I could to be powder coated, sandblasted and sprayed what couldn't, had polybushes made and re-modeled those that were close but not fitting. Sourced and fitted new dampers, re-built the brakes, cleaned and painted the fuel tank and put it all back together again. It took a little longer than anticipated, mostly because of the bush problem but that's all part of the fun.

The filler connection was looking a bit rusty and I have been trying to figure out how to remove it for a while now, I seem to remember reading that it was from the Vauxhall Viva (maybe wrong). 
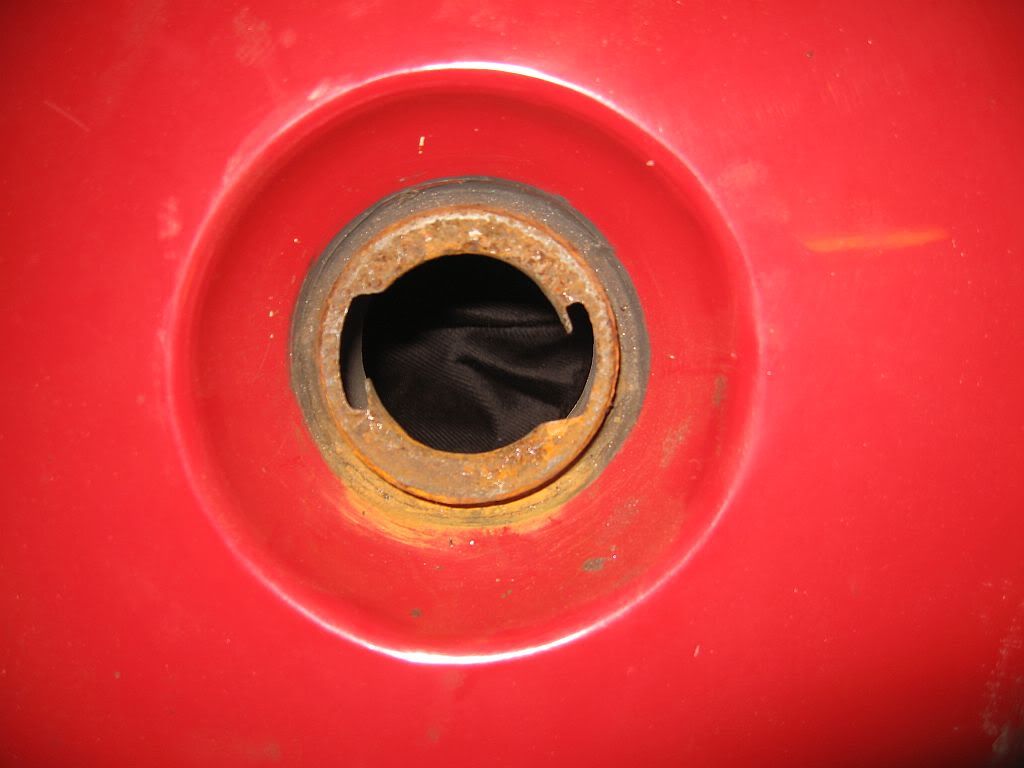
Anyway I could not see how to get it out without resorting to a hammer which I certainly didn't want to do so I rotary wirebrushed the rust and got most of it off, I then painted it with rust converter as there was still some rust on the inside edges that I could not reach and when that dried I masked it off.
This is a coat of silver metal paint, it doesn't look to great but once the car is sprayed the rough edges will be cleaned up.
Hopefully tomorrow is the day it goes back on its wheels, to do this I need to get the brakes all working, I have bought and was going to re-fill with Silicone brake fluid but after taking some advise and doing a lot more research I have realised that this could create some bad braking problems. 
When converting to silicone all contamination with dot 4 must be removed as when combined with silicone forms a sludge that can block things up. I was hoping to just flush through a couple of times but that's not enough, after my research I have found that every damn thing needs replacing, master cylinder & pipework and calipers (mine have been re-built). Seeing as these are all new from the last owner I am going to put the silicone on ebay and have a trip to Halfords.
Well that's for today
See ya Paul 

Thursday, 9 February 2012

Gearbox Mount & Test fuel sender

Hi
Got back to the freezing weather last night and a bit of a shock to the system after being sheltered in an engine room for 2 1/2 weeks and not seeing the sun or snow except from a cctv camera. Brrrr!
Been busy in my off watch time and have been patrolling eBay with some success, I have managed to get hold of most of the parts I needed all bar the nuts for the brake hoses, guess I'll have to do a more of a thorough search of the garage as I am not sure of the size they are. I have been reliably informed that they are metric but must be of a very fine thread as my set of dies are 1.5 pitch and are huge in comparison. The flea market is on tomorrow so I am going to search the tool stands and stock up on all imperial taps and dies I can find.
What did I manage to find.
Well I down marketed the E clips for the handbrake to steel instead of stainless, I found a pack of 20 mixed for around £2.50p I shall protect it with a smear of silicon grease and if it rusts I have 3 more.
E clip selection
The correct size is the one showing 3 E clips
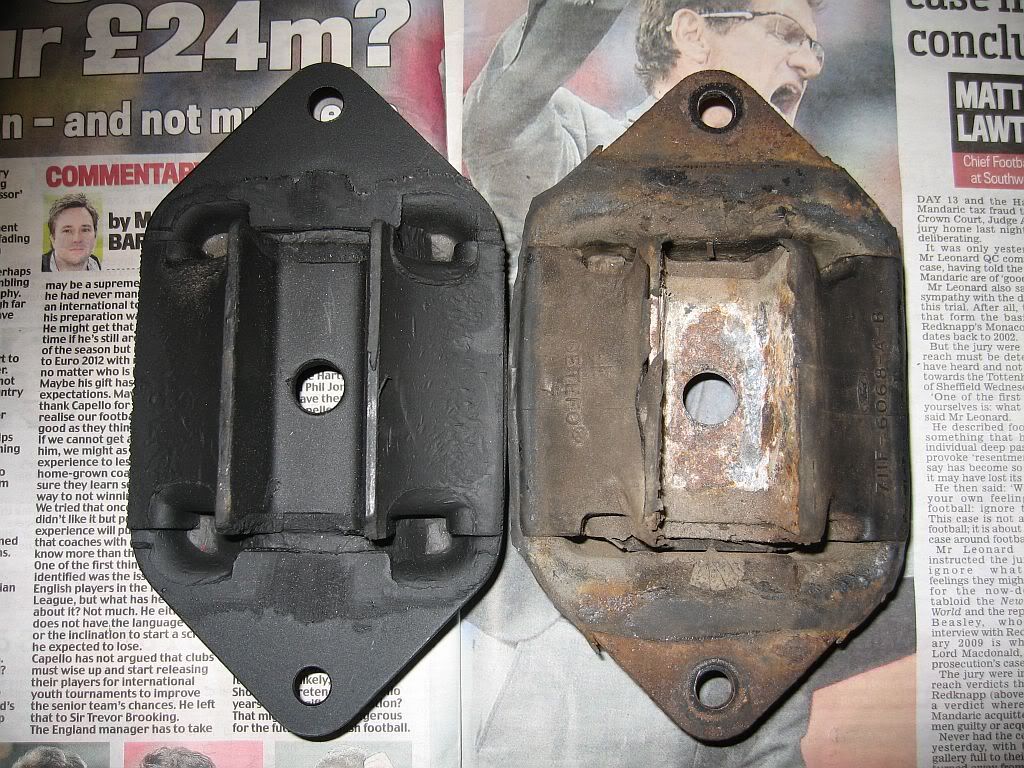
The gearbox mount was easy to source once I realised that Ford used the same mount on most every car fitted with the type 9 gearbox and probably a few others, so you just have to search for a Capri, Mk4 Cortina, Mk2 Granada and even I believe; a Transit van.
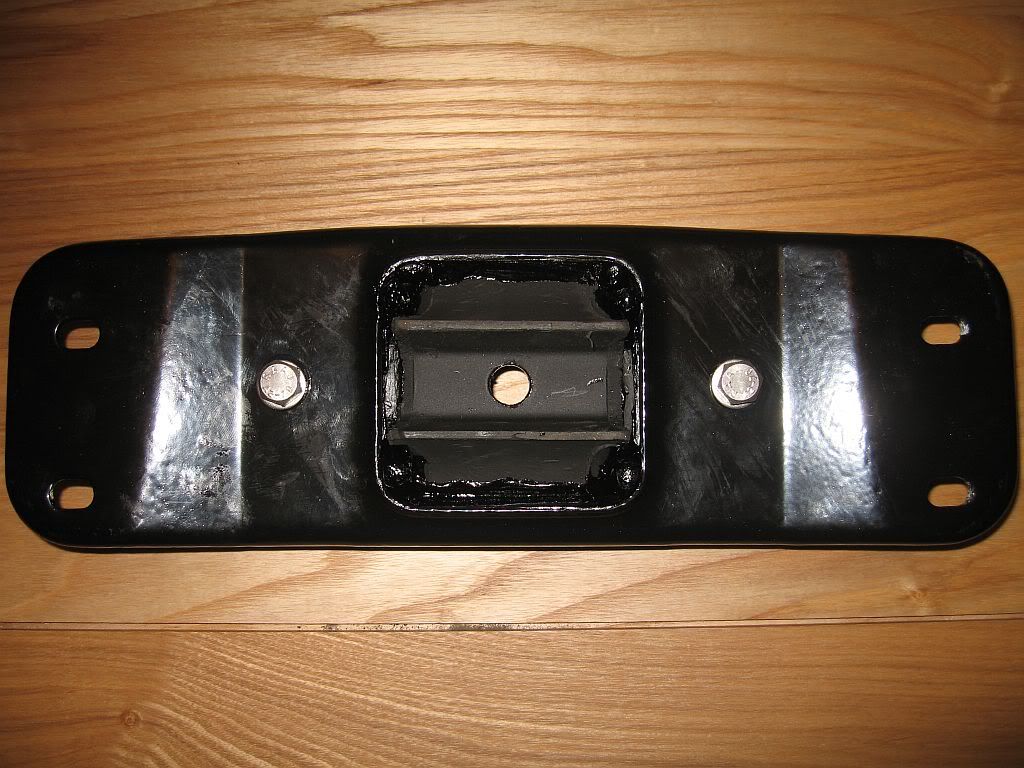
Gearbox mount
Here you can compare them both, lots of damage to the old one, the new one is not an original Ford, which is hardly surprising as they stopped making them years ago but still looks good quality.
You can see just how much damage has been done to this one considering it has only done 35,000 miles its ripped at the top and split down past the center hole.  It is an easy item to change and at only £17.50 including postage it may be worth getting your hands dirty and checking out yours.
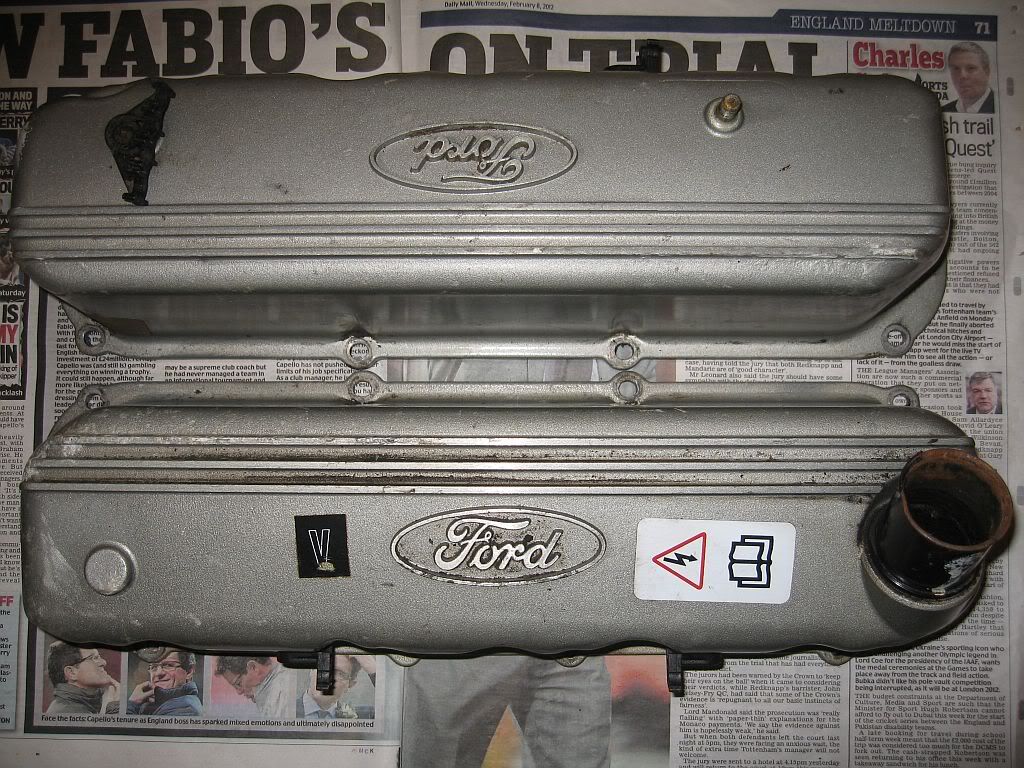
The other bits I have been after for a few months are Ally rocker covers, the original ones just don't do it for me and as I am going to fit a round K&N filter it just would not look right, so seeing as how I have worked an extra 5 weeks overtime since April last year to pay for these bits I thought I would splash out, I have seen these go for upwards of £160 so £130 for the pair was about average.
Rocker covers
I haven't decided on what colour to have the engine powder coated but have seen a set of rocker covers on the front page of http://www.peintureenpoudrepb.com/ that have been done the same colour as I plan for my paint job, so maybe plum with the Ford logo and bars polished natural.

The next and most surprising purchase was defiantly not what I was expecting to buy and blew my budget for the rest of the month, but seeing as how I planned to spend the money doing what this item comes already done I thought it would be well worth it.
What am I blathering about; in 1973 Ford came out with the Mk 2 Mustang and one of the optional extras was a 2.8 Cologne V6 engine, in total over a 4 year period over 1 million Mk2 Mustangs of various models where produced and within these million a good few thousand must have been fitted with the V6 Cologne engine option and maybe only a few hundred left in the world.
These Ford Cologne V6 being for the American market did not have the inconveniences of the European models and so were produced with hardened seats for unleaded fuel and even more importantly with the 6 exhaust ports instead of the siamesed exhaust ports of the european version.
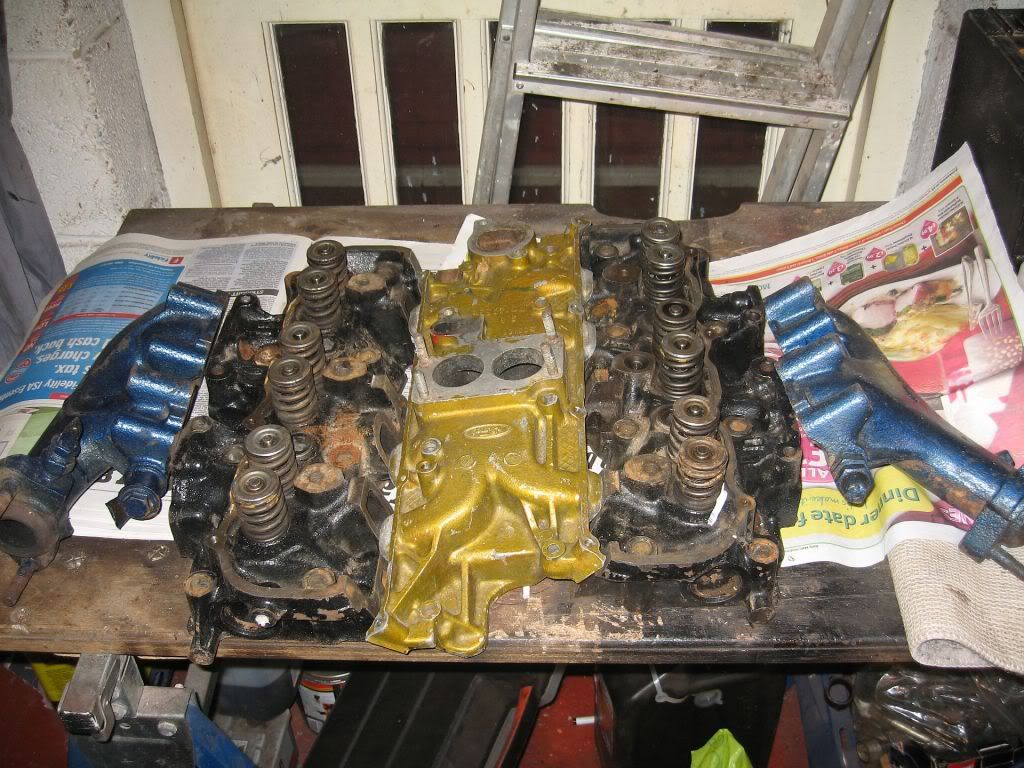
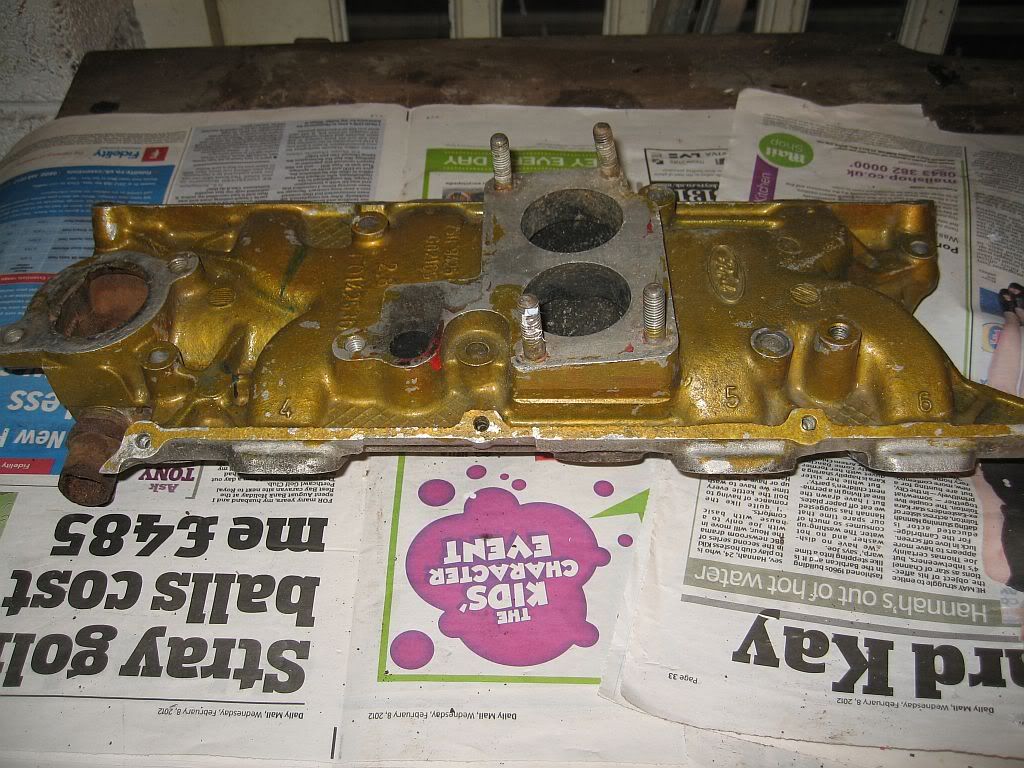
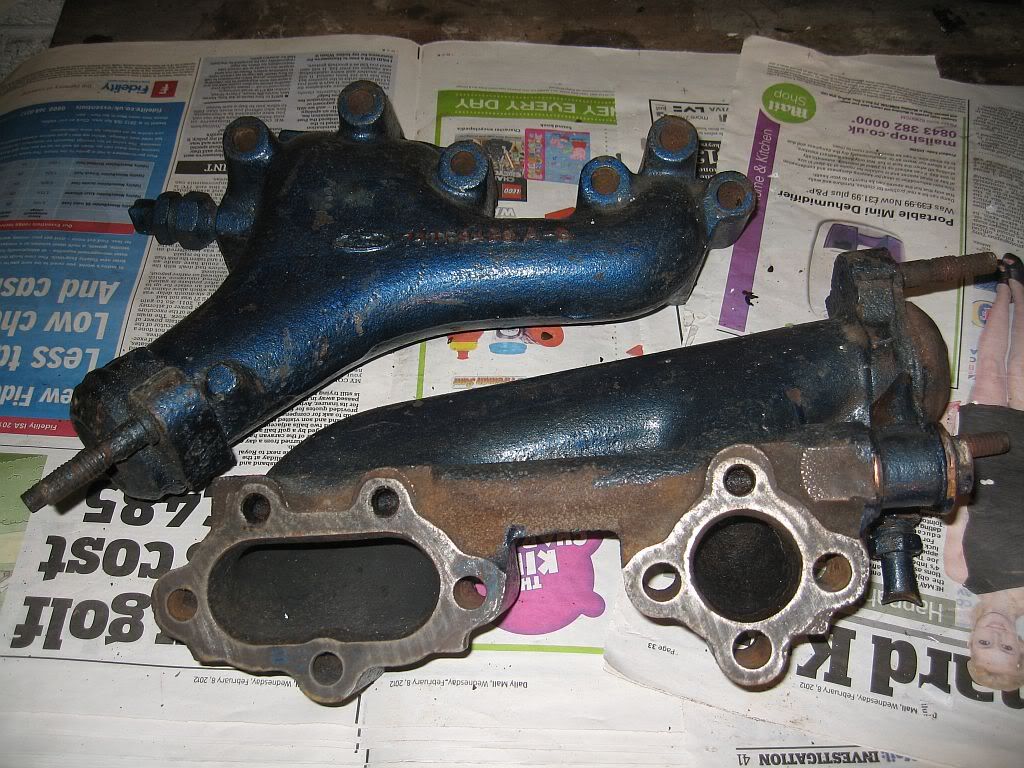
On sale on eBay was the heads the matching inlet manifold and the matching exhausts manifolds (headers). You can see from the photos that the seperate items came from different engines or someone had a strange colour scheme but they all match up.
I bought these from a business called Tickover Retro Ford Parts and this was their write up on eBay.

Here we have a pair of Ford 2.8 V6 Cologne heads with a difference. These are the American Ford Mustang spec units, and as such have the full 6 port arrangement for the exhausts. This pattern was copied by a well known tuning company in the 80's and 90s in an effort to emulate the vastly superior flow characteristics these have over the European versions with the lame siamesed setup. Well these are the proper Ford ones, not a set that has been cut open and extra material welded in! Other advantage being that these come factory fitted with hardened seats so that can run properly on unleaded fuels. We have included the matching inlet manifold and exhaust manifolds, in this auction, so all the ports will line up correctly. These parts will fit onto any 2.8 or 2.8i Cologne V6 engine and work correctly with the existing camshaft and other hardware.

I have always planned to have my heads converted to un-leaded fuel and have searched out 2 firms in the North East that can do this with a price I believe of around £400, so it was a no brainer I get the unleaded conversion and a better exhaust flow and all for £313 plus £25 delivery. I am hoping to get the money together for stainless side exhaust so a lot of the weight (55Kg) will disappear with stainless piped headers.
Mustang Mk2 heads
No way am I put of by a bit of rust and different paint jobs, I have had a good look and these will be great with a bit of work.

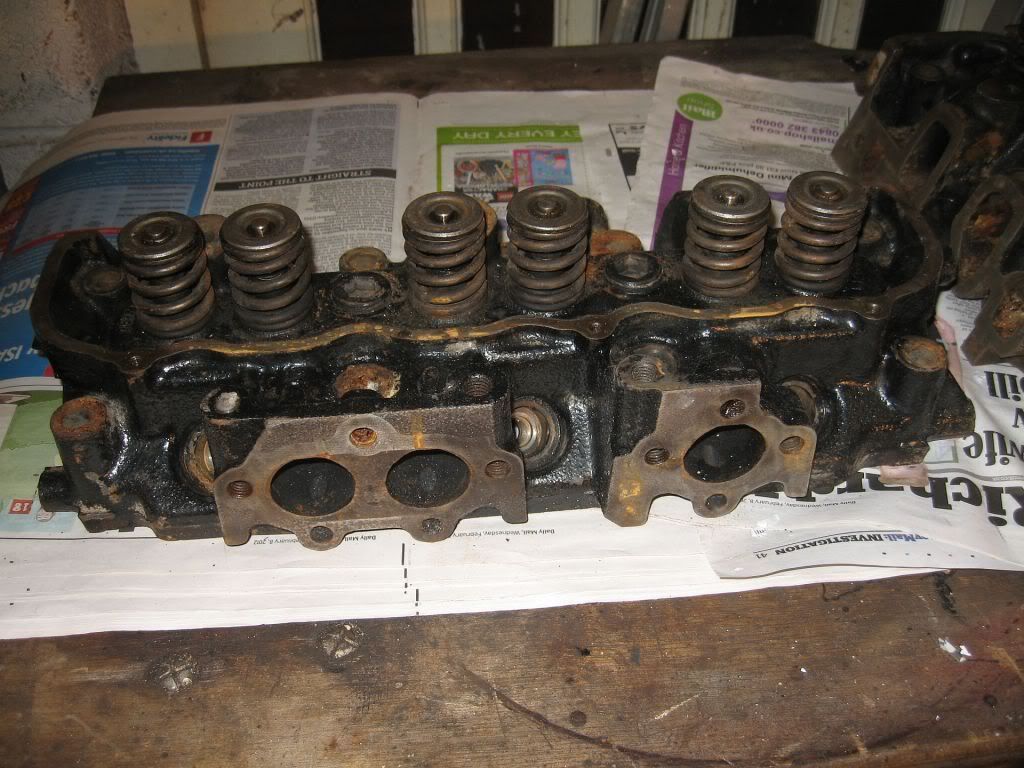
This is what its all about, the 3 port exhaust.
3 port exhaust
One of the studs looks a little bent, not a problem.
Inlet manifold
Exhaust manifold
So as you can see they show their age, I have already ordered a twizle stick and lapping paste just need a spring compressor. I shall remove the valves and get a little blasting done and see what they come up like, once the valves are lapped in and have had a smoke test or petrol test I shall be able to see if the valves need changing but if ok they will stay. I shall probably have the heads skimmed just in case of any warping over the years, but judging by the weight of these things it would take a dip in a volcano to warp them.
So a productive time and hopefully there will just fall on and work fine.
I have also managed to get a bit of work done today, the main job was to drop the axle to fit the upper arm on the nearside, I was hoping the new bushes I ordered from Floflex would come today and finish both sides but no such luck. Lynne has took Friday of and wants me to take her somewhere for the day which means missing the delivery, so unless I sweet talk her out of it I may have to wait till Monday for an alternate delivery date. So to get things moving along I swapped the upper arms over, I had fitted the offside arm last time home and all it took to fit to the nearside was to drop the lower arm and undo the damper. I just pulled the axle and the arm that was trapped dropped into place.


I had to do this as the upper arm would not fit in position as the Panhard rod brackets prevented it, I have made a little video to explain the problem.
I changed over the already sized bushes and the arm just slipped in nicely 
Upper arm fitted
The gearbox mount was an easy job, just bolting to the cross member, you can see straight away the reason for its failure. If you look at the photo you will see that each corner is a lovely little water trap, as no drainage has been incorporated. I have painted the underside with tetra shutze before bolting it on and filling the four corners with the tetra. I can't stop the water sitting in but I can slow down the rot.

I also re-fitted the hand brake bar which I had removed to paint the axle, the e clip just pushed into position, next came the brake pipe work which I also removed for the painting.

If you remember a few months ago I fitted the front sub-frame and got the steering out a few degrees and I hate driving a car with an un-centered wheel, I was going to wait until I was ready to fit the new wheel and try to re-align it with the boss. I decided not to wait as it may not have worked and I will have had the paint done by then so I thought I'd have a go. I had to center the front wheel hubs as best I could by eye then unbolt the track rod end on the steering side, out came the bolts holding the steering rack and I took out the linkage bolt from the uv joint and tapped it off. I centered the steering wheel and refitted the uv coupling, re-fitted the track rod end and checked the center. I was happy with the first fit so bolted everything tight again.

One other job that needed doing to progress was the testing of the petrol tank sender unit, this is a resistance test. As the float rises and falls the arm makes contact with a coil, the movement across the coil changes the resistance in the field and is measurable. This test measures the resistance in Ohms, using a multimeter set to 20k Ohms, connect the red lead to the  spade connection and the black lead to an earth point, then simply move the arm up and down slowly and you should get a reading of zero at empty up to 20 at full. I only got 19 which doesn't really matter as with the price of petrol in this country I won't be able to afford a full tank.

I have lots of jobs planned for the next 2 weeks and hopefully a moving car.
see ya Paul


Saturday, 21 January 2012

Fuel tank & Bushes

Hi
Last day home again, didn't expect to get much done today but after another trip down town and a coffee and croissant at Nero's I got stuck in.

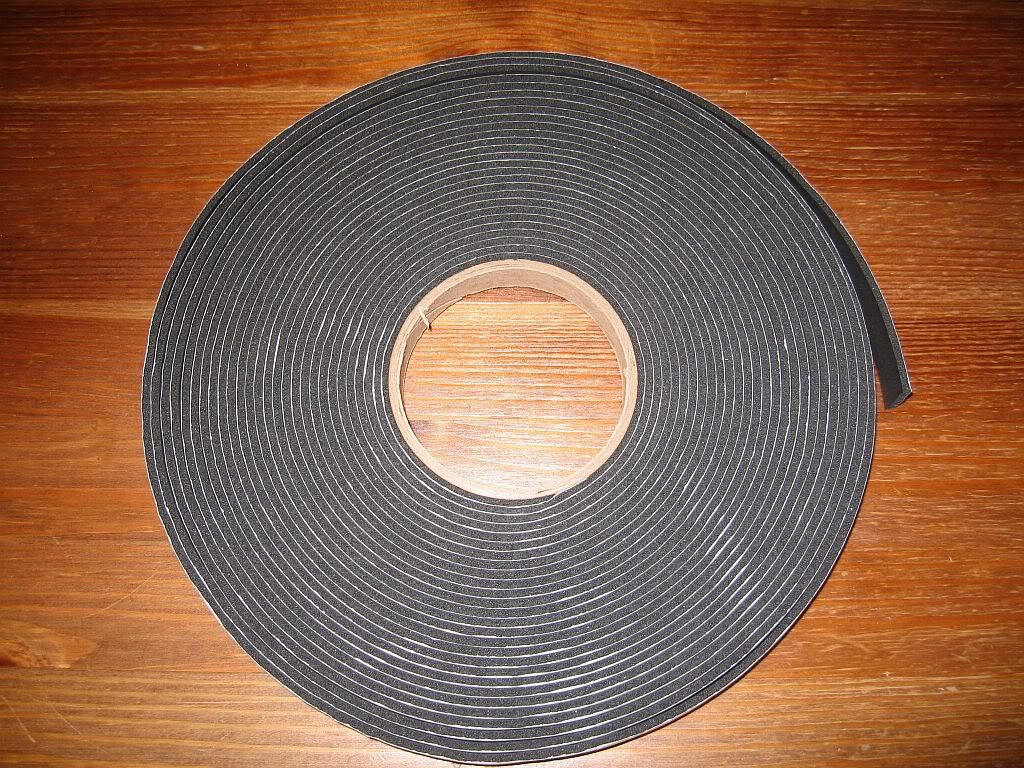
I started with the fuel tank, I had bought a 15m x 19mm x 3mm roll of foam tape which arrived yesterday, I needed this to carry on with the tank.
I got this of course from eBay 15mt foam roll
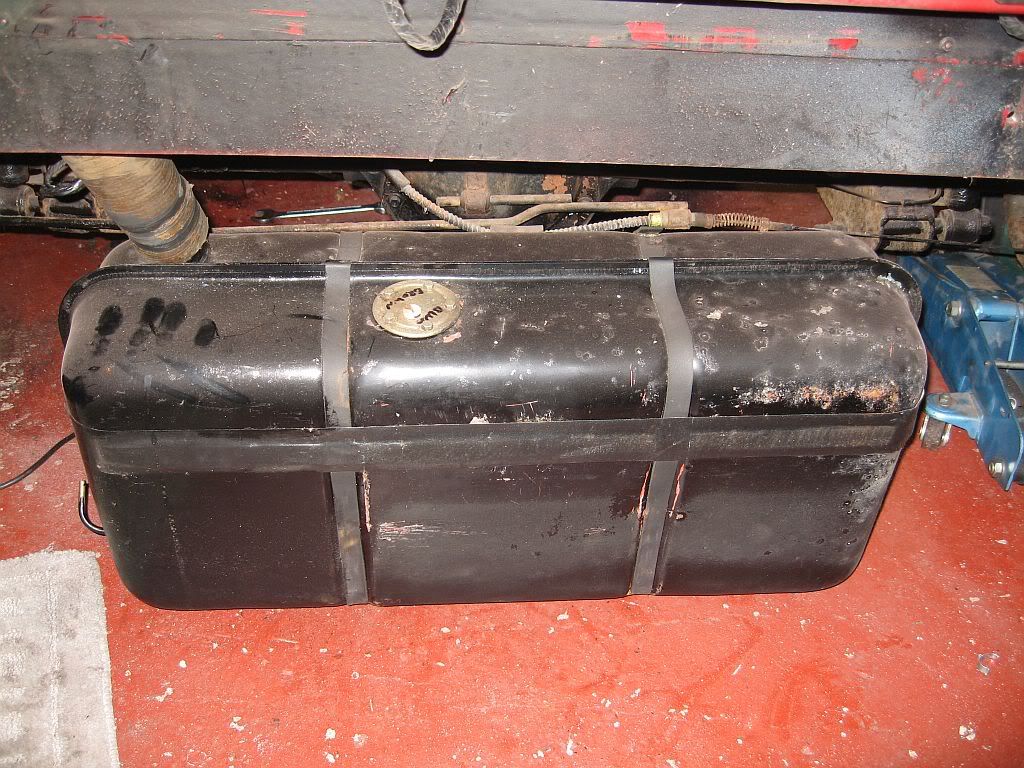
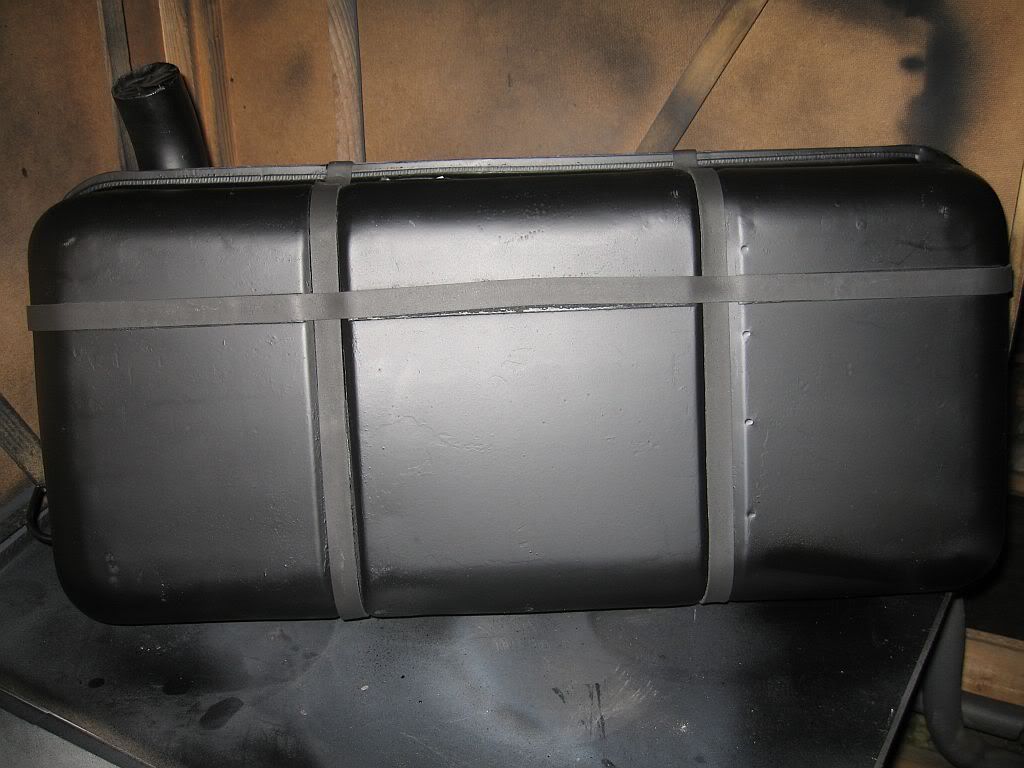
I had already cleaned primed and sprayed the fuel tank but as I had a couple of tins of stone chip I decided to give it another spray.
Fuel tank before

Fuel tank after
I finished it of with the foam tape and its ready to fit, I may give the bottom half a paint of under seal which I imagine will add years to its life. Although it will probably rot from the inside out.
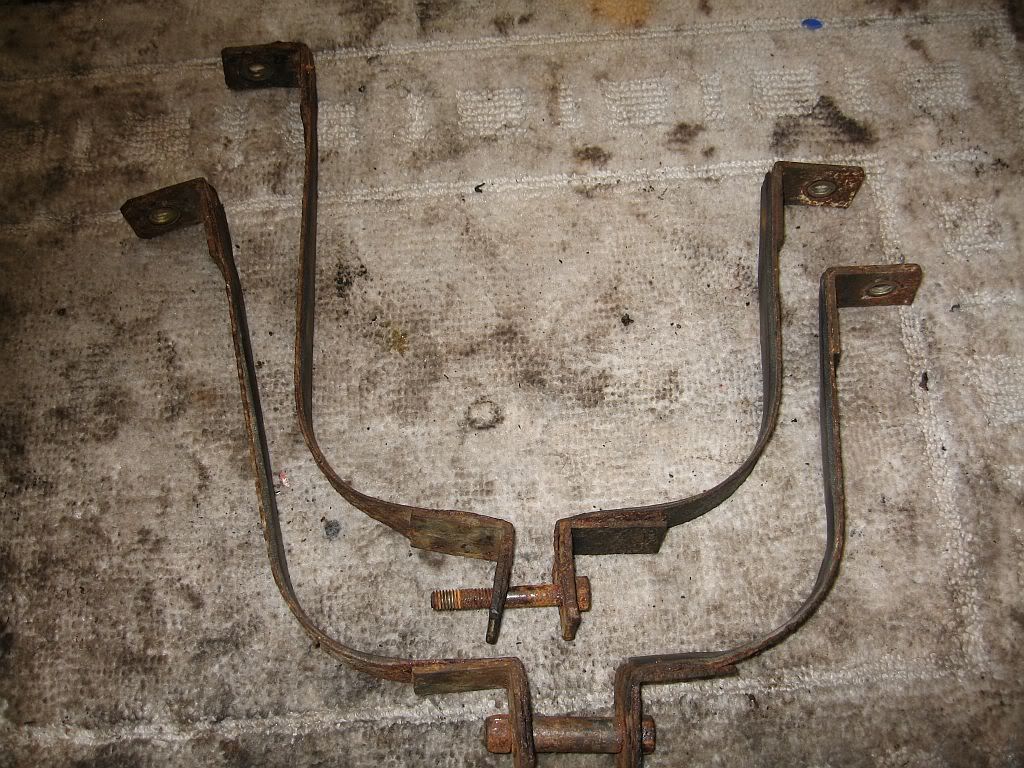
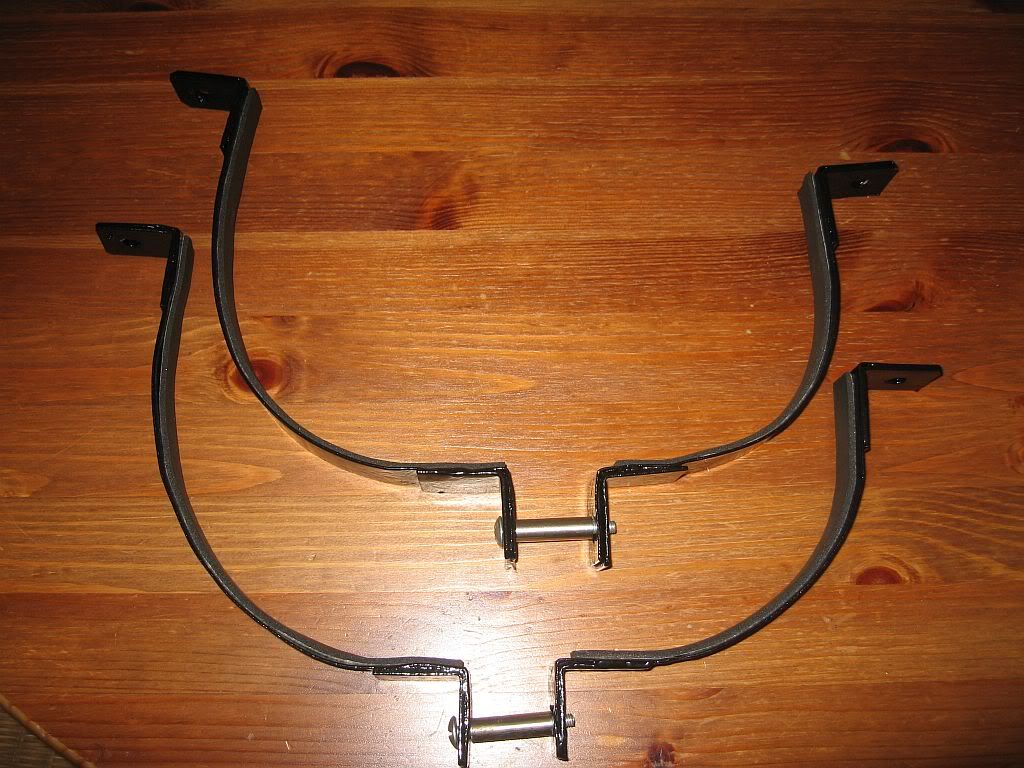
The bracket are also ready, these got powder coated this week and just needed the foam stuck on, I also have new stainless steel separator tubes cut, I just need to sort some stainless bolts.
Brackets before
Brackets after
Just need a bit of re-shaping before fitting.
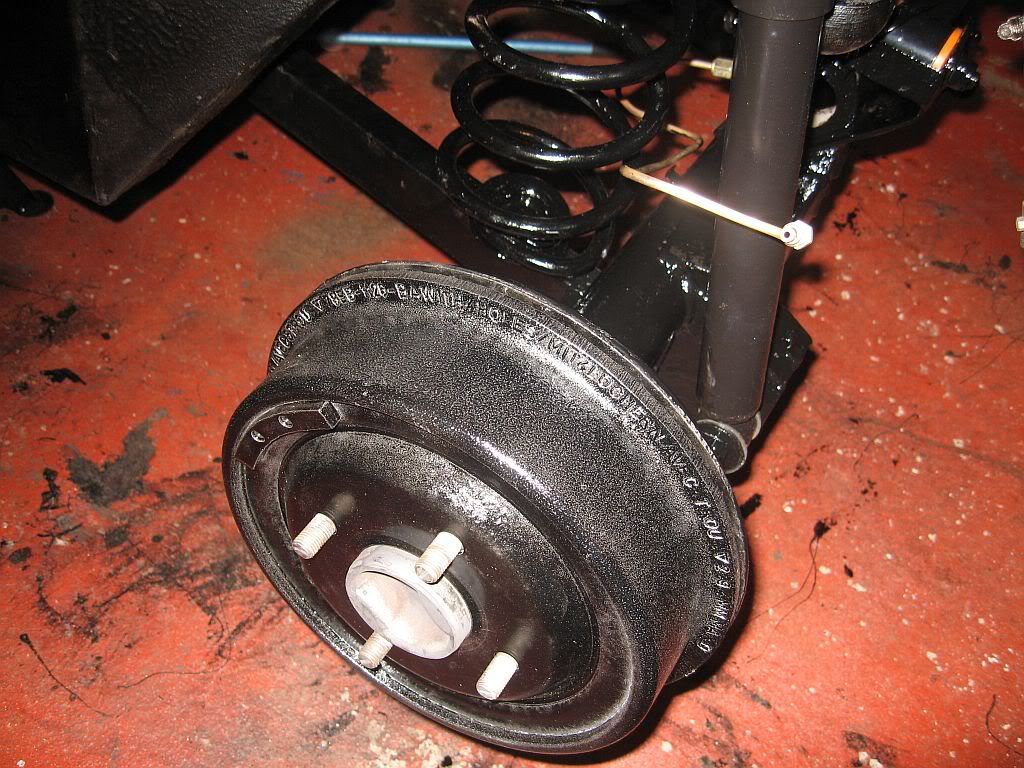
I got the painted brake drums out of the way as well, the auto adjuster needed a little tap to allow them to go on and they pushed straight on.
Drums fitted
I have a habit of painting the bolts I have tightened to let me know what's been done and checked. I started checking the tightness of the arms already fitted and painting the nuts and heads and I got a bit carried away. I wasn't happy about the finish of the axle, I had used 2 coats of hammerite after blasting thinking it would give a good finish and of course I had paid good money for it. It looked great at first but it seemed to soak up all of the dust and and debris flying around from other work and looked terrible. So I got stuck in with my chassis paint and I now have the finish I wanted originally.
Gloss painted
I was about to call it a day when I thought I'd have 5 minutes on the left over bush 2 hours later it was all done and fitted.
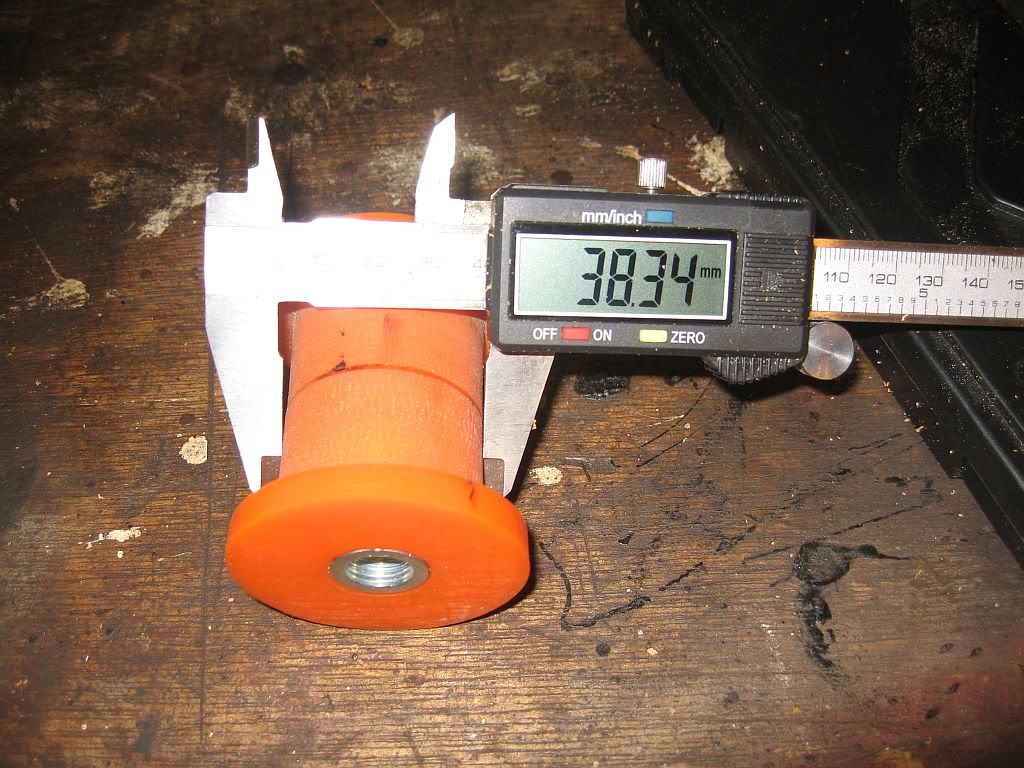
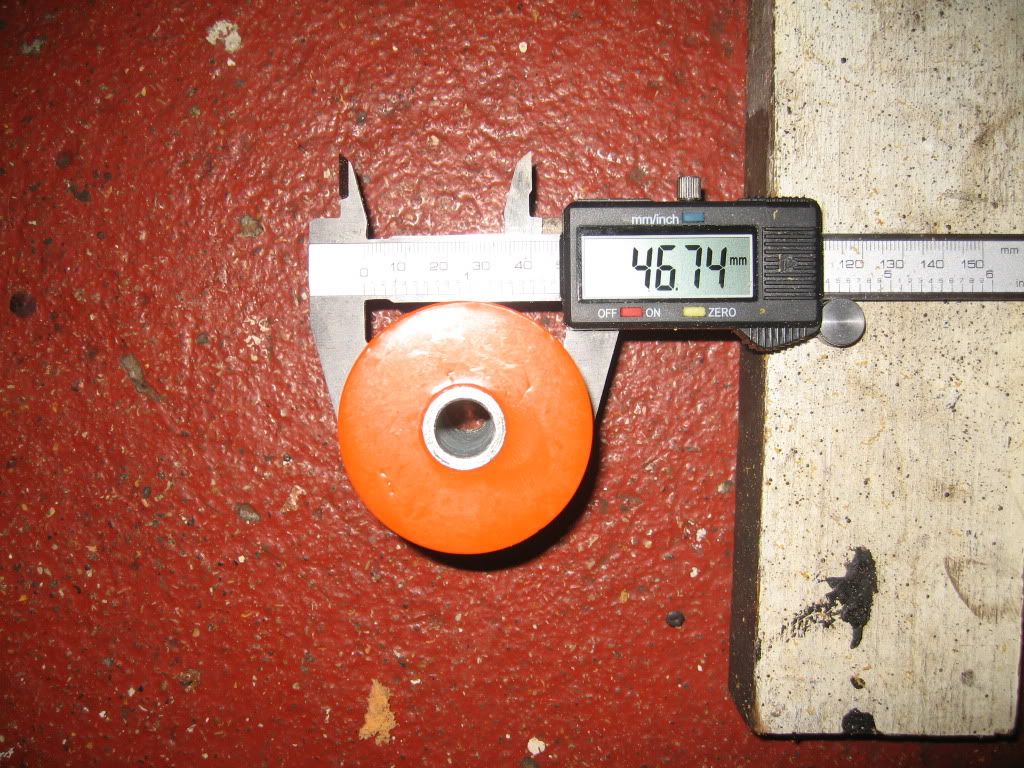
I used the lessons learnt yesterday to get it right this time. I started by measuring the squish which started out at 46.6mm un-tightened to 47.9mm when tightened, a squish of 1.3mm. This is the distance I was out yesterday. 
I needed to get down to around 38mm, so only using a file I did a bit then stopped, removed to check and carried on. When I got to around 38.5 I cooled it under cold water and measured again and it came out just right.
I tested in the axle hole and it fit with just the right resistance.
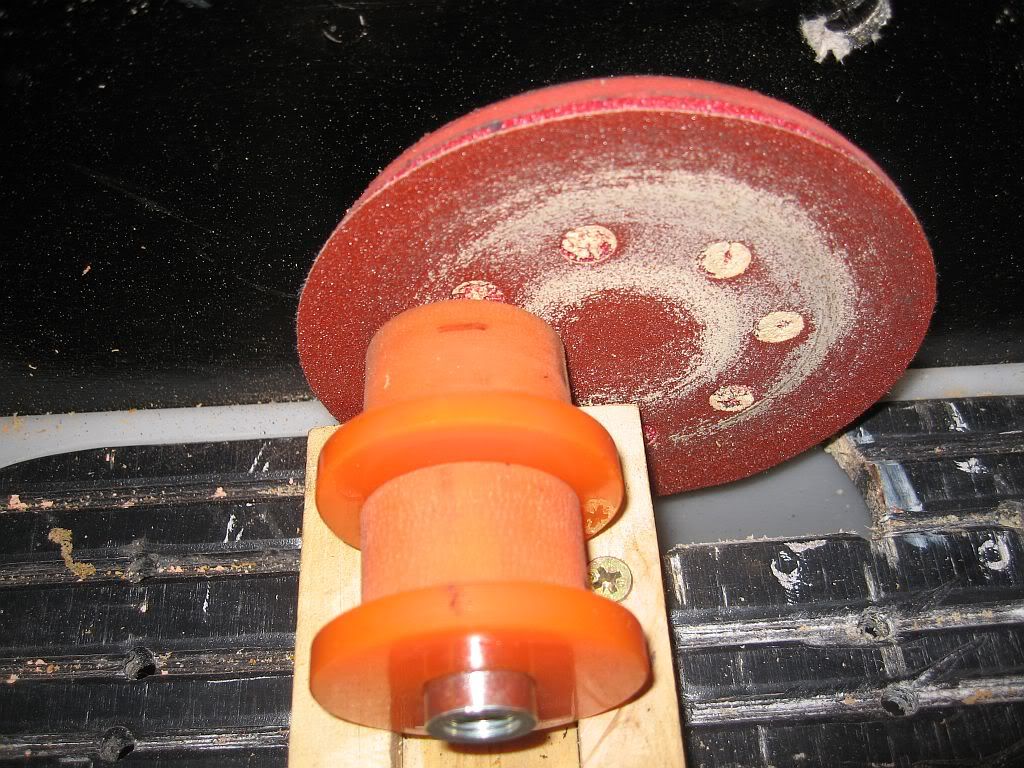
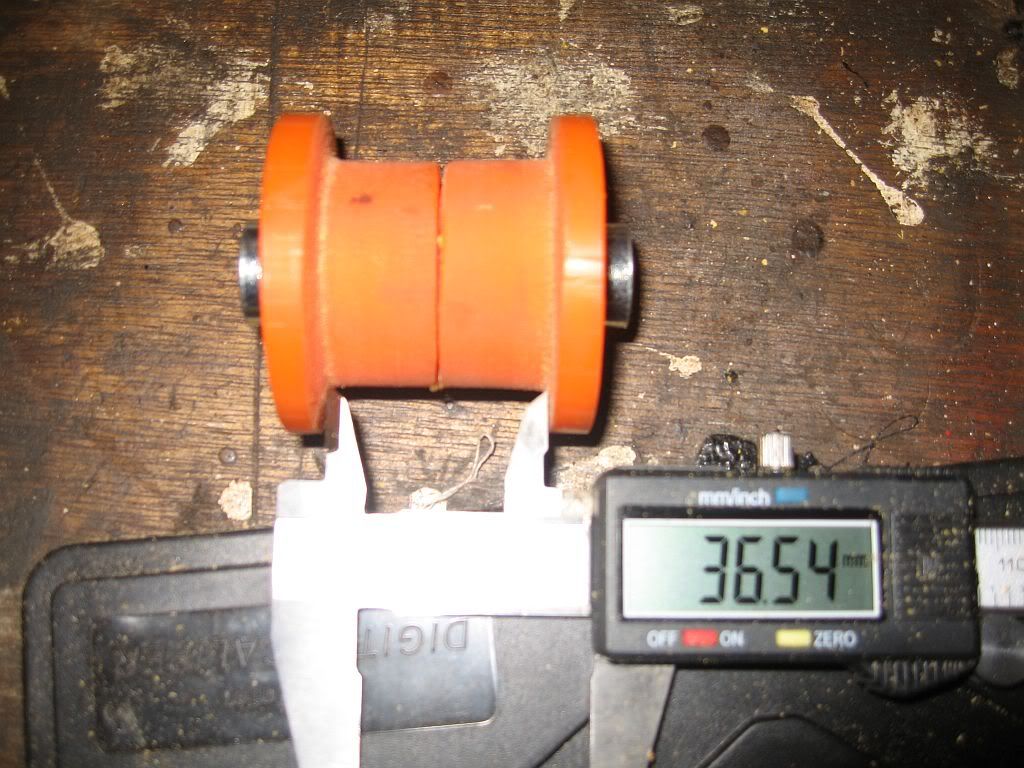
Next the distance between the flanges was measured this had to be 36.5mm so onto the sanding disk doing each end at a time and they soon came down to size.
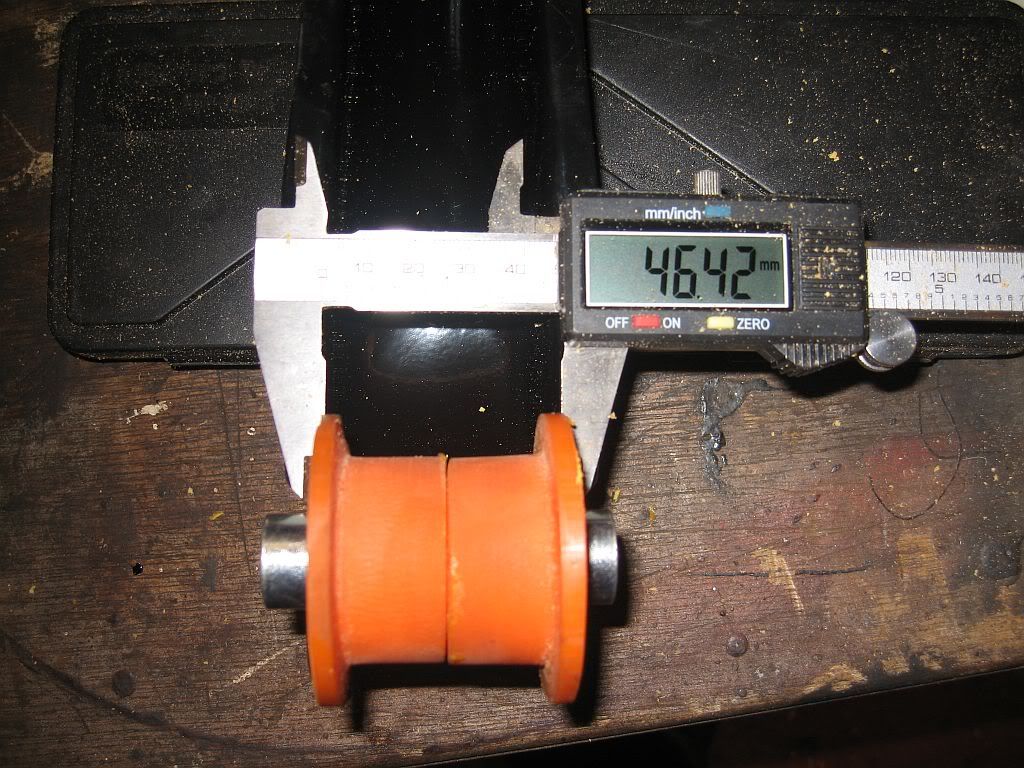
The flanges had to be sanded next, the axle side of the upper arms weren't really designed for bobbin style bushes; in that the distance for the thickness of the flanges is not substantial at only around 4mm either side. I needed to get down to around 45mm for a good fit.
This photo shows them at 46.42 but I had to take them down to 45.3mm to fit neatly, you can see from the insert how much has gone already. It got a bit more difficult the farther down I went, but with a bit of care I managed it ok.
Once the poly fitted I took a hacksaw to the insert then onto the same sander and smoothed it off.
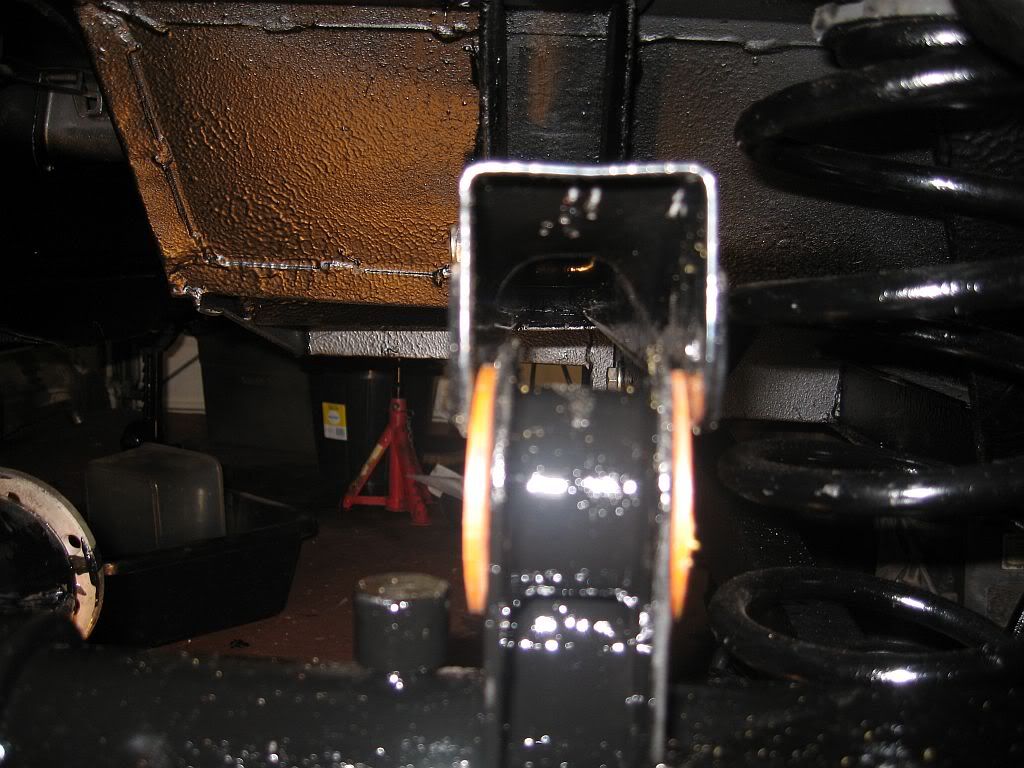
This photo shows the final test fit, pretty good.
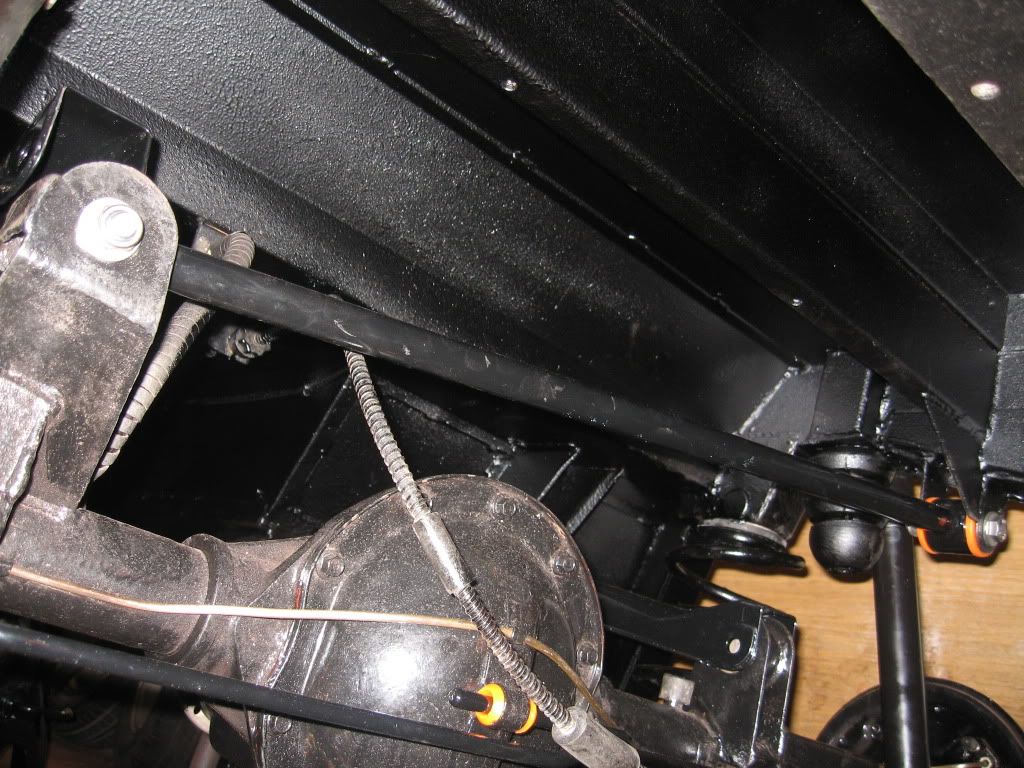
There is one major thing I found out about fitting the upper arms that would have been good to know a couple of days ago and that's "you can't fit the nearside upper arm with the axle fitted". This is because the axle connection of the panhard stops any movement of the arm, so when the next bush has been made I will have to drop the axle again to fit the upper arms first, or maybe I could just remove the nearside damper and get enough pull to fit it.
This photo shows what all of the work has been about, I may trim the outside of the flange to make it look a little more fitted. I now understand why Floflex couldn't find a fit, there ain't any.
Well back in 17 days.
See ya Paul
Friday, 20 January 2012

Friday 20/1/2012

Hi
I guess yesterday was to good to be true because today didn't go quite as planned. 
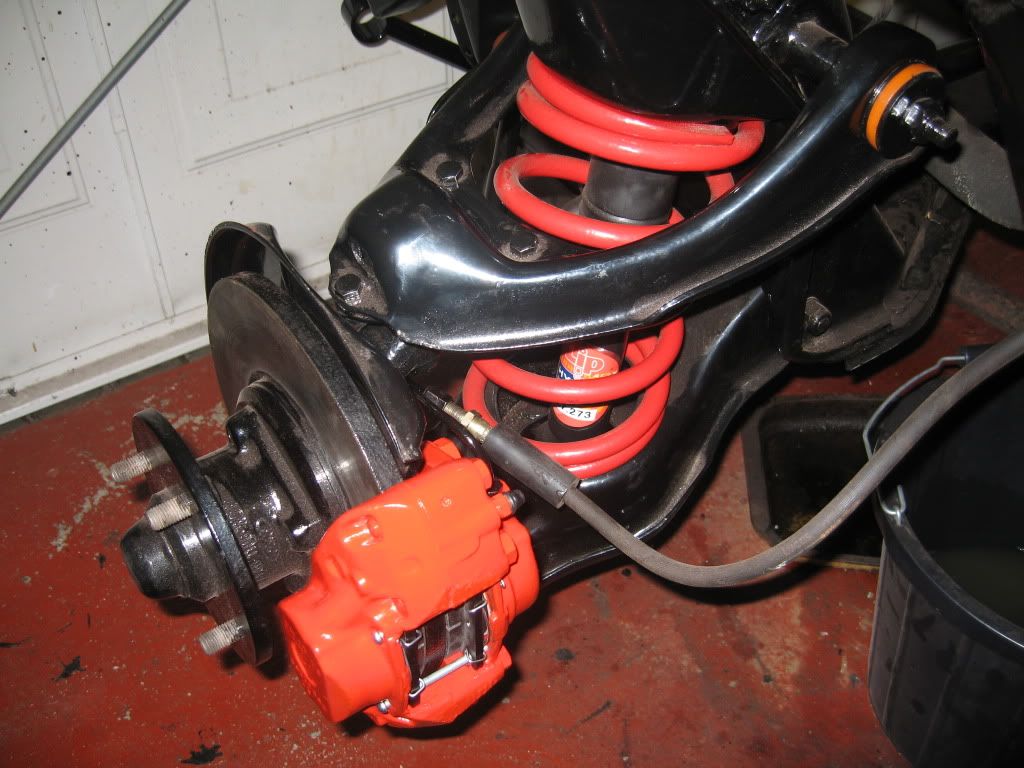
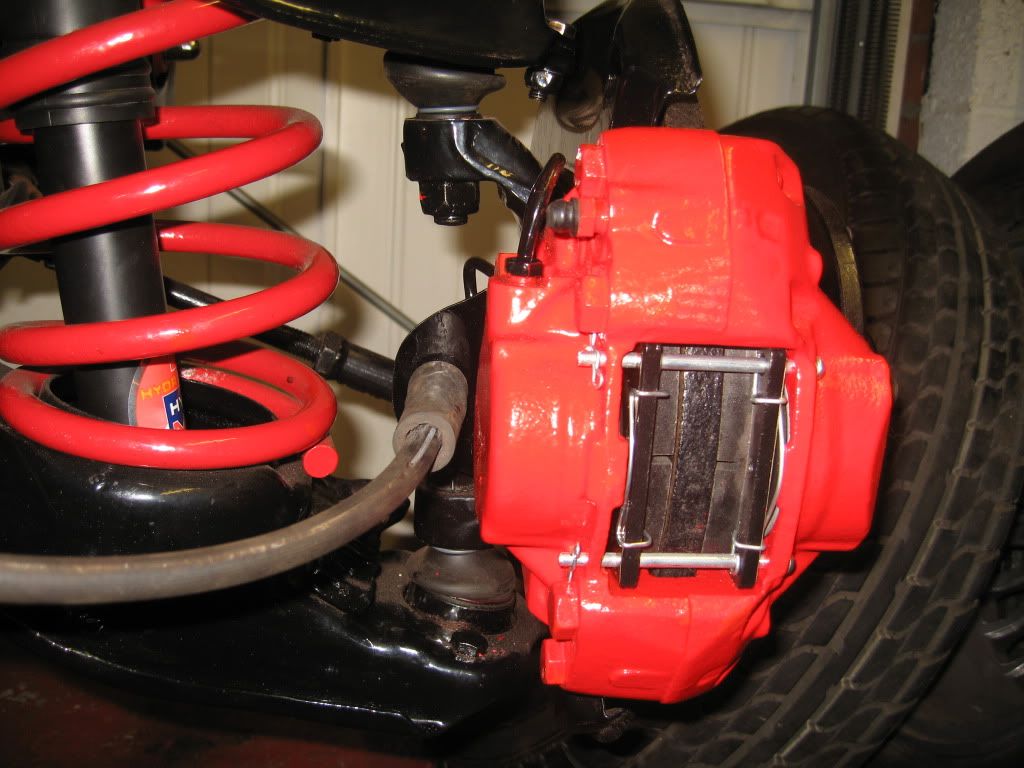
It started quite well, I fitted the brake pipe for the rear brakes, I originally thought that I had lost the fitting for the connection yesterday but today with the spotlight on I realised that there wasn't one and that the copper just screwed onto the flexy via the bracket. Which leads me into the first problem of the day; I moved onto the front calipers which went on and connected up without a problem and looked great.
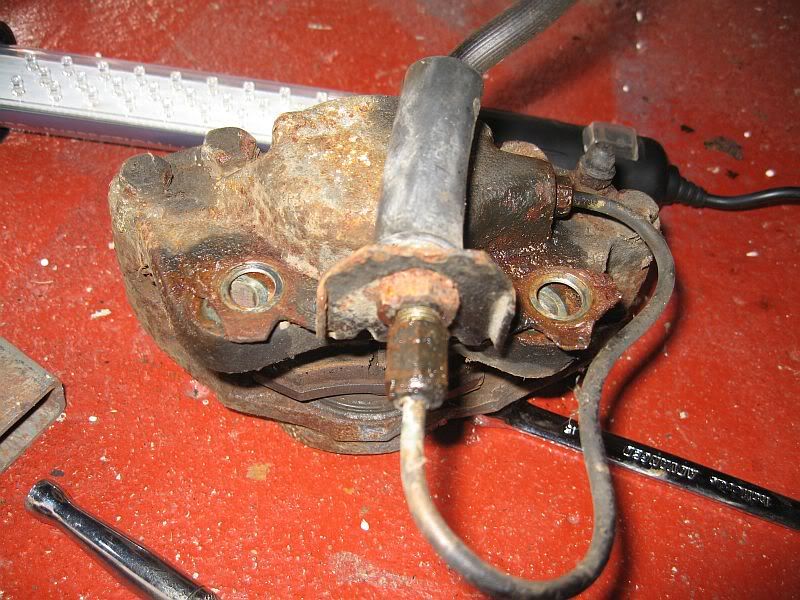
It was when I took the photo I realised that there should be a bracket bolted on so the brake pipes are secured, I checked thru my photos of when I stripped it and there was the bracket.
Original bracket
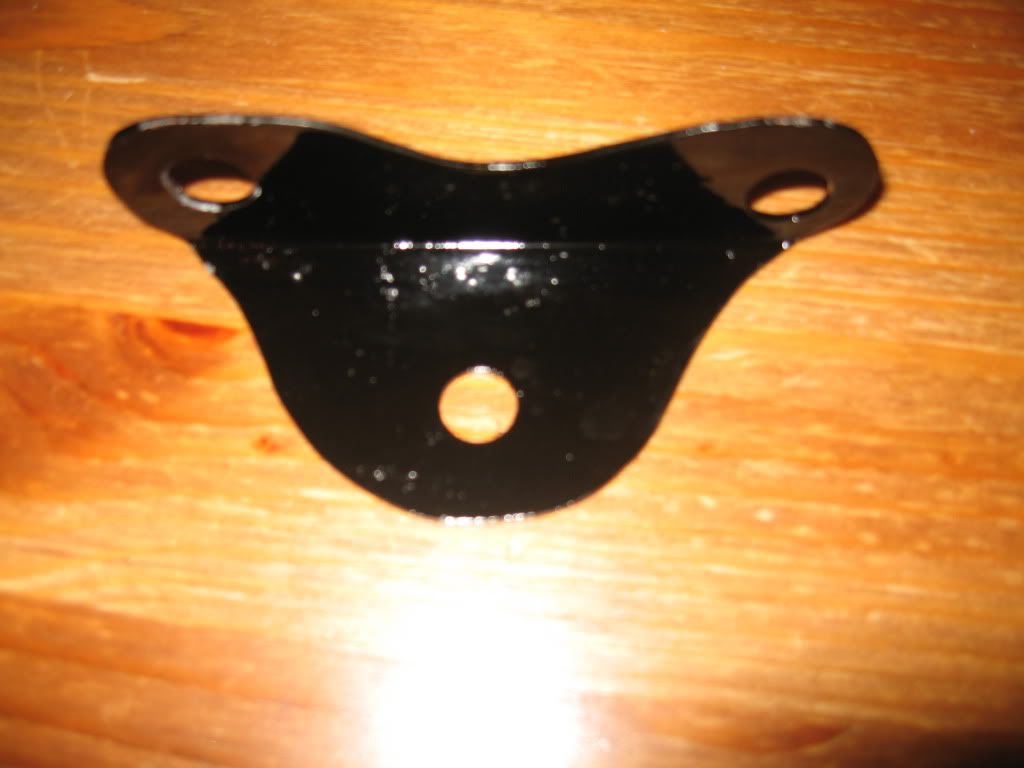
I have searched everywhere for them and they are gone without a trace, I think they may have been left at the powder coaters when I put my first lot in a couple of months ago. It was easy enough to get around this as there was no chance of me driving all the way to the coaters, so I made a couple of new ones, unfortunately its the nuts that are also missing that's the problem. Bet they turn up when I'm not looking.
One of the new brackets
The nuts are the fine thread of the brake nuts, no idea what these are.
New bracket fitted
Luckily there was a nut still attached to the offside pipe so I fitted the new bracket and secured the pipe. Will have to find a couple of nuts somewhere.
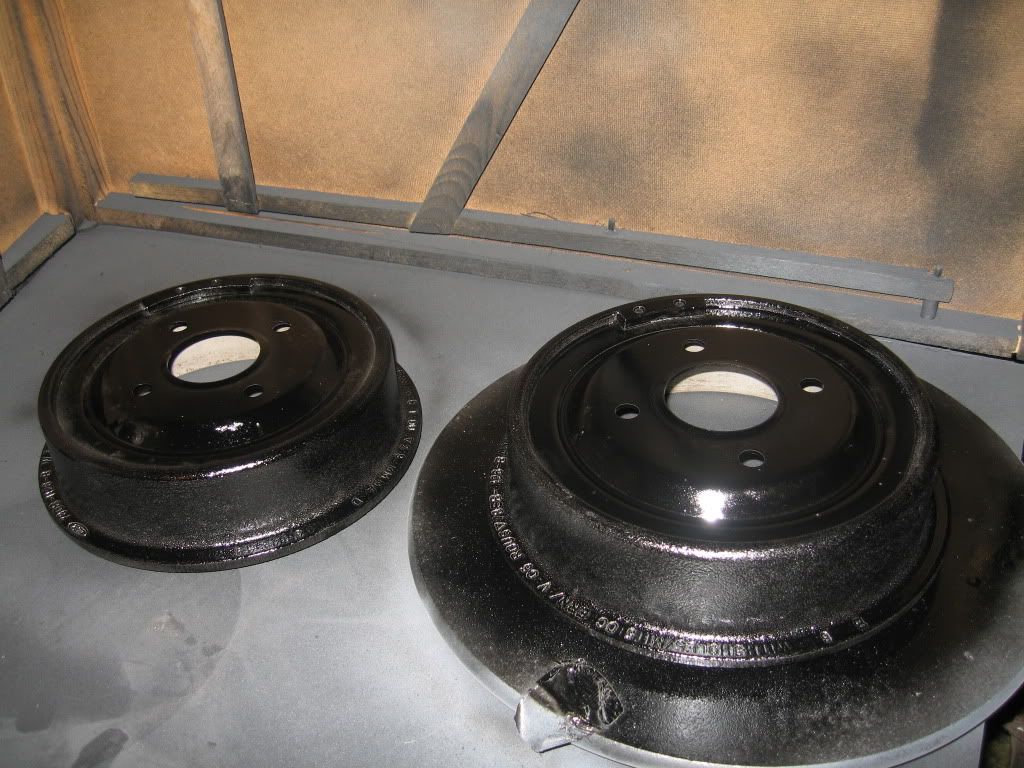
The next job was pretty straight forward and went without a hitch and that was to finish blasting the rear drums and give them a light spray to try and keep the rust at bay for at least a week.
Brake drums
I had been told by Floflex that my bushes were due today and they duly arrived, the Panhard rod bushes went straight in.
That's the last of my designed one's fitted and if I had the money I would have had a mold made of both sides of the upper arms because what I thought was a scale drawing from Floflex wasn't. 
This was a bit of a disappointment when I opened the pack but the biggest was yet to come.

I had to decide whether to see if I could return these and have a red face plus the fact I would have to figure out what else to order or I could try altering them. After yesterdays success and realising just how easy this poly is to alter I thought I would give it ago.
The sizes I required are:-
38mm OD instead of 46mm.
36.5mm between the flanges
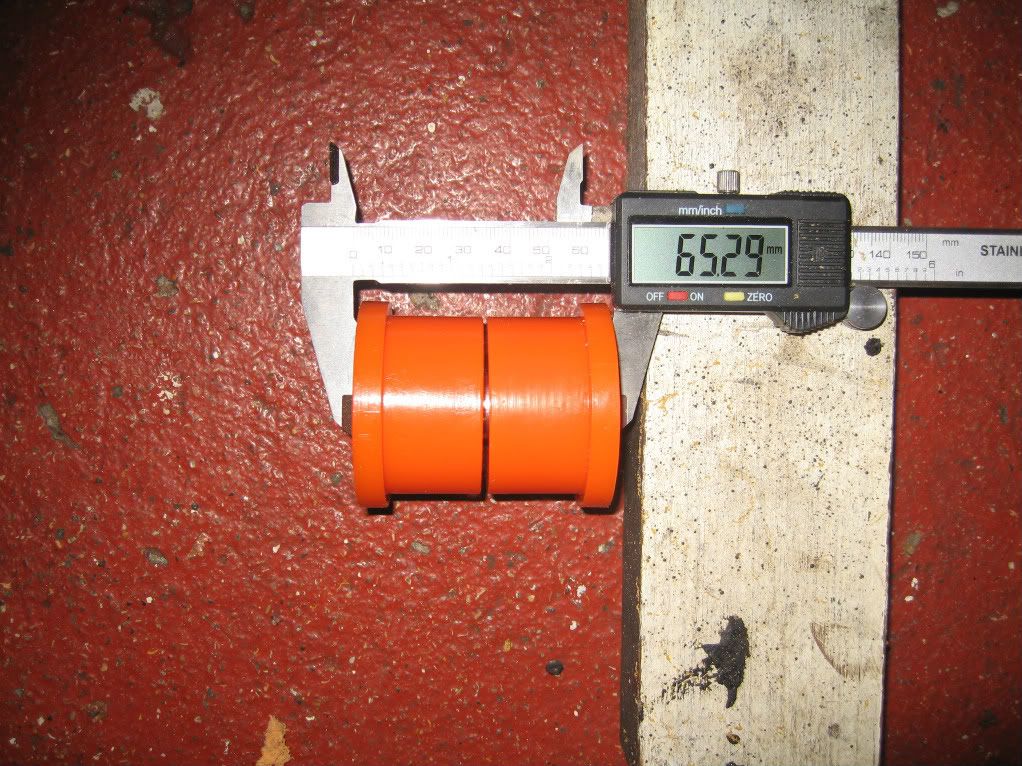
44.5mm overall width instead of the 65mm.
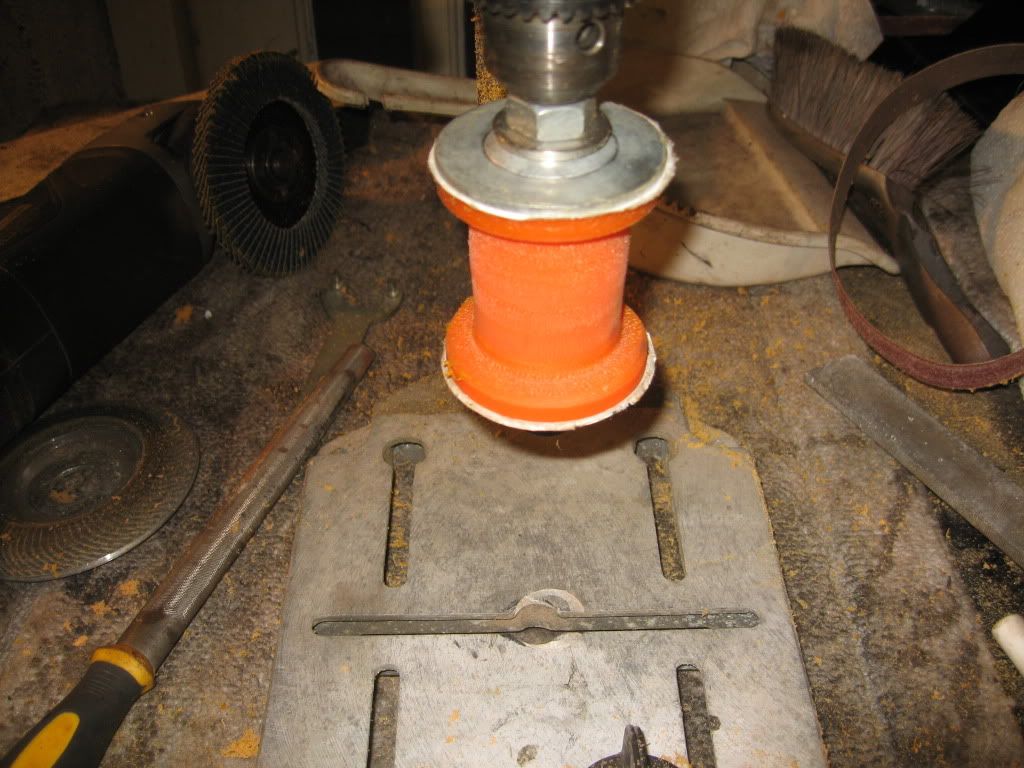
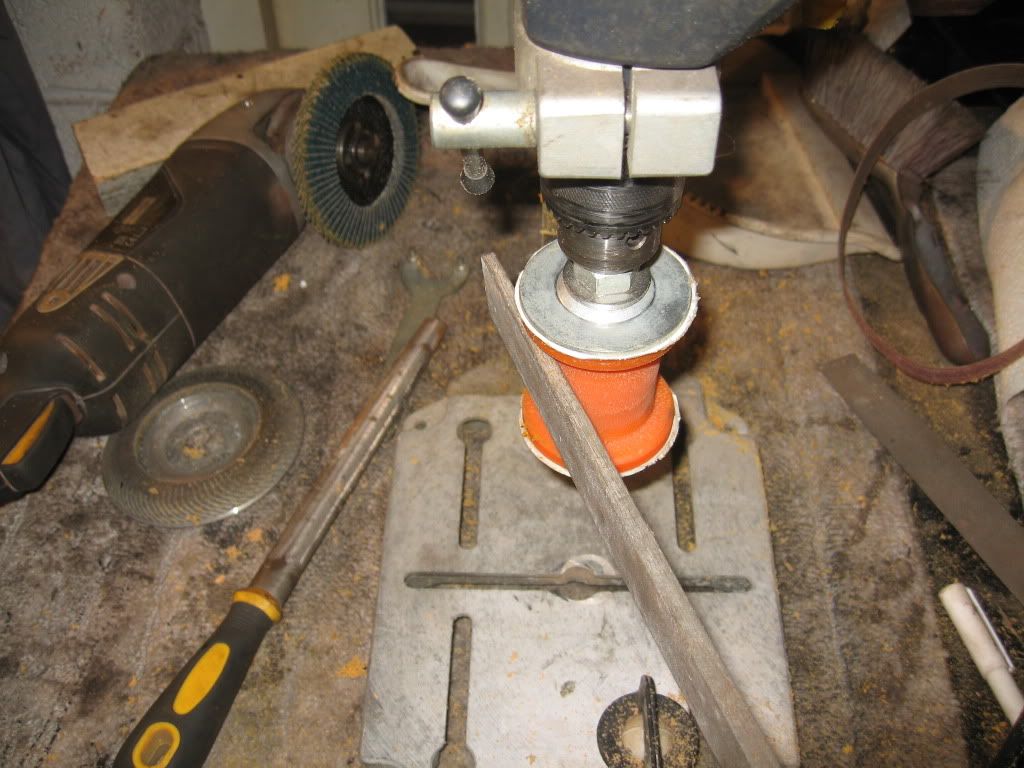
As I no longer own a lathe I decided upon a vertical drive to spin centrally so attached the bush to my drill in its stand via a 12mm bolt with spacer washers borrowed from my bench grinder.
Bush fitted to vertical drill
I used a number of tools to reduce the bulk including a grinder with a sanding disk and a air file but I found the best tool for the job was an ordinary file.
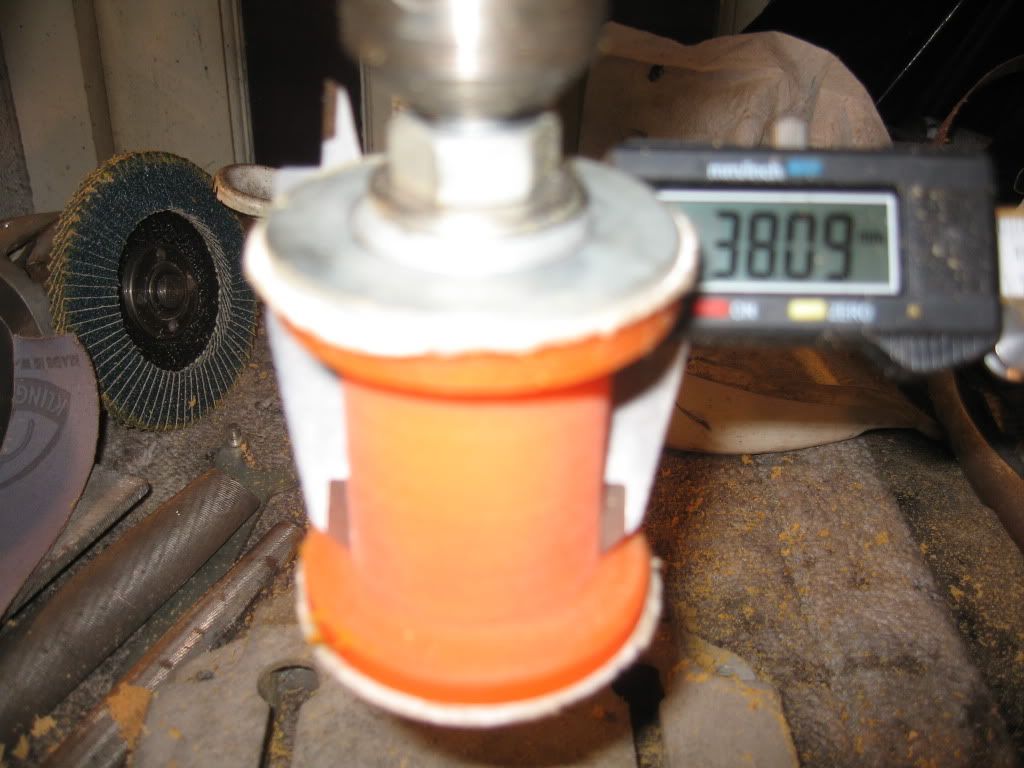
This kept the diameter perfectly parallel and the size (I thought) came out perfect at 38mm, unfortunately a huge dose of stupidity lent a hand.
What a great accomplishment turning down a poly bush by hand to 38.09mm, think again!
I had forgotten to take into account the tightness of the bush on the spindle which as the bush got hot needed tightening a little more and a little more to stop it spinning. So great, success until I tried to fit it in the axle bush hole and found it over a mil to small, I couldn't believe it. After doubling checking my sizes I realised that as it was tightened it squashed up and as I released the nut it returned to its correct diameter.
Well you have to laugh.
I still have the other bush to do, so I will check the size by loosening the nut and allowing to cool before taking a measurement, of course I will have to buy another bush, that will be £10 for the bush and £8 postage.
Well over £200 for the rear bushes so far. £80 for the Teflon blank and the mold, so really only around £120 about the same as the front.
I had to give up after this disappointment so got the brush out and cleaned up.
I hope to get a little more done tomorrow but that will be my last day as I am off early Sunday for a 17 day trip this time, hopefully I will have a full 2 weeks off when I return, although we find out about redundancies at the end of the month so I may have more time than I thought to work on car.
See ya Paul


Thursday, 19 January 2012

Thursday 19/1/2012

Hi
I'm afraid progress has been slower than I had been hoping for since getting home on Sunday, well today has more than made up for it.
Yesterday was a no day as Lynne had the day off and I was working on her birthday so she decided to have me out for the day, which wasn't to bad as I ended up with a new coat in the sales, result.
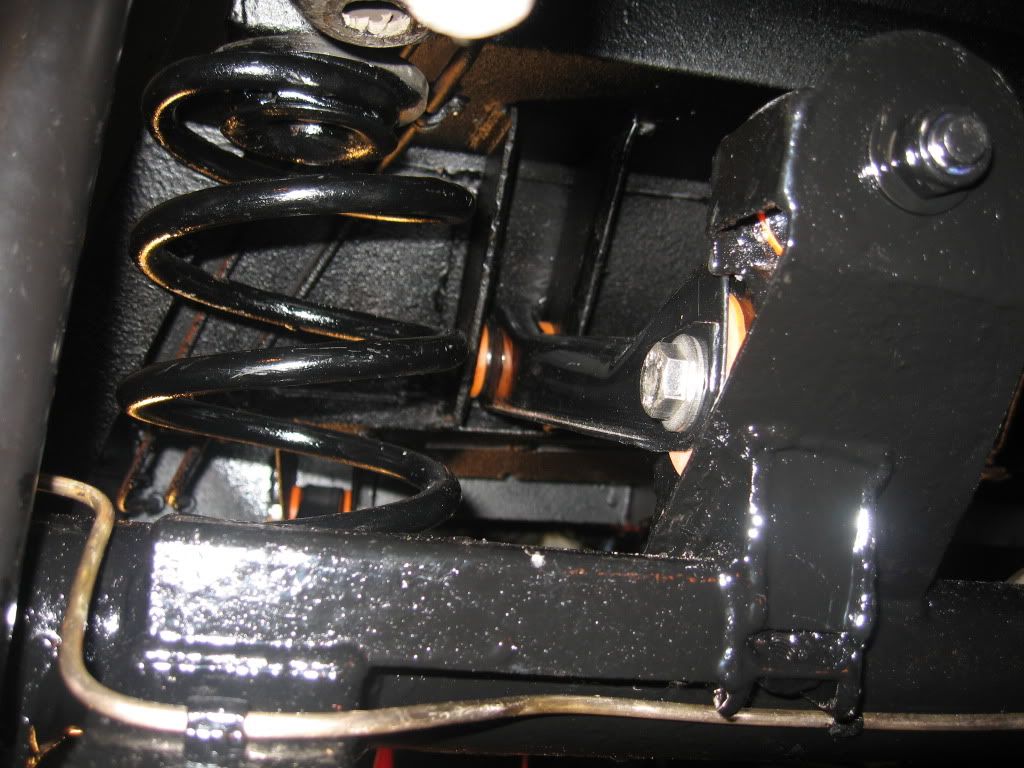
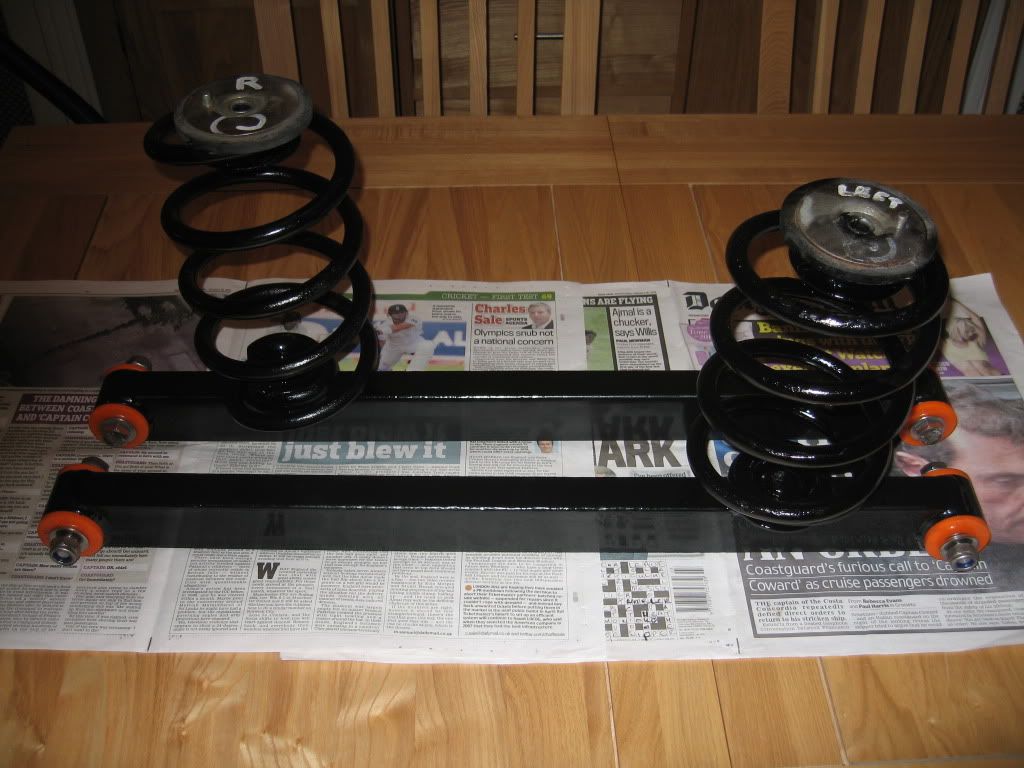
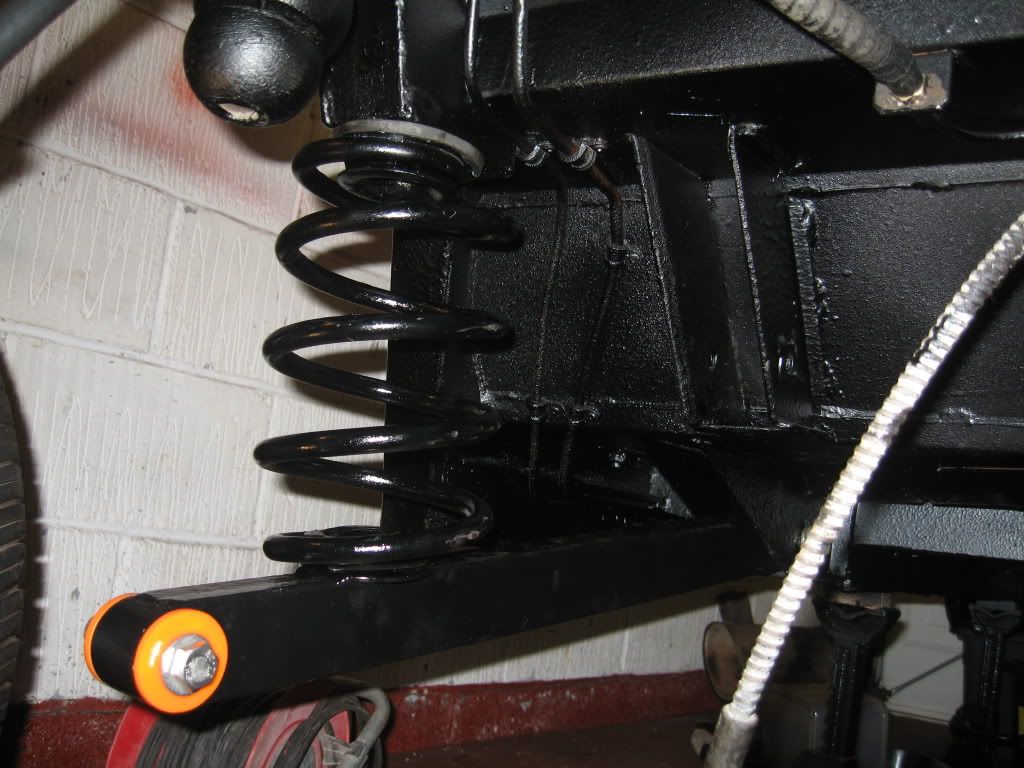
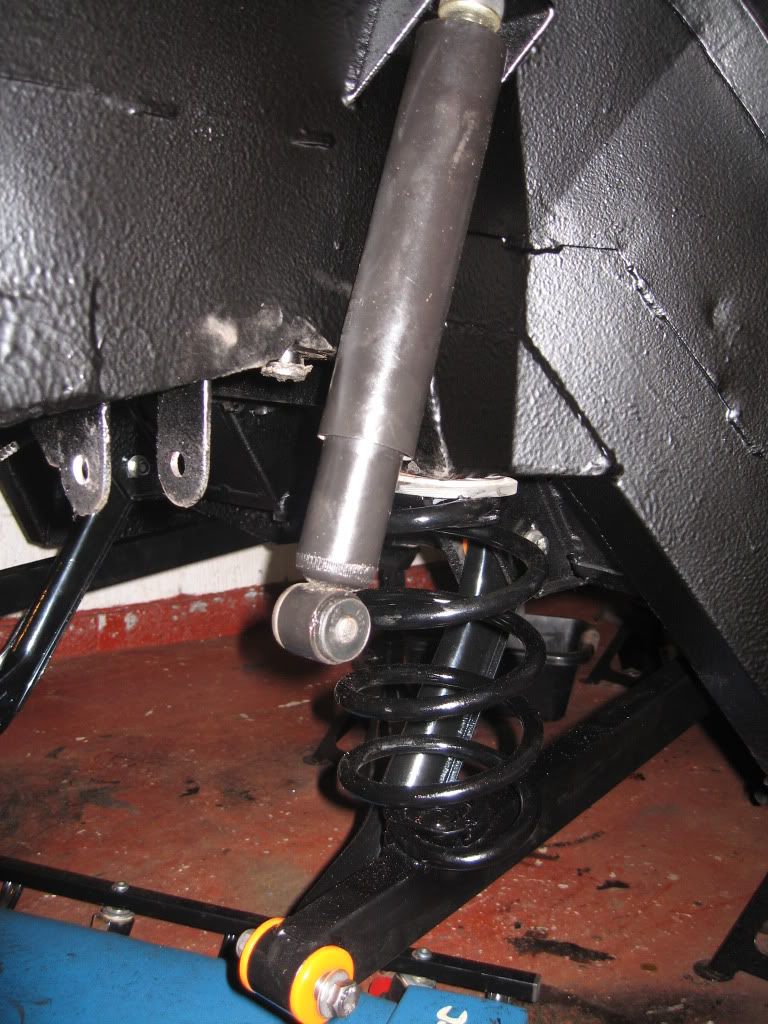
I did manage to get an hour or so in on my return and got under the car with a spotlight, what was left of the under seal and a paint brush, surprisingly there was very few places the spray gun had missed; in fact I was rather pleased with the result. I also attached the springs to the lower arms and fitted the bushes.
Lower trailing arms and springs
The bolts were also bought yesterday, 10 x 12mm and 2 x 10mm for the upper spring attachment, with washers and nylocks in stainless came to just under £20.

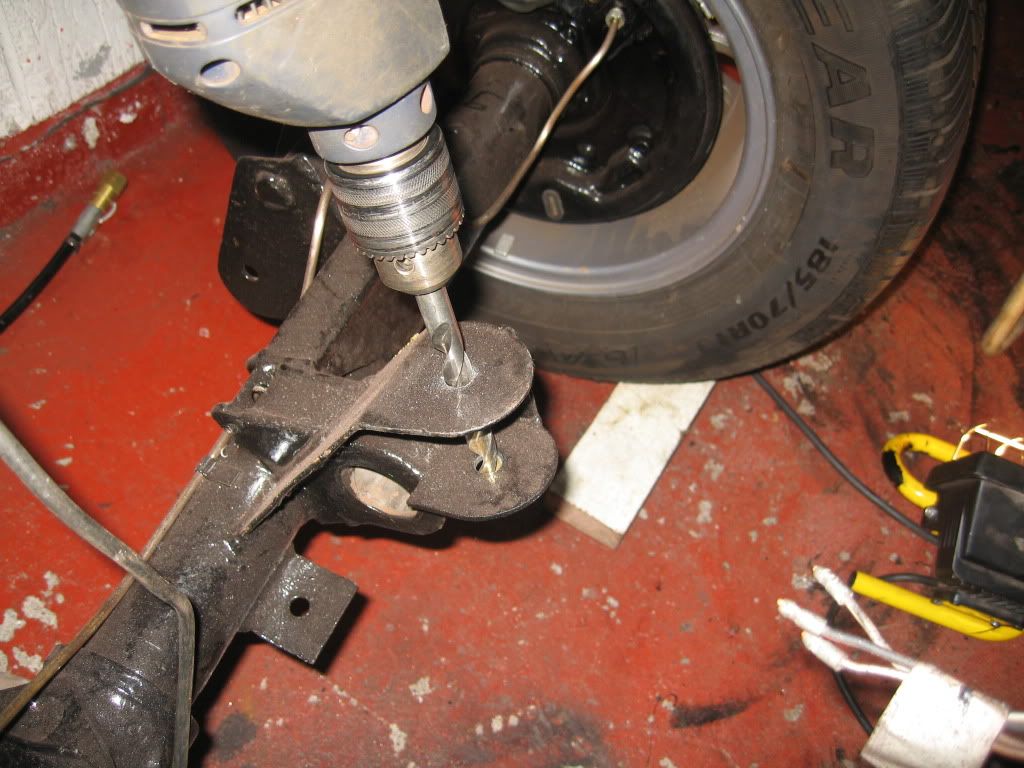
I started today by drilling out the 7/16" bolt holes to 12mm, I mentioned in a previous blog that the upper trailing arms were 1/2" BSF or UNF and the lowers were all 7/16" well to make life somewhat easier all mine are now 12mm. Unfortunately it is not as straight forward as it may appear, not a problem when you are used to difficult situations that have to be overcome but be aware if you do try it you will need a couple of unusual tools. or a decent file.
A couple of them I could just straight drill using a 12mm bit.
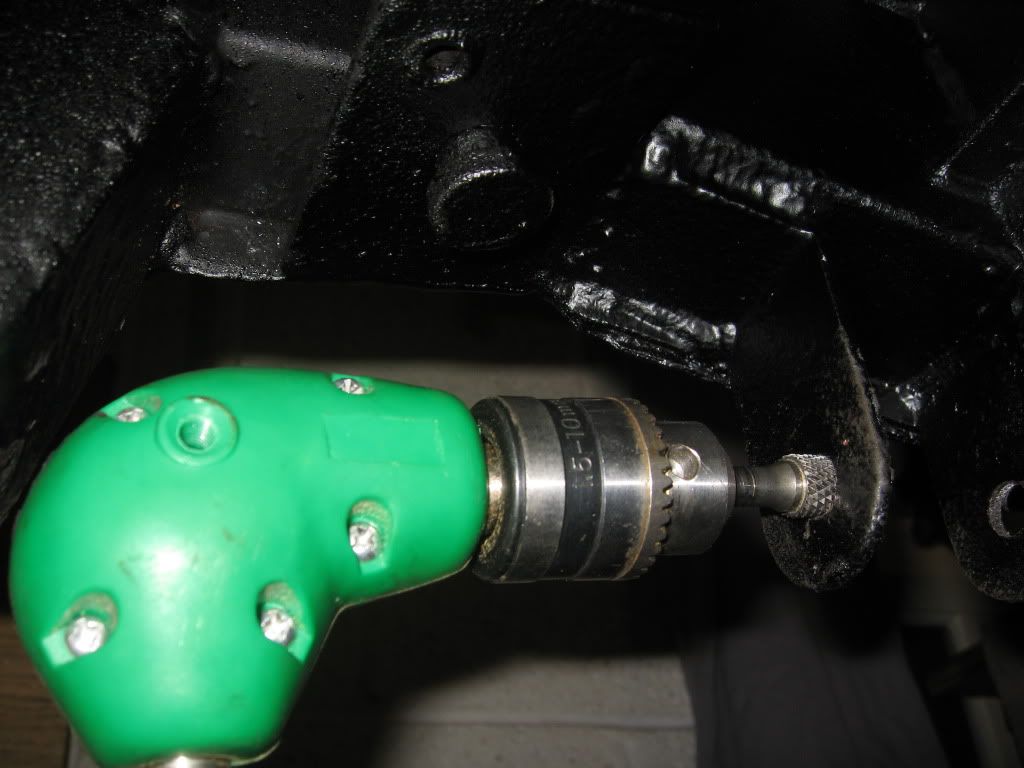
Most of them required a right angle drill attachment with a carbine rotary file.
Right angle attachment
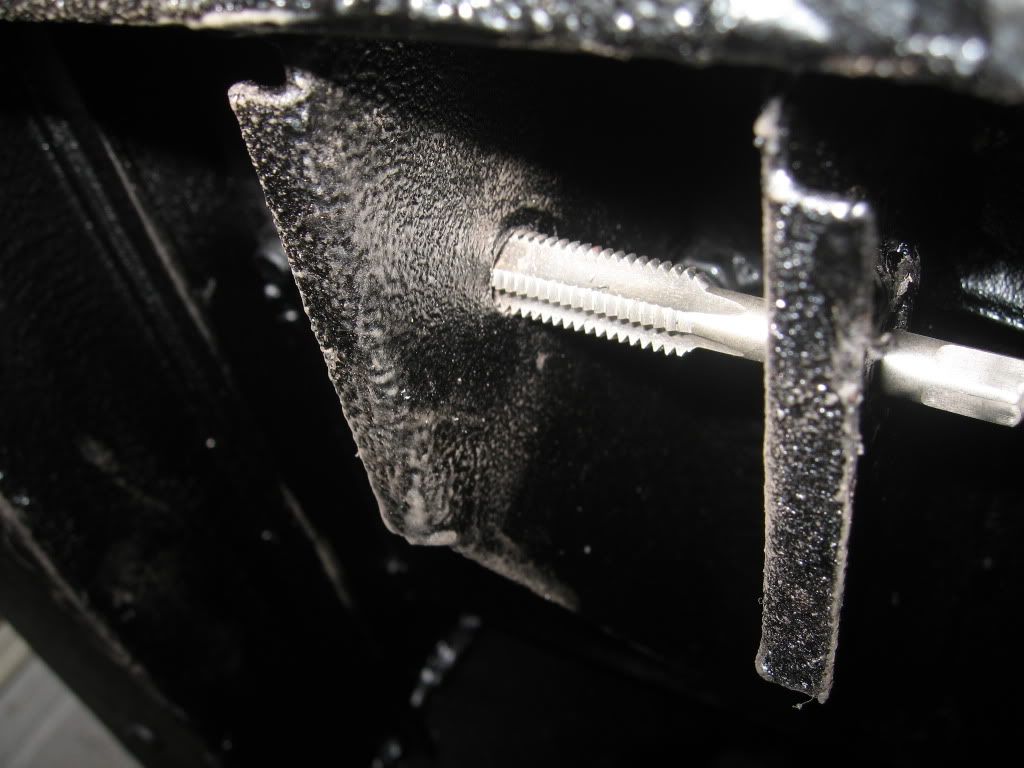
And 2 of them required the drilling of the first hole with the 12mm bit then a bit of filling before fitting a 12mm tap through this hole and threading the 7/16" to 12mm.
Chassis lower bracket
All this is because of the tight angles and lack of room to fit a drill and bit, If anyone buys the bushes I had made at Floflex then ask them to drill the inserts to 11mm to fit the 7/16" bolts fitted although I think it comes from a standard tube and cut to size. Still for an hours work it is well worth it as I have fitted all stainless and will never have to worry about grinding them of as I did with the originals.
I was now able to fit the lower arms and bolt the springs to the chassis, the new bushes fit like a dream, it took a bit of effort having a bobbin made in Teflon then a mold but seeing them slide in made it all worthwhile, very pleased.
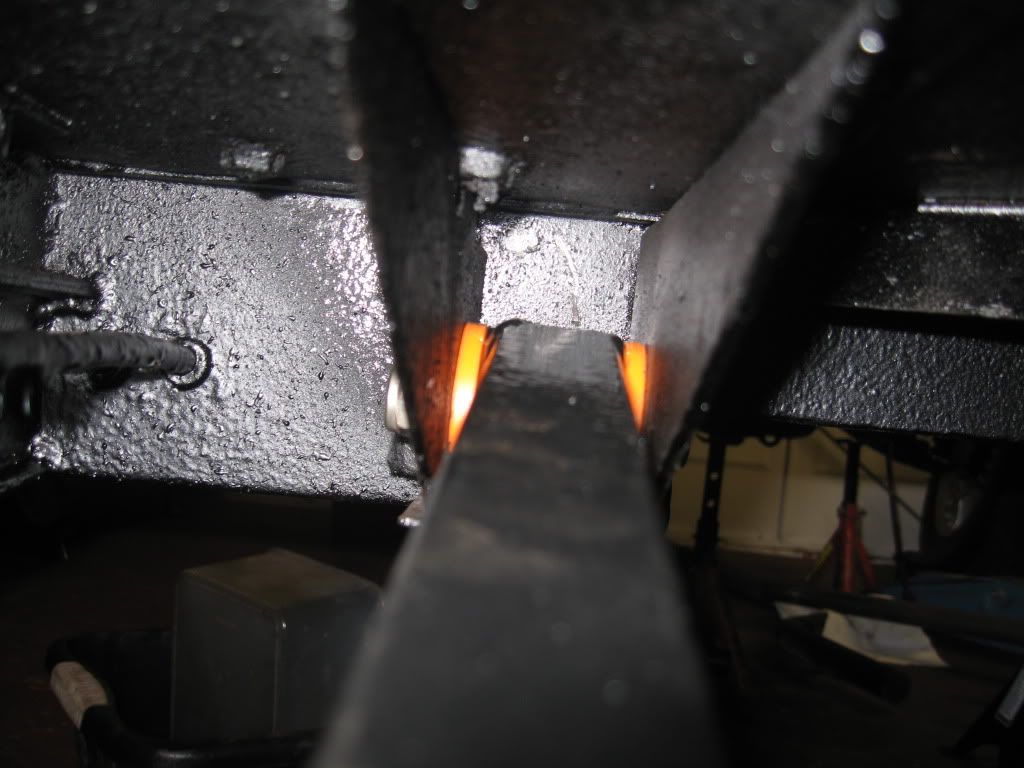
Lower arm new bush
The spring was bolted on first with the locating pin slotted into its hole then while loose I pushed the bush in place and bolted it all up tight.
Once these were in position I got out the upper arms and oversized bushes, for what reason I do not know? I had bought a attachment for my grinder to cut these bushes to size, stupid idea.
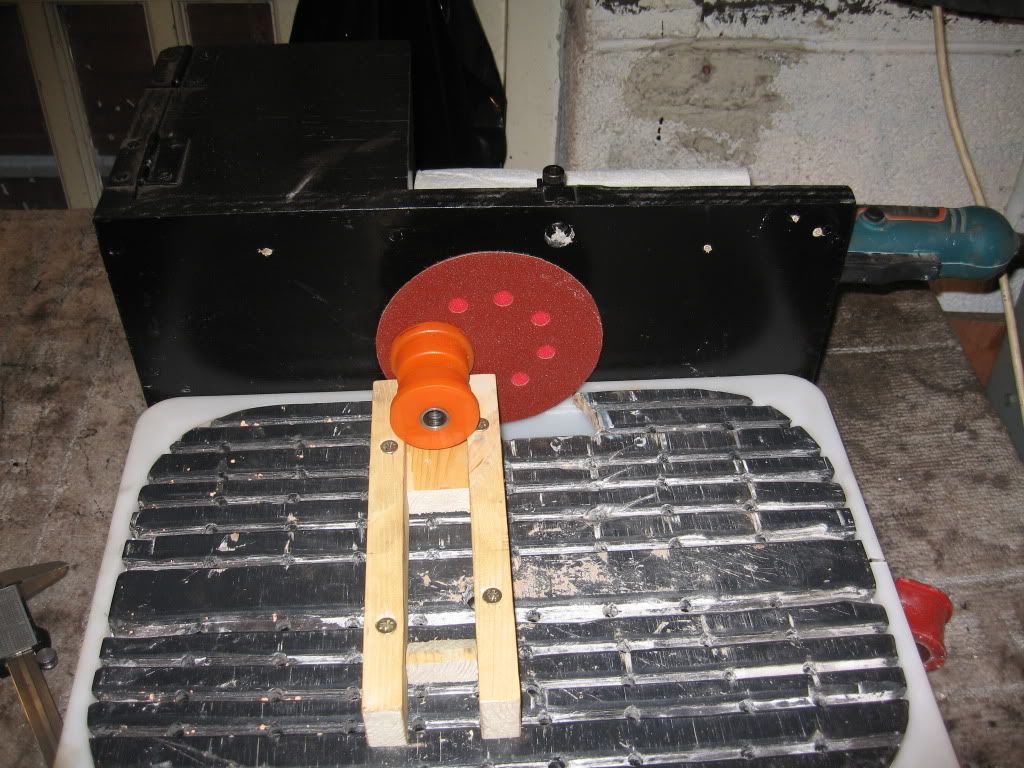
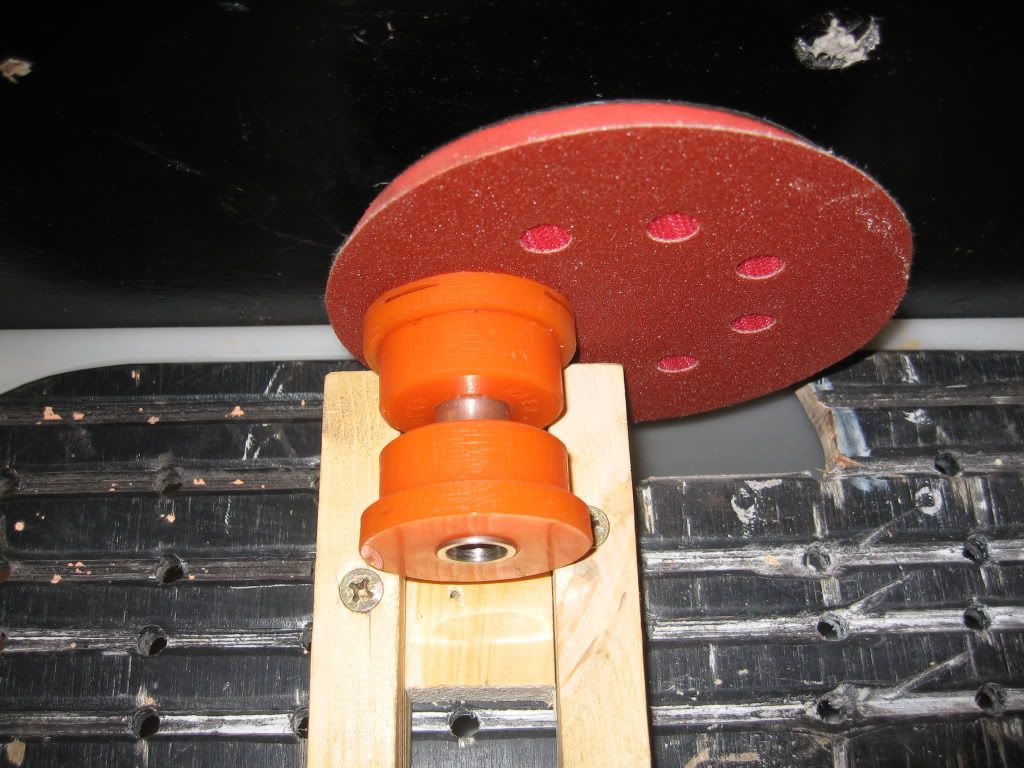
I had in the loft the perfect tool I made last year for grinding smooth the edge of glass using diamond pads, all I had to do was swap the diamond pads for grit pads and I had it.
Horizontal grinder
The sander is just a box with my spare variable speed grinder fitted to the back, the work bench is the water trough for the water pump to go, I just removed the splash guard and pump and screwed on a couple of straight edges and da! da!, perfect. I had taken a lot of trouble when I first built it to get the wheel in as close to vertical and horizontal as possible so as long as I screwed on the straight edged square then I would have aligned bushes.
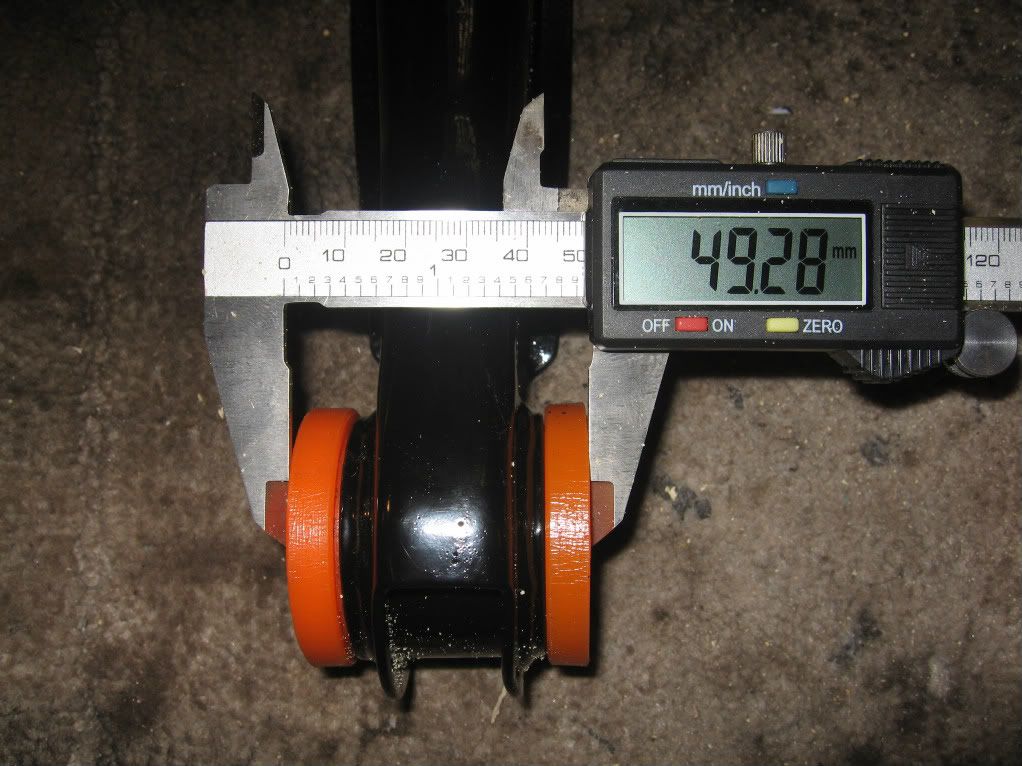
The bushes I am using for the upper arm chassis end are the one's selected by Floflex and they fit great in every department except width and these are.
Upper arm bush before sanding
As you can see the O.D is 49.28mm, unfortunately it should be 45.5mm.
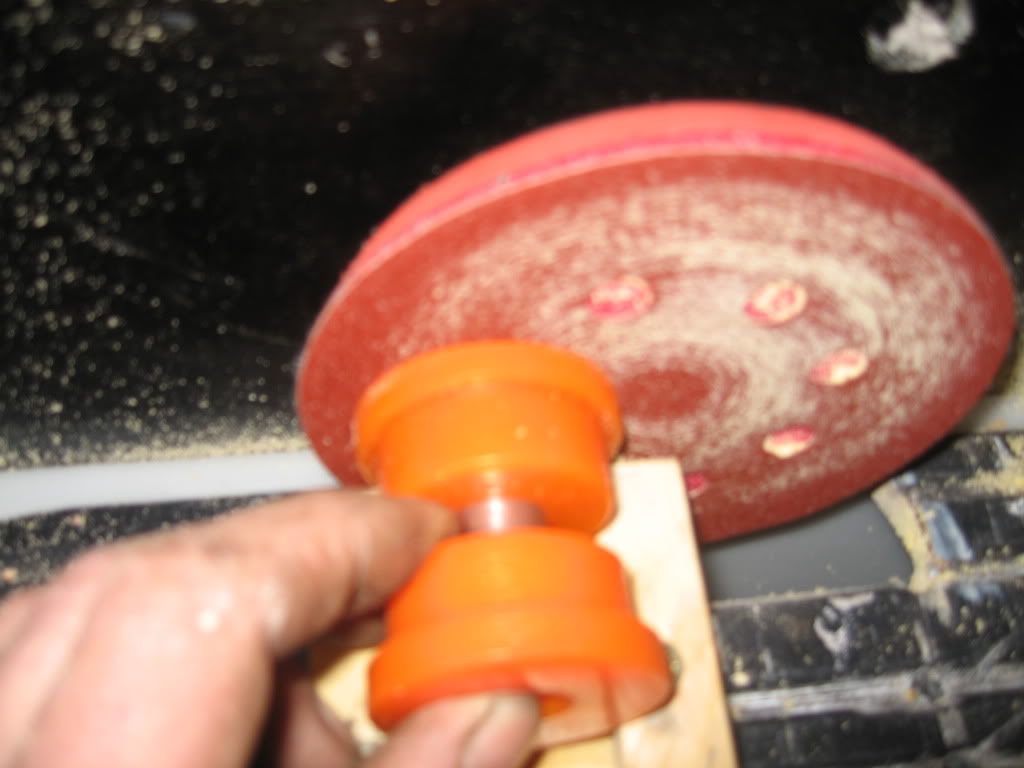
I rough marked to bush and give it a sand nice and gently and testing all the time.
The sanding disk worked great, I didn't go mad, turning it constantly and it cut down and gave a perfect finnish in no time on a 80 grit disk.
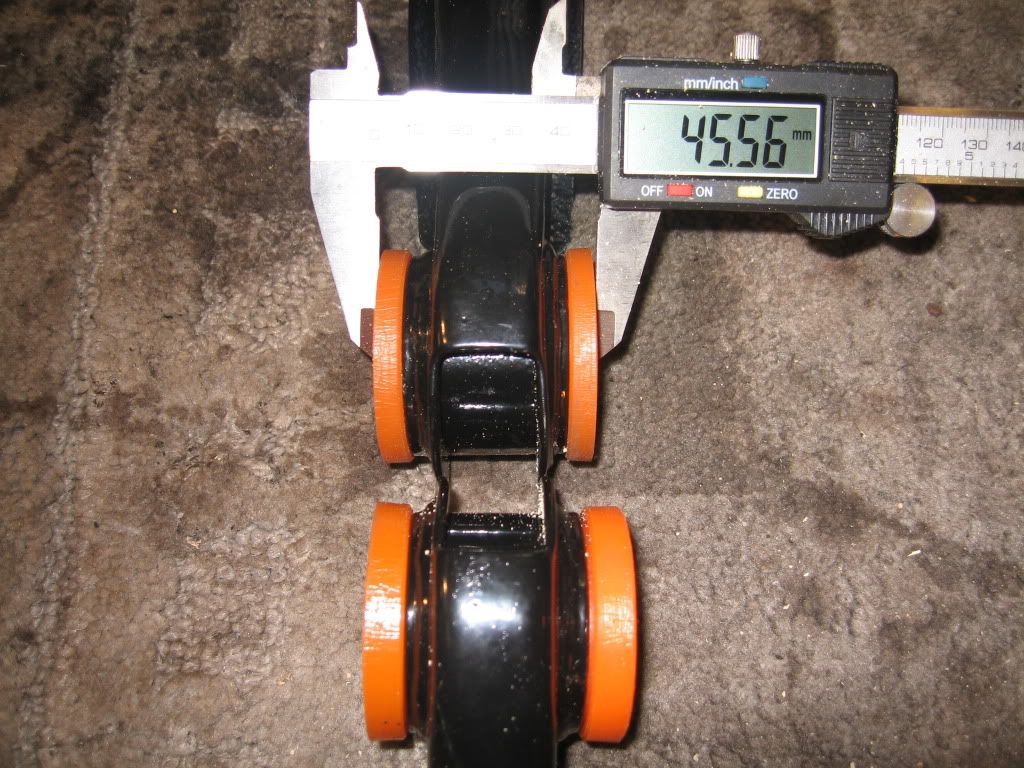
Bushes compared
Only .o6 out, perfect. The other one turned out just as good and the steel inserts got the same treatment. 
When finished I loosely fitted them and will fully fit when the opposite bushes arrive.
The opposite end of the upper arms have been ordered and an email from Cat at Floflex informed me they will arrive tomorrow along with the Panhard bushes that they forgot in the first order. 
I took the sizes for the axle end from a scale drawing luckily supplied when my front bushes came, I returned a set of the Capri bushes and ordered these new one's because the internal section is longer and will fit better. Hopefully these will fit and if so I shall post the order number.
I also received and fitted a poly handbrake bush 
Handbrake bush
This just slotted in without a problem

Next was the shocks, I bought these on eBay and are for the Vauxhall Magnum, unfortunately the holes for the bottom bushes are to large at 12mm. There was a couple of ways around this but in the end I took the easy option and removed the bottom bushes from the originals, these are still in great condition and a polish with a bit of silicon grease and good as new.
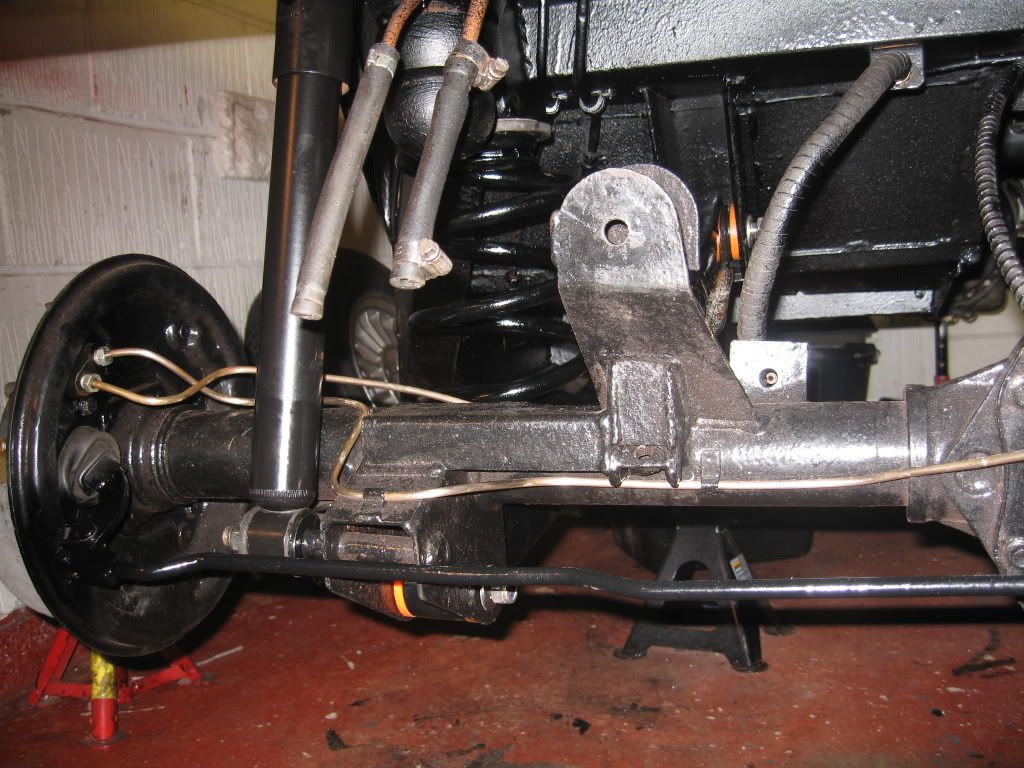
You can see here all three elements fitted, upper arm, lower arm and damper.
Once these were all in place it was time to fit the rear axle, I still had the wheels on so it was just a job of wheeling it into position and then jacking up one end and fit a stand then the other. Once up the lower arm bushes were pushed into position and a bolt inserted the same with the other end. Next came the dampers, I had fitted these to check them and had to remove again as the lower end needs to be fitted first.
I was pleased it only took about 20 mins to re-fit the axle instead of the half day it took to remove it, that was a bit of a workup.
I was a bit disappointed with the condition of the rear axle, I only painted it a couple of months ago and the gloss has gone already, could be the gunk I used to clean all of the dust from it, still no one will see it and its well protected.
Next was the handbrake rod, this just slipped thru and the cable and Teflon sleeve slotted into position, I still haven't bought any E clips yet, but will track down a stainless one. Both handbrake levers had they Teflon stoppers fitted then connected up with the pins and R clips.
Not finished yet as the new bushes need grinding and the panhard rod to fit.

Just a few reminders 

Well getting there slowly but surely.
Another good buy arrived today, 99p on Amazon, of course the sting was in the p+p at £3.80 but stll a great bargain.

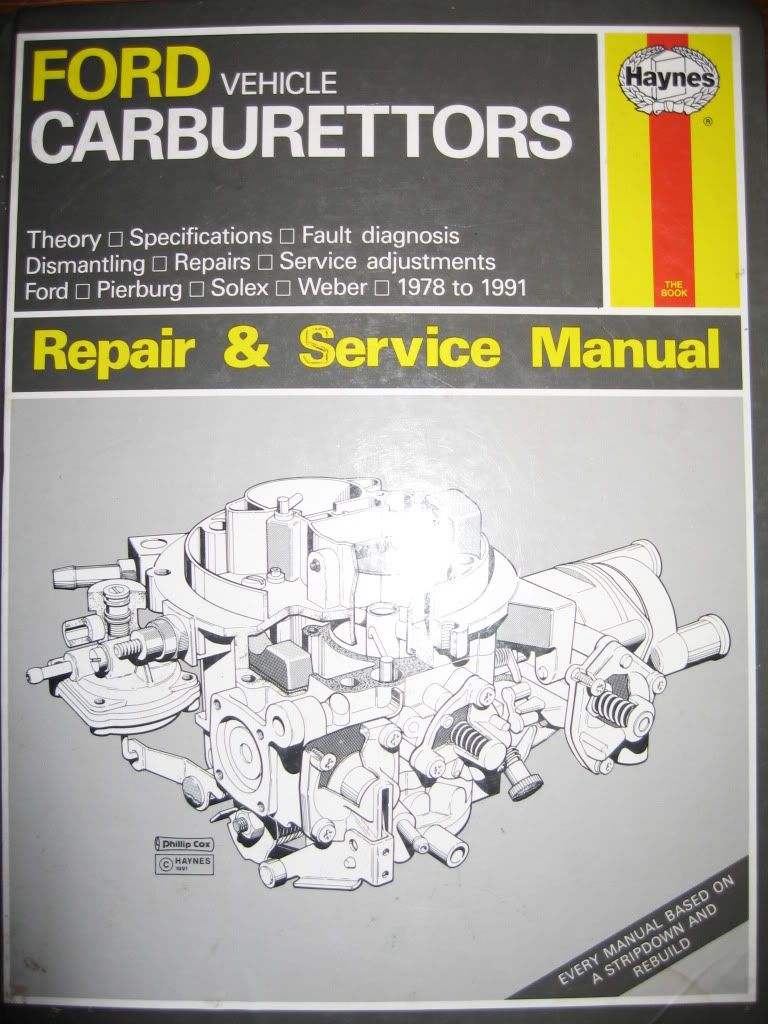
This manual covers the whole strip and rebuild of the Solex EEIB 38, great buy.
Well pleased with todays progress and hope to get the brakes fitted tomorrow and await the arrival of the rest of the bushes.
See ya Paul