In this blog you can follow the restoration of a D reg 27 year old Panther Kallista (meaning small and beautiful). Each part of the restoration will be covered with photographs and video's, anyone with a comment on how to improve the restoration or if in the area can come along and give advise.
It has taken all of Tuesday and most of today to finish off the seats, the prep work is the most important so that took most of the time.
Yesterday was all car work but of a different variety, it was Lynne's day off and new car finding day, her little Sport Ka had seen better days so It was time to go. I had been looking for a new car since coming home and we finally agreed on what she wanted, I found it on Tuesday night after a good search on the internet and went to look at it yesterday morning. It took most of the day to test drive and sort out price and paperwork but I pick it up tomorrow.
Lovely car only 27,000 miles on the clock and its from Stratstone Jaguar at Newcastle, unbelievable Jags in the showroom and is in mint condition, just got to sell the MX5 now.
Very pleased that the seats are out of the way as I can now concentrate on the bodywork, I mentioned last time that I wasn't to happy with the technique of using a sponge to put on the first coat. Well a change of mind as I found the correct way of doing it and used it on the last seat. Simple really, just wet the sponge; I had washed the sponge when I had finished the day before and it was still damp. Using it damp removes any streaks and if done in one long sweep give a smooth even finish, I gave the second seat 3 coats like this and it came out great. I still went over it with the air brush but this time I filtered the colour and used my 0.2 air brush and got a very fine finish. Glad I practised on Lynne's seat first as all of the mistakes were made there.
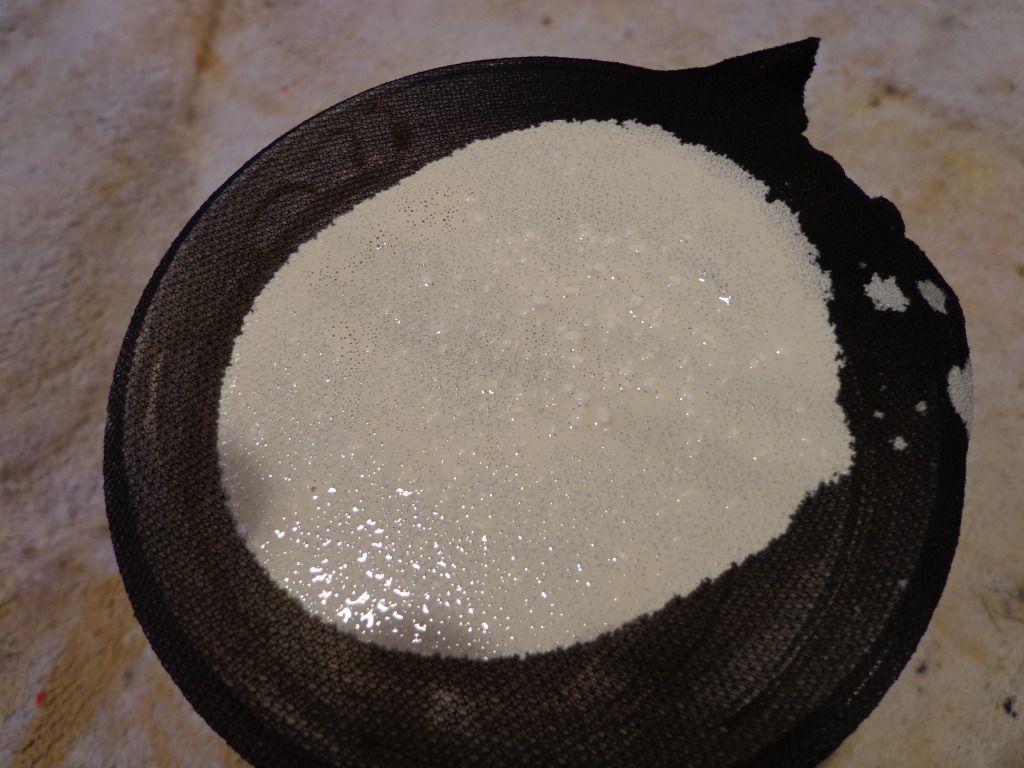
This is what was filtered out; no wonder my air brush was getting clogged, I mixed the colour with water before filtering and what came out was ready for use.
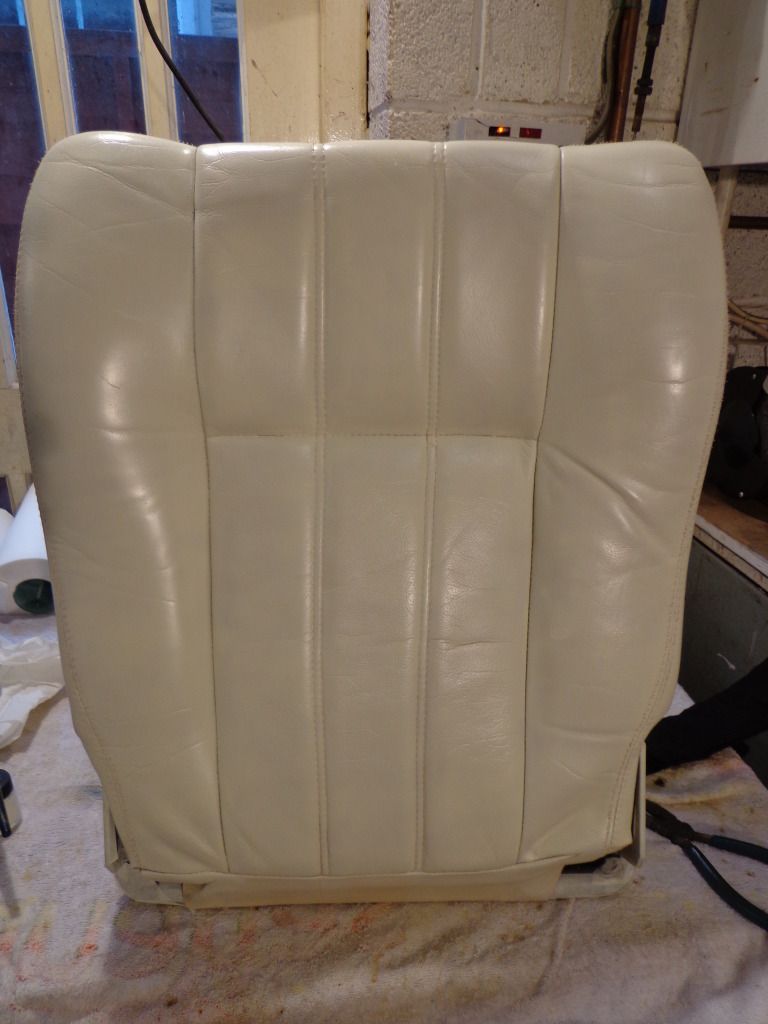
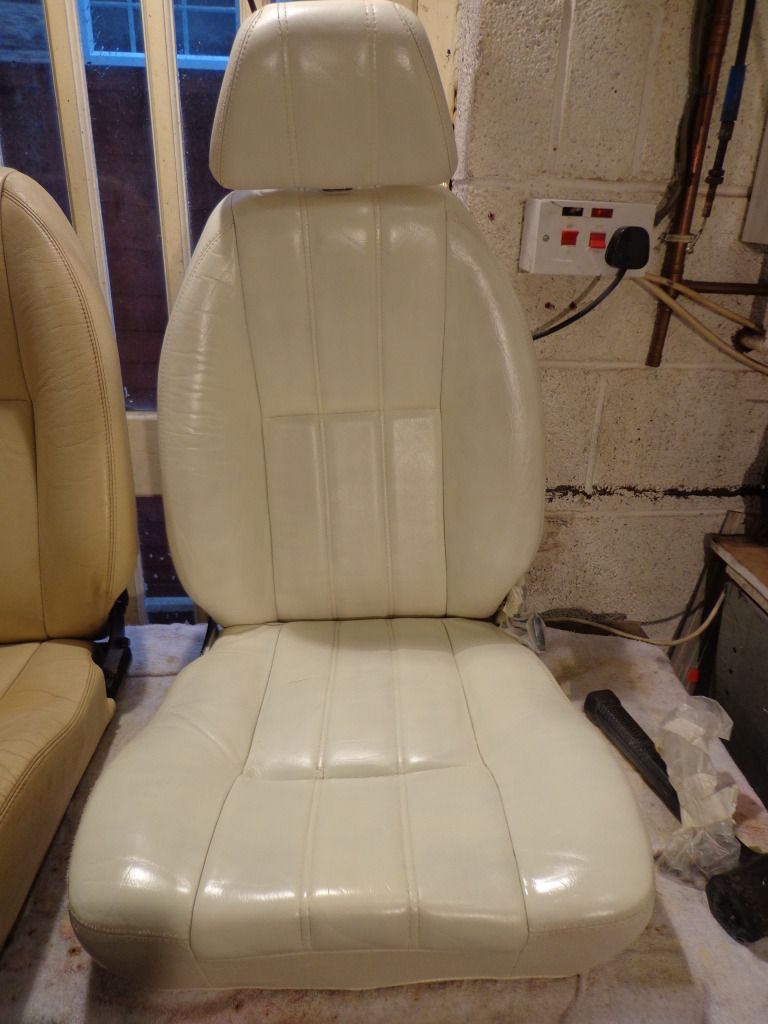
Well this is the finish I got and they look great, Still not quite finished though as I have to wait 7 days for everything to harden off before putting on the cream coat that makes the leather supple and it is advised to use this every 3 months.
I did have a go at colouring the door cards but unfortunately they did not come out to well and I am going to have new one's made so it was just an experiment.
Back on the seats again and the first seat is mostly finished, big learning curve here and glad I started on the passenger seat so all of the mistakes will be on Lynne's side.
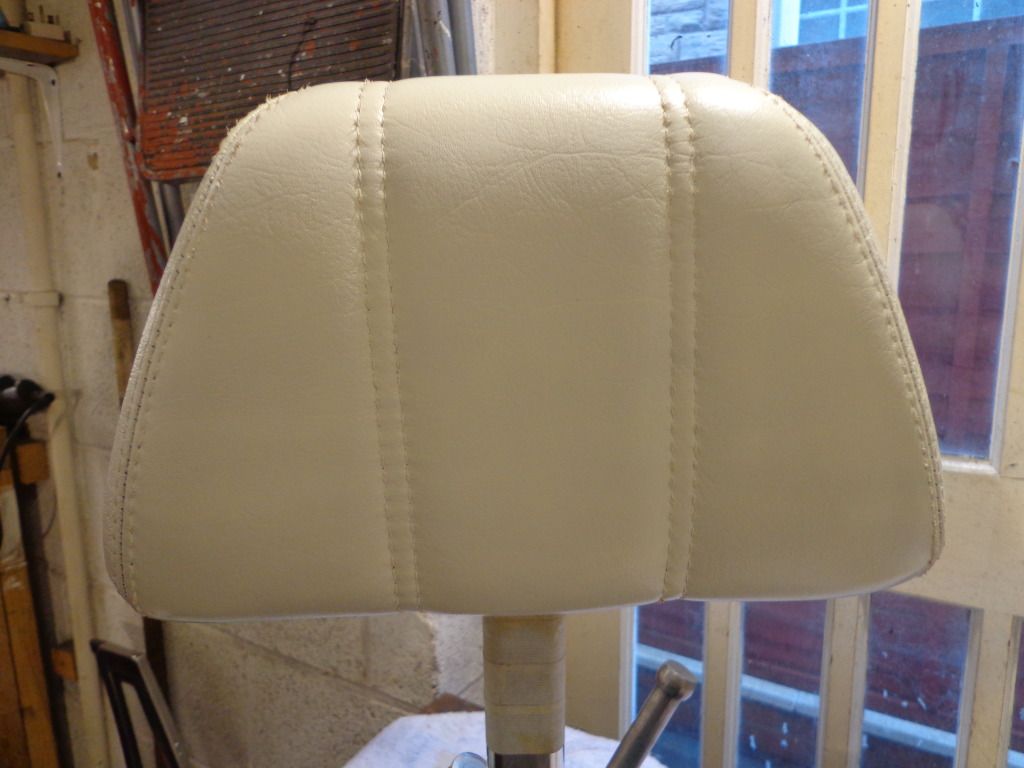
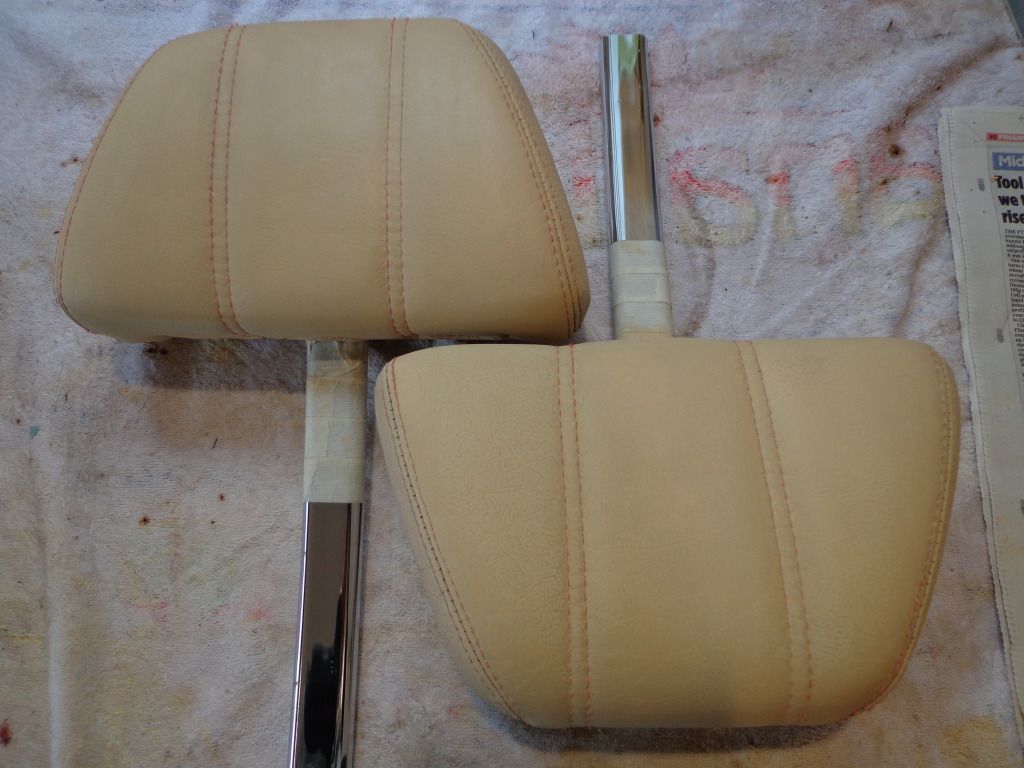
So starting on the headrests I following the instructions and used the sponge supplied to put on the first coat, I had to be very careful here as it is easy to get heavier streaks that are quite difficult to cover. The instruction say that the sponging is to get into all of the nooks and crannies, I dont think this is particularly necessary on items like the headrest and is more for seamed areas and deep creases.
I covered the headrests and set it aside to dry while I sorted out my air brush and found the correct mix.
I have a number of airbrushes and compressor setups from when I used to
do Glass and tile work, not as an airbrush artist but just for laying down
colour.
I made this as a commission a few years ago, deep carved and air sprayed on porcelain.
I started out using the colour straight from the bottle and it worked quite well for a while in fact I managed to get the first coat on both the headrests with minimal of problems, then the blockages started. I had used my fine spay airbrush with a 0.2 needle and it just started clogging up continuously.
Still I managed to get quite a nice finish on the first coats.
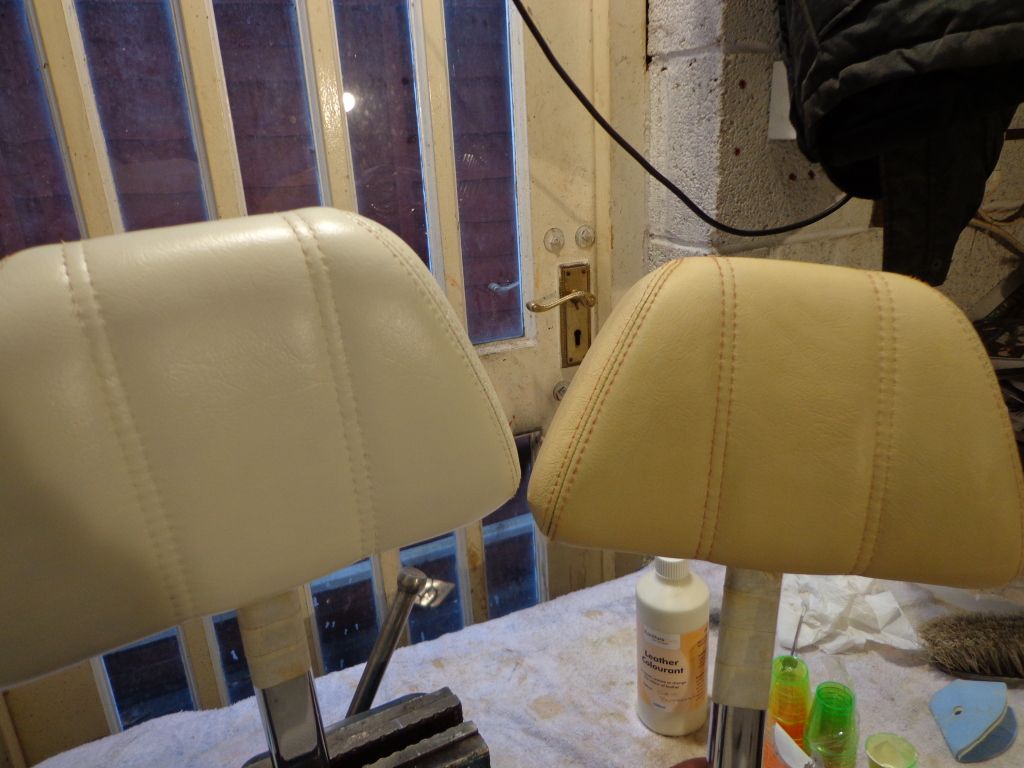
I ended up getting out my old badger suction pot airbrush that can suck virtually anything up through the tube and mixed the colour with water to thin it down. This still gave me a few problems as there are a lot of unfiltered bits in the colour and I ended up in Lynne's knicker draw for a pair of tights's to use as a strainer and that solved that problem.
They came out quite well with 3 coats of colour.
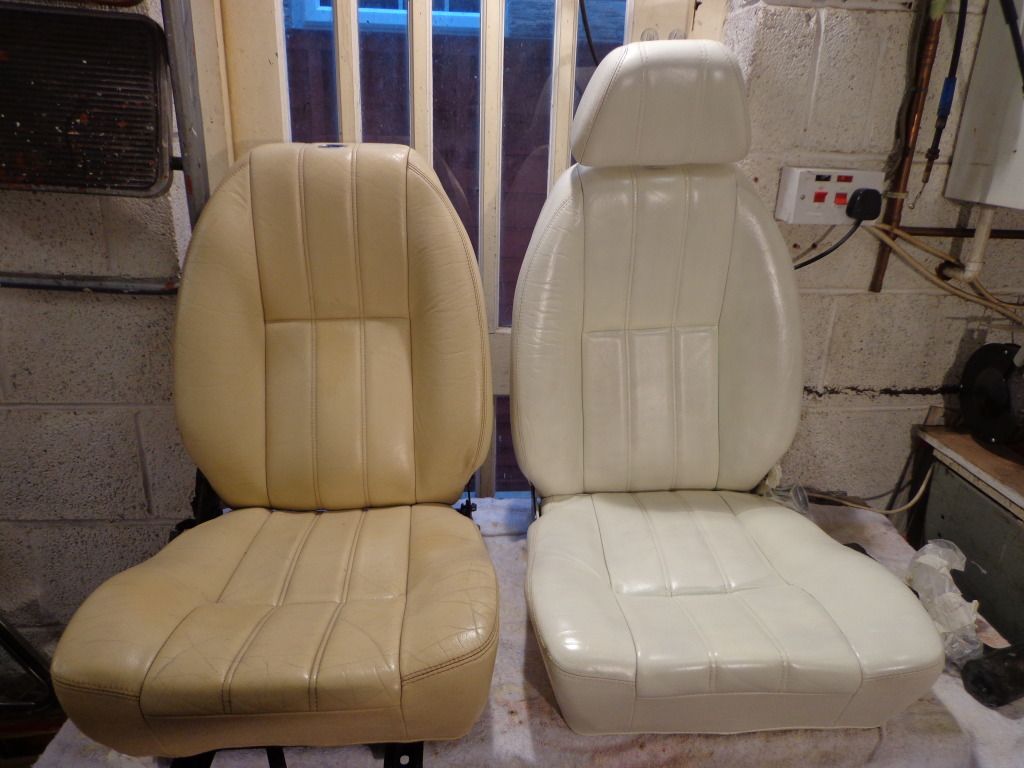
The new colour is Buttermilk.
Once I practiced on the headrests I was a bit more confident to do the larger pieces, I also have a mini smart repair spraygun with a 0.5 tip and thought I would give this a try and maybe speed up the colouring but no matter how much I reduced the pressure and how fast I worked I still got runs so it was back to the airbrush and a panel at a time.
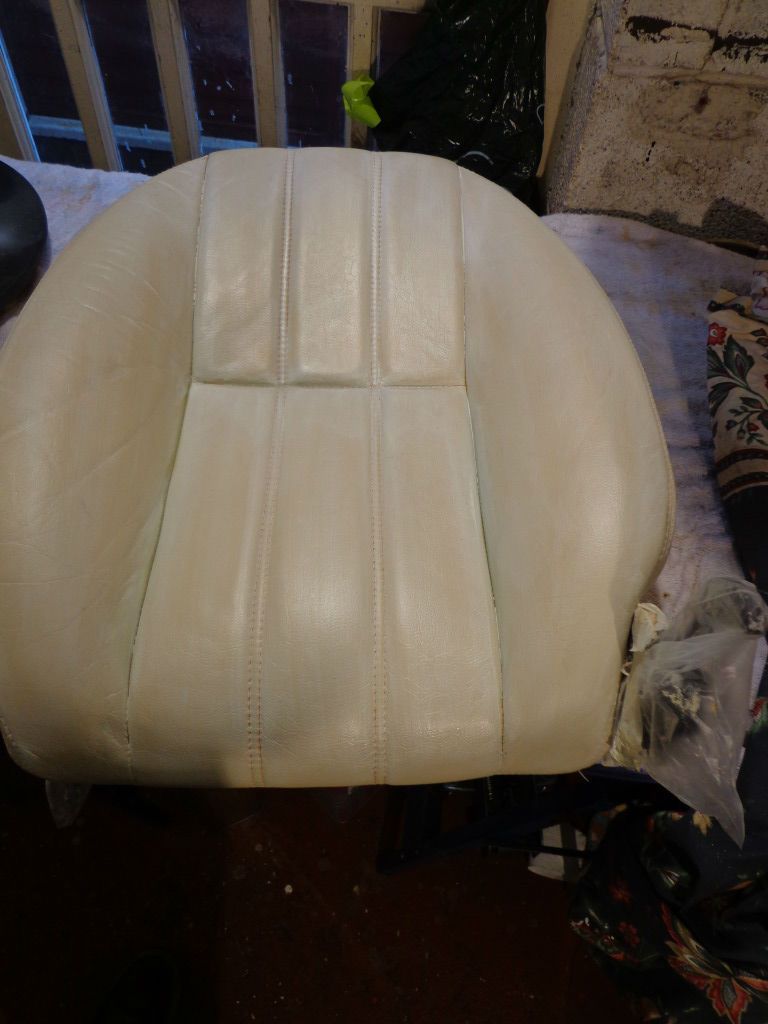
I sponged the colour on the back and the seat.
Then sprayed around 4 coats on both the back and the seat, and used the heat gun between each coat and it went on nice and smooth.
I let them dry for an hour or so before spraying with the gloss sealer, and gave all the parts 3 coats, drying with the heat gun between each coat.
When the gloss dried I was a little tempted to keep them nice and shinny but I do like the satin finish, so tomorrow I shall give them a couple of coats of satin.
It looks a little white in comparison to the magnolia of the original but up close you can see the proper colour and its nice.
So tomorrow a couple of coats of satin then onto the other.
Home again, got back late Monday as we where a little late for the early flight so I had to hang around Schipol for 6 hours, nice airport but would have preferred to get the earlier flight. Love the new job.
Got back from a few days in Yorkshire yesterday, we went to Wensleydale and stopped in a nice old pub where the author of the James Herriot books had his honeymoon, best bit was the tour of the Black Sheep brewery, lovely beer.
Lynne being brave at Aysgarth falls, with added finger.
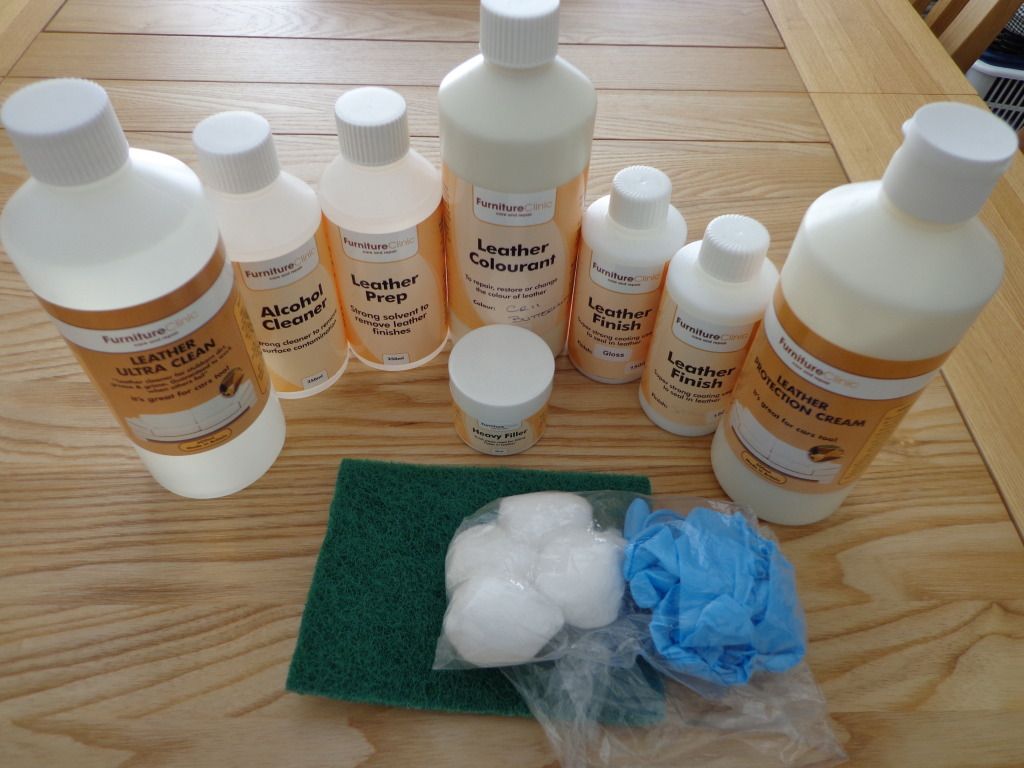
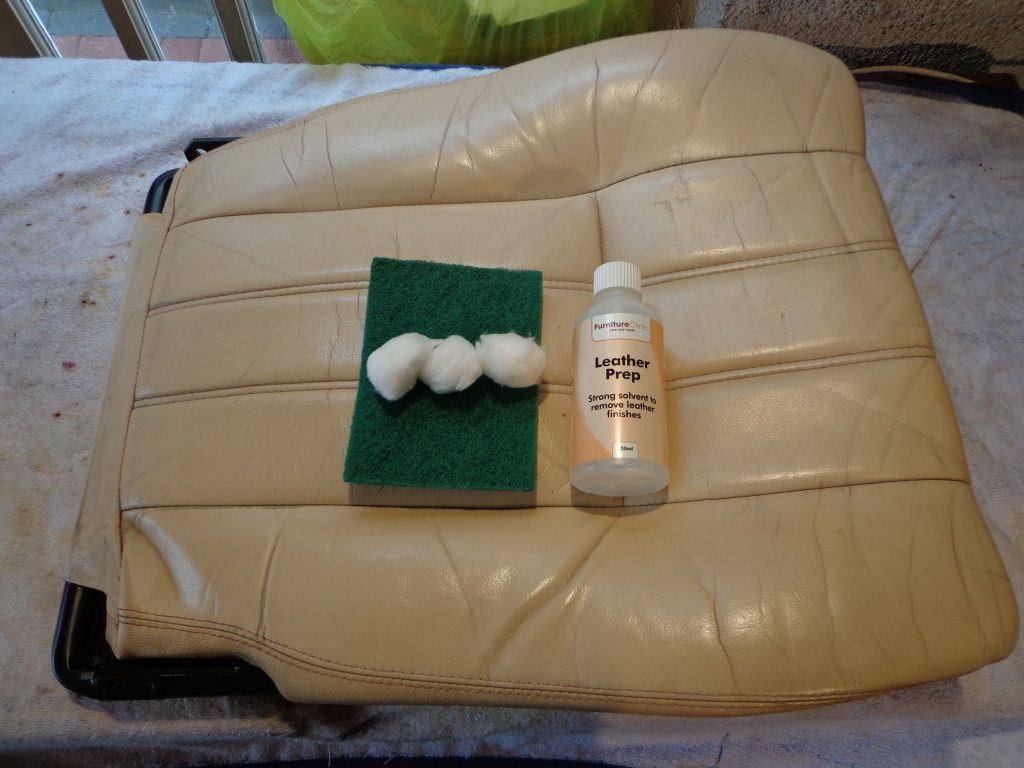
Managed to get back to work yesterday and decided to get the seats finished before starting on the bodywork as I know what the dust situation will be; so before going to Yorkshire I took a drive to The Furniture Clinic near Newcastle and had a talk with the guys there. It is split into two businesses, the restoration side that does furniture and car interiors and the internet supply / colour mixing section. I had a word with the restoration guys and got some tips and a quote for re-colouring both seats at around £330, more if any repairs are required. I then had a talk next door and bought the colouring and care kit to do it myself.
This is the medium kit which is enough for 2 seats and cost £67, it includes the prep for removing the old colour which is a solvent to remove waxes, silicons and colour plus alcohol prep for those that solvent won't remove also a sealer and silk finish. The medium kit has 1/2 a litre of colourant, I have gone for Buttermilk which is much lighter than the original colour. I was also told that the seats had been coloured once before, easy to see once the tell tale signs where pointed out, mainly the original thread colour (red) came through in places so this has to be removed first.
First was to read the instructions and watch the video again, (which I linked to last time) little did I realise that removing the old re-colouring would be a major task but as they say it is all in the prep.
The leather prep is supplied in a 250ml bottle which I used up on just the seat bottom, this is supplied as a strong solvent and for some reason I thought it was a special mix so after using it all yesterday I drove the 20 mile to Furniture clinic for 1 litre more and had to fork out another £25. Guess I must have more money than sense as I just bought 5 lt of solvent thinners for £7 at my local auto paint suppliers, so tip #1 If you have colour to remove just use normal solvent thinners and save a fortune.
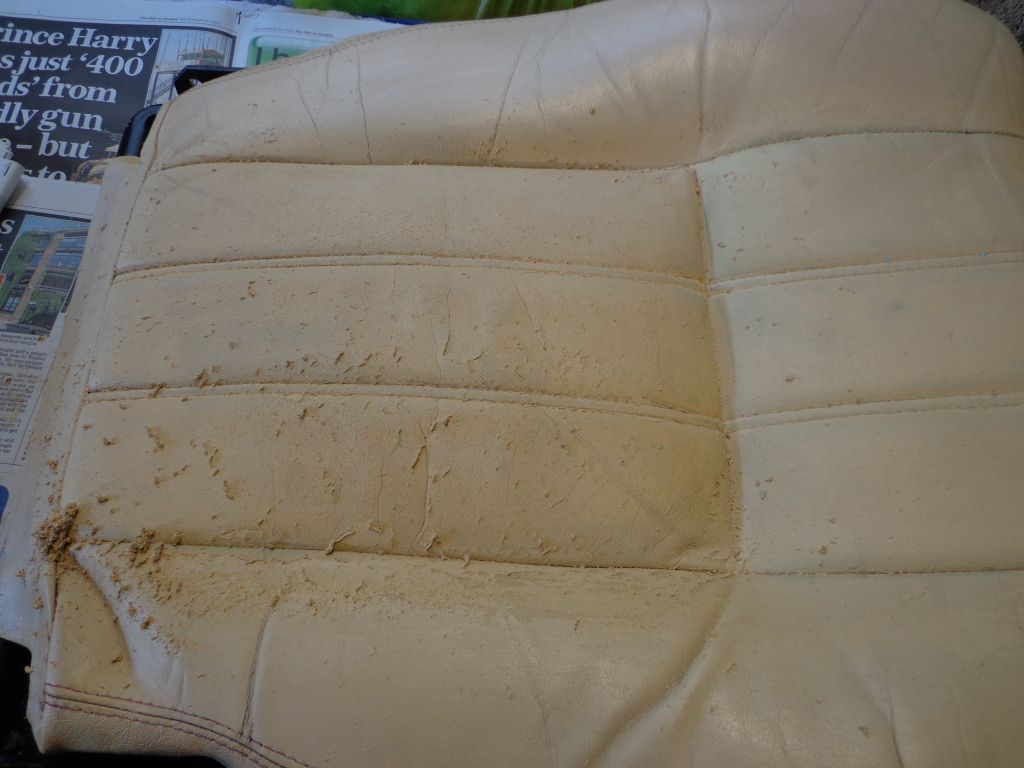
The re-colour took a bit of effort to remove, as with most paint when thinner is applied it turns into a sticky mess.
I don't imagine this is normal as the original colour would have been a dye, the scouring pad supplied soon got clogged up but I had a big pack of these for the bodywork so no problem.
After a lot of solvent the colour soon came off and I left it to dry.
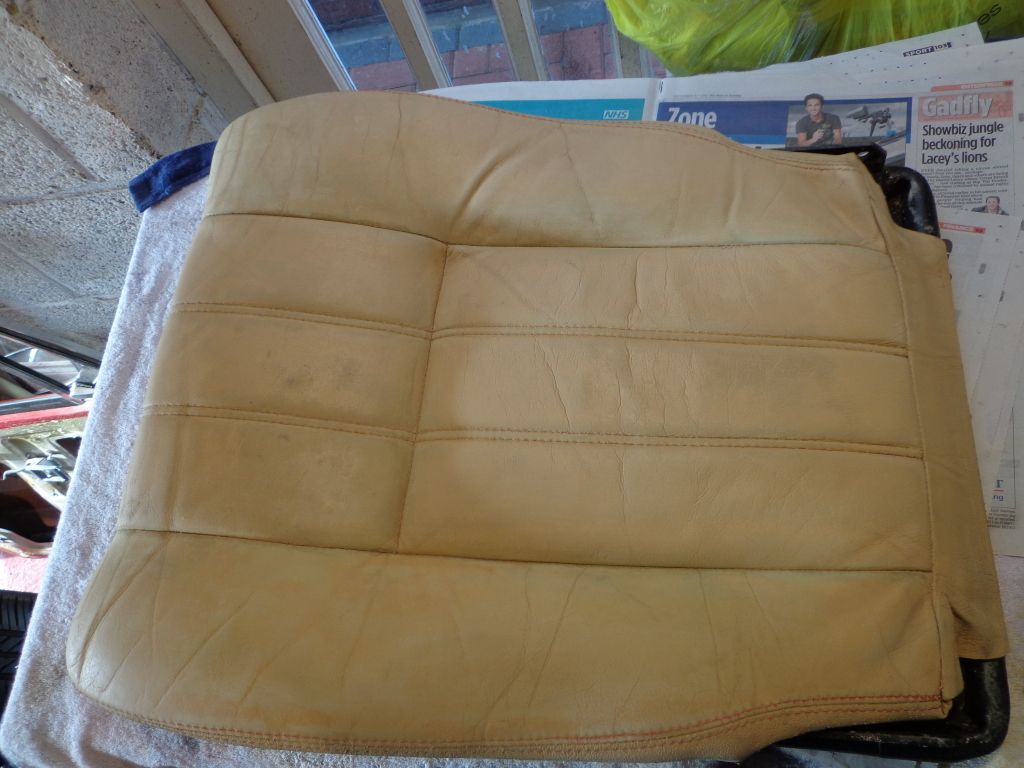
The headrest looked good before I started but after the original colour came through it showed what they looked like new.
Before stripping
You can tell the difference.
After a lot of hard work I managed to strip all the re-colouring off.
Tip #2 Mask off the paint on the frame, the solvent melts it.
Now all I had to do is to remove the original colour.
This was now a simple operation, I also used the new thinners I bought and used it in larger quantities as I found that it dries very quickly and it is far easier to wipe off the colour while it is still wet.
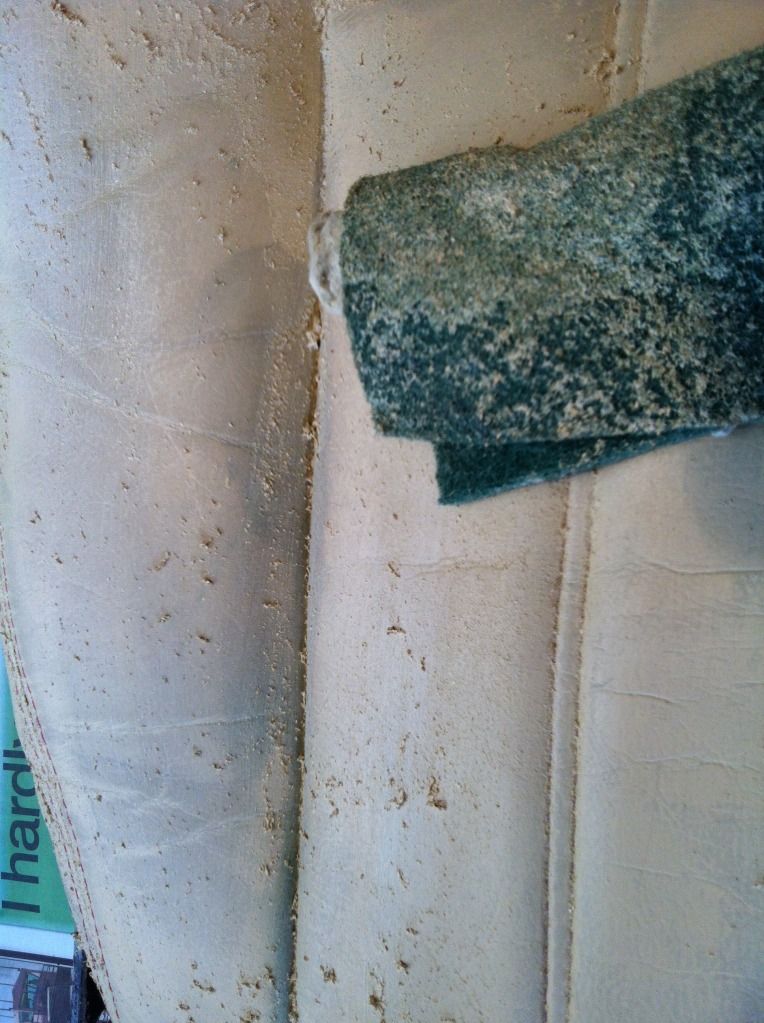
Once all removed I dried the area with a heat gun and started sanding.
This was something I never expected to do, when talking to the restoration guy he said to treat the leather as if it was body work before re-spraying i.e remove the old flaky paint, sand, fill where required and sand smooth. I started with 320 grit as after being rubbed with the scouring pad and thinners the surface can be quite rough then worked down the grits until 1200 grit.
Still a lot to do in the prep as I still have the back and headrest to finish, not to mention the next seat. So plenty to get on with.
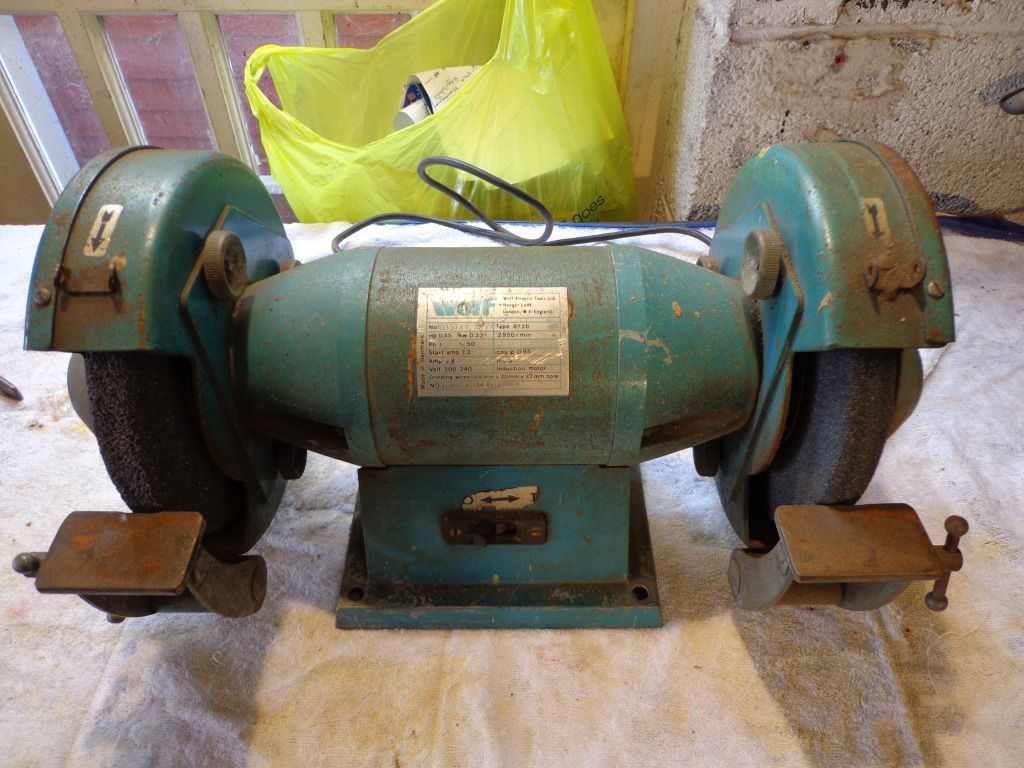
I also got a few things in for future jobs, my best bargain is an 8" Wolf grinder for £12 on ebay which after removing the guards, wheels then fitting pigtails and buffing wheels will be a polishing machine.
More in the future when I build this.
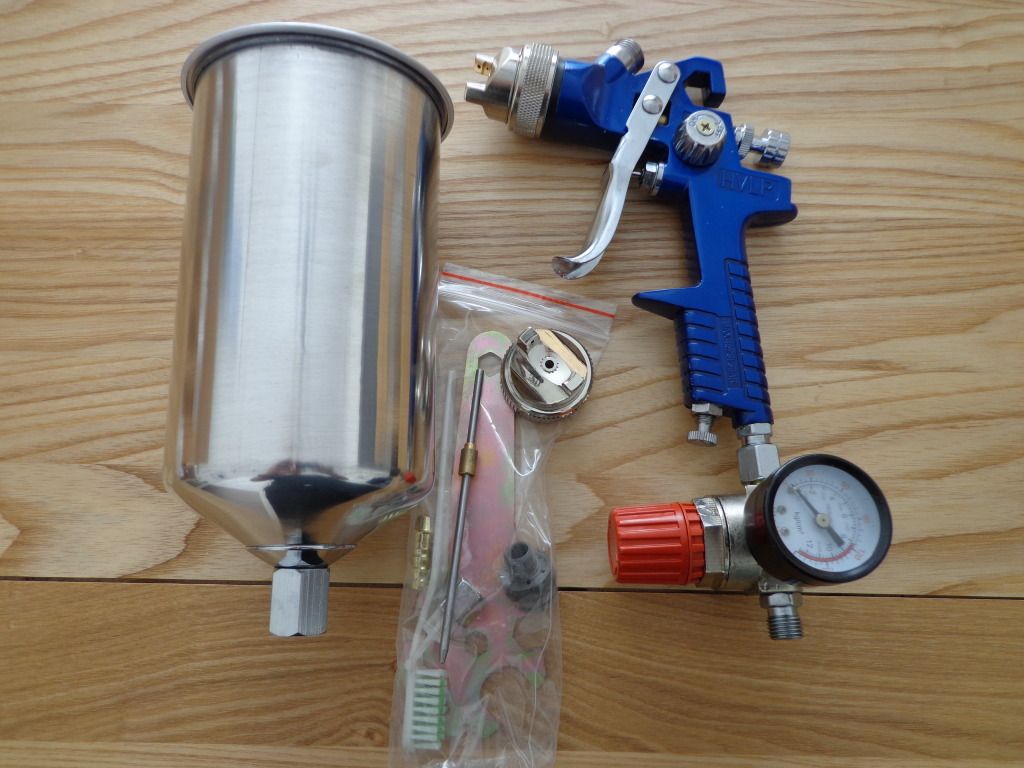
I also bought a large capacity spray gun for the 2 pack filler primer.
I picked this gun as it came with the pressure reducer and also a 1.4 and 2mm nozzle for thick then thinned down coats of primer.
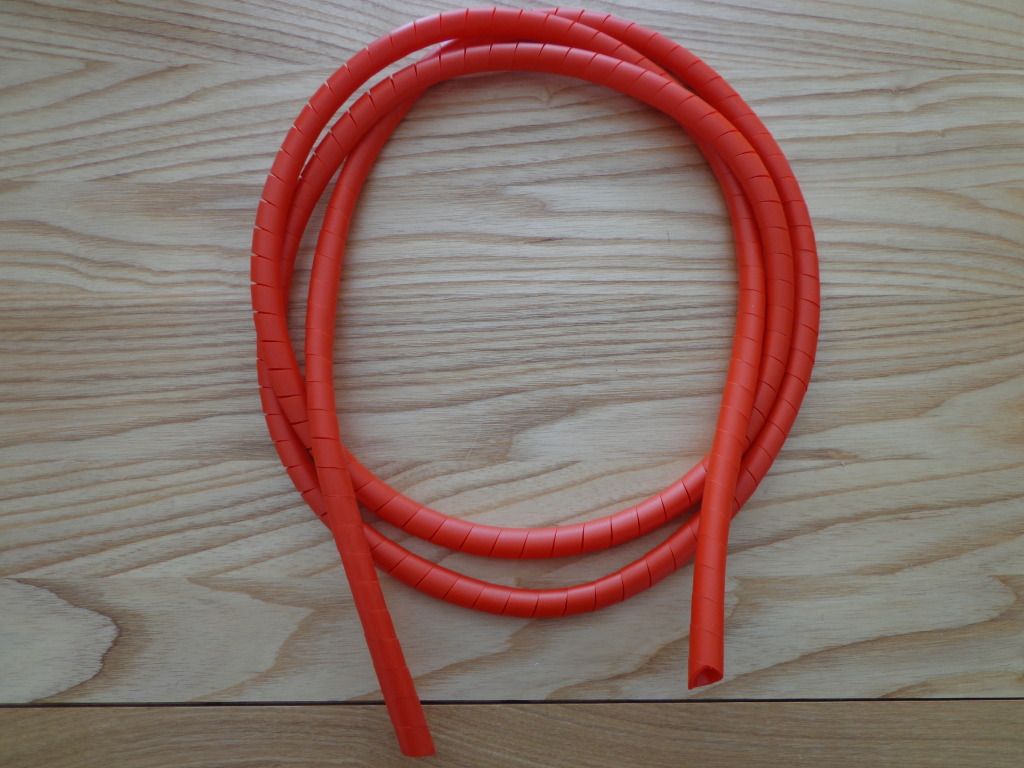
As I have fitted nitrile fuel pipe I needed something to protect it so I bought a couple of metres of spiral wrap, it's a little on the small side at 12mm o.d and only 9mm i.d but still wrapped ok.
Busy day and a lot more to come.
see ya Paul
ps anyone wondering why I'm not wearing protective gloves, well I was but they kept melting on my hands.
I have spent the last 2 days working on the seats and seat belt mods.
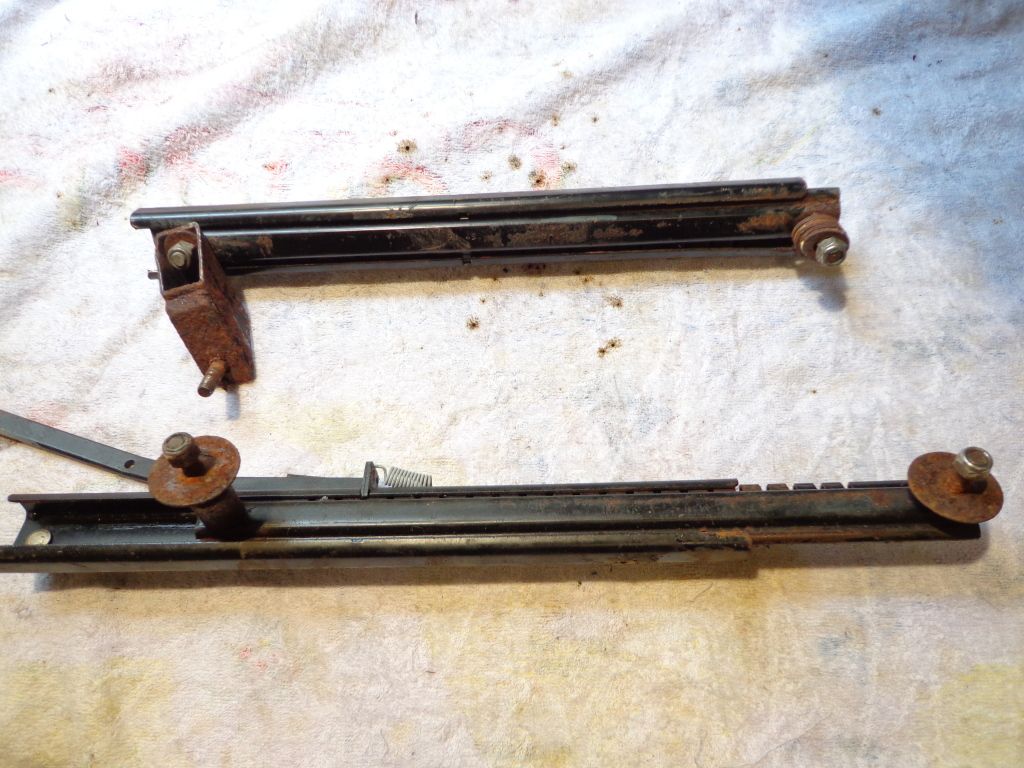
I decided to use the runners from the original Kallista seats instead of the one's fitted to the TVR seats, a couple of reasons for this, one of which you can see from the photo.
They are a little cruddy so I went for the originals which are nice and clean and rust free.
The other reason for going for the originals is that the floor pan fixing holes won't require any changing as these frames will bolt straight on.
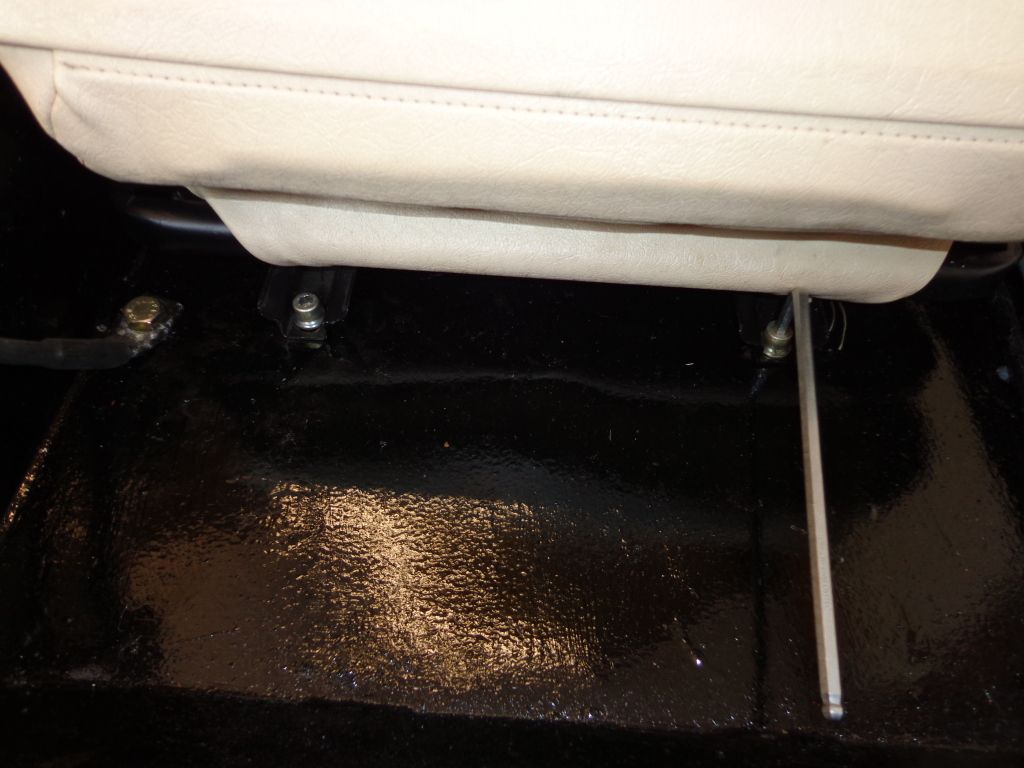
The first job was to drop the new seats in place and position them correctly, as I have never done this before it was a bit of guess work. If you look at your floor pan you will see just in front of the seats it drops down around 25mm, I used this to give a position to work from by squaring the front of the seats to this edge leaving room on the inside for the soundproofing and the carpet. When I was happy with the positioning I jacked up the car and found where the bolts come through under the car, only 2 are visible as the others are hidden inside the underside box section. So using the 2 holes available I marked them by poking up the holes with a stick, the end covered in copperslip.
Before removing the two separate runners on the Kallista seats I cut 2 steel bars and welded them to the runners just to make sure everything matched up when I fitted the seats.
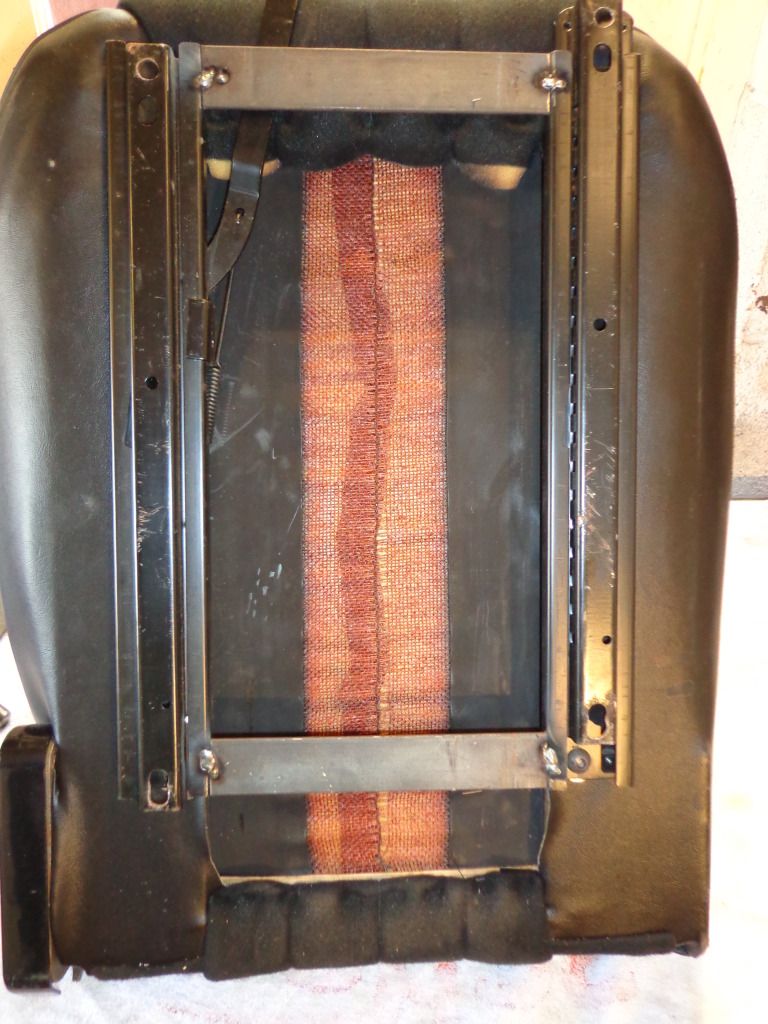
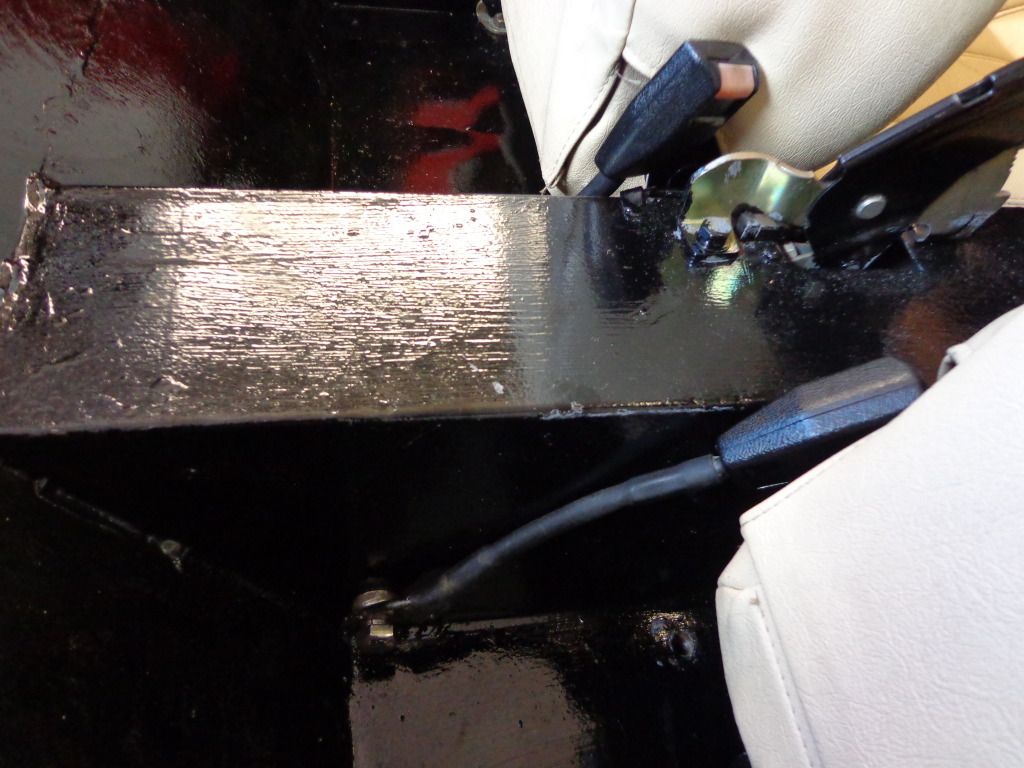
The TVR frame mounts differ a great deal from the Kallista's, so a little bit of new frame needed to be added.
I was able to line up the bottom 2 holes with the copperslip markings then mark and drill the top holes and bolt the frame into position. Once secured I cut and welded the bottom bar on, then drilled and bolted.
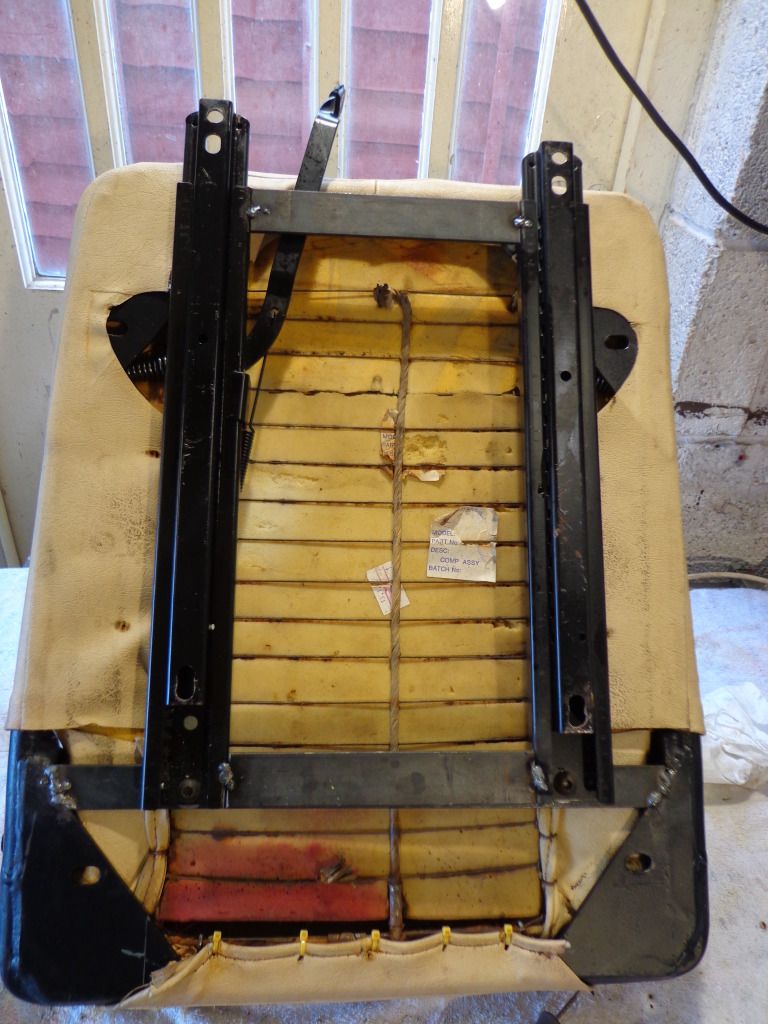
Both seat were done like this, the runners were sprayed with silicon grease then bolted in position.
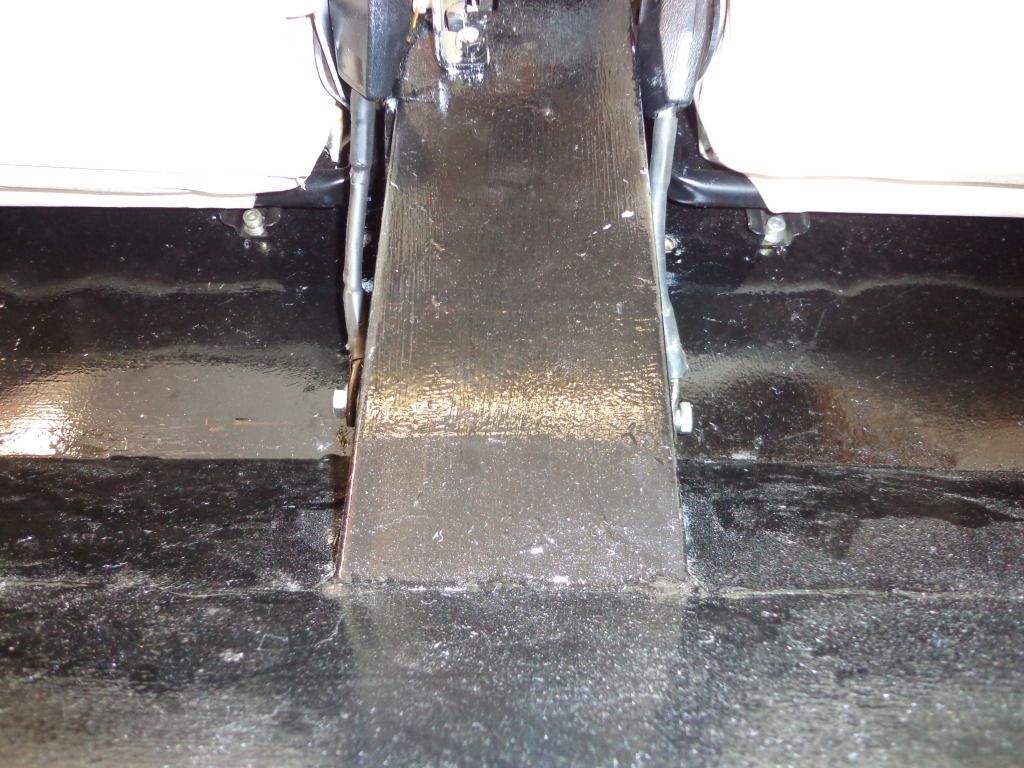
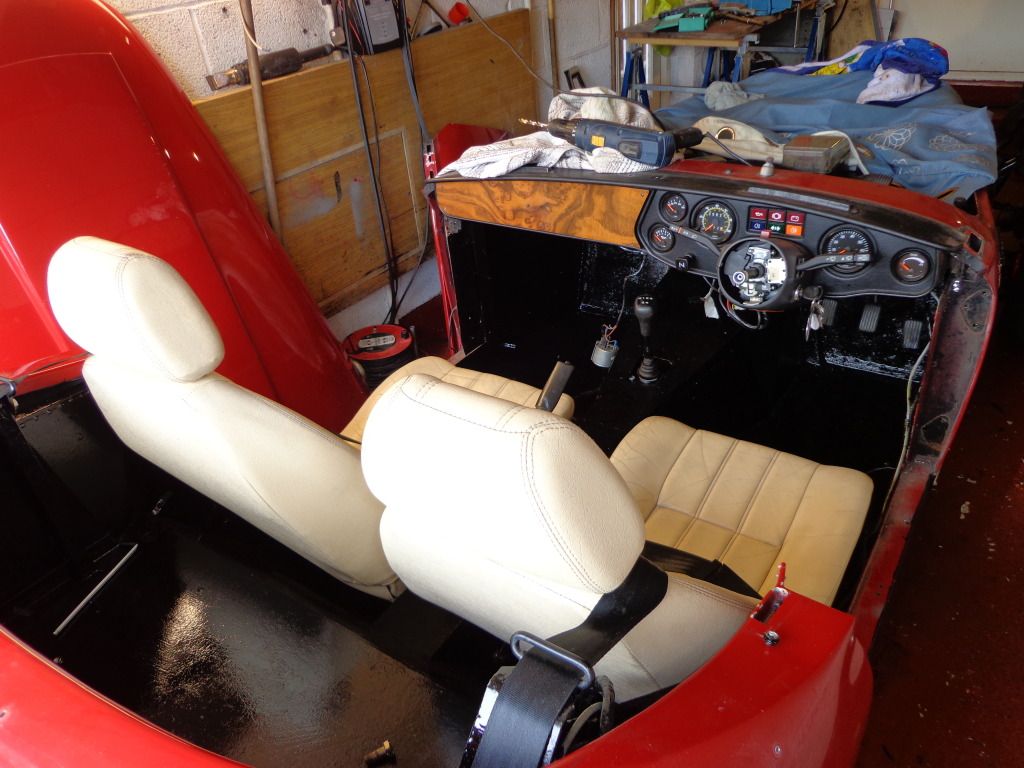
Not the best photo, (new camera) but the access both front and back hold down bolts is very good.
Once the seats were in the belts came next, only the anchor points needed changing on these, that was after I spent 15 mins trying to get the seat belt to unwind as they had rolled fully up and unless the angle is absolutely perfect then they ain't coming out.
You can see the original anchor point and the new position on the tunnel side's, I have drilled and tapped them out to 10mm and shall make steel plates to position behind and nylock them on.
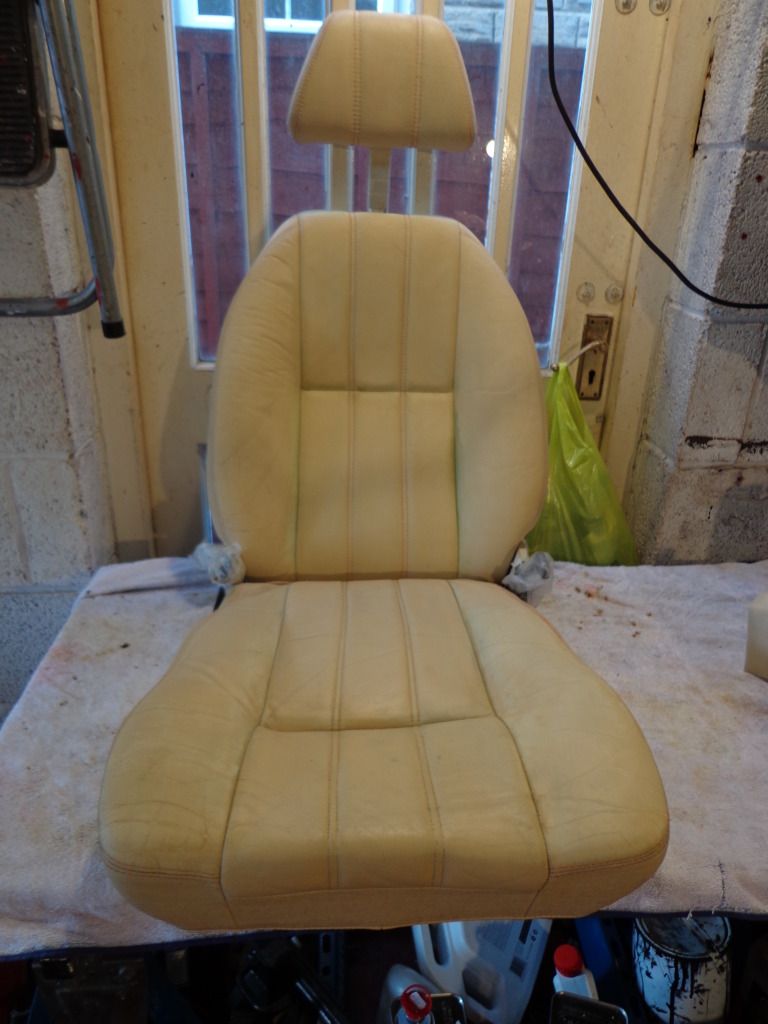
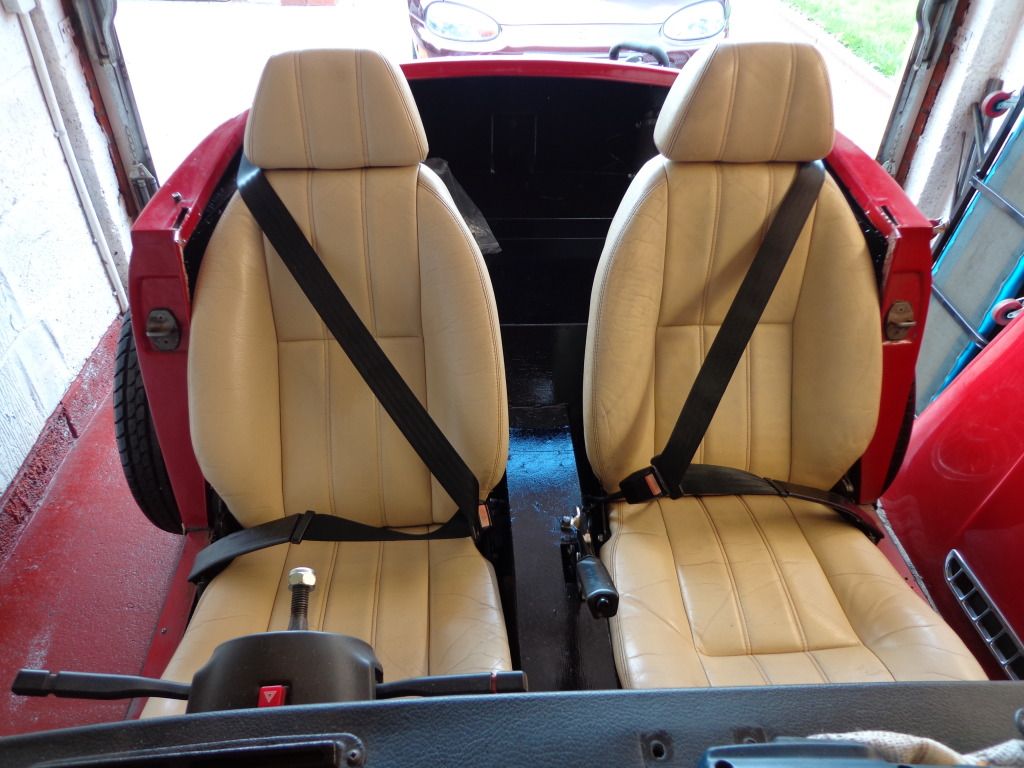
That's the seats fitted, I shall remove them next time home to re-colour them, the dye I ordered arrived today but not quite what I was expecting. On the add it showed a full kit of 4 bottles the applicator, basically everything required to clean and apply the dye, I ordered the next size up at 250ml and that is what arrived; just the dye. So I have returned it on there 7 day return policy and shall go to the Newcastle furniture clinic with part of the seat and get the colour matched.
Another problem I have found is that it is even more difficult to get out than I remember so I am looking to modify a little by removing some of the metal work in front of the drivers seat so I can at least get my foot out, I shall refit the door and see what can be removed, still that's for the future.
Well that's the last from me for 2 weeks, off to my new job.