
Well I have been away from the car for a while now mostly because I have been away at work but the rest of the time was due to the terrible weather we have been having and as I need to roll the car out of the garage to work on it things came to a standstill.
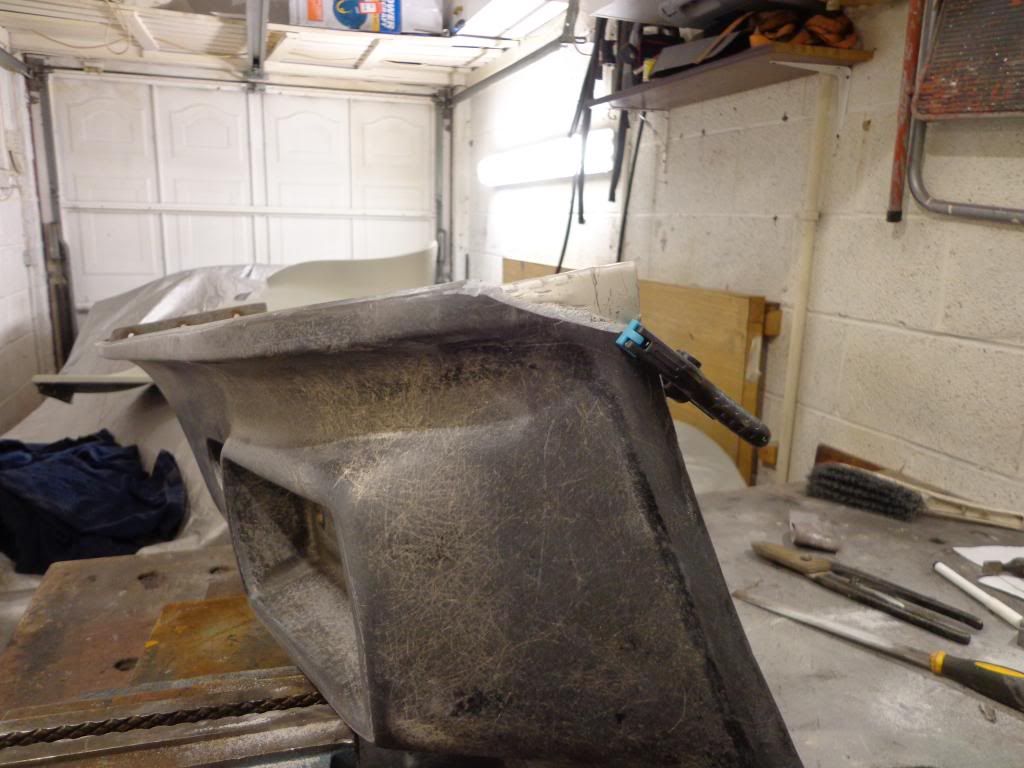
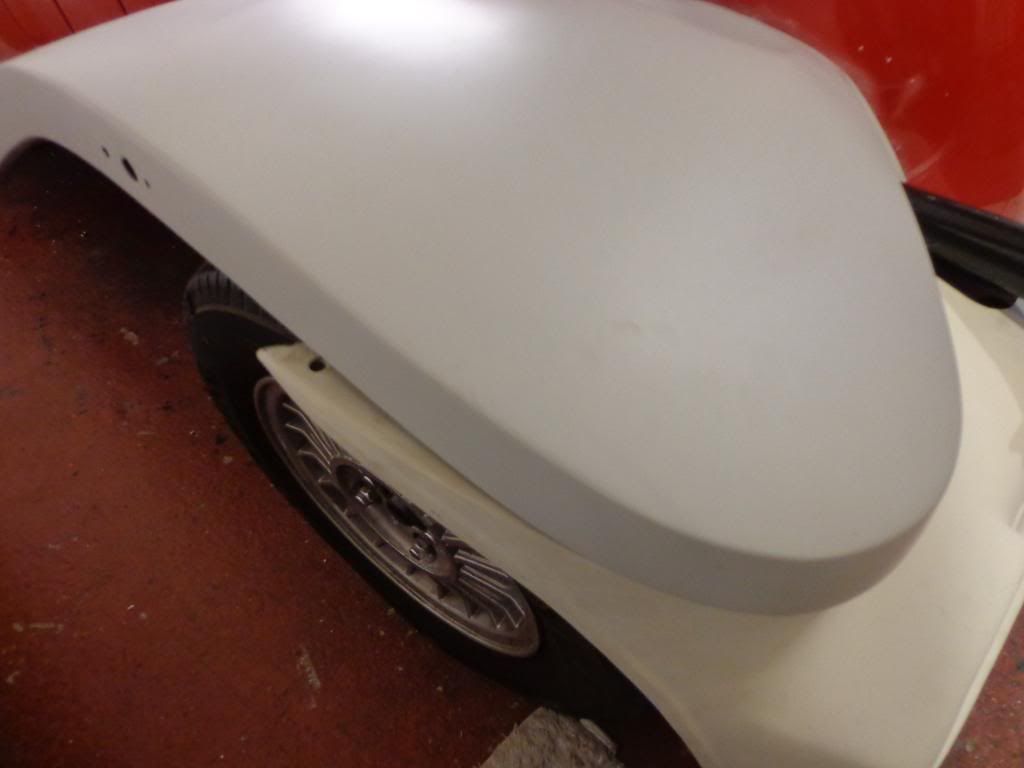
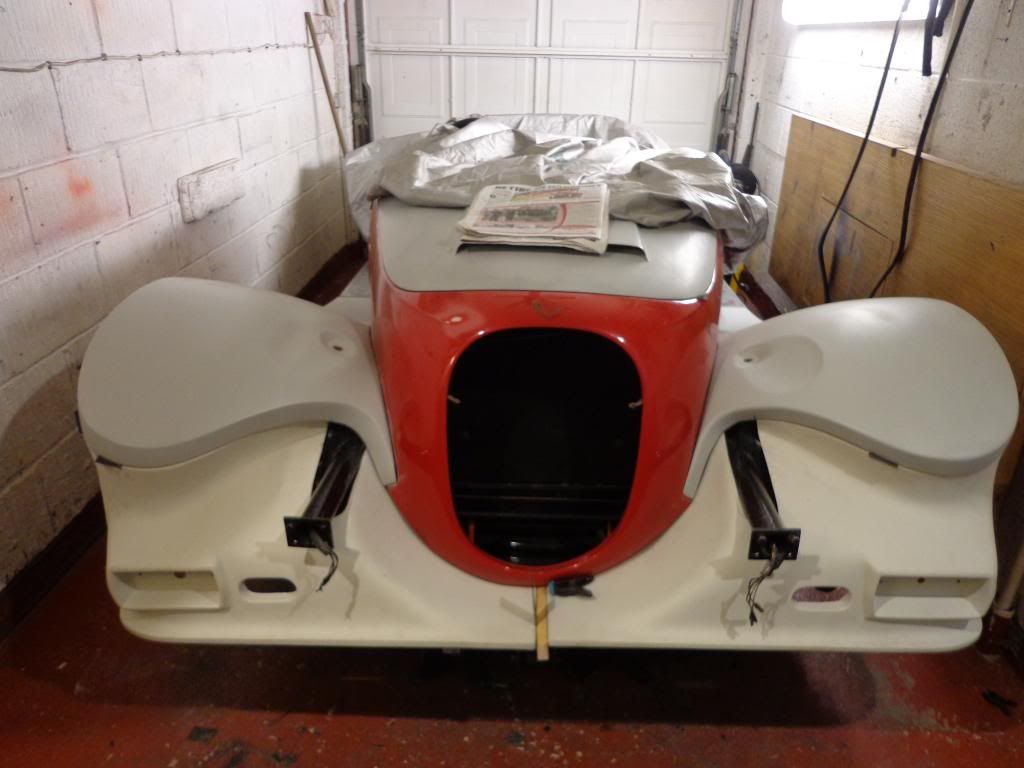
I decided to get to work on the spoiler as there is no need to roll the car out into the snow to work on this, I bought this a while ago from Terry B and unfortunately it arrived damaged in the post.
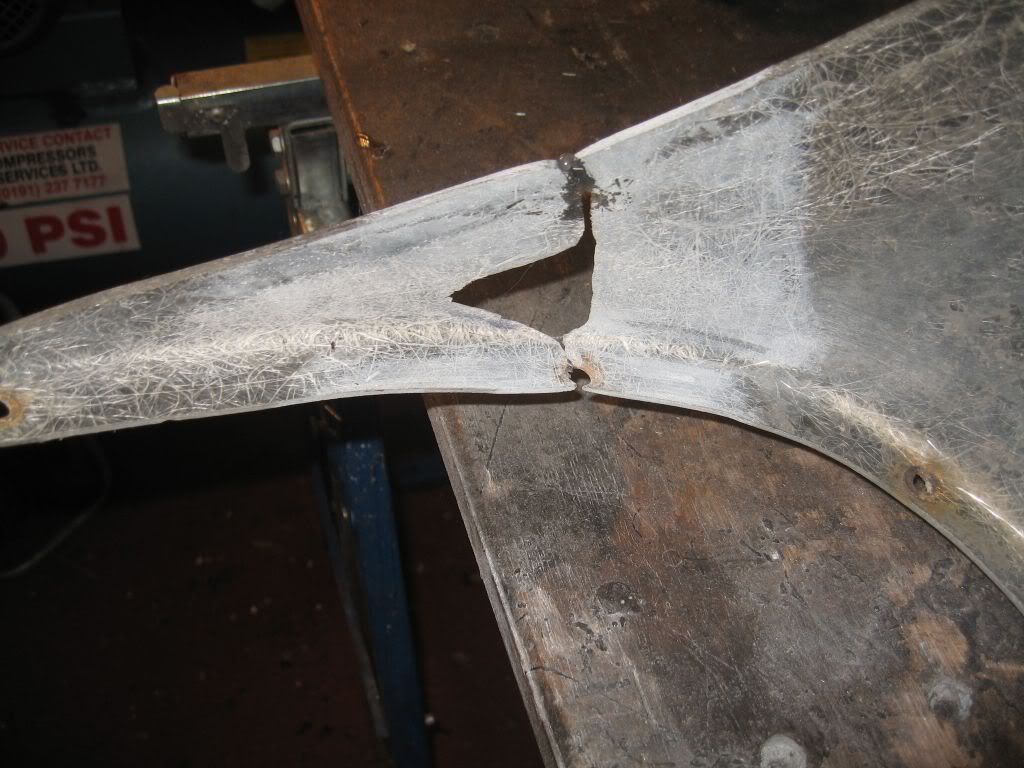
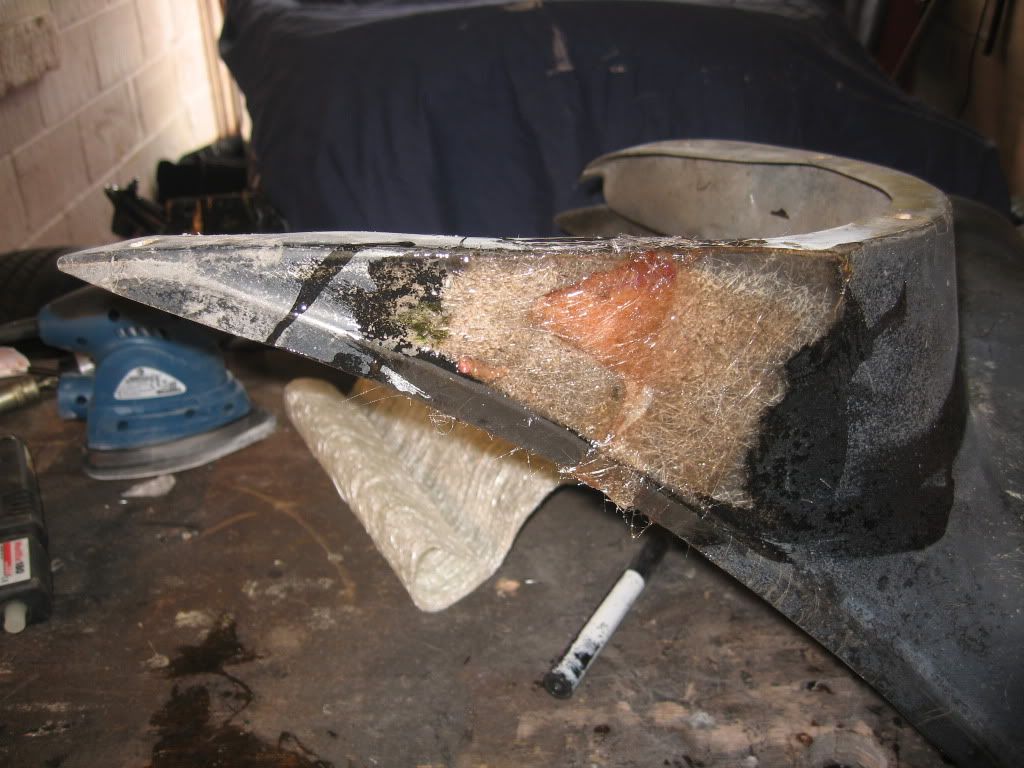
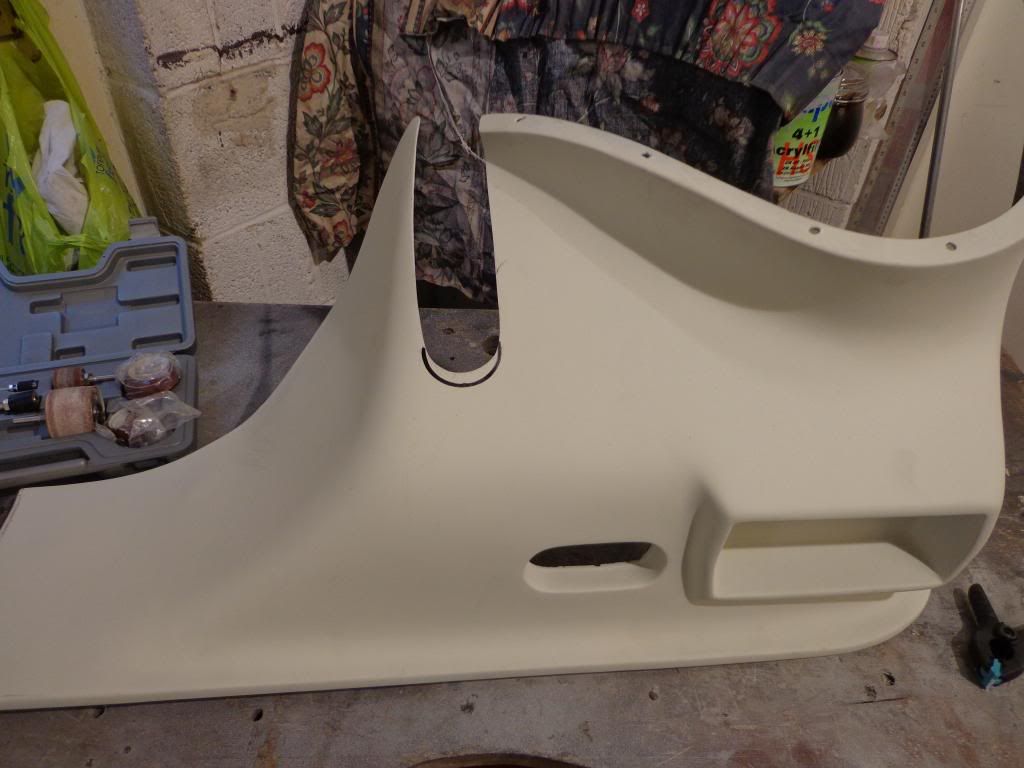
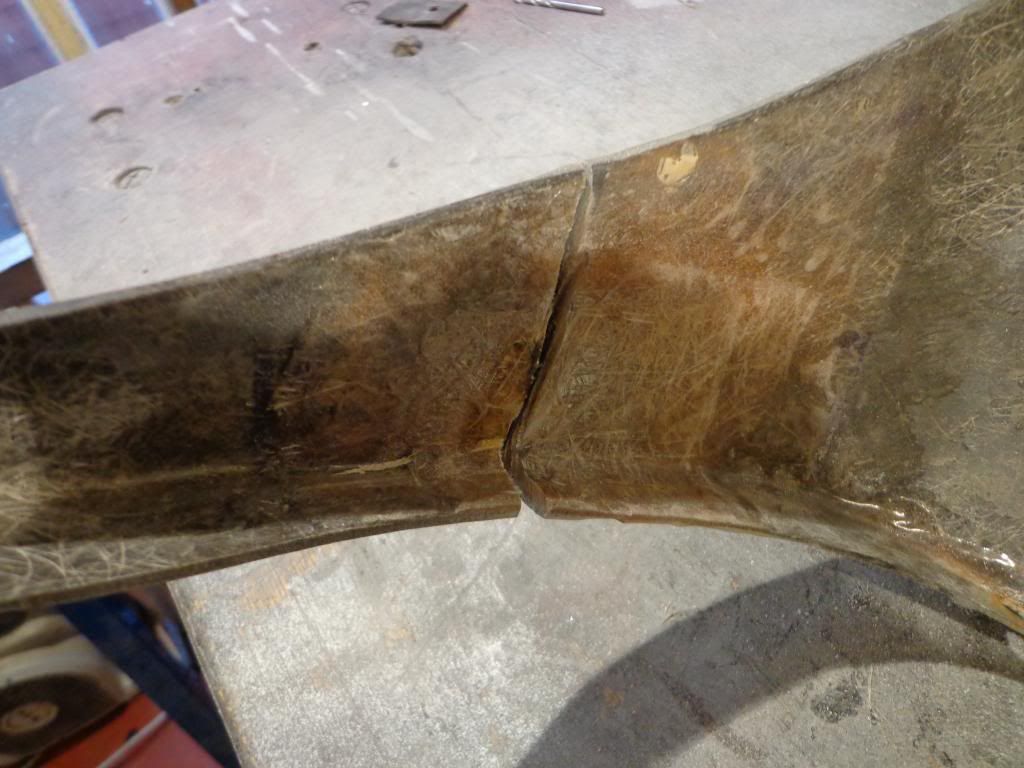
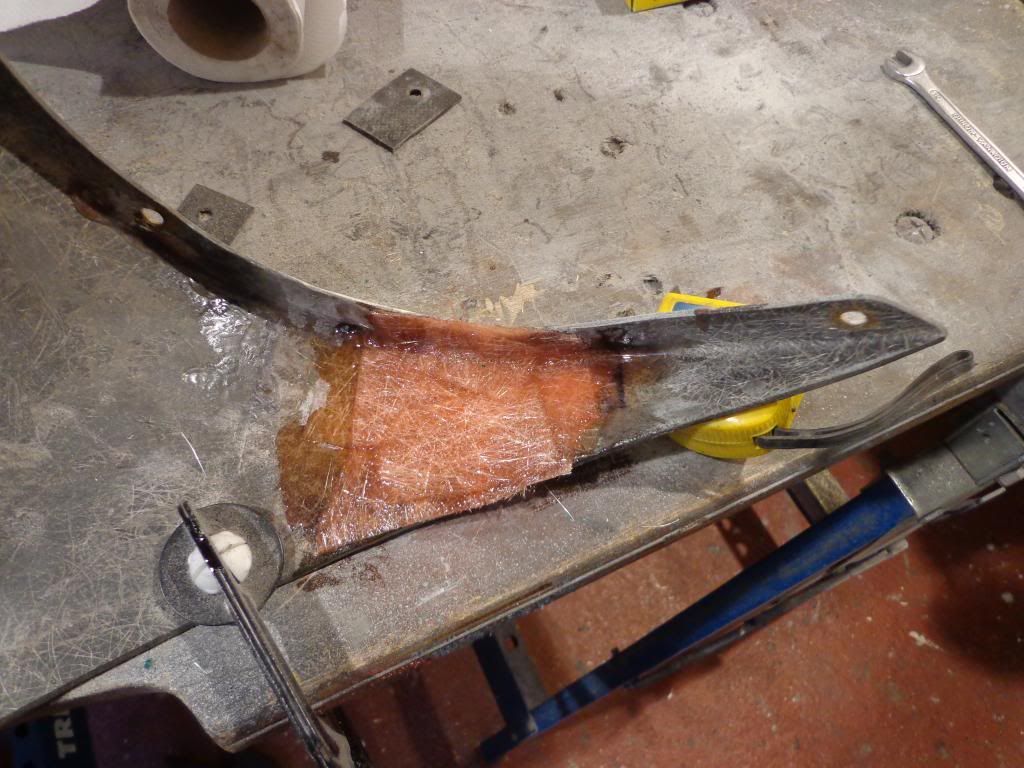
I repaired the main damage with fibreglass and steel supports and they came out great, there was still a few damaged areas which I filled and sanded before spraying with filler primer
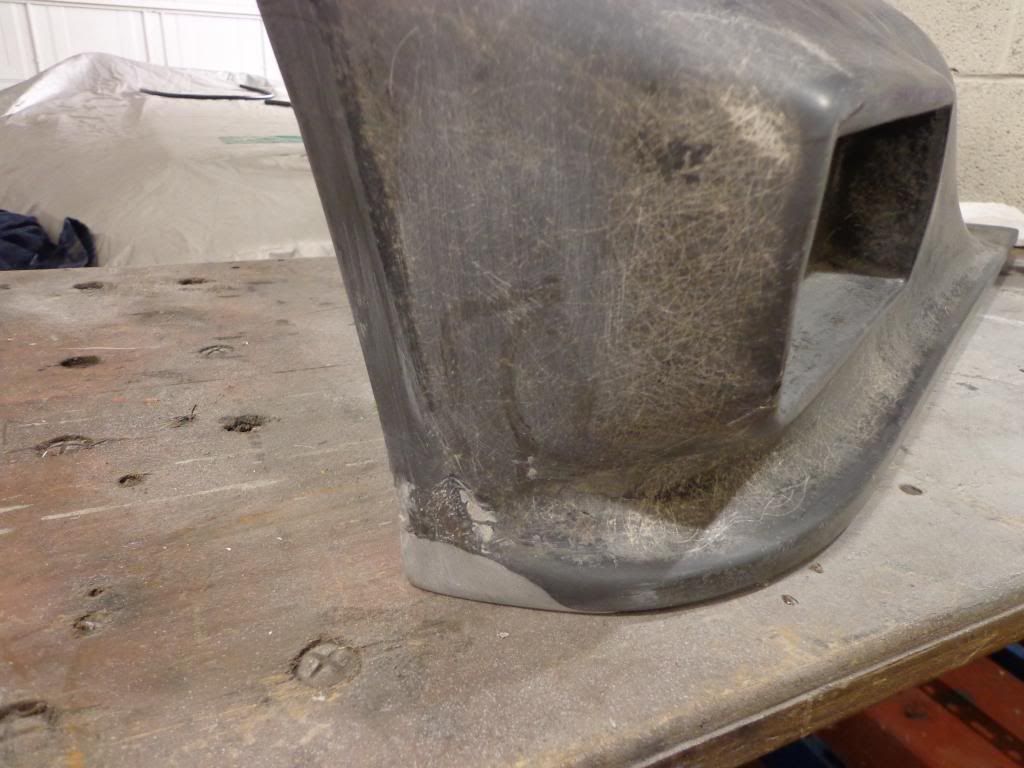
There was a corner missing on the drivers side that needed building up, this looked like it was done by scrapping over the road but that seems unlikely.
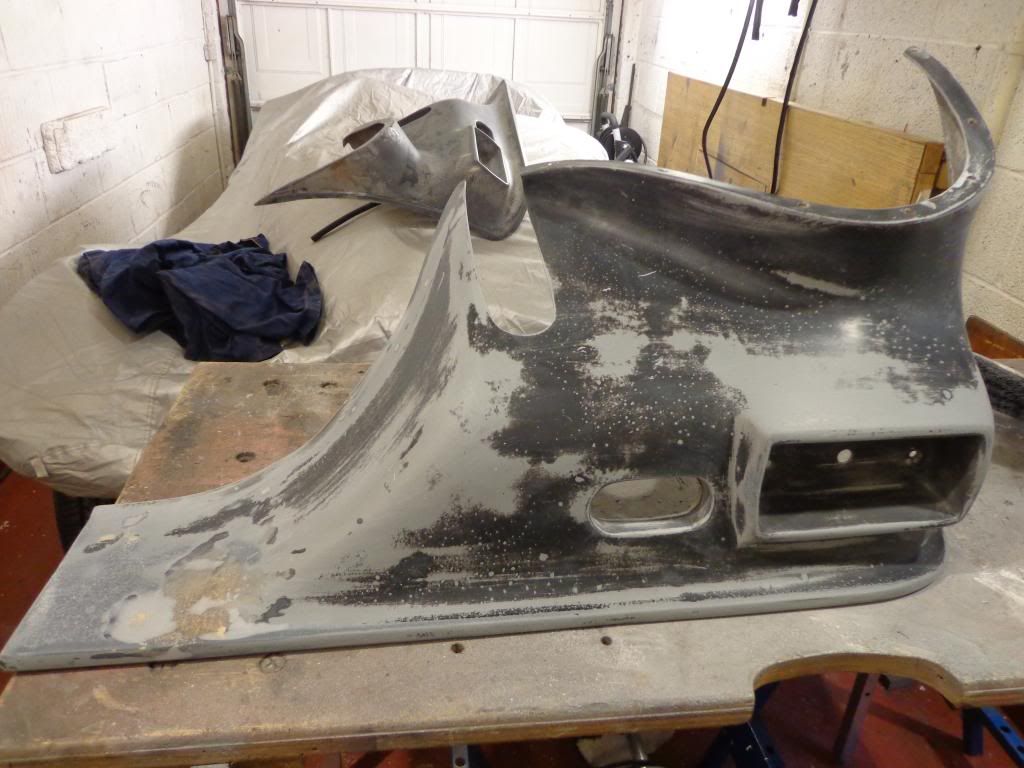
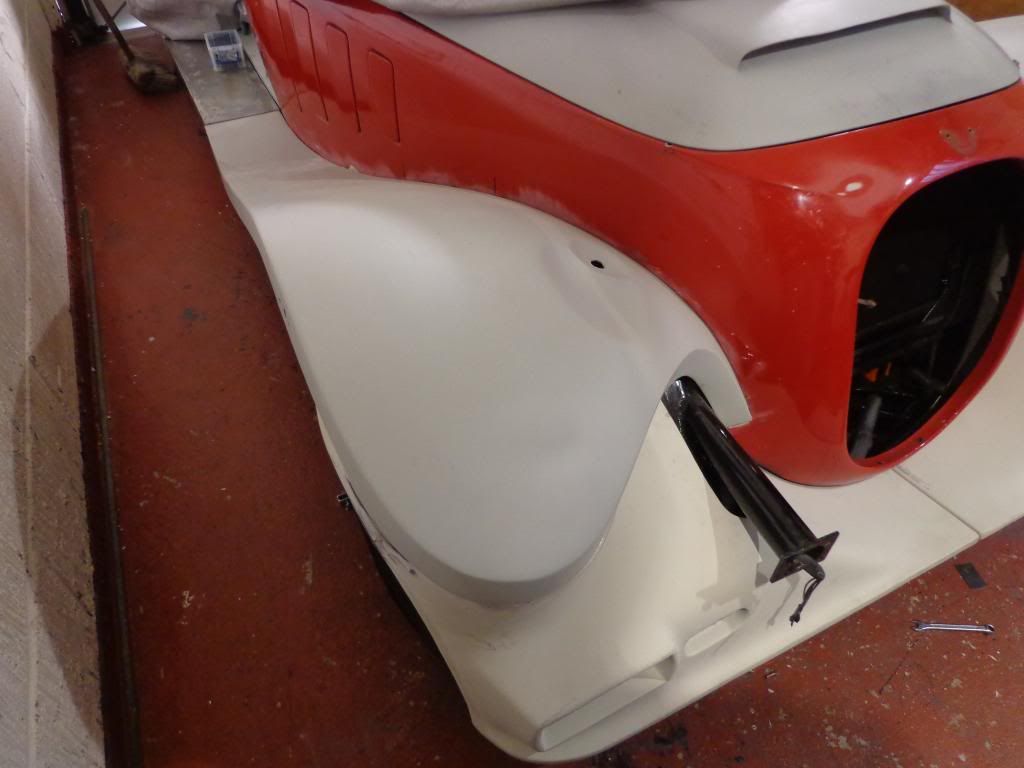
Now came the difficult part, I have been working for 2 days trying to get these to fit and believe me it is not an easy job especially on this car as there is a huge difference in the shape and position of the wings.
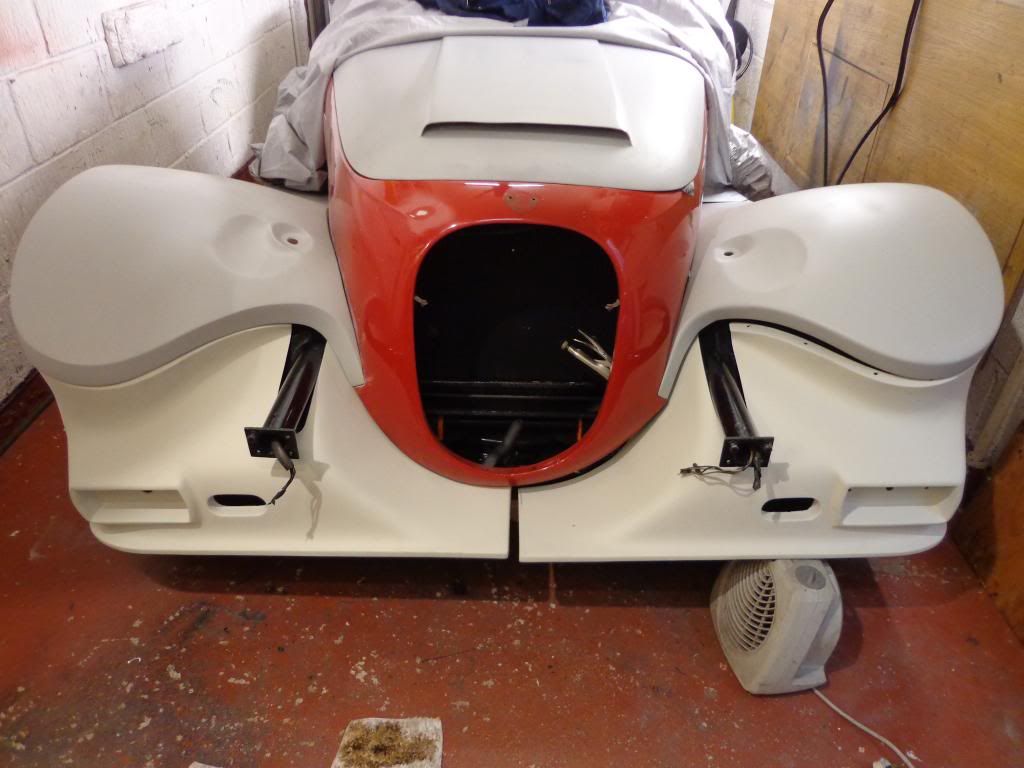
You may be able to see the difference where the wings mate with the body, the right is lower than the left and the inner curves are are totally different, not a problem at 70mph but trying to fit the spoiler has been a bit of a problem.
I tried a couple of ways to fit the spoiler but found the best way was to put the car on stands and remove the front wheels, I was then able to get around the back and work from there.
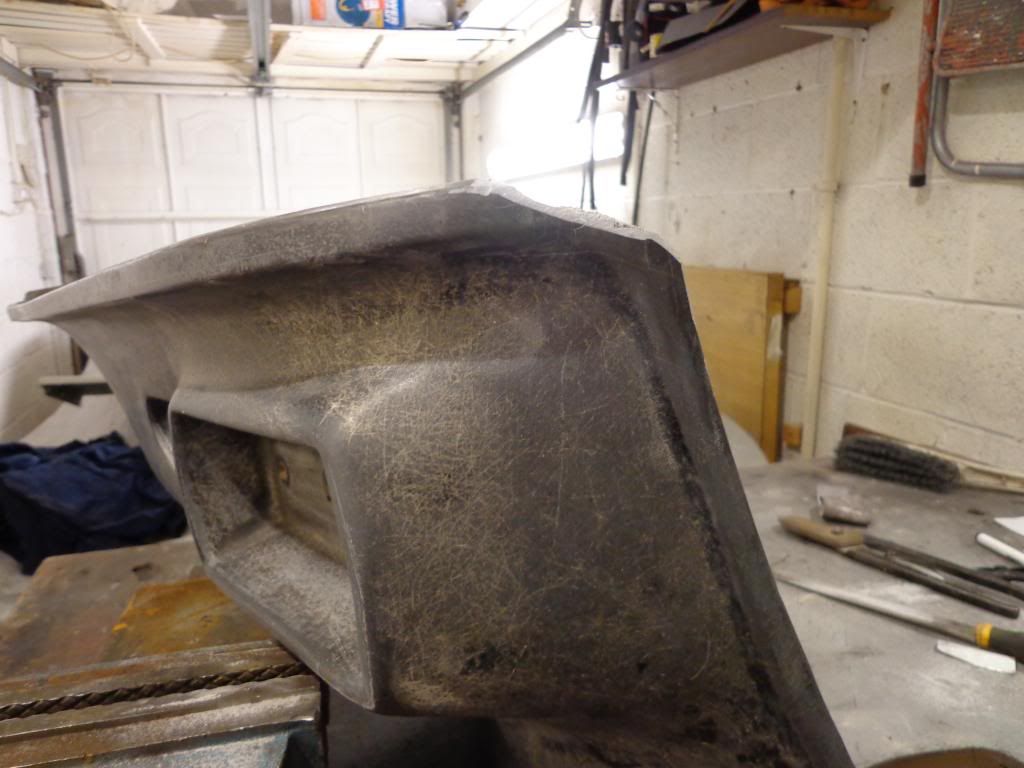
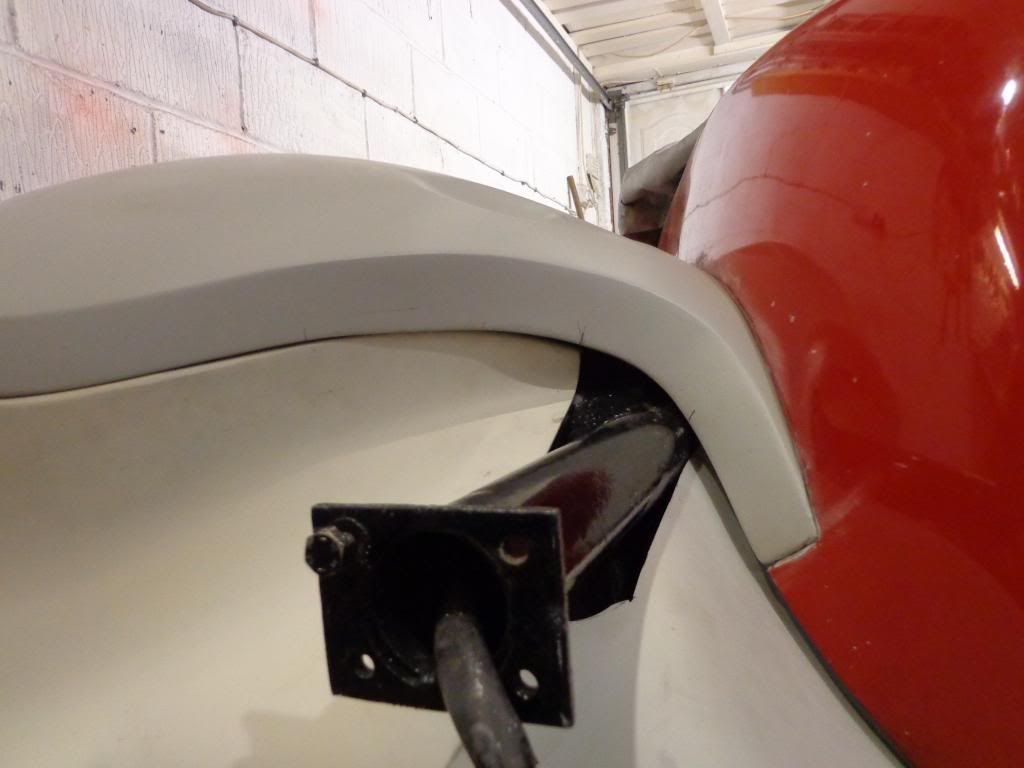
I started on the passenger side as this had the best fit and clamped in position from the back, I was then able to drill through and bolt on as I went around.
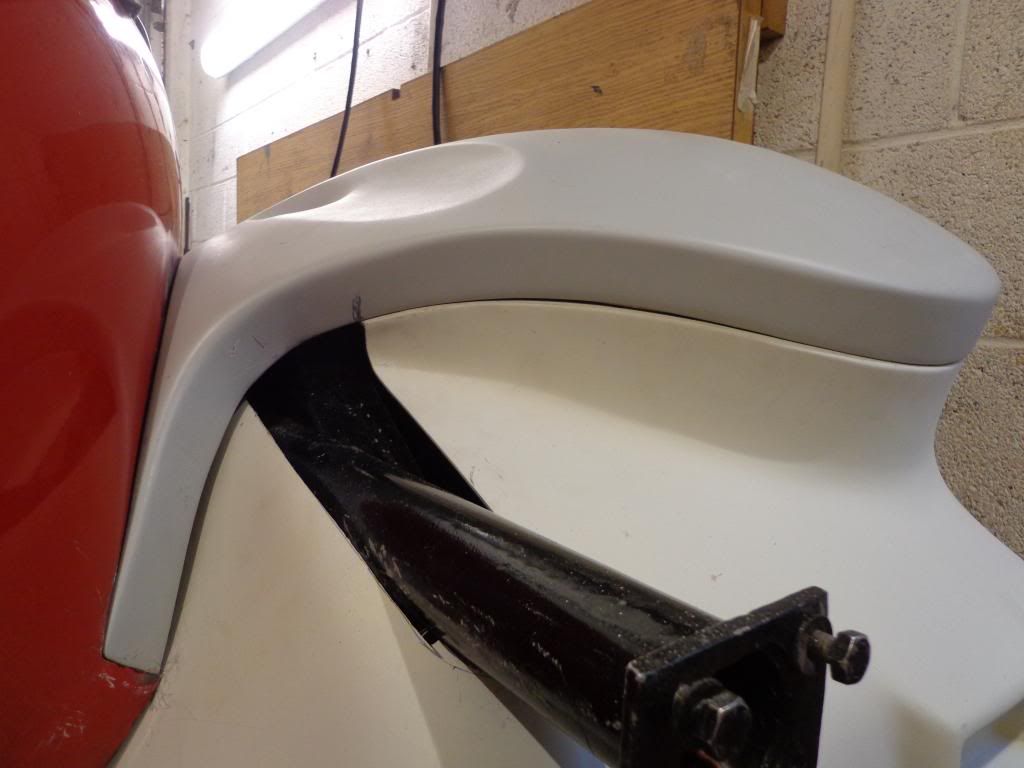
The cut out was binding on its edge and needed to be cut then tested and cut again until correct, it still need a little more for clearance but what I have done allows it to fit.
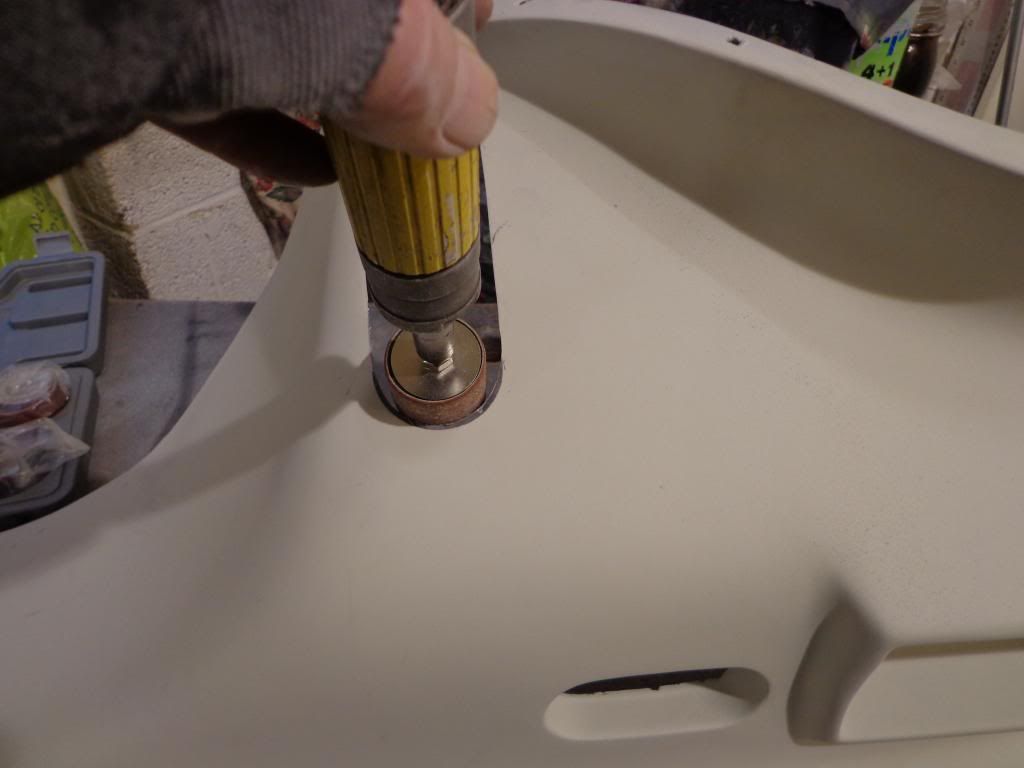
When I fit these permanently I plan on using rubber piping just as with the wings so I have used rubber spacers to take the place of the piping.
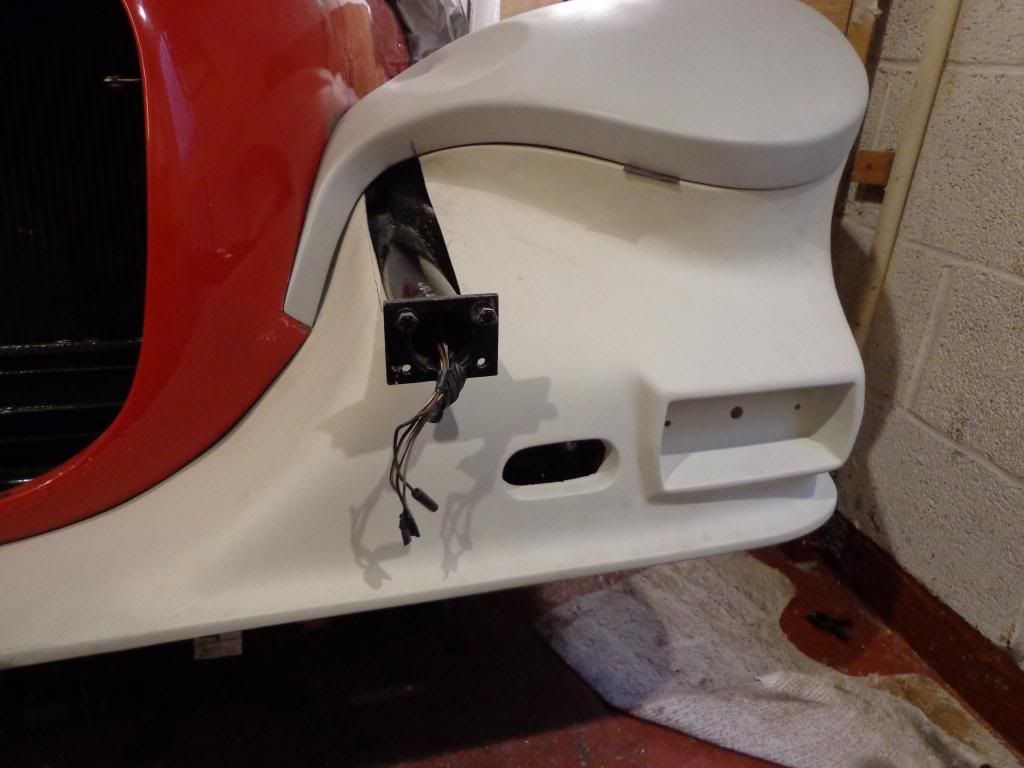
I am very pleased with the way this came out as the fit around the wing profile is pretty much perfect unfortunately the other side is a bit of a problem.
Part of the problem was the repair I made when the corner was broken off, I got the angle wrong on the repair which caused it to stick out of position.
The only thing I could do with this was to cut a groove in the repair and bend it to shape around the curve of the wing.
I have tried all ways to get it to fit, but to get it inline sets the other side out of position which are more visible so I'll have to think about this.
Anyway apart from this I have got it to fit fairly well.
I had been warned by Terry B that it may be possible that a spacer would be required, originally I was trying to fit it without one and this was causing most of my problems and it wasn't until I fit a temp spacer that the fitting became a lot better.
My ship has recently had a new engineer join who just happens to live only a mile or so from me, and is also into car restoration he is onto his second car which is a Mustang, I have found out through him that there are a lot more car restorers where I live and he has put me in contact with a friend of his who has been restoring and building cars for many years.
He is also a paint sprayer and is coming round this weekend to see my Kallista and hopefully look at doing the spray work for me.
This was the last car he built so hopefully I shall get not only get the car sprayed but also some build tips from a pro.
More snow due so the work levels won't be high.
see ya Paul