Monday, 31 October 2011

Monday 31/10/2011

Hi
Well the last bolt went into the subframe today and what a happy chappy I was.
First I had to go hunting for the new nuts and bolts, I also received an email from Terry concerning the positioning of these bolts and the importance of getting them in the correct way around. I never thought that this was an issue but as Terry explained the join area is a potential shear point as a number of owners have found out. You need to fit the bolts from the inside to the outside keeping the threads away from the scissor action 
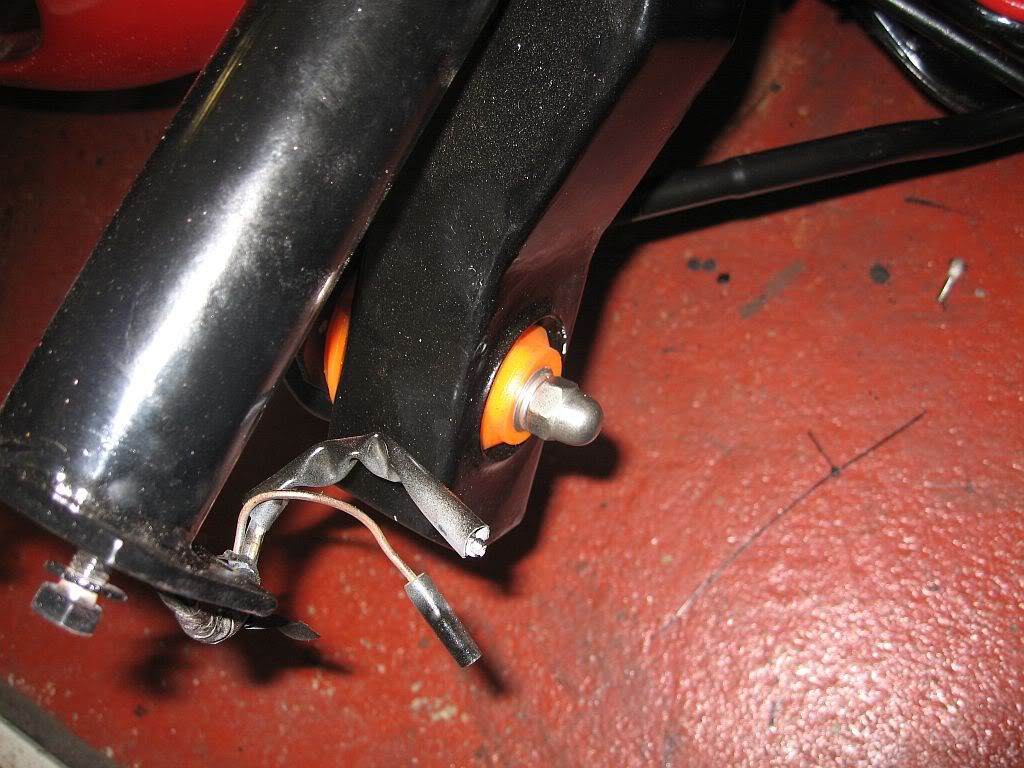
Dome nut
The new bolts are stainless 12mm x 100mm 8.8 tensile strength and at Terry's suggestion I replaced the normal nut with a dome nut to give a nice clean finish. I was a bit worried about maintaining the tightness of the dome nuts so belt and braces I fitted a spring washer and also a good dab of thread lock, never coming off and at only £2.40 for both side I was well surprised
All that's left is to tighten the track rod ends and the tie rods but I shall leave this and do some basic tracking when the wheels are on so it will drive safely to the garage for its MOT and pro tracking.
I also fitted the other hub after a good strip and clean of the bearing, weather caps on and all done. 

So that's that now for the back end.

I have spent most of the day studying the rear underside and taking lots of photo's, I was going to push the car out to turn it around for easier access but a reworking of the work area in the garage has canceled this move.
It seems that everything that contains oil in this car leaks, the diff being no different, it looks like the oil seal has gone. There is nothing on the garage floor but as you can see from the photo the oiling around the diff, hopefully it is just the cover gasket that is leaking.
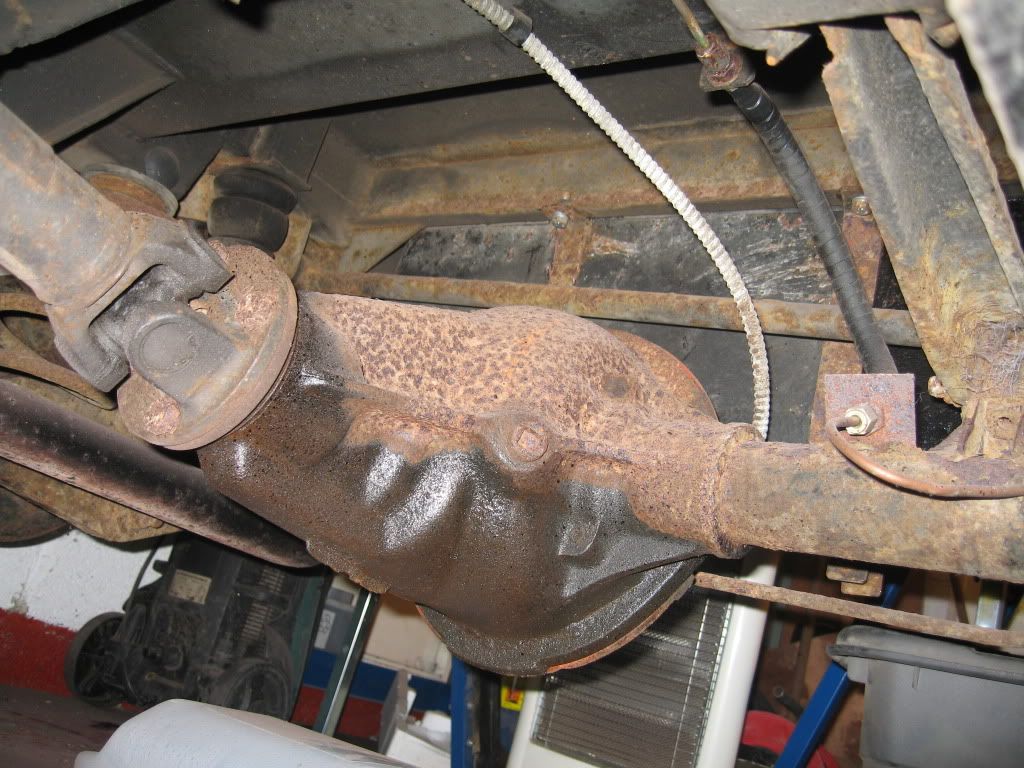
Diff oil leak
Anyone who has read this blog from the start and seen the state of the front suspension will not be at all surprised by the condition of the back end, but as with the front its only surface rust and underneath is good steel and will look like new with a good blast and powder coat.
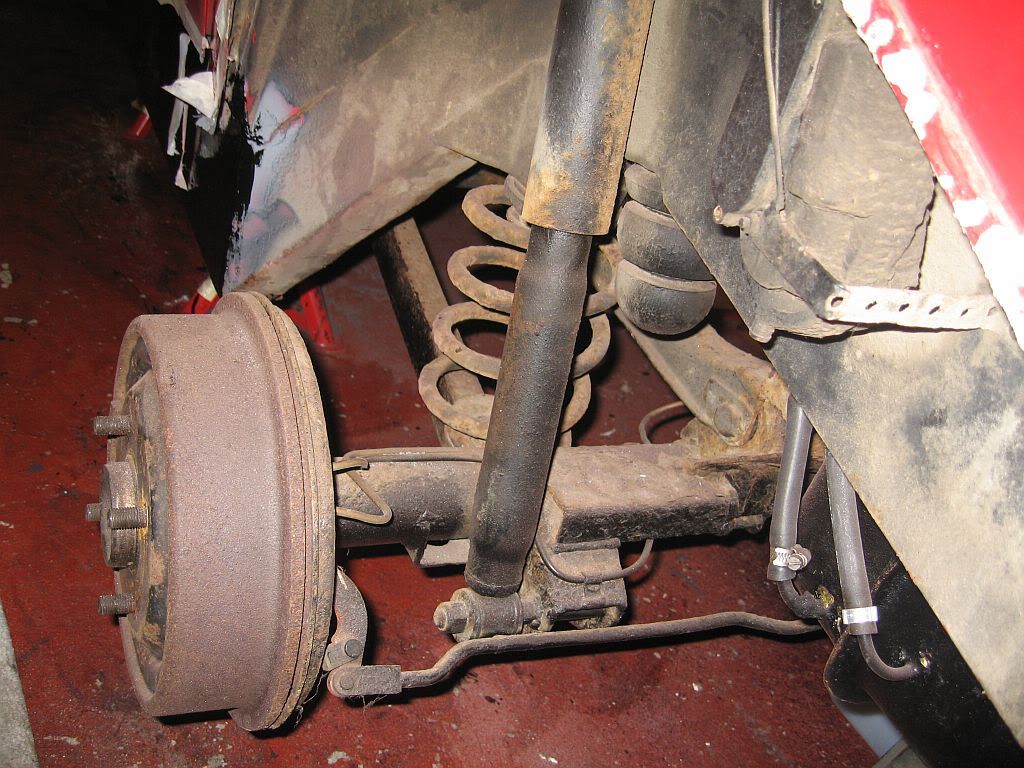
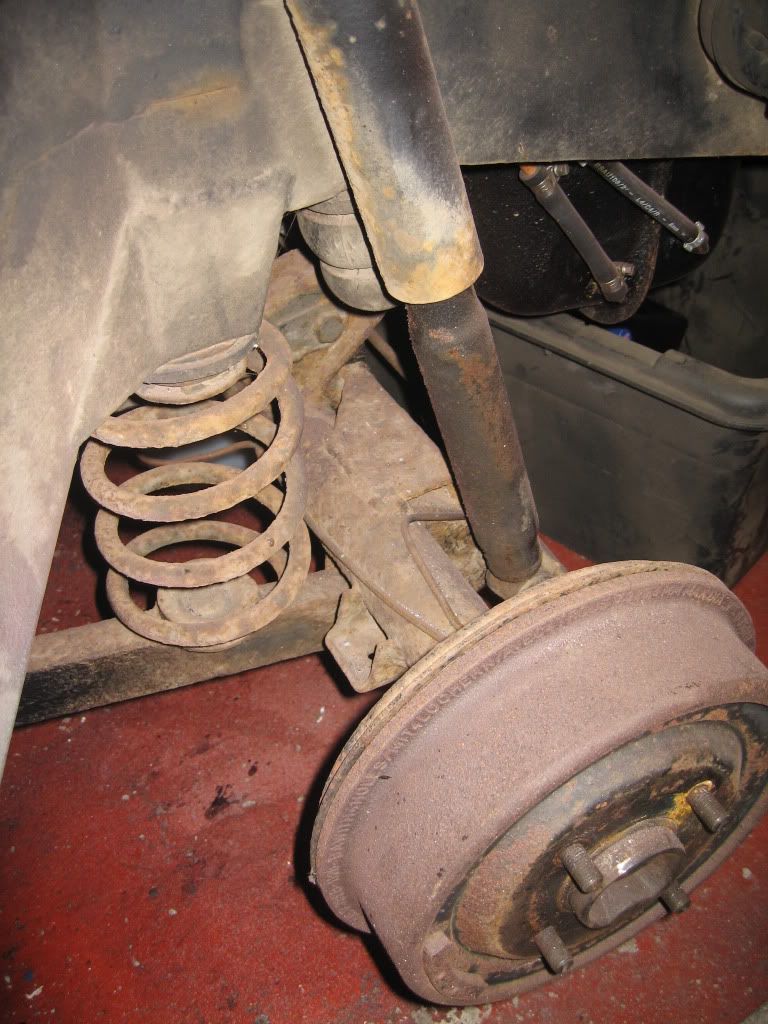
Pass side rear suspension


 Well got to start somewhere:- so

First off is the rear exhaust pipe, this had a new U clamp on which came of easy, then I got wondering what the drums were like so off they came.
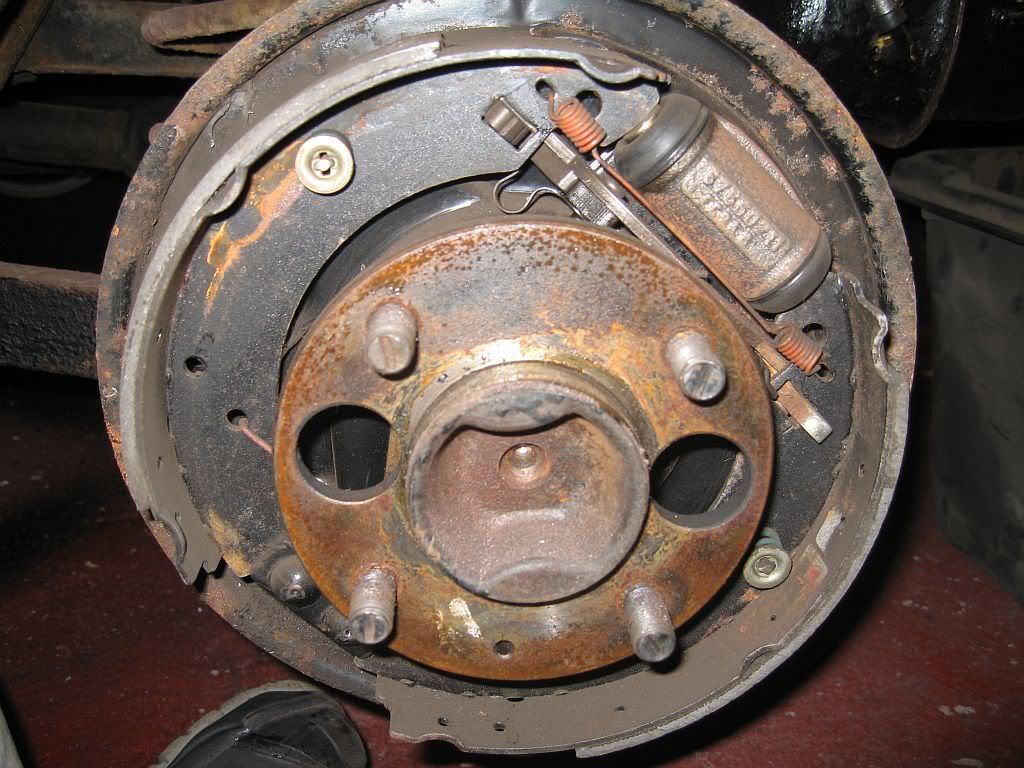
Drum brake
The inside of the drums looks good just the surface rust on the outside, I'll have these powder coated. The inside are a bit seized as you would expect after so long unused, I have over my numerous years owned around 15 cars yet I have never stripped down a drum brake, disc brakes yes but never drums. Looks a bit daunting but what the hell I'll give it a go. The bearing sound Ok but will check when I tear it apart.
Next to come off was the spare wheel, luggage rack, number plate, lamp cluster and bumper. I have labeled all of the wiring as I removed it and found a bit of damage that will need sorting.
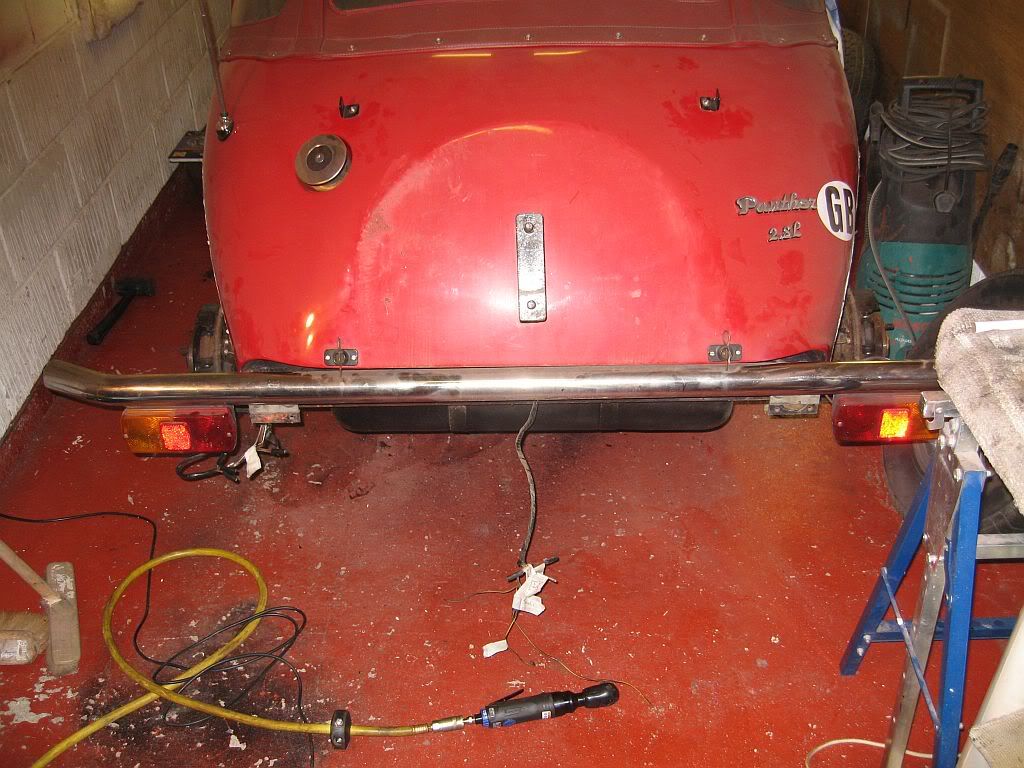
Sad back end

The damage is to the number plate / lamp cluster holder, this is just flimsy plastic, also all of the lamps will need replacing. I shall contact Bruno to see if he has a new one and lamps and also order new Spax dampers.
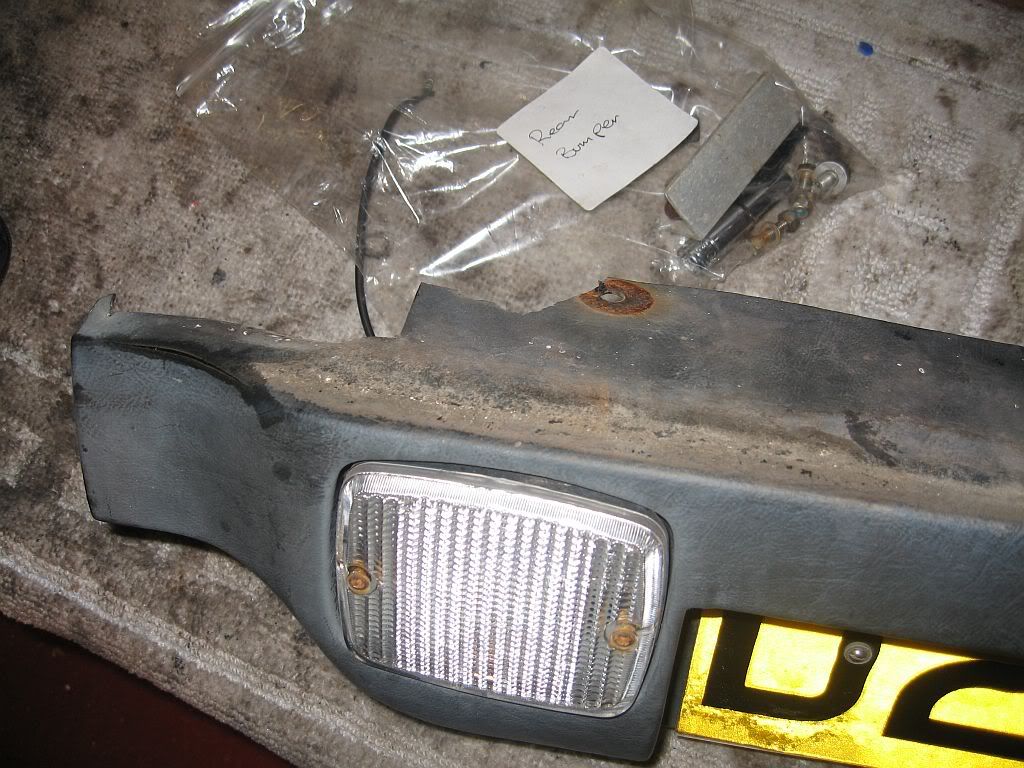

You can see the broken section by the rust stained area, if a new one is not available I shall repair and fiberglass the inside to give it more strength. The break had been looked at in the past as a newish piece of angle ally was bolted on to keep it in place. The number plate could do with replacing but as this one is the original Panther plate I shall give it a good clean and re-fit it.
Once the bumper was off I started looking at the fuel tank, part of the work done to the car before I bought it was the fuel system. All of the the pipe work from the tank to the fuel pump has been replaced also there are new stainless bolts in the tank brackets. The brackets need replacing so I shall make 2 new one's up  in stainless. I never finished removing the fuel tank, got to figure that one out so that's tomorrows job. 'O' yes and drop the whole rear axle suspension unit. Just a little job.
See ya Paul

Sunday, 30 October 2011

Wheel Bearings

Hi
Not much time to do things today but a bit of progress on the hubs, the roller bearings in the hubs (i have read) have a life of around 100,000 miles, so at 35,000 on the clock jut a clean, check, re-grease and re-fit.
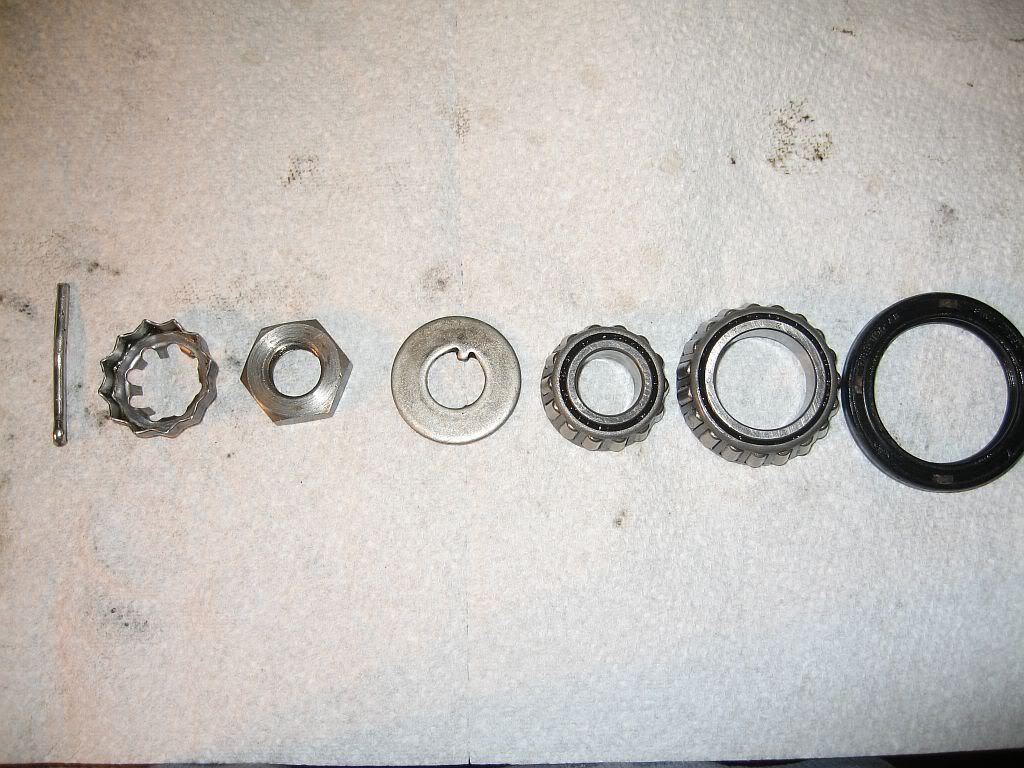
The outer bearing is easy to remove and clean as it comes of with the removal of the hub, the inner roller is retained by the grease seal which has to be removed first. The book says to replace the seals after removal as they get damaged, I had no problem with the removal just a wide blade driver under the seal and it popped out, it was just a matter of cleaning out all the old grease and have a close inspection to ensure all is fine.
Hub bearing
Here are all the bits laid out, right to left are:- Grease seal, inner roller, outer roller, tab washer, nut, nut cap and split pin. There are 2 more parts to the bearing that I have not removed and these are the other half's of the two rollers. These only need to be removed if replacing the bearing as they need to be knocked out with a drift and may get damaged.
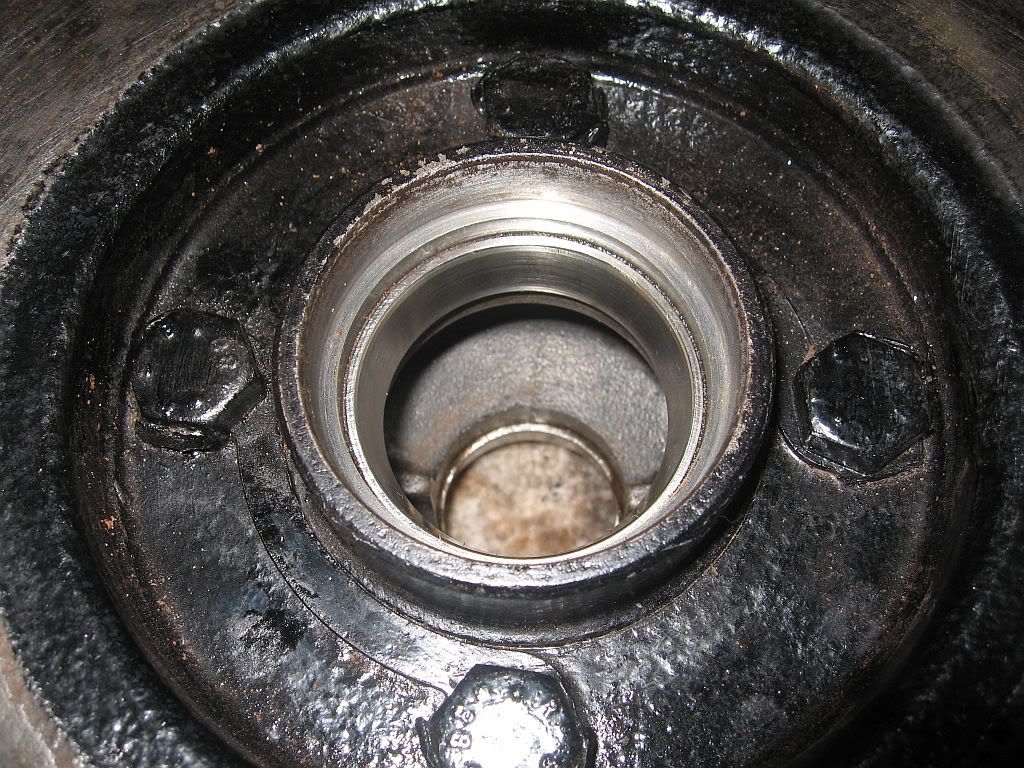
Hub inner bearing
You can see the 2 half's of the un-removed bearing in position on the cleaned hub.
I cleaned out as much of the old grease as I could and packed the inner race with new grease working it into the rollers as much as I could then slipped it in followed by the cleaned and checked grease seal. The hub is now fitted onto the stub shaft, the outer bearing is packed with grease and slid into position followed by the tab washer. 
Now comes the tightening, put the nut on and tighten by hand until the hub is positioned fully back, it is important that a little float is allowed in the hub to take into account of the expansion that will take place due to the friction heat created when driving. The Haynes manual says to tighten to 27 lb ft which is around 37Nm then to turn back 90 deg's to give the end float, unfortunately my torque wrench starts at around 50Nm so I had to use another method. Basically I just tightened with a shifter turning the hub constantly until the end float was lost then turned back 90 deg's. Give the hub a shake and the hub just moved around a mil which when on the road should take up to the correct tightness. I shall check again once the car has done a few miles.

Hub into position
I then fitted the nut cap and split pin, the cover is still wet from painting and shall fit tomorrow.
I have cleaned up the original disks, only a very small lip around the outer edge which I have ground off, sanded and cleaned the disc with brake cleaner and it looks in great condition.
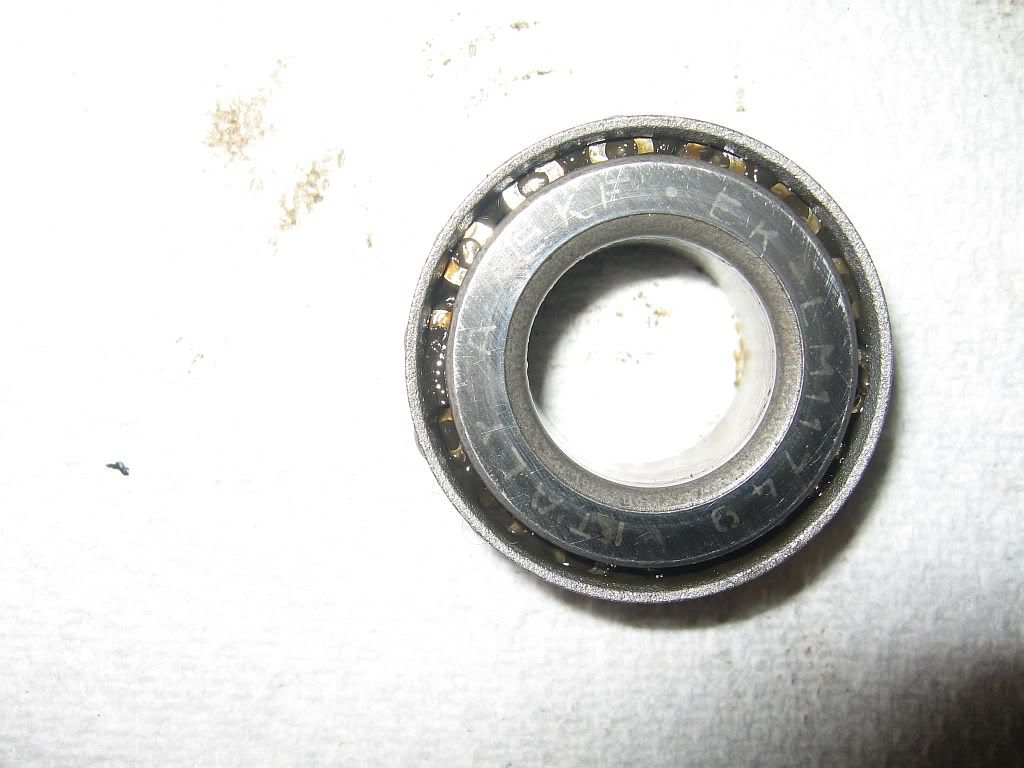
There were 2 bearing manufactures used on the Cortina, Timken and Skefco, the bearings fitted on my 86 is Skefco.
SKF bearing
This is the outer bearing with the bearing i.d stamped on  SKF EK-LM11749, I am sure that if anyone requires the Timkin order number Terry at the panther club will have it or know's who has it.
Just need to fit the other hub, find some new nuts & bolts for the subframe to chassis fit the wheels and I will be able to have a rolling car, tomorrow i think.
See ya Paul
Saturday, 29 October 2011

Steering Rack Modification

Hi
First off! for those of you who spotted yesterdays deliberate mistake then well done, for those of you who did not spot it; then 'what mistake'.
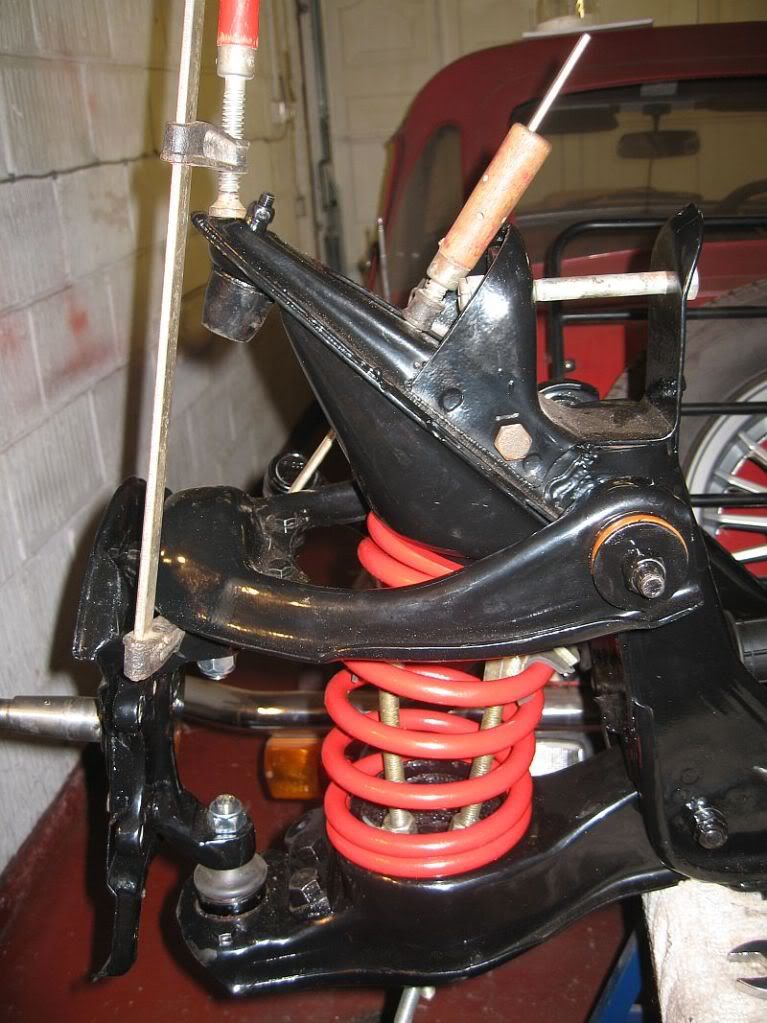
I foolishly got the control arms on the wrong sides, it was not until this morning when I tried to fit the track rod ends that I realised the internal tapper was upside down. Once I stopped swearing I found it was not as big a problem as I originally thought, It just required the tension in the spring being held while the control arm nuts were removed and the arms swapped round.

Spring being held
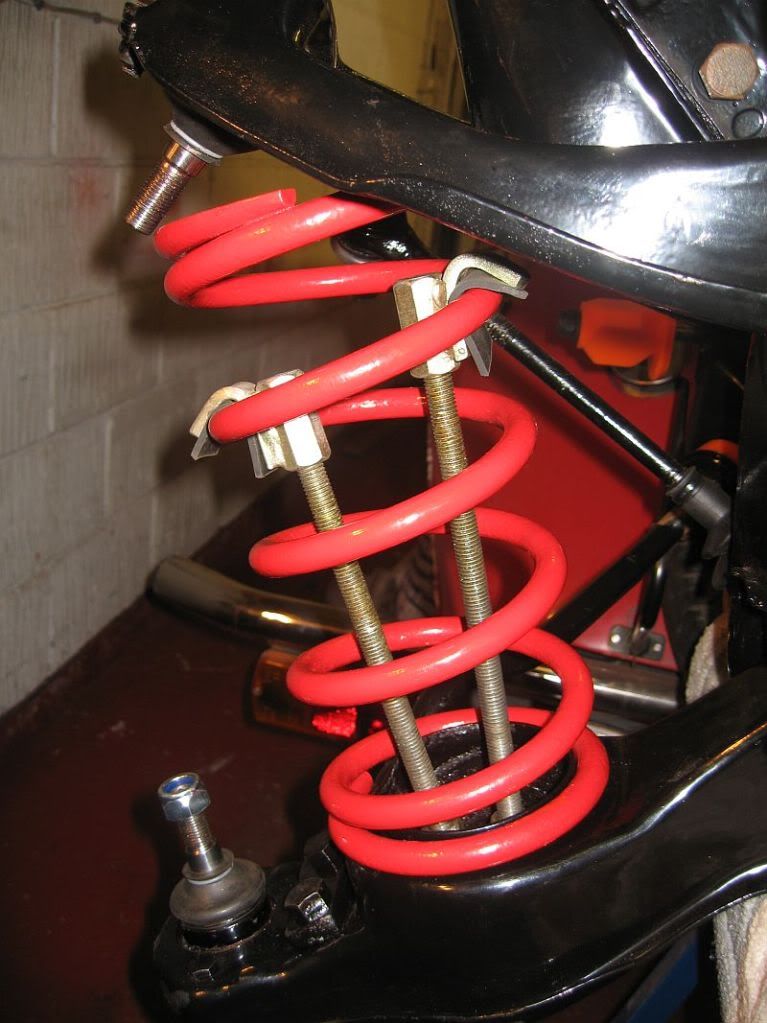
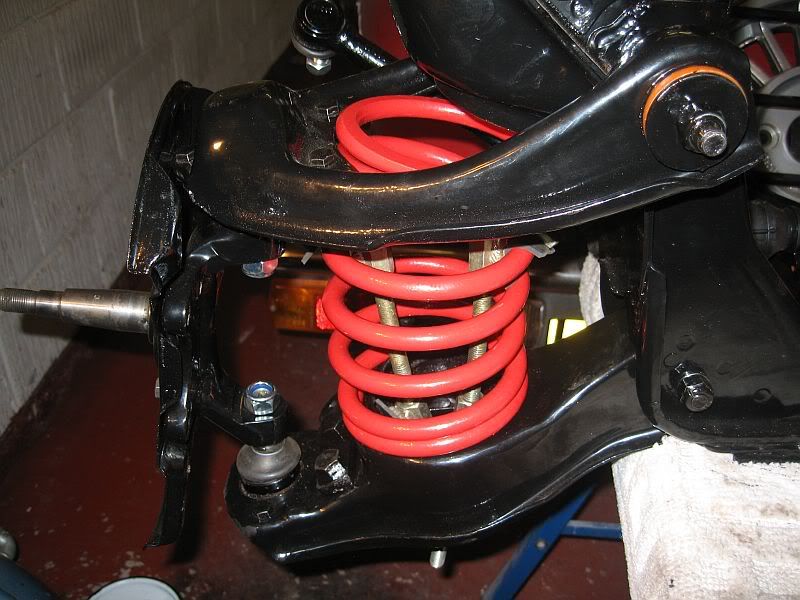
I fitted a spring compressor on the underside of the lower arm and the other end over the upper arm, a bit of tension to hold then gingerly undid the control arm nuts. I refitted the dampers and around 40mins later all done.
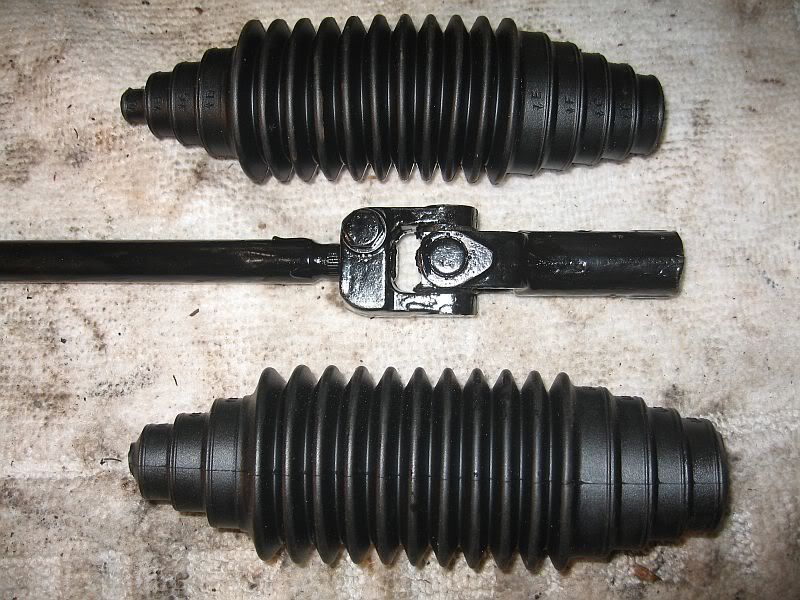
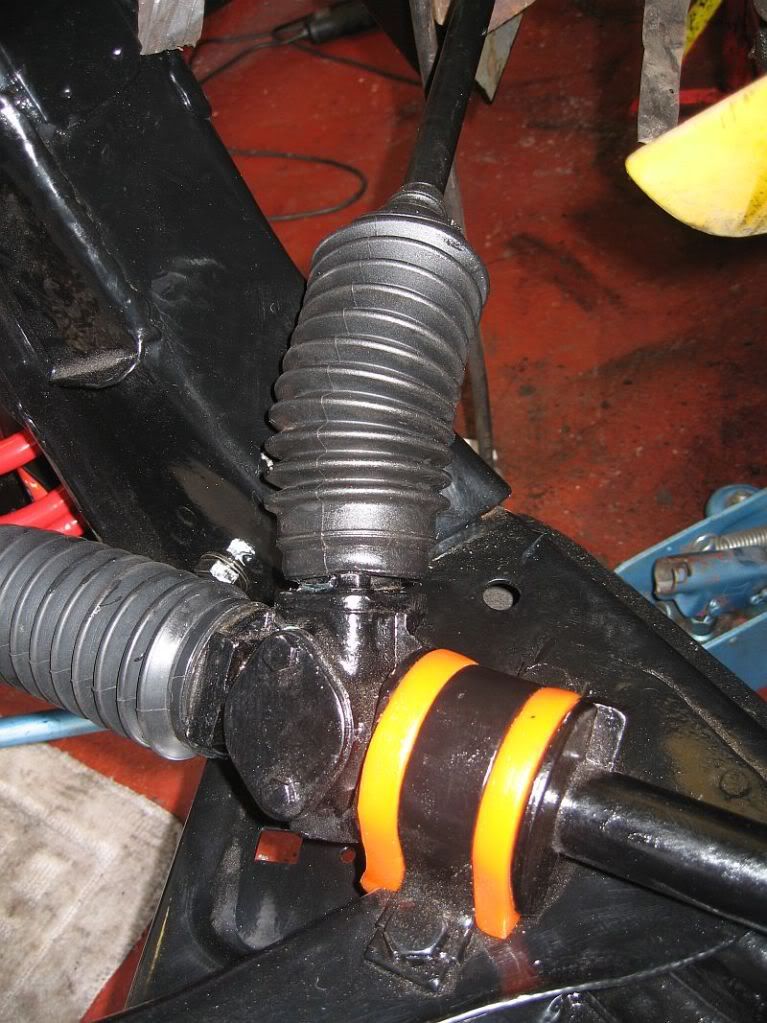
The paint was dry on the steering rod and knuckle, and the stiffer one soaked over night in oil was nice and free so time for my small mod to prevent future seizing. The universal steering rack boots are perfect for the job and cheap at only around £5.

Universal boots
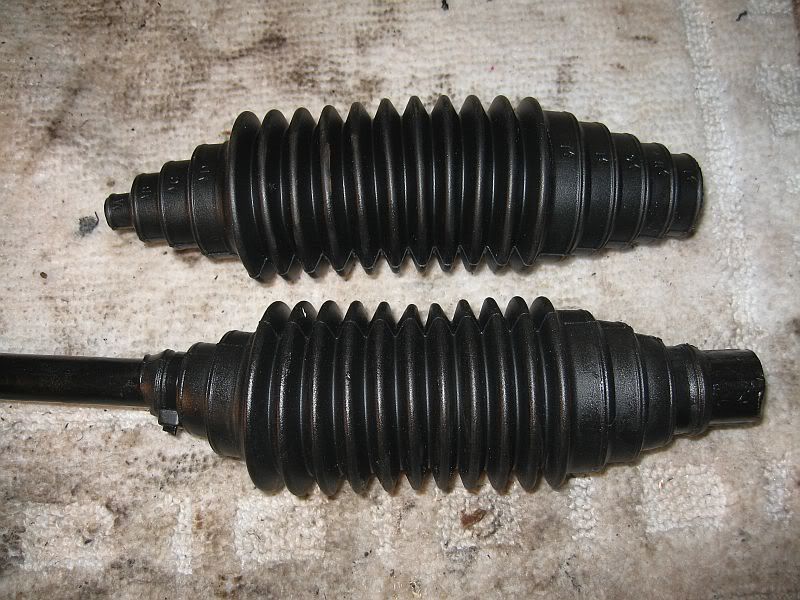
The boots have cut of areas to fit lots of sizes, the top was is uncut and the lower ready to fit.

Boot fitted

I first packed the knuckle with grease then slid the boot over, being rubber I was able to stretch it over all the lumpy bits. One end I secured with a tie wrap and left the other end until bolted to what was left in the car.


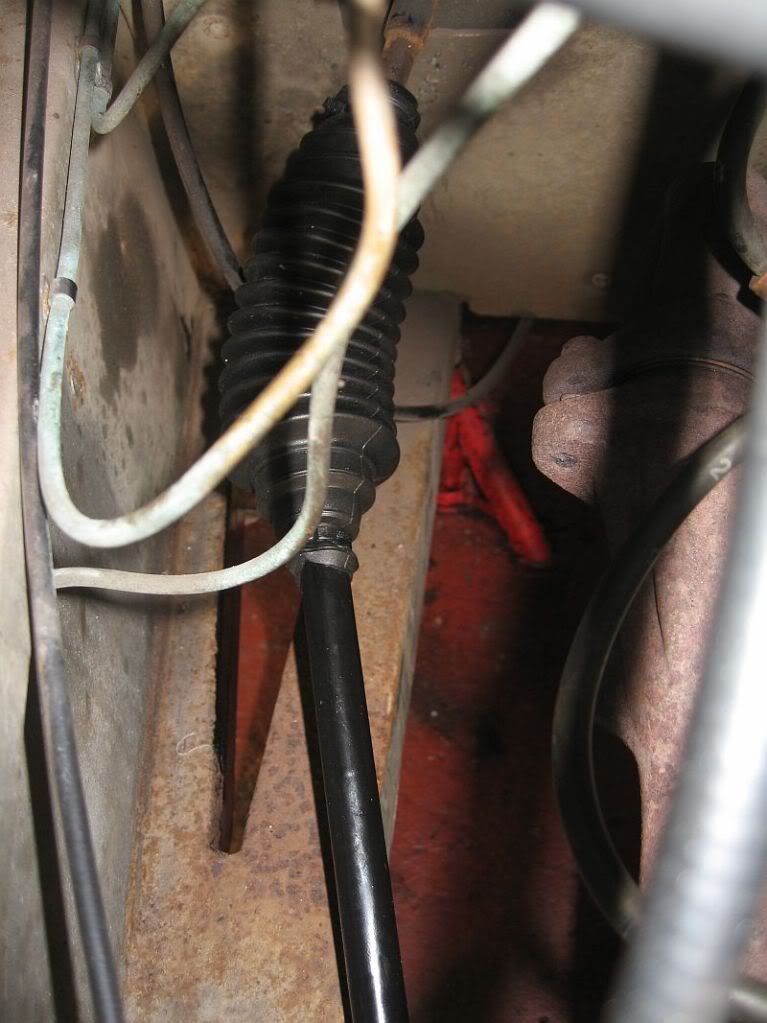
Not a great photo but you get the idea, once bolted on I slid the boot over the bolt and tie wrapped in place.

Rack end
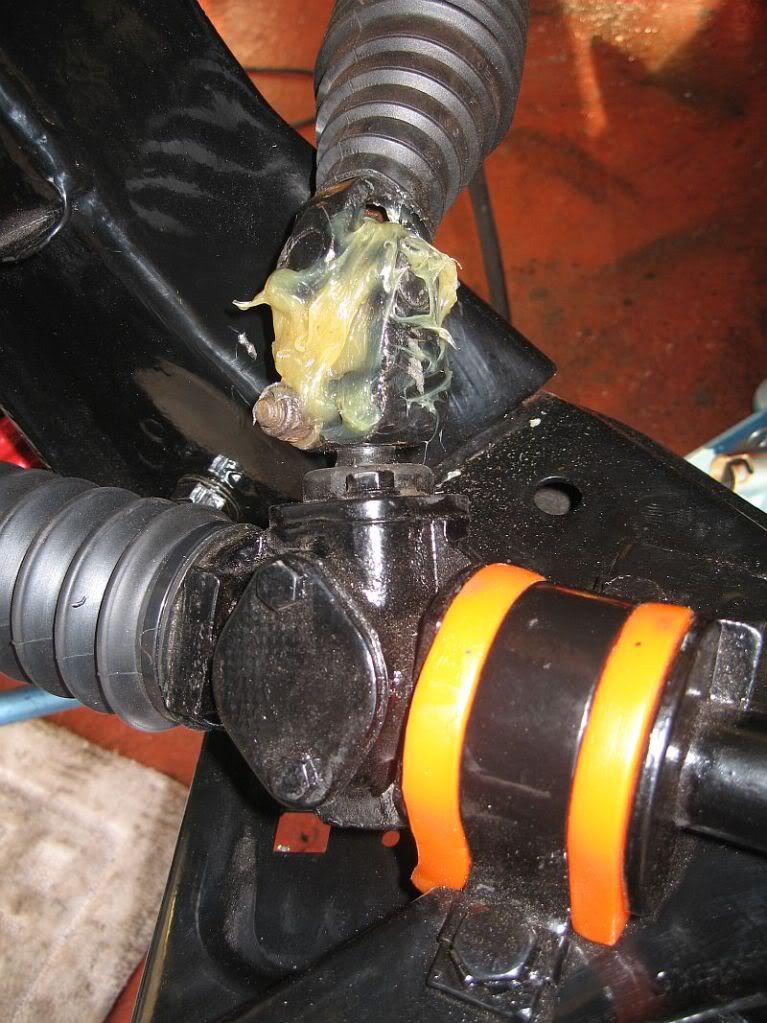
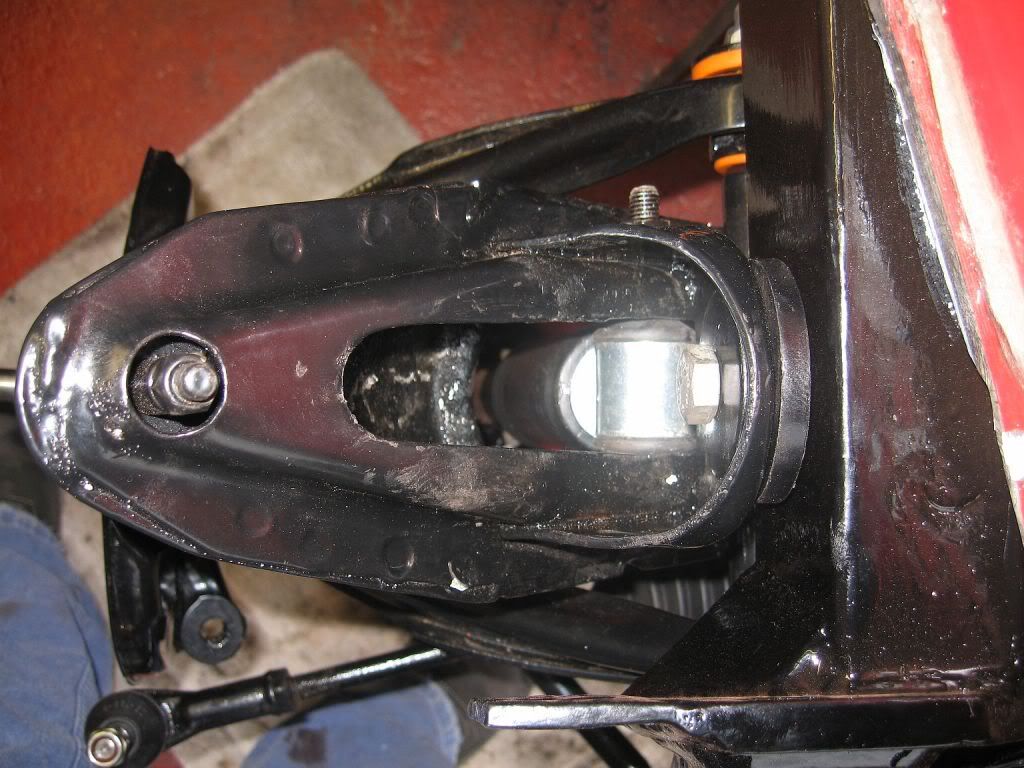
Once the sub frame was slide in place I pushed on the steering rod knuckle end, unfortunately I got the fit wrong and the steering wheel is a few degrees out, I am hoping that when I change the wheel I can sort it, If not the the rack will have to come off again to turn the knuckle. 
Once in place I packed with grease and slid down the boot,


Unfortunately I have not been able to get a tie wrap to stay in place on the bottom end yet as it keeps sliding of but I'll get there.
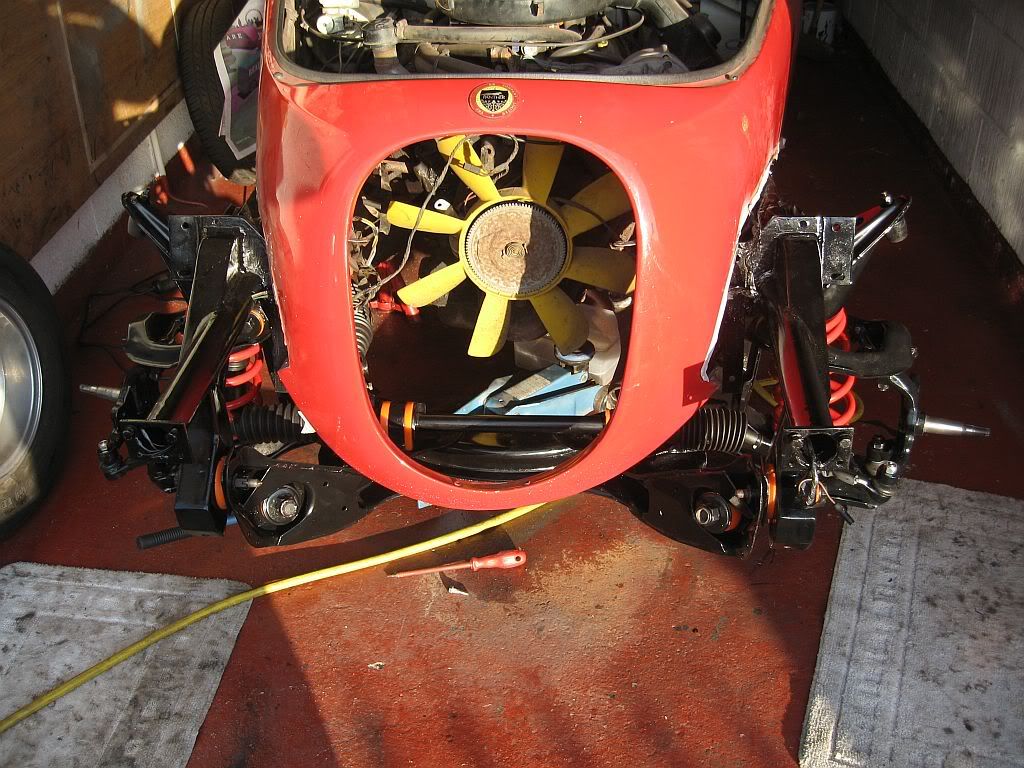
The subframe went in quite easily considering its awkward size and shape, a few things to remember when fitting.
First the large black plastic washers need to be in place before jacking into position.

large black washer
Secondly, Don't forget when positioning the subframe the steering knuckle is slid in first. You can't fit after without unbolting the steering rack.
How did I learn this, by firstly fitting without doing either, secondly by fitting with the big black washers and not the steering knuckle then thirdly by fitting the right way.
The big bushes for the subframe were a bit difficult to fit at first as the lead edges were to shallow so a little shave and a spray of silicon grease and they slid in position, there was an i.d mark showing the upside to get it right.
Subframe in postion
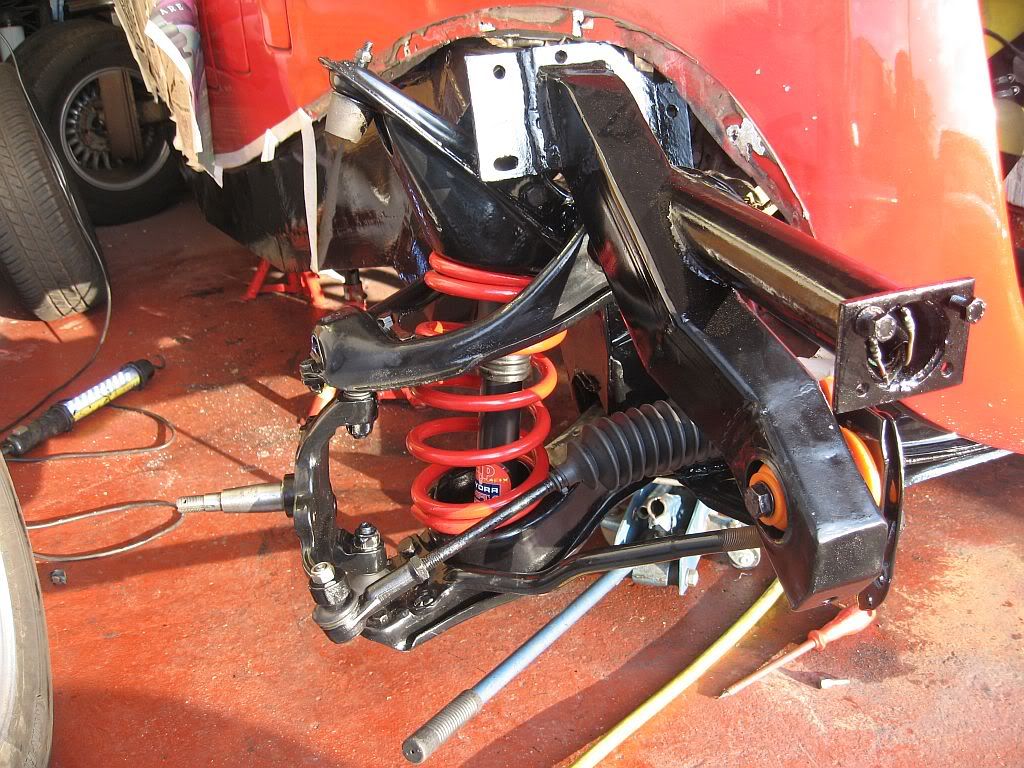
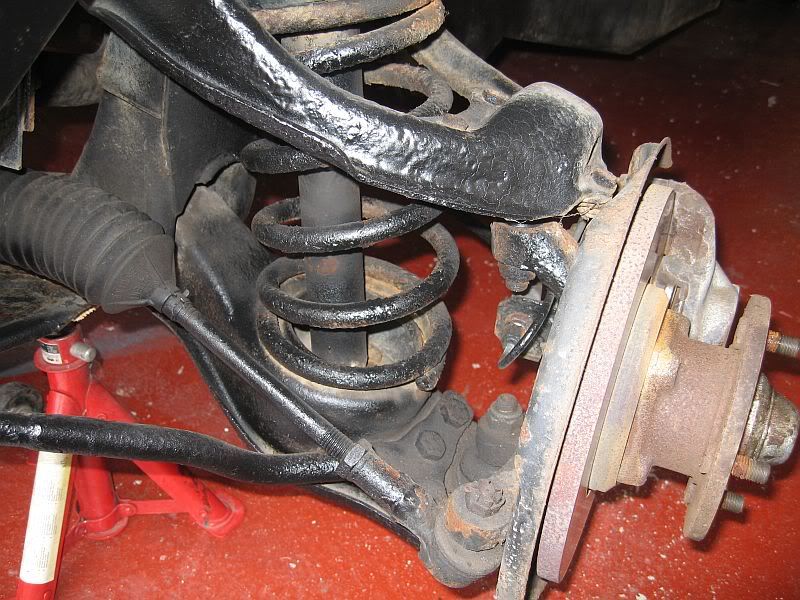
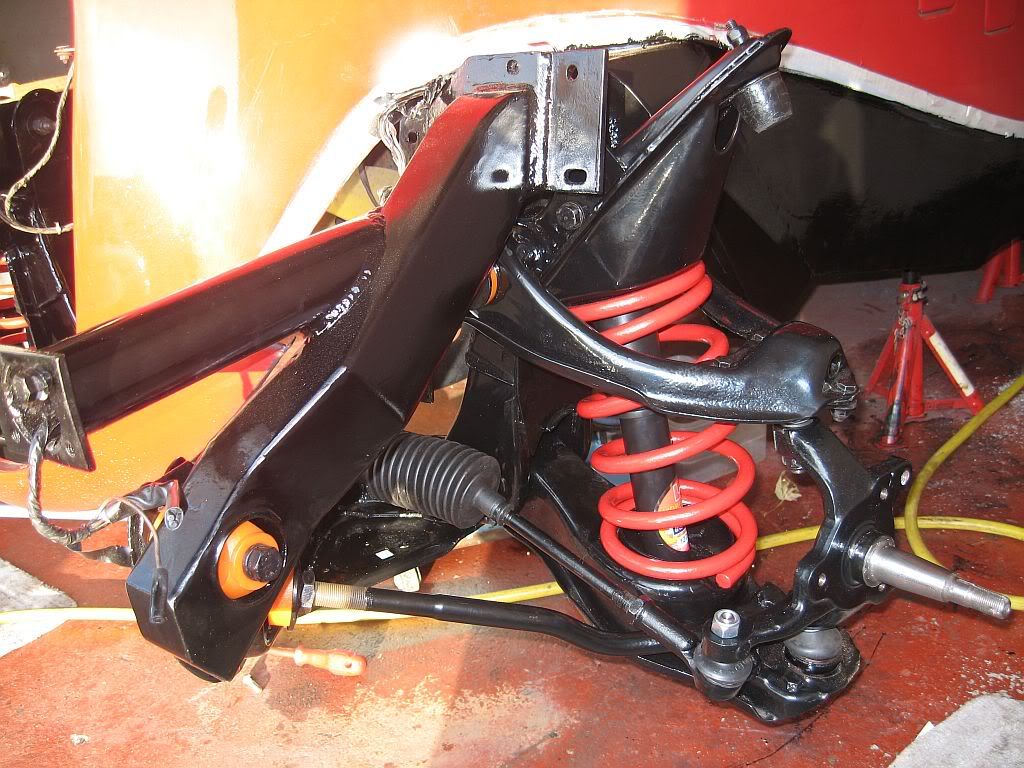
All in all the whole job of removing and re-building was not that difficult, I replaced all of the bushes, ball joints, track ends and dampers. Sand blasted everything and had most pieces powder coated, those pieces not coated were hammerited. 

Before
After

Before

After
 The next job is to fit the hubs and get the wheels on, hopefully tomorrow.
See ya Paul

Friday, 28 October 2011

Subframe and Suspension

Hi
Back home again after a 3 week stint onboard my ship, 1 week of before I return so I need to cram in as much time on the car as my wife will allow.
I did not get as much done last time home as I would have liked but I did crack on, it was mostly underside work which I am finished with for the time being although no where near fully finished. Last time I managed to get some protection on the outer and importantly the inside of the framework. The sides and under were cleaned of all rust that I could access while on stands, the areas that I had difficulty getting at were given a rust cure treatment, then primed and 2 coats of chassis paint applied. Thankfully I could find no more signs of pitting or holes in the box sections, I then got out my Schultz gun. Now this is one messy job, first off I fitted the extension hose and got right inside all of the box as far as I could spray with Vactan rust cure. I used over 1 1/2 litres in the hope of hitting anything that was not previously treated. Then it was the turn of the wax oil, over 4 litres was sprayed inside the box section and around half a litre over the garage floor and me. I also looked at where water was ingressing through the fuel pipe drilling's as this was the cause of the underside rusting, I had a tube of flexible roofing sealant handy so I sealed everything I could find with this. Next was the gap where the body work ends and the chassis begins this had a nice big gap which you can't really see with the wings on, no more gap now. Once the engine, gearbox and exhaust are all of I shall be able to get further underneath and preserve everything before I spray with schulz or some other underseal.

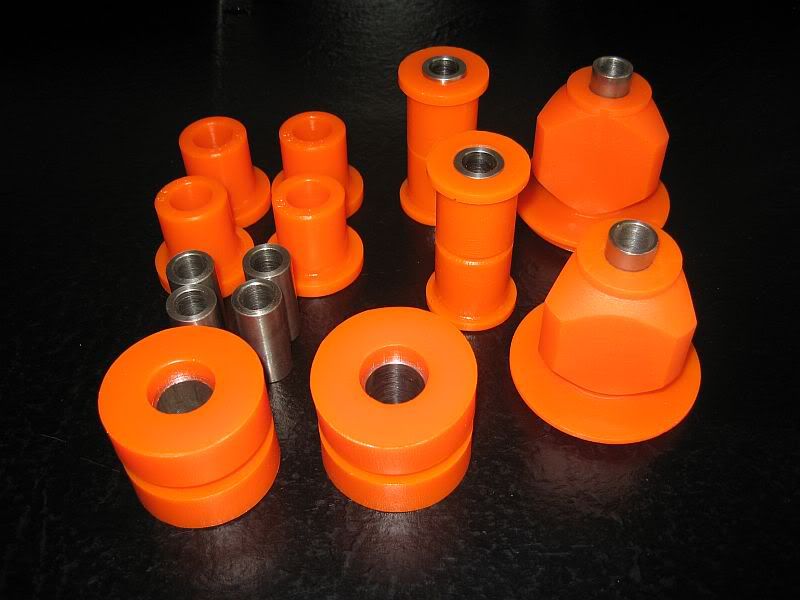
Typically the day before I left my new poly bushes arrived, I know I went for the cheaper option with the Flo-flex as opposed to the Superflex but as I said before for only a couple of thousand miles a year around country roads do I really need track running gear. Anyway I did do a search on Flo-flex and was surprised at some of the good comments.

Flo-flex poly bushes
As you can see, a rather bright shade of orange.
The Superflex and Powerflex have a different colour scheme, each of there colours denotes the hardness (shore rating) of the poly, so each different use ie. wishbones will be one colour / hardness while an ARB may well have a different colour / hardness. Flo-flex does it a bit differently in that they use just one hardness therefore keeping the price down, but as you can see there is no skimping on quality; I originally bought Powerflex which I had to return and comparing the 2 I can see no difference.
http://www.floflex.co.uk/index.php?cPath=23_40_44&osCsid=f4819c91798b26c3c59d41d08e58aadd

Cortina Mk 4/5 poly bushes used for the front suspension and steering.
  • CRT45X Cross member mounting set £14.75p
These come in a set of 4 for the Cortina, call and ask for only 2 and stipulate the insert to be 65mm not 70mm as used on the other 2 not required. I ended up with 70mm inserts as you can see in the photo and had to put them on the lathe.
  • CRT45FRNTG Steering rack large £7.26
  • CRT45FRNTF Steering rack small £6.05
  • CRT45FRNTC Tie bar                  £12.10
  • CRT45FRNTB Lower wishbone    £14.52
  • CRT45FRNTA Upper wishbone    £14.52
These all come with galvo inserts or there is also a stainless option that I went for at £3 per insert.

http://www.superflex.co.uk/products.php?cat=148

The Superflex bushes do look the biz and if I never had next to every item on the car to replace I may well have went for them.
  • SF148-1547KSS front subframe      £52.75
  • SF148-1187K Steering rack kit        £18.75
  • SF148-0046KSS Tie bar                 £25.75
  • SF148-0262KSS Lower wishbone  £30.75
  • SF148--1401KSS Upper wishbone £110
All of these above prices are subject to VAT and P+P.

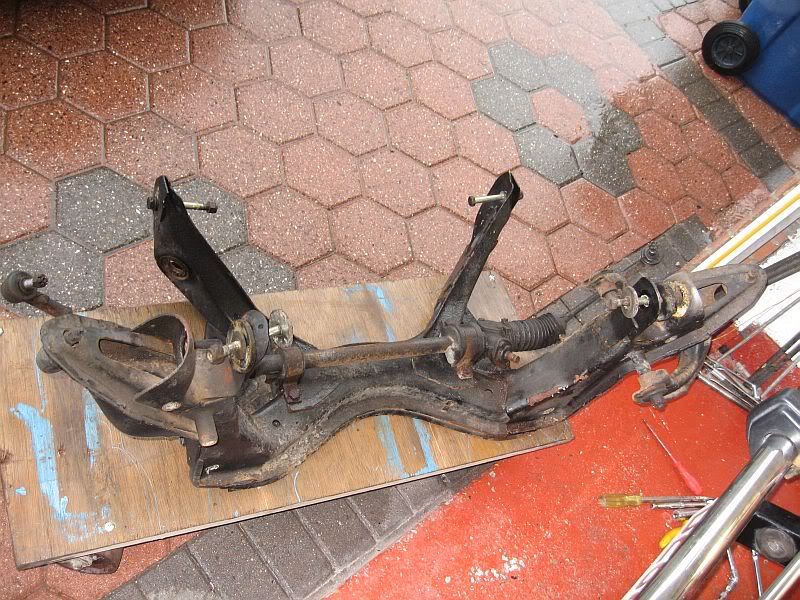
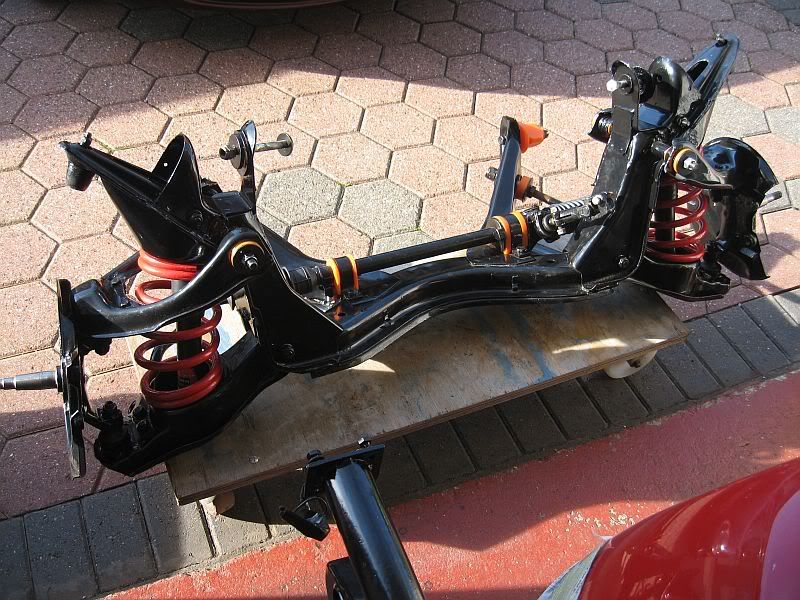
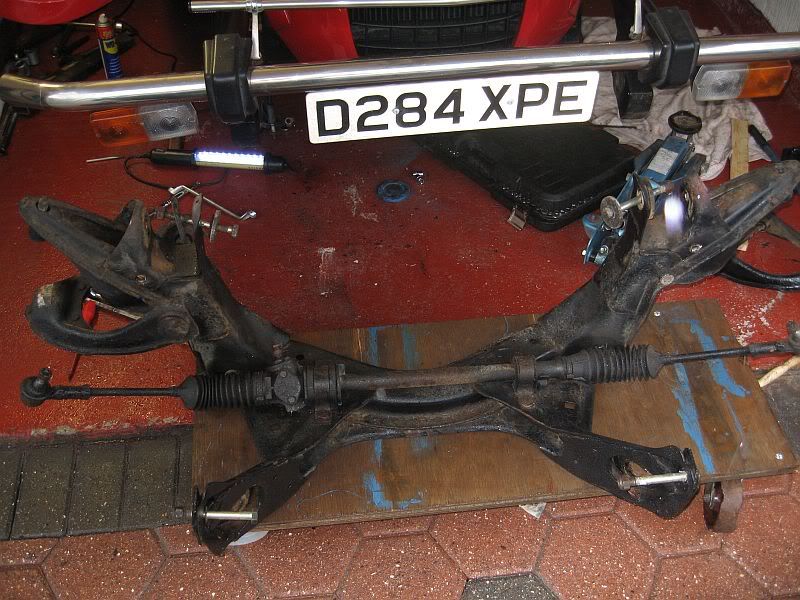
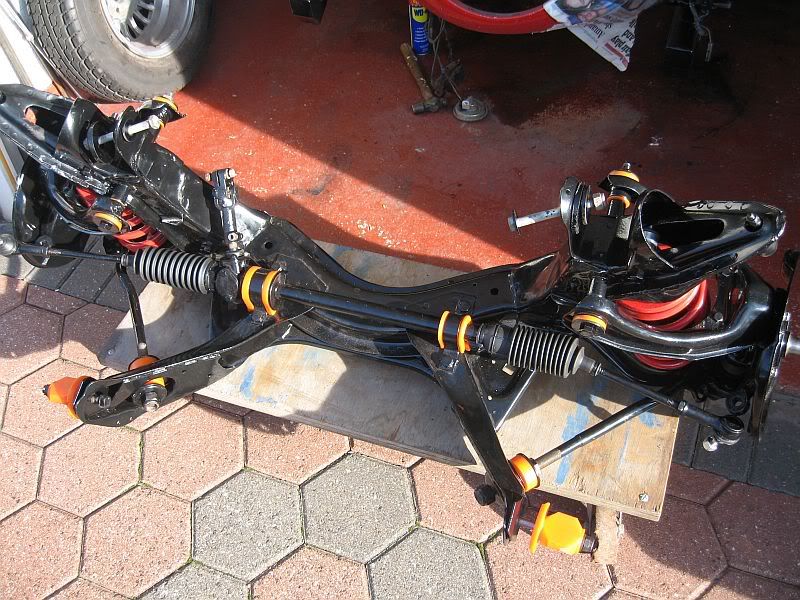
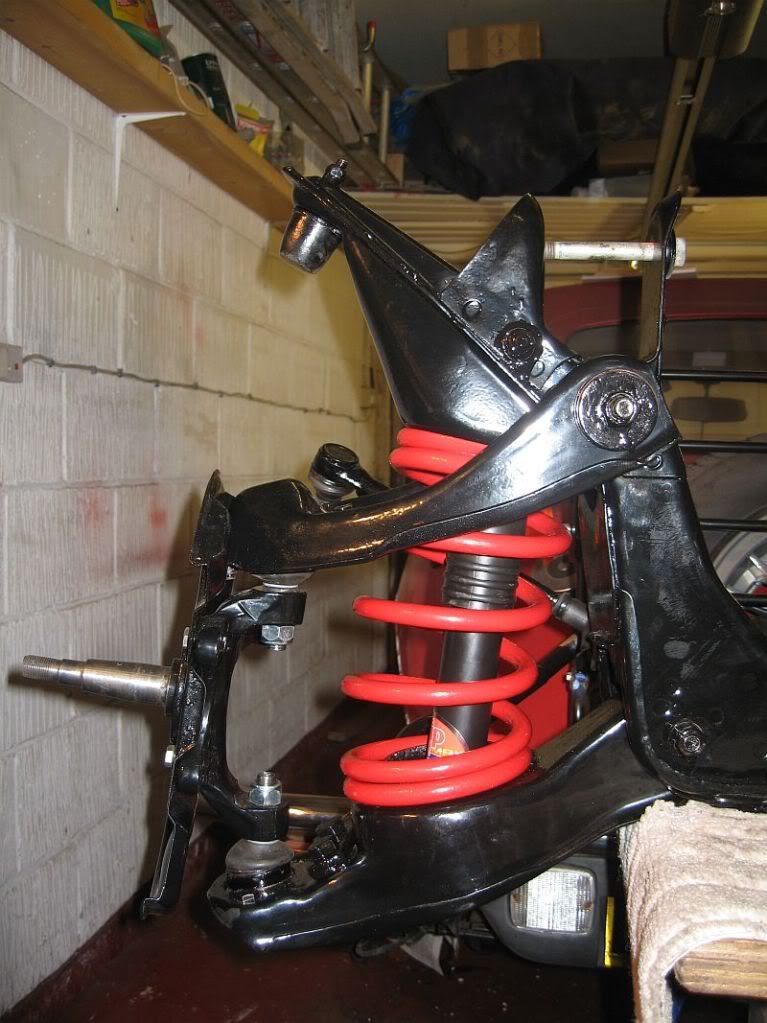
I have spent some of yesterday and most of today re-building the front subframe and boy what a difference from when I first took it out.

Just a reminder


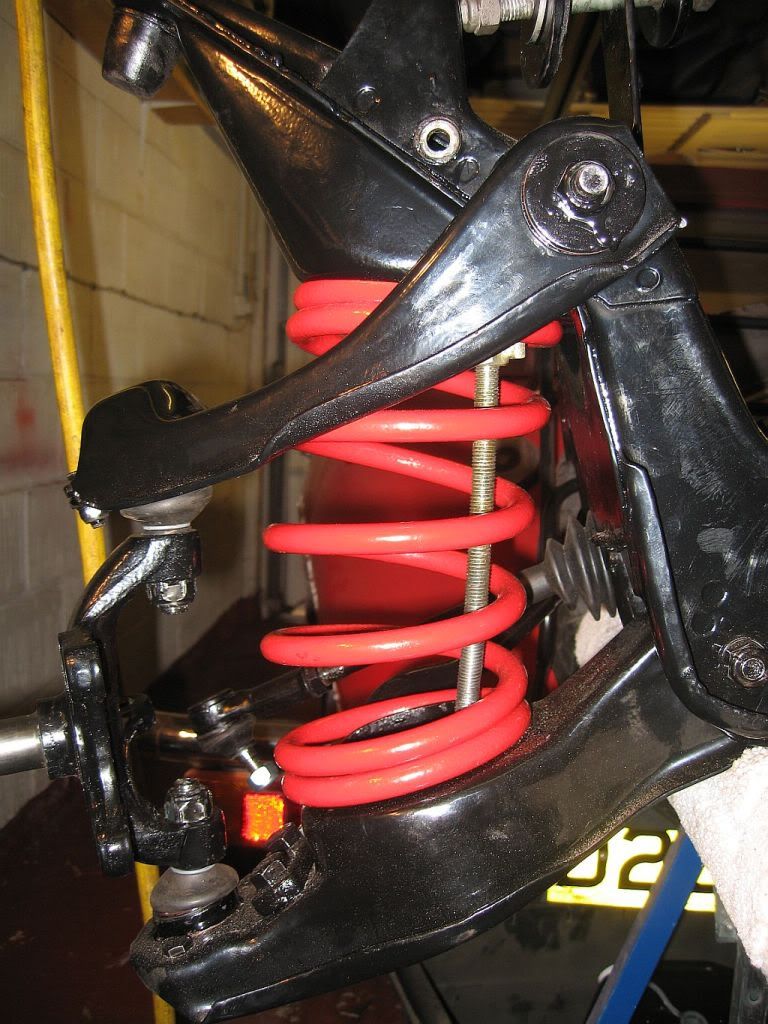
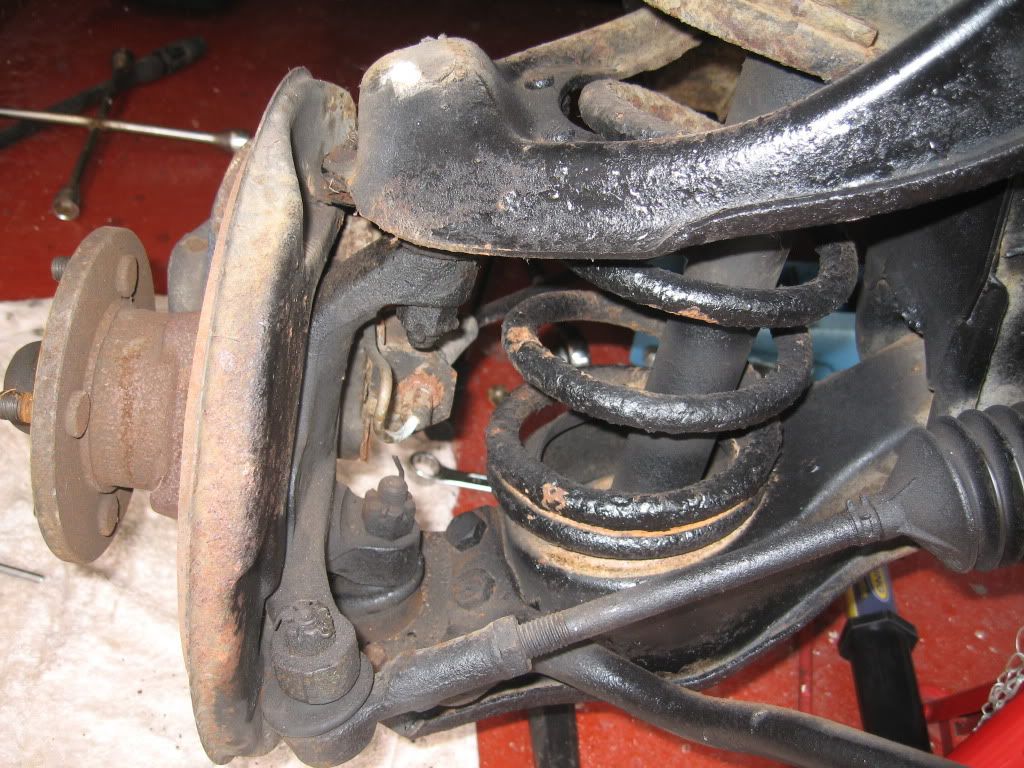
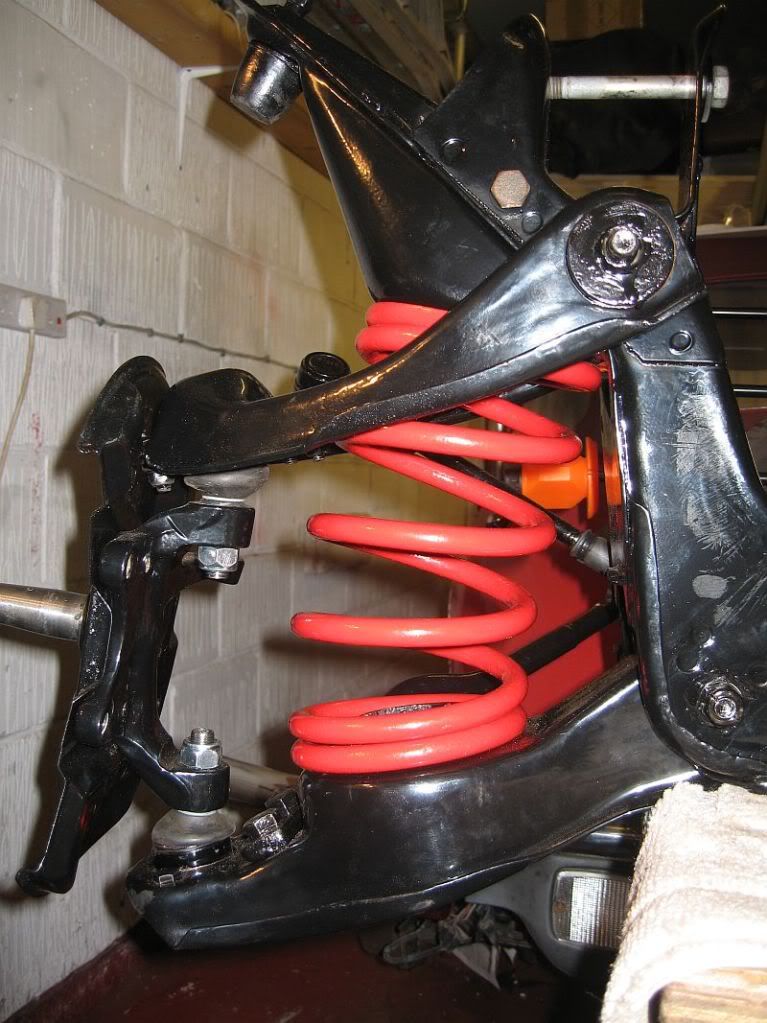
Fitting the steering rack and the bushes into the arms went without a problem, the fitting of the springs was a bit more problematic and dangerous if not done correctly.
For any one wishing to do this here is a step guide.

First of is safety, these things can cause serious injury or kill if not handled correctly while under compression so beware.
I used a internal set of spring compressors, these are a slimmer set than the normal heavy duty ones as they have to fit through the small space where the gas damper fits, you can also use them for external compression.

1st stage
Place the spring in position, there is a stop on the bottom where the spring end is located, ground end up. I had pieces of rubber gasket material ready so as not to damage the powder coat, slip the compressors in from the bottom and hand tighten on to spring. Try and get the back one the highest as it has the most work to do.
2nd stage
Tighten the nuts on the compressor evenly and compress the spring far enough down so that the back end can slip under the upper locating ring. Once this is achieved you can fit the control arm onto the upper and lower ball joints. The spring will not stay in place just yet because of its weight so clamps are required.

3rd stage
Fit the G clamps to hold the spring in place over the upper locating ring.
4th stage
You can now undo the compressors, again take care as even though the spring is now safely trapped the compressors can get a bit stuck and needs a tap which releases them a bit with a loud crack. Finger out of the way, just undo evenly and out they will pop.
5th stage
The last job is to fit the damper, I have fitted gas dampers from my local auto supplier for around £30 each, these locate on the bottom 2 studs and you feed the long bolt in the top. This can take a bit of wiggling as you cannot move the lower arm to position it correctly but with a toggle bar it went in Ok.
I have been getting into the habit of painting every nut & bolt as I tighten it, this ensures I don't miss torquing any up and prevents bits dropping of at 70mph, so any unpainted bolts will need checking at the end.
The last job of the day was the removal of the steering rod and knuckle joints, I had already removed the lower one that went onto the rack and this was really stiff, the one coming from nearest the steering wheel was lovely and free; so I guess the MOT failure I had on notchy steering was down to the lower knuckle. Its hardly surprising that this was to blame seeing as how there is zero protection from the weather. I have managed with a lot of WD40 and oil to get it moving freely and ready to fit, I have also bought a set of universal steering rack boots. I am going to slide these up the steering rod when I fit it, then fill the knuckles full of grease and slide the boots over them, a couple of tie wraps and this should prevent any future seizing. I have all the steering bits painted so hopefully tomorrow I should be in a position to fit the subframe as I need the car rolling to turn it and start on the rear suspension.
I have been debating since the purchase of this car as to the colour it will end up, I was always after a 2 tone finish but could not decide on red and cream / ivory or red and black. Well the decision was made for me.
http://www.ebay.co.uk/itm/200664549116?ssPageName=STRK:MEWNX:IT&_trksid=p3984.m1439.l2648
(Unfortunately I haven't figured out how to copy a photo from ebay)
But I am now the owner of this fantastic original Kallista steering wheel in maroon & cream leather a bit expensive at £108 and I must apologize to the other guy bidding but I was determend to get it and had a £350 max on it; stupid but hey!. So the colour coding of the car is sorted. 2 tone in Maroon candy with cream frost paint and hopefully a leather interior with the same colours, I also secured a pair of chrome over riders, just had to get rid of them plastic ones.
Well that's all for today
See ya Paul
Friday, 30 September 2011

Radiator

Hi
Well the weather was glorious so the top was down on the MX5 and we set out north this time, we headed off up the Northumbrian coastal route and ended up in Craster. http://www.northumberland-cam.com/craster/
Craster  is a small coastal fishing village famous throughout the world for is oak smoked kippers and I fancied some for breakfast, and very nice indeed. After the kippers we went for a walk up the coast to Dustanburgh castle. Just one of the many castle on this side of coast.
Lynne and castle
Only around a 2 mile walk and very nice when the sun is shinning, anyone not done the drive up the north coast will surely enjoy it.
Things have started to arrive on the car front. firstly the powder coater arrived with the front end suspension and subframe. What a fantastic job, every bit looks like it is straight off the shelf, I am really pleased I took the advise of my mate Shaun to get it done professionally. I already have a collection of bits ready for the next batch, I shall post photos of the quality when I re-build the suspension.
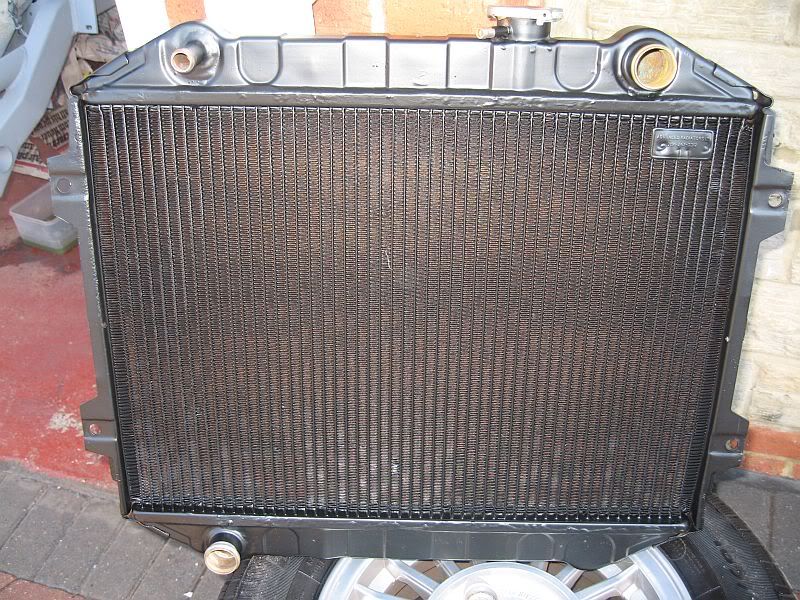
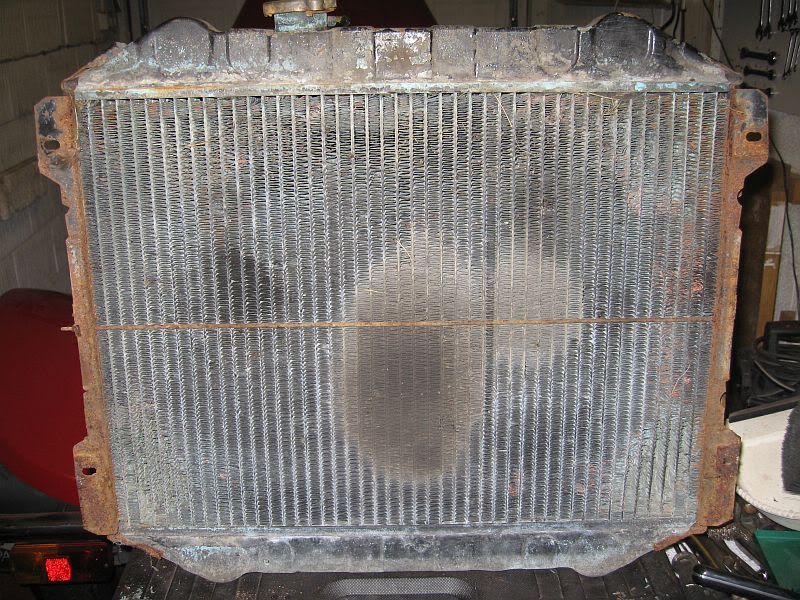
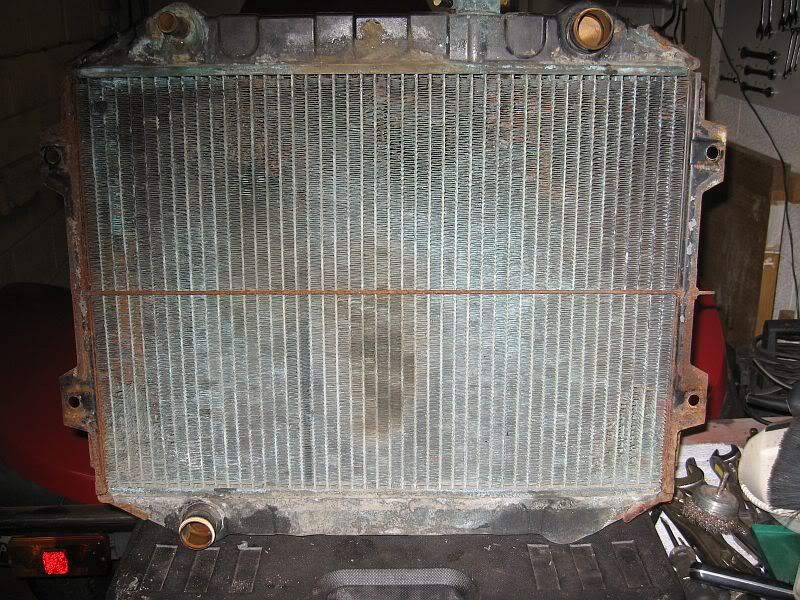
Next was the radiator, got a call from Advanced radiators and picked it up on my drive north, yet another fantastic job. After seeing what came out of the car to what they where able do it was well worth the £166

Radiator before re-core
After re-core
Next to arrive was the bushes; unfortunately I made a mistake on the Powerflex selection, the tie rod bushes were good as were the lower arm but what I thought were the upper arm bushes when i ordered turned out to be the upper ARB bushes. It appears Powerflex only make the Lower suspension arm bushes and not the upper. So after a talk with Larkspeed I have returned them all. The Flo-flex bushes I ordered also arrived and after comparing the quality against the Powerflex I gave them a ring and ordered the rest of the bushes from them. They may be the cheaper option at around £120 for the lot with stainless inserts and being all bright orange but they look and feel well made. http://www.floflex.co.uk/index.php?cPath=23_40_44

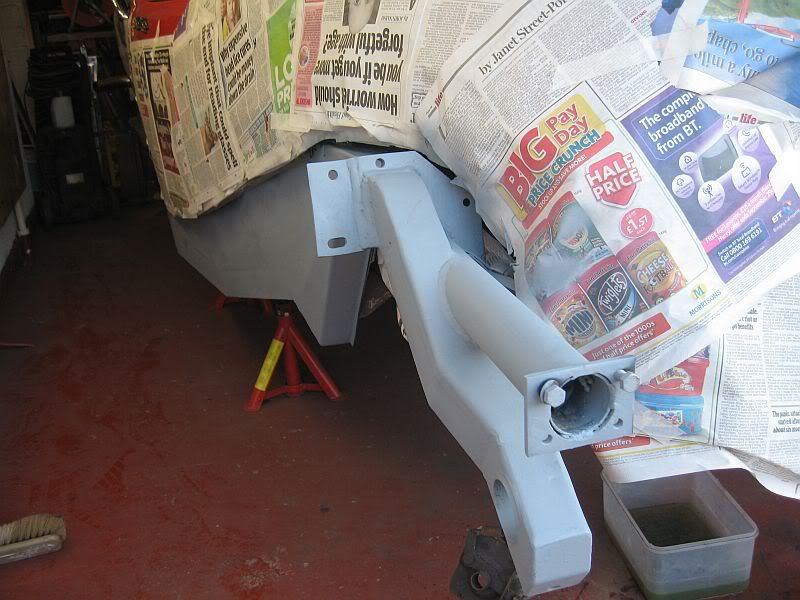
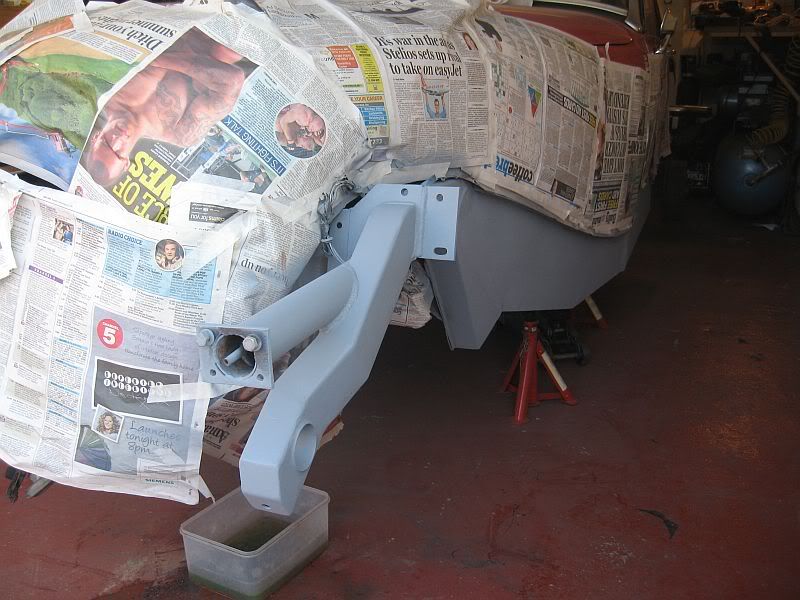
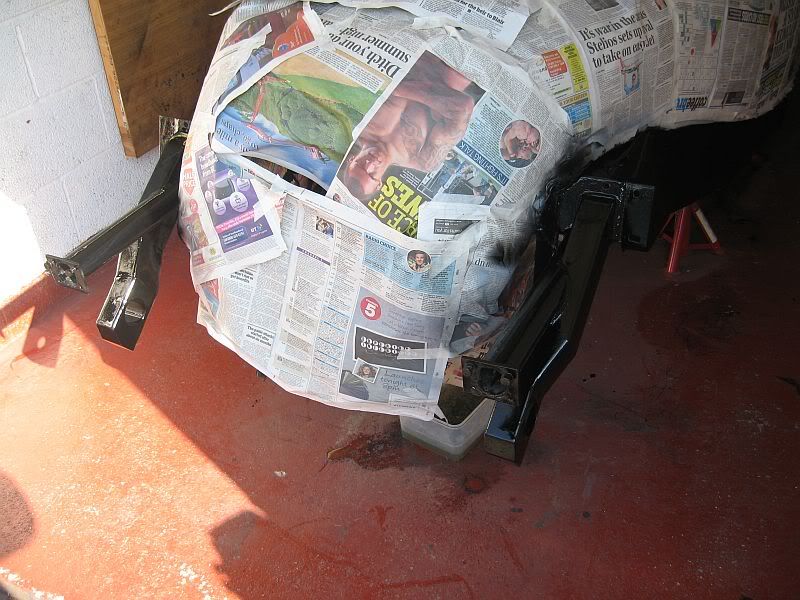
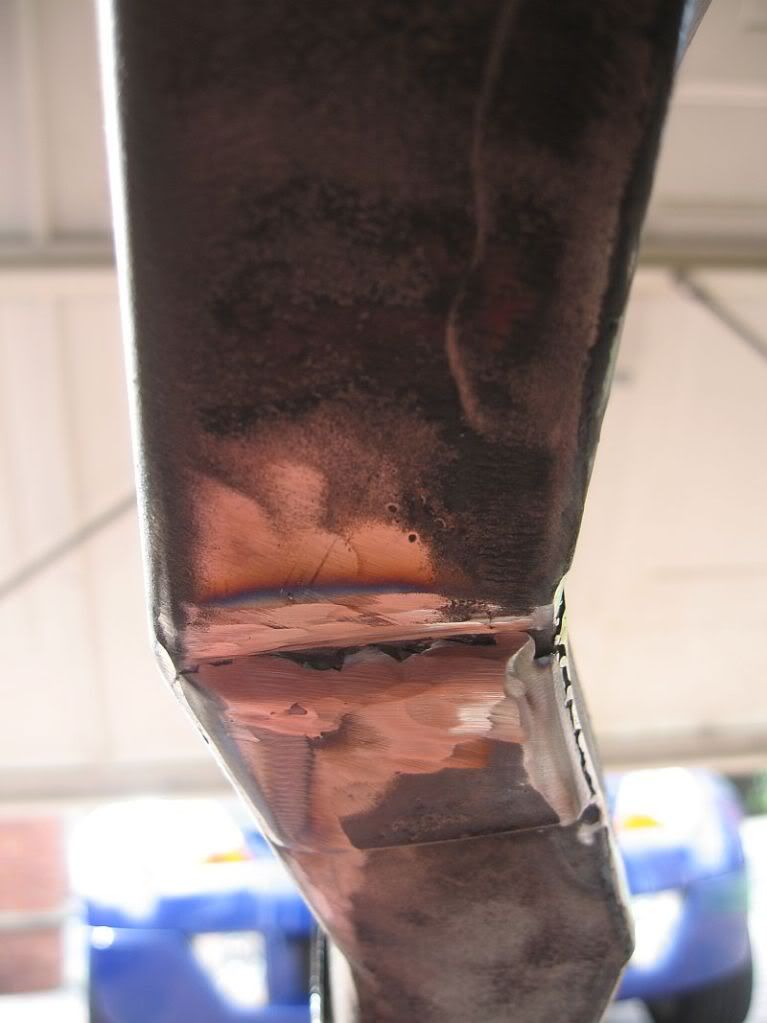
I have carried on with the underside getting all of the rust off and where I cannot grind clean I have used the rust converter. I had a bit of a shock on the drivers side with the amount of repair work carried out, around 3ft of the side panel has been replaced. Also there is a weld on the pipe that hold the bumper bar, I can't see any distortion to the frame work, and the subframe has no evidence of damage but it has defiantly been cut and welded. You may be able to make out the weld in the photo, around 6" back from the square plate.

Drivers side frame
Pass side primed


First coat of chassis black
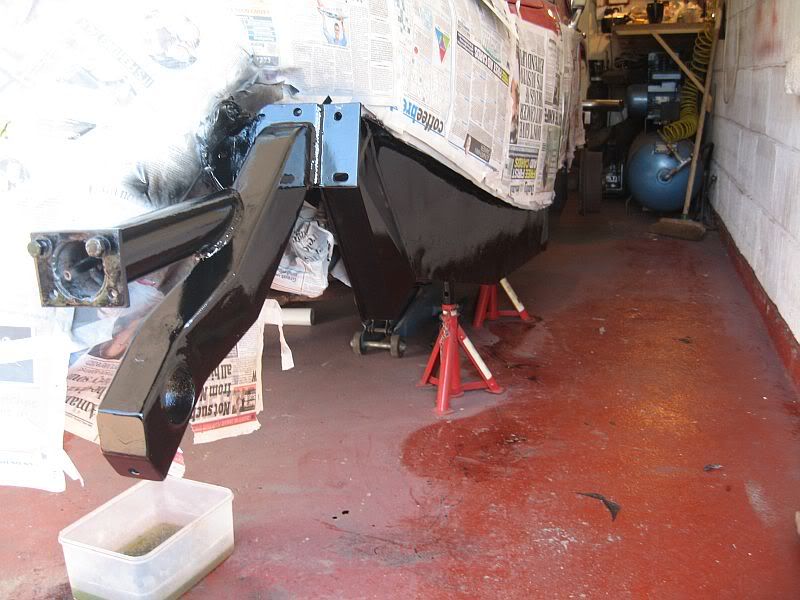
Both sides blacked
 I have primed all of the frame work and painted with the new chassis paint, I have used the tough black spray on the front arms to get a better finish than with a brush. I shall rub down tomorrow with the green pad and give it another coat, should be well protected on the sides and an extra coat of hammerite under seal on the underside over the chassis paint should give it a lot more years.
I have taken one of the door steps to a sheet metal firm to get a price on stainless steps and new frame work, should get a quote on monday.
A waxoil application gun arrived today so tomorrow I shall give it ago and spray some rust converter into the sections I don't think are waxoiled, I have a 5 litre tin of waxoil to use up so all of the boxes will be getting a good coating.
Paul
Tuesday, 27 September 2011

Hole Patching

Hi
Been under the car again today, which I suppose will be a recurring theme for quite a while, but first I had to spend the morning driving around sourcing a large gas bottle. I had problems with my welding yesterday which I have found out is called burn back so it was off to Machine mart for new tips and more gas. I was lucky enough to talk to a guy who works there who restores cars and he put me onto a local gas supplier with far more realistic prices than £14 for a 1/3rd litre bottle from Machine mart. I ended up at Ashley gas supplies in Ryton Sunderland where a large pub style Co2 bottle cost £48, £40 refundable on return and £8 per refill; that's more like it.
I also figured out my burn back problem as being the wire feed to low and a dodgy swan neck and tip so I have replaced them, now its just learning the machine, although I am much better at TIG and stick.
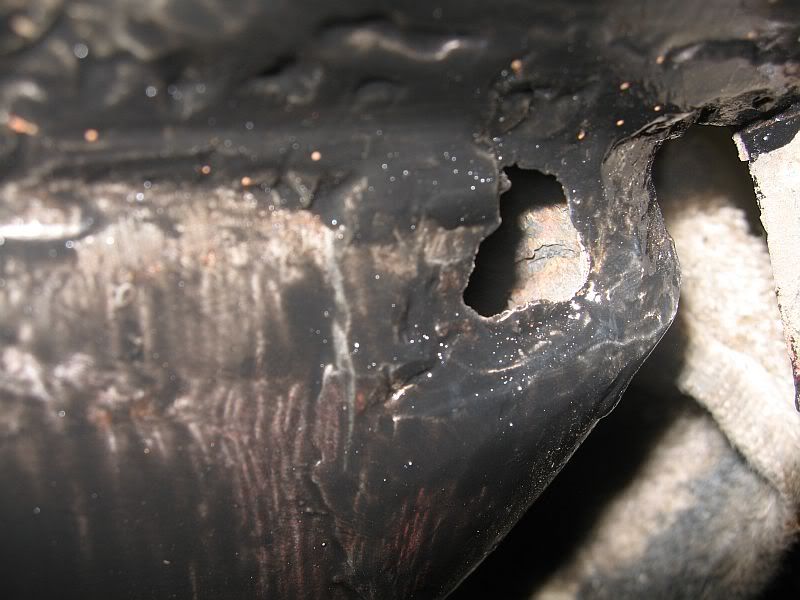
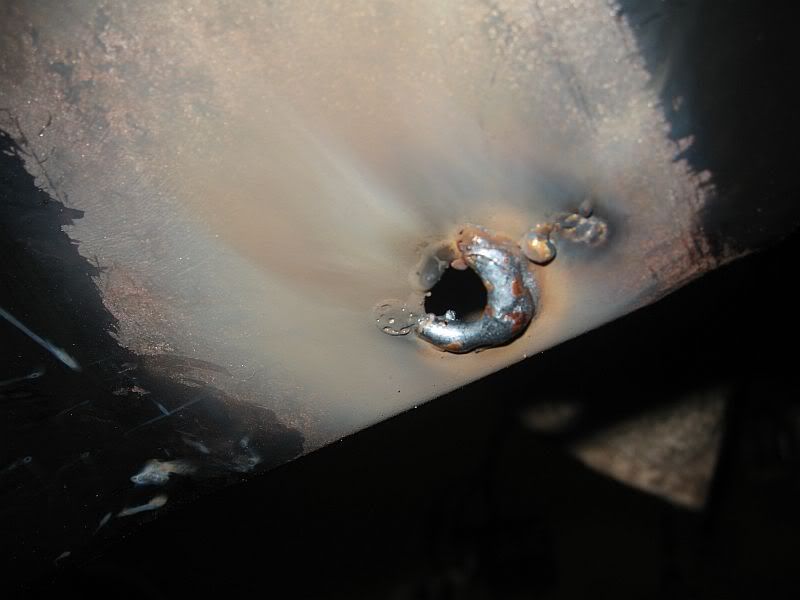
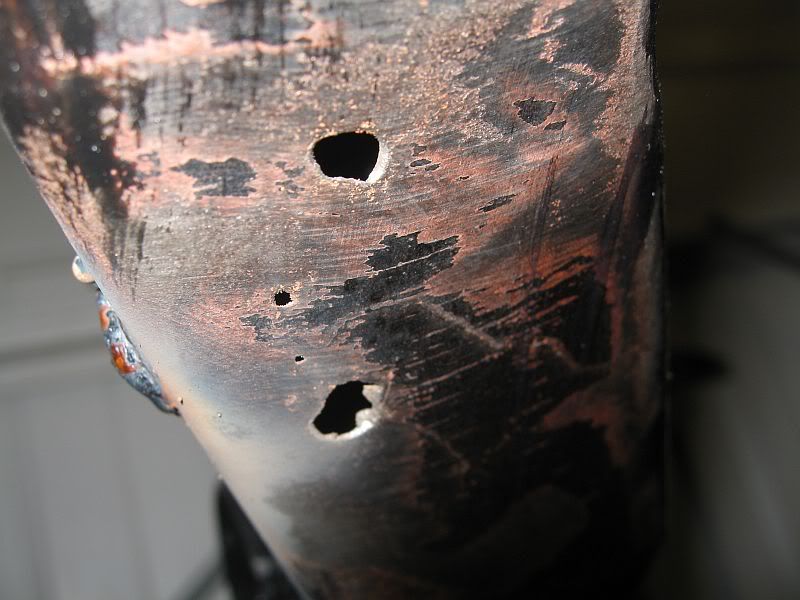
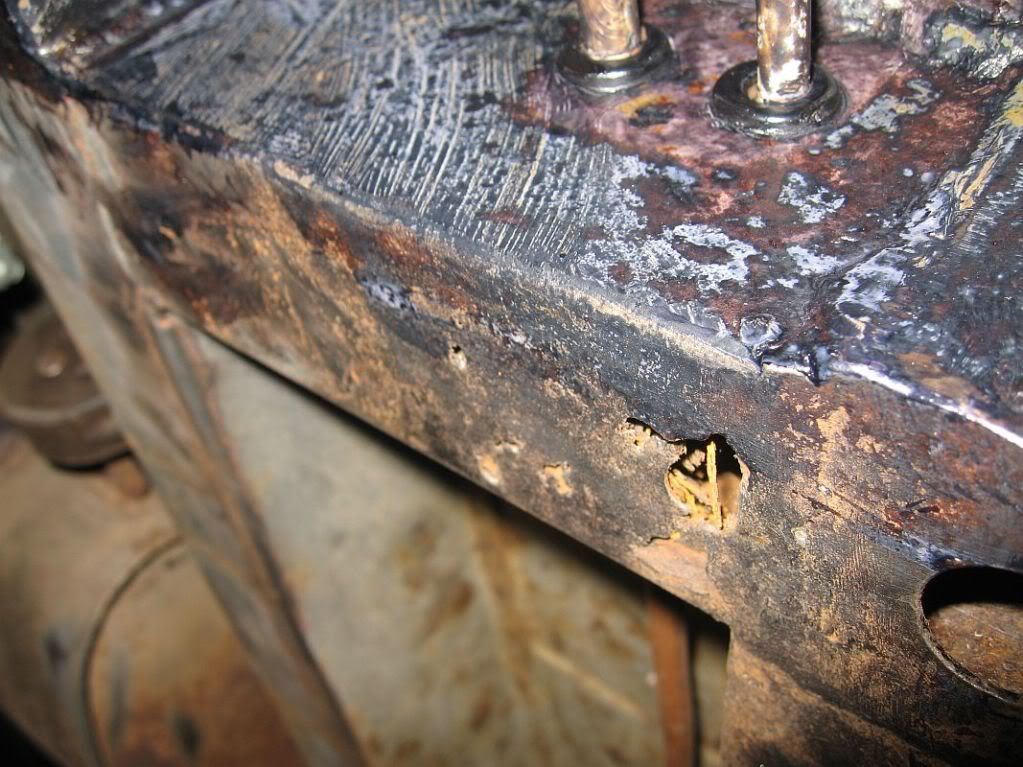
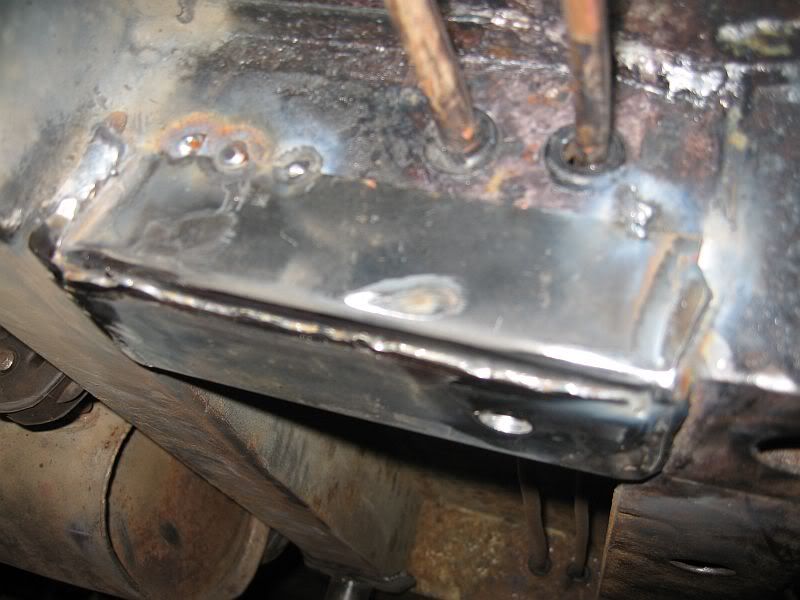
I have spent the rest of the day welding patches to the holey parts of the frame work, I uncovered this little lot yesterday. The water has got in between the grommets for the fuel pipes and because it was only a small piece 125mm long no one thought to drill it for wax oiling
 

I got out my dremmel with a grinder attachment to have a look inside.

I have managed to scrape out most of the loose rust and made a large patch out of a couple of pieces of angle iron with a hole drilled in for rust cure and wax oil injection.
It may not look brilliant, but it is underneath and once painted and hammerite underbody sealed will make it invisible.
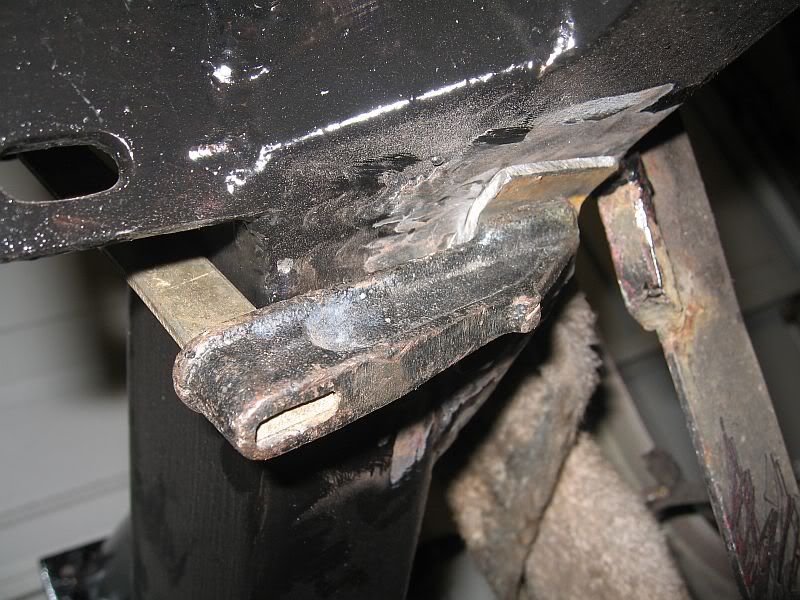
The exposed holes on the upper chassis arms required a bit more finesse, I tried touch welding the holes but just made it worst. So a patch was cut from some 3mm and welded on, a bit of grinding and ready for vactan and primmer.

I also received a call today that my radiator is ready, so it looks like a lot more driving tomorrow although the powder coater hasn't come through with they promise to deliver today.
Paul

Monday, 26 September 2011

Hole repair

Hi
Got back late Wednesday night for a 2 week break, only today have I actually got down to doing some work on the car, even though you can't see that I have made progress.
I have managed to organize some other things during my time; firstly after many years in my job and many years spending some of the money earned at Halfords I have only just found out that I am entitled to a Halfords Trade card. So any Engineers out there get down with your quals and get a discount on all of those essentials, tools, oil, filters, lamps, all sorts.
I have been trying to track down which radiator is fitted to the Kallista, even though it is stamped Ford I have had no luck so far. I first contacted http://www.aaronradiator.co.uk/catalog/Ford_Radiator-26-1.html which has all Ford models listed with picture and sizes and could not find it there. I spoke to them and sent photo and sizes but got nothing back. I next asked the man who knows these things, (Terry) and he said it was commonly thought to be from a Granada 2.8 but the sizes don't match what is currently available for this model. So it was a re-core, I have found a good firm in Newcastle http://www.adrad.co.uk/ who are charging around £150 for a full re-furb.
Next was front end bushes, I have spent my 2 weeks away trying to figure out the best deal on my budget, I had 3 main manufactures in mind, Superflex, Powerflex and Flo-flex. As always the best is the most expensive so with probably only 2 to 3000 miles per year and no rallying I have plumbed for the Powerflex and the Flo-flex. The Powerflex ordered are the Upper and Lower wishbones and  Tie rods, the Flo-flex are the front chassis mounting and the steering rack large and small. Unfortunately Powerflex do not do the chassis mounting bushes which was the reason I went with Flo-flex.
Costing
Powerflex for all bushes      £84 inc p+p
Flo-flex for all bushes         £44 inc p+p
My first choice for the Chassis bushes were Superflex but the cost for these 2 bushes was (inc p+p) more or less the same as all the Powerflex bushes. I can always change to Superflex in the future for the chassis if I find the Flo-flex no good.
Next purchase was chassis paint, I had started using Hammerite, mainly because I did not know what else to use and it was later suggested to me to try the paint from Ken & Lyn on 01298 814813 who sell they car supplies at the main motor shows. So after parting with £22 pounds I now have 2 1/2Lt of lovely black chassis paint.
Next buy was a Mig welder, I picked up a used Clarke 135TE for £150 locally from Gumtree.co.uk but need a bit more practice,
Well finally got stuck in today which involved the removal of the rest of the Pass side wings and after 26 years they did not want to budge but eventually of they came. The poor car looks rather sad without the wings.


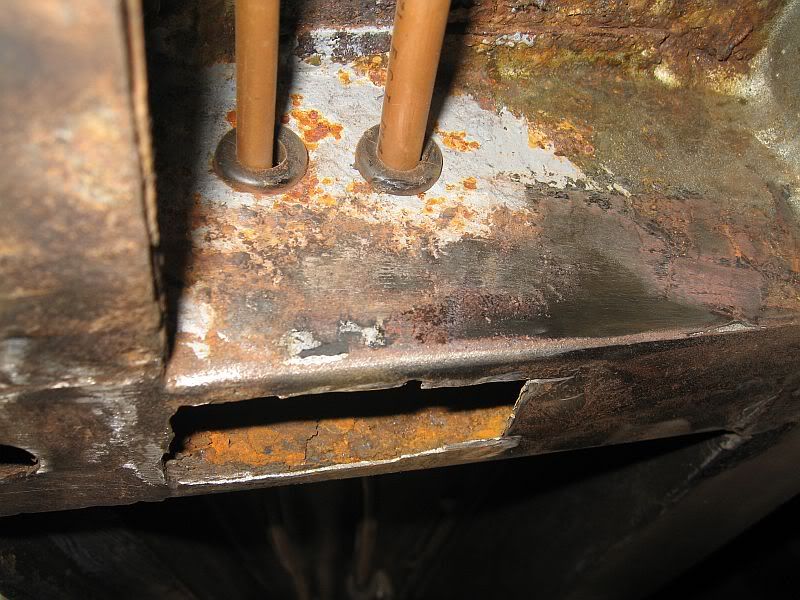
It was out with the wire brush again and all of the other rust removal tools, the Hammerite came of easily and I got well underneath, I have found a number of holes in the members but surprisingly when removing the rubber bungs and sticking my finger in I have found wax oil.

This hole is were the chassis mounting arm drops down.
I made a metal patch, just about to weld it on.

Started welding this one.
Yet more to weld, I'd better stop there as I'm get depressed. 
start again tomorrow.
Paul
Tuesday, 6 September 2011

Tuesday 6/9/2011

Hi
Been a busy couple of days, I have the steering rack all painted, the gaiters changed and new track rod ends fitted. Looks like new.
No word on the bushes yet, gave him a ring and they are waiting on the new price list.
Suspension parts are still at the powder coaters, SO
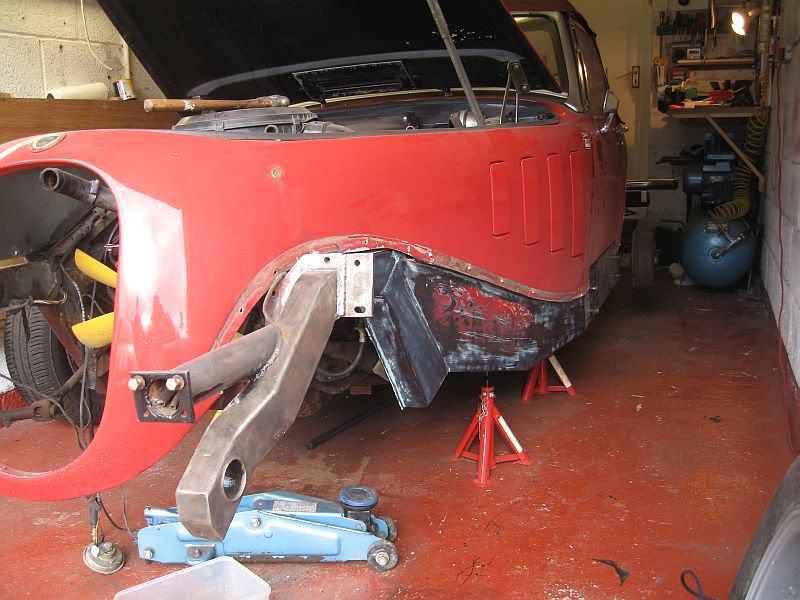
I have have bit the bullet and started doing what scared me the most, Wings off.
I started by removing the headlights or trying to, the drivers side came off easy but I am afraid the pass side will need cutting off as they is no way the nut will unscrew. Not a problem, colour coded headlights are nice but www.europaspares.com have some lovely shells in heavy chrome, will look great with matching spots.
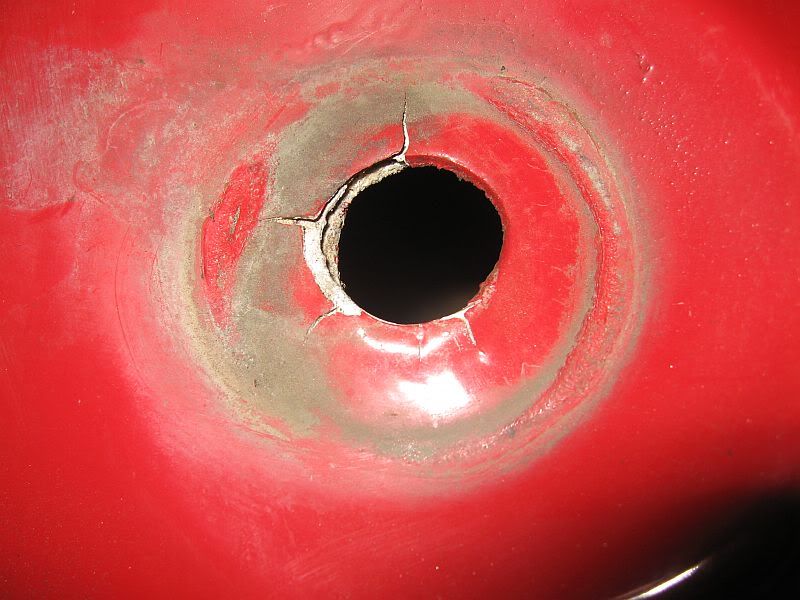
There is a fair bit of damage to the hole in the wing, it looks like the ally has broke away and only the underside fibreglass is keeping the hole in place, I shall have to make up a few ally washers and laminate to both sides with araldite. The swivel mount of the headlights is made of steel and was rusty, looks like it has eaten away at the aluminium and the oxide has swelled.

Headlight damage
Next was the radiator grill, made of plastic and not great, I am replacing this with a stainless grill from Bruno to give the front a clean look. Once off the full condition of the radiator became more apparent, I new it would need replacing but did not realise how bad it was, the copper on large sections of the fins was gone, total wreck.

inner side
Outer side
I need to track one down now, should not be to much trouble, it has Ford stamped on but no serial number so a bit of detective work, or of course I could ask Bruno or Terry Borton as I am sure these gents have been replaced a few over the years.
The surround frame I have put to one side ready for my next trip to the powder coaters.
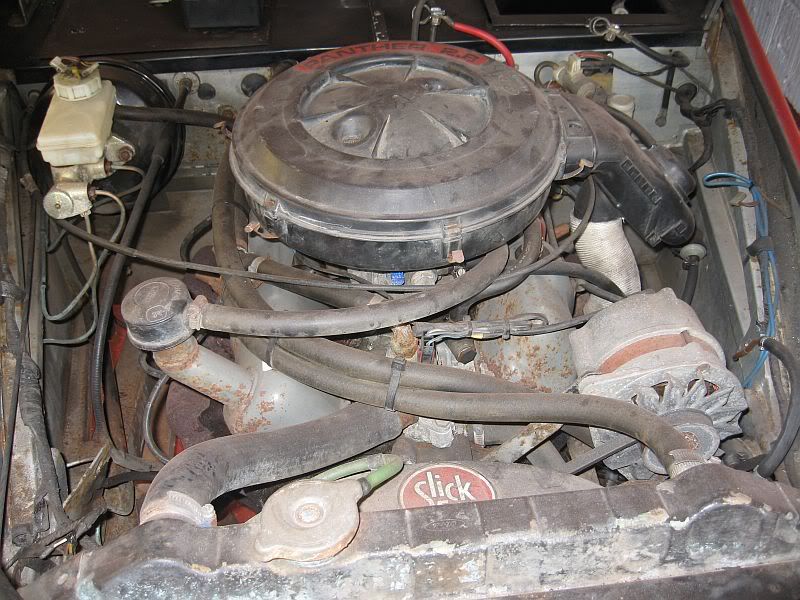
Now that the radiator is out I can see the engine better and it looks like most of the engine oil leak problem has been the rocker covers all along. 5 minutes work when first seen could have saved a messy engine, on the positive side; it ain't rusty where the oil is.


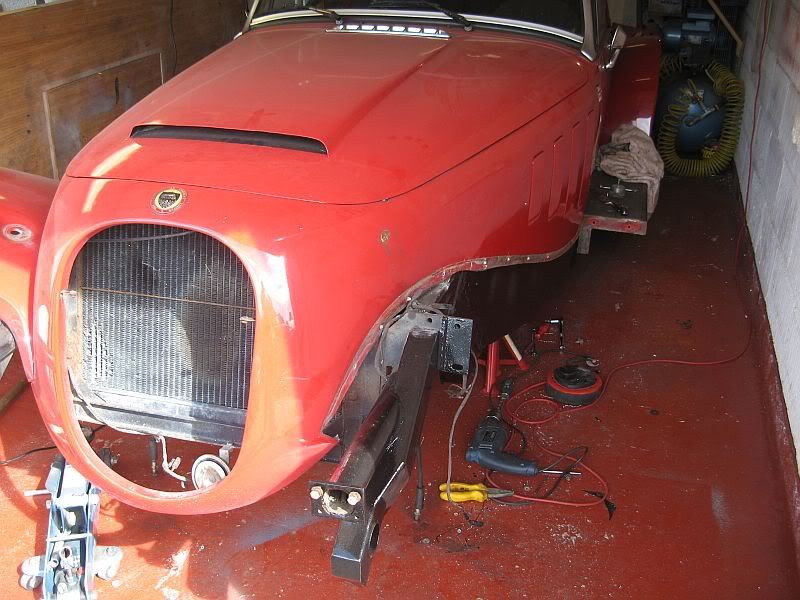
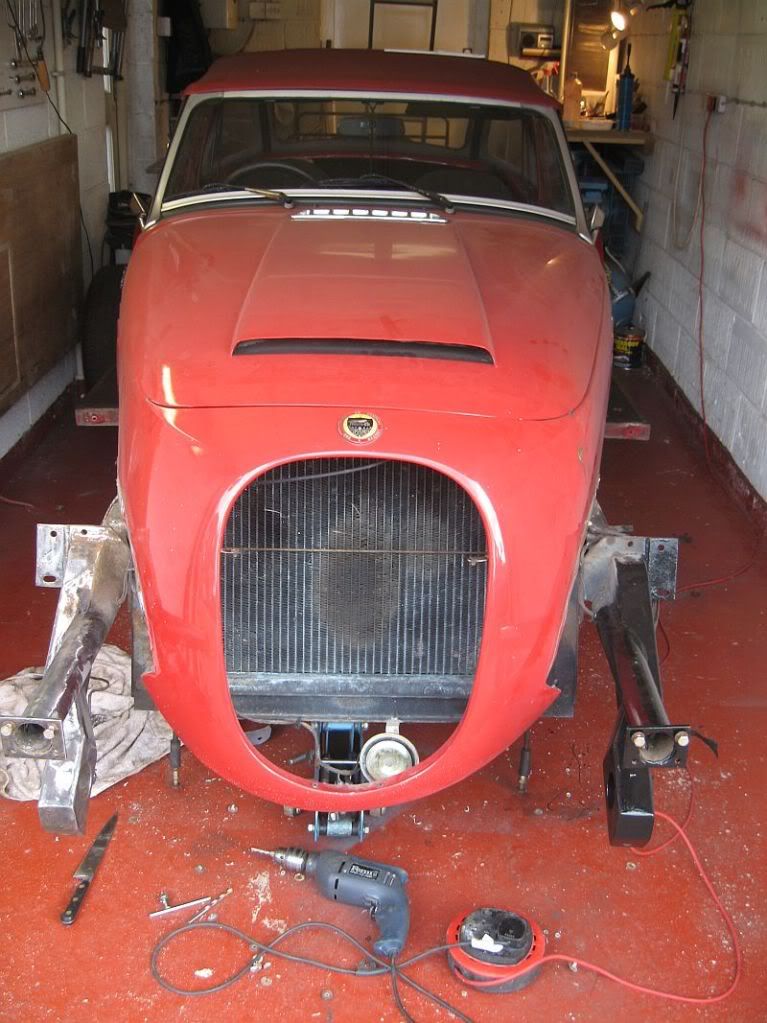
The wings came off far easier that I imagined only 2 bolts and around 10 rivets, the ones inside the grill area were a little difficult to get at and one hidden behind the frame work but being ally they drilled out very easily. Once drilled a long sharp knife slide between the body and the wing and off it came. I shall get the rear one's off later but for now the wing went very carefully up into the loft.

Wing gone
One more wing, strange thing is that there are 2 different bolt sizes, the first wing had 10mm on to the step where as the drivers side had 8mm or BSW equivalent; maybe changes over the years.
The second wing was stuck on a bit better than the first but a little swearing and its up in the loft ready to be cleaned and sanded ready for the spraybooth.


I had already spent yesterday with the rotary wire brush getting the underside frames cleaned up and looking for monsters, and did not expect to find this.


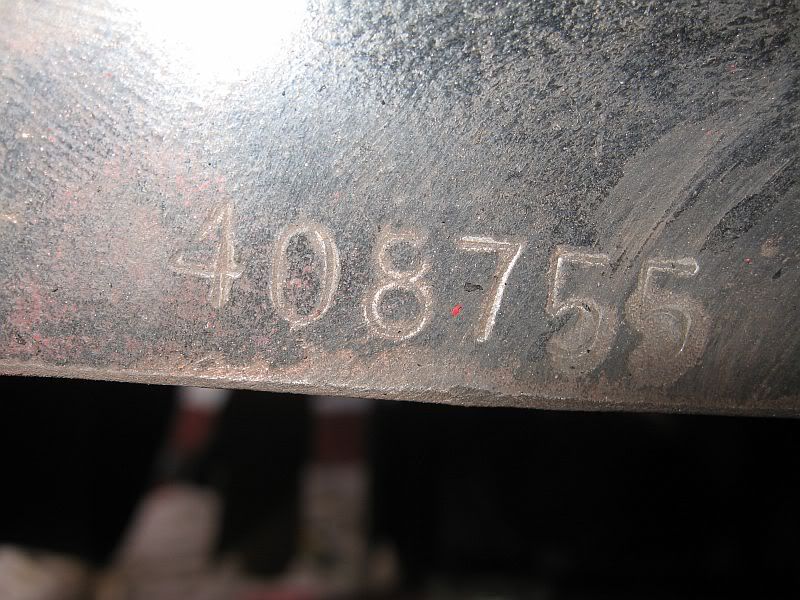
Hidden under the paint and waxoil just behind the wing support bracket on the pass side, so now I know my chassis number or so I assume that is what it is.
I have got most of the waxoil of the sides and only found three monsters and they are all on the pass side. On reading the garage history I got with the car it mentioned a welding job on the car and it seems that it is in or around the same place but on the drivers side about 6" behind where the chassis bush holes are. I only have a stick welder so next time home I shall be looking for a MIG and get these holes welded up before the waxoil injection.
Well that's all I have managed this time home, get the early flight to Heathrow tomorrow for another 2 or hopefully 3 weeks, my wife is already talking about taking some more time of when I get home to climb another bloody mountain, so I am going to get her a boiler suit instead. That will soon put her off taking leave.
Paul