
Home again and back to work.
First job yesterday was to get the rocker covers to the powder coater's and today £30 lighter; I picked them up, and boy do they look nice.
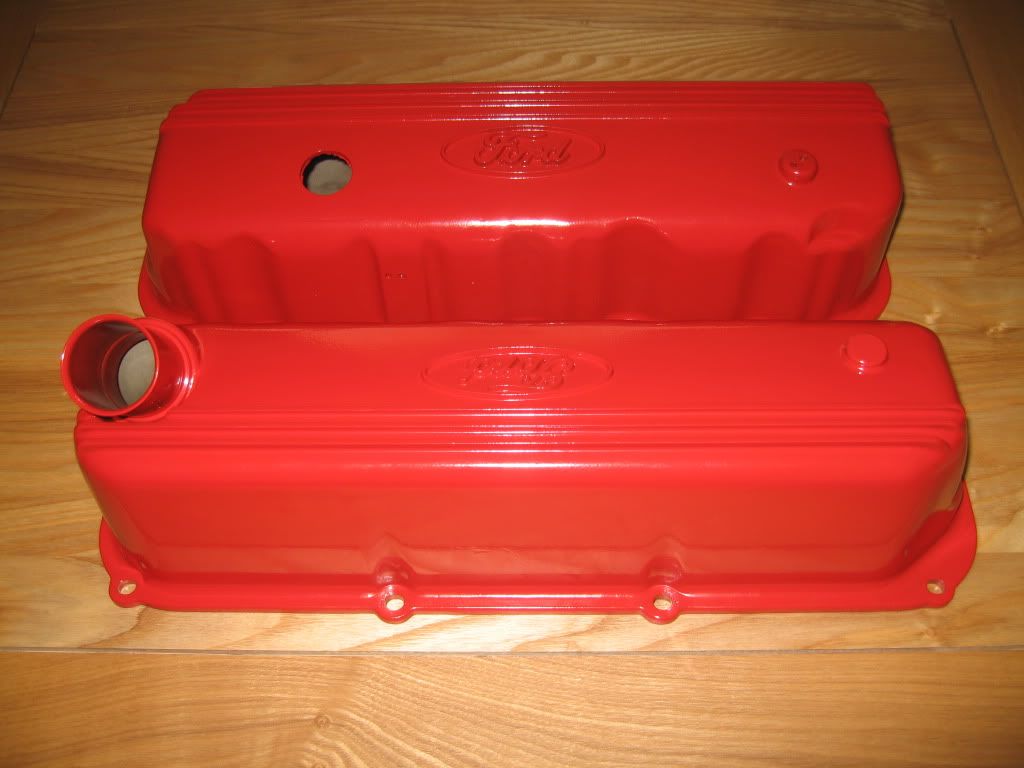
I plan to either sand off the raised Ford and straight lines and polish or paint them black as highlight, a small job for the future.
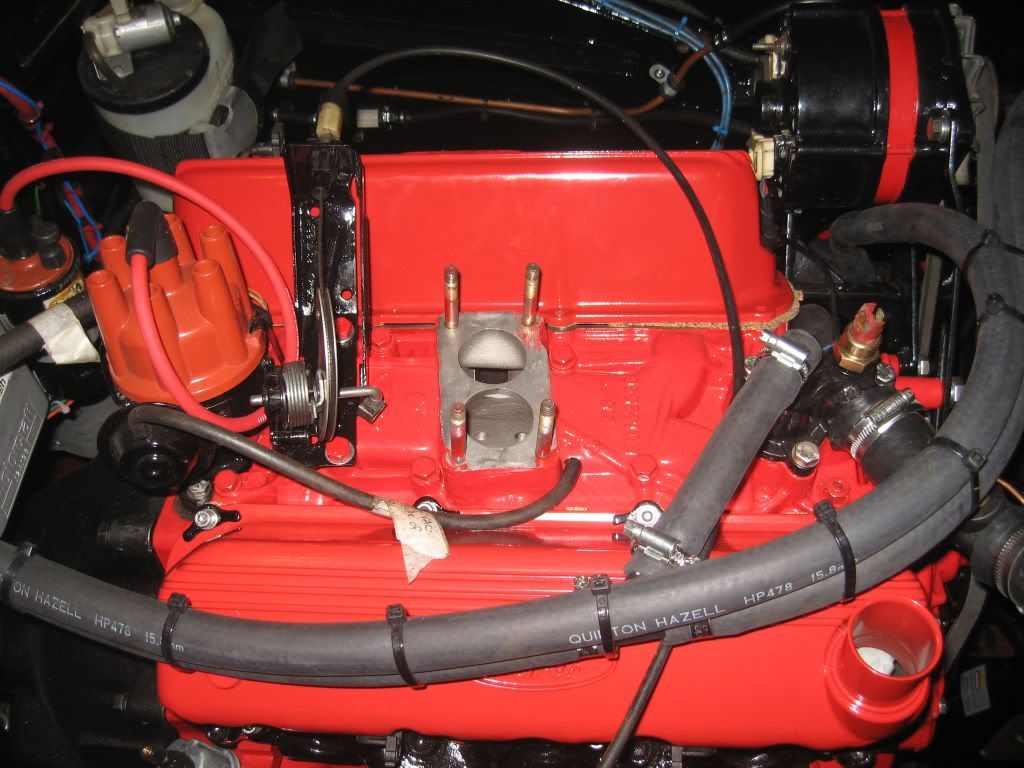
I have re-fitted the the deflectors inside and the lead clips on the outside and tried to fit them, the reason for fitting is mostly to stop any dirt getting into the rockers. Unfortunately I have come across a small problem with the cover next to the alternator, it don't fit. The problem is the alternator power plug hitting the cover, I only need an extra 5mm or so which I may get by slackening off the bracket attached to the head bolt, the bracket has a slot hole and I may have a bit more play on it, if not I shall extend the slot and maybe gain the few mill I need.
When I started the suspension I thought that was going to be the difficult bit but no, when I worked on the engine / gearbox I thought that was going to be the difficult bit but no. So what is the difficult bit, taking out the damn carpet from the tunnel that is the most difficult bit of the whole restoration, (well so far anyway).
The interior is going to be the last stage of the restoration but because of the new extension to the gearbox I need to cut a new gear stick hole and blank off the old hole, so the tunnel carpet has to be removed for access. Easier said than done.
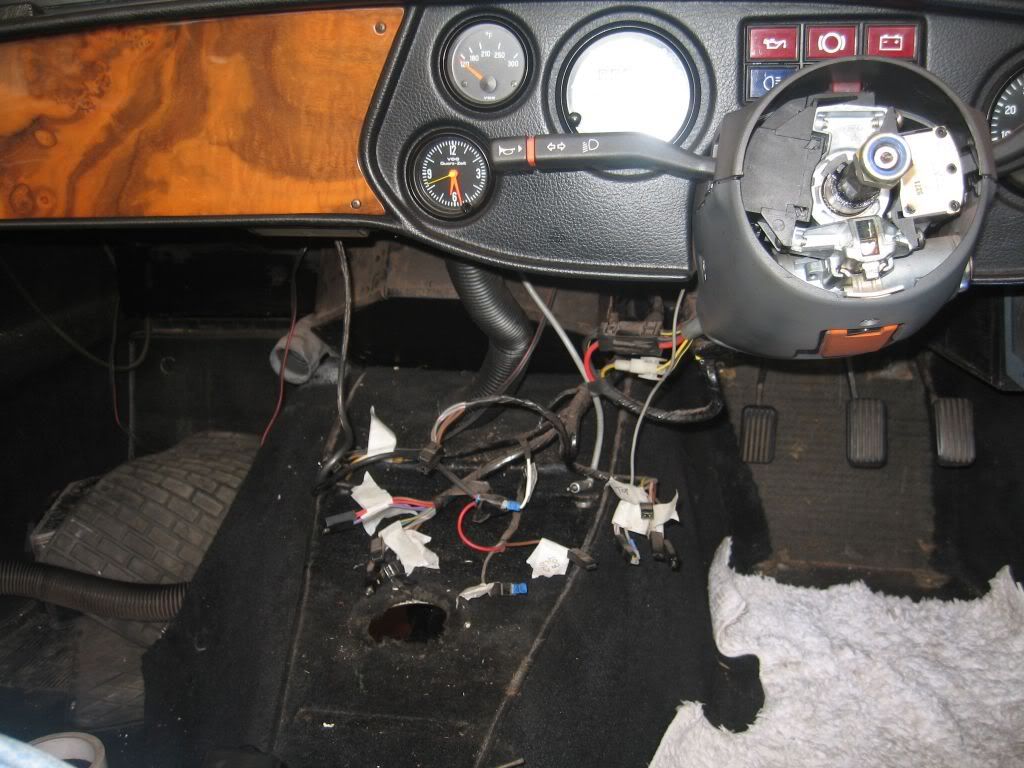
First to go was the steering wheel and radio, unfortunately I did not have the radio removal tool so a little brute force and a whole load of ignorance and out it came. It was the original radio so no loss as I am hoping to have a Radio / Sat Nav system.
Next came the center console; this was a bit of a work up as well, the upper bolts are mounted through the top frame and lower bolts go through rivnuts in the tunnel to the underside of the car. These took quite a bit of work to remove as the bolt heads are Phillips and are a bit inaccessible, fortunately the bolts were stainless so I was able to get under the car and clean the underseal from the threads and one of them came out relatively easy whereas the other would not budge. So out with the small cut off saw and no more rivnut, I shall replace both with hex head stainless bolts to make re-fitting easier. I unplugged and labeled all of the wiring and removed the clips keeping the vent operating cables in place, only now could the center console be removed. Believe me this is quite a work up and not for the faint hearted, you also need to be a contortionist to get your head under there to see what you are doing, not easy.
With all this work done you would think the carpet would just pull out, ha ha nothing as easy as that.
Next to come out is the heater
You maybe able to see the heater base jammed down into the carpet and it is a very very tight fit. The heater is held in place by 2 bolted brackets at the top and a bracket right behind, plus 2 very tight hoses and not forgetting the fan intake box sticking through into the engine bay. Not a lot really except it took over 3 hours of swearing to get it out.
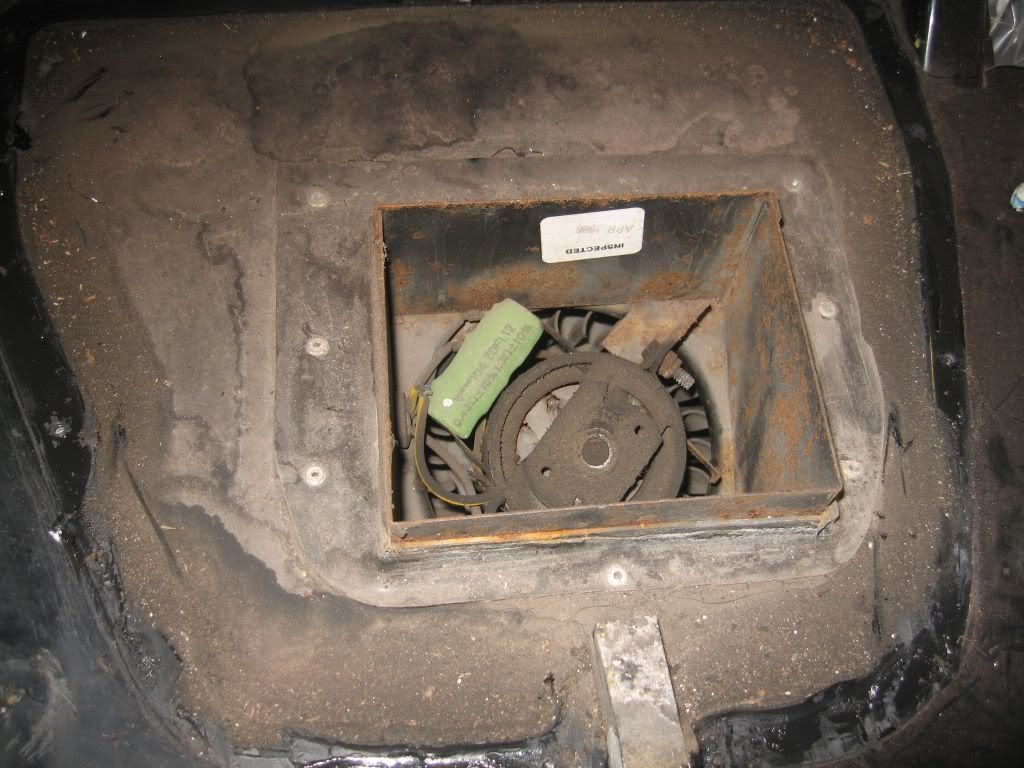
This is the fan with the surround removed, years of sucking dirt has made it rather cruddy so a bit of work and testing here.
The bolts for the upper brackets are captive and once the nuts were removed the brackets needed to be bent over to free them, the other attachments were the hoses which after 26 years refused to come off. One of these I had already changed so that was relatively easy, the other which is attached to the water valve needed to be cut for removal.
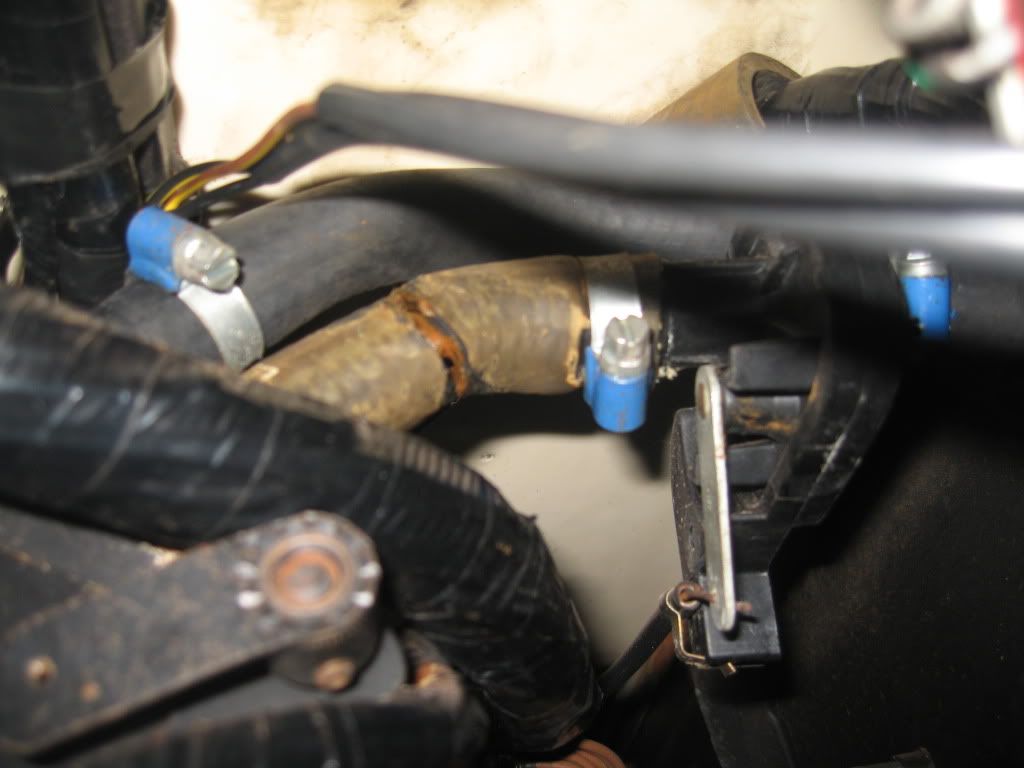
This shot was taken right at the back of the heater and you can see the cut I have made and the water valve with its open / close arm. Even with the hose disconnected the heater still refused to move as it needed to be pushed back and up to then pull down the fan box section protruding through, what was stopping it was a right angle bracket hidden under the soundproofing at the back, once I pulled the sound proofing out the bracket came away and I managed to wiggle the heater out.
This was a major workup but gives me good access to get underneath to fit the oil pressure gauge.
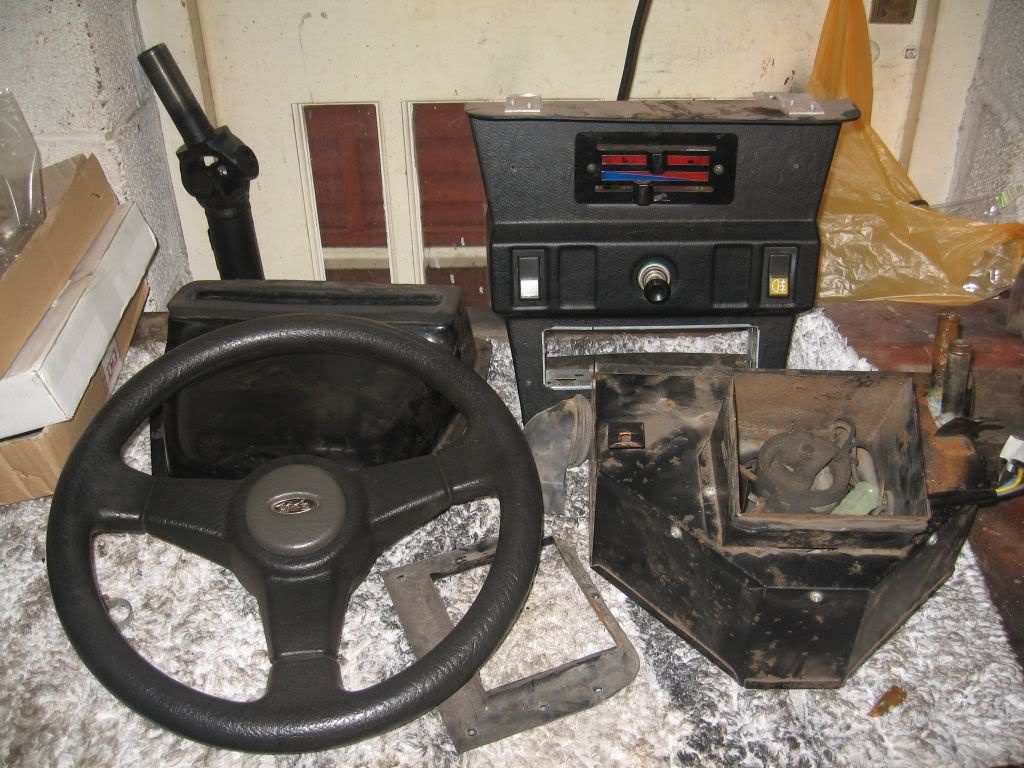
These are all the pieces removed just to get the carpet out of the way, I have taken lots of pictures of the wiring and heater mechanism so hopefully it will all go back together again.
Now that I had the carpet out of the way I could get in to cut the new hole.
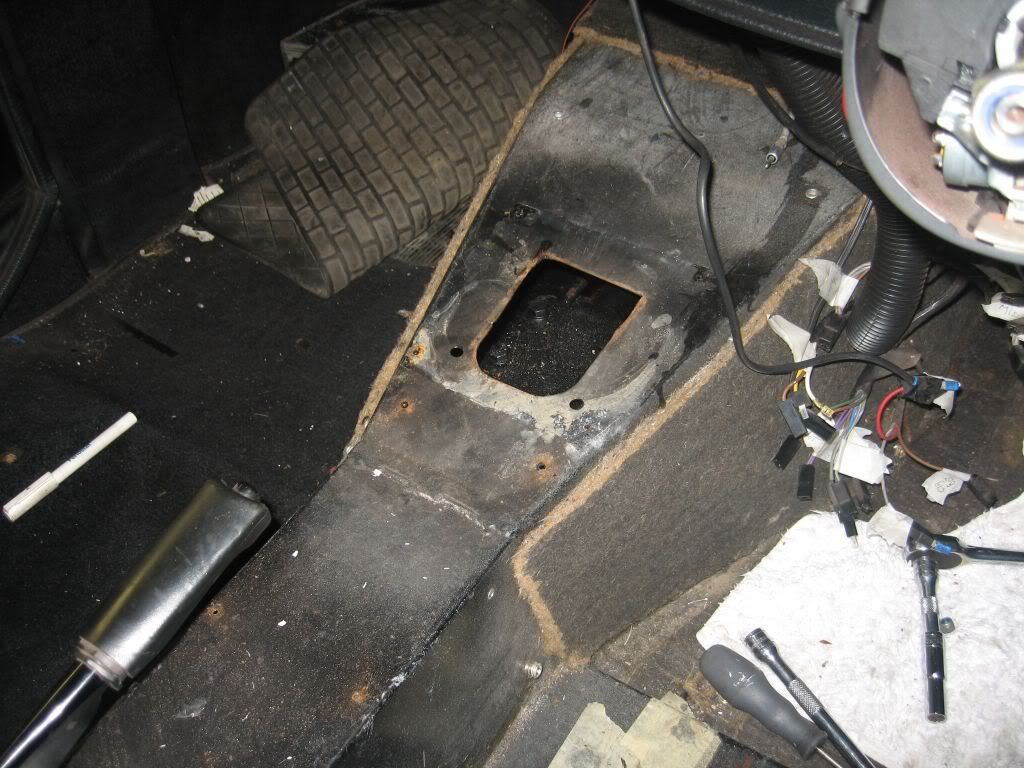
I marked the new position and cut out the steel with a grinder.
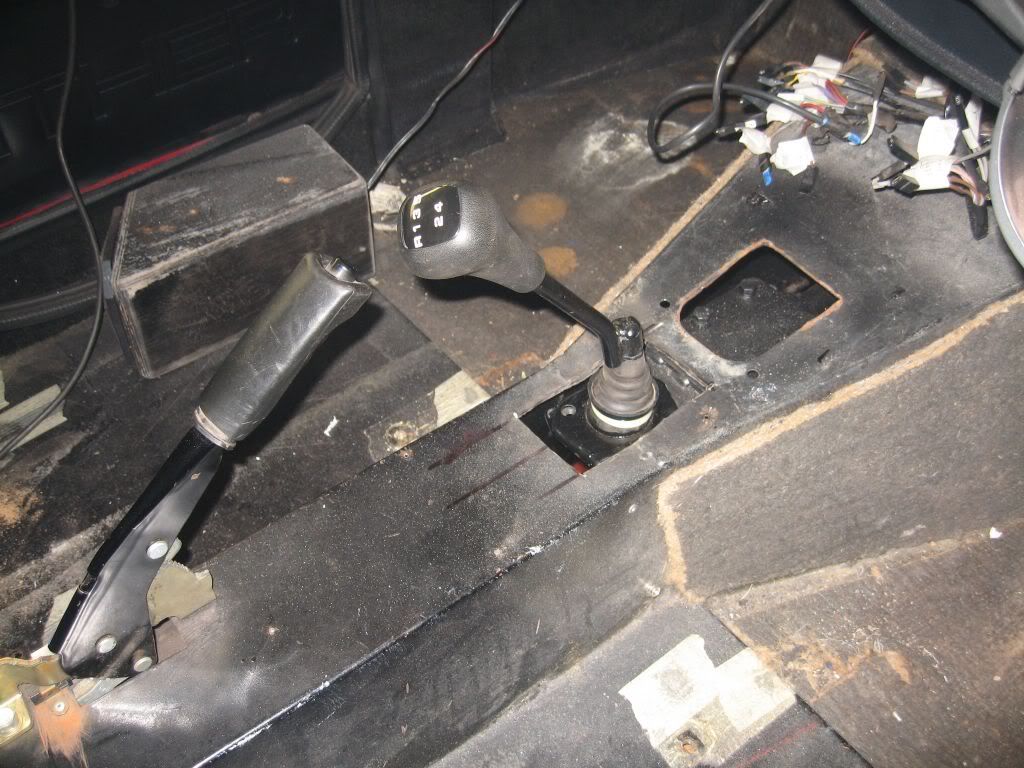
The gearstick as you can see is now to close to the handbrake, I thought this may be the case from the beginning due to the angle bent into the stick. This is easily solved by cutting out the bent and welding it back where it was manufactured, bit shorter but more sporty looking.
I have a piece of stainless to use as the cover and have decided to just rivet it in position instead of welding a plate over the hole, who knows I may have to change back to the original setup at some point.
Well that's for tomorrow
see ya Paul
No comments:
Post a Comment