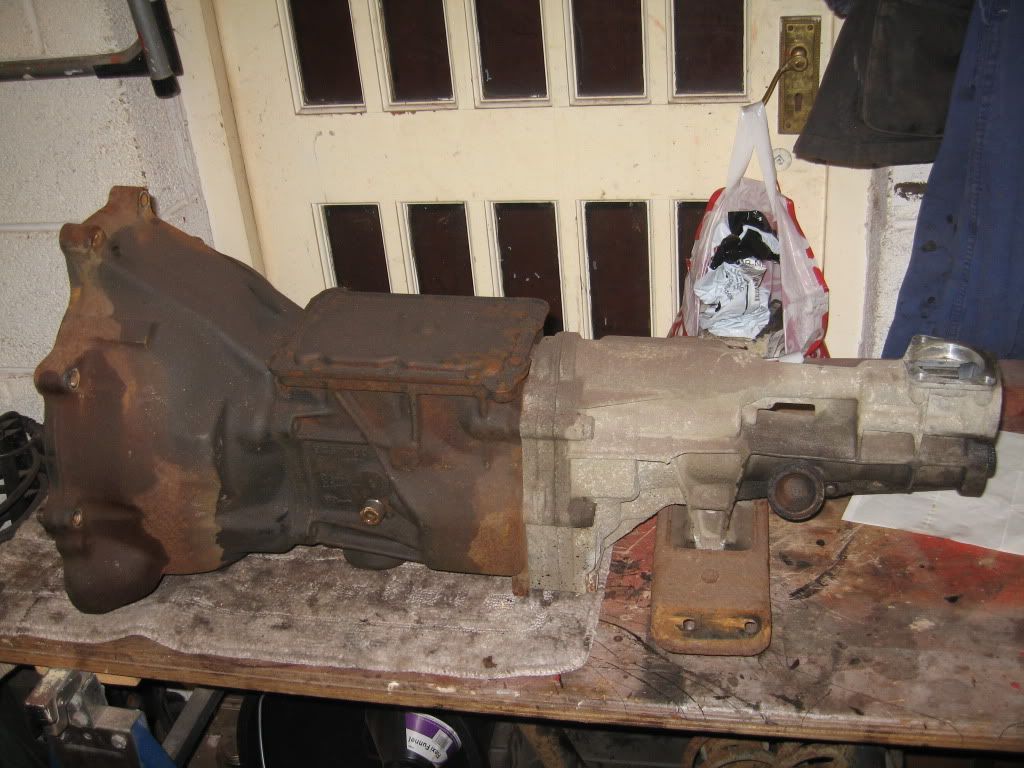
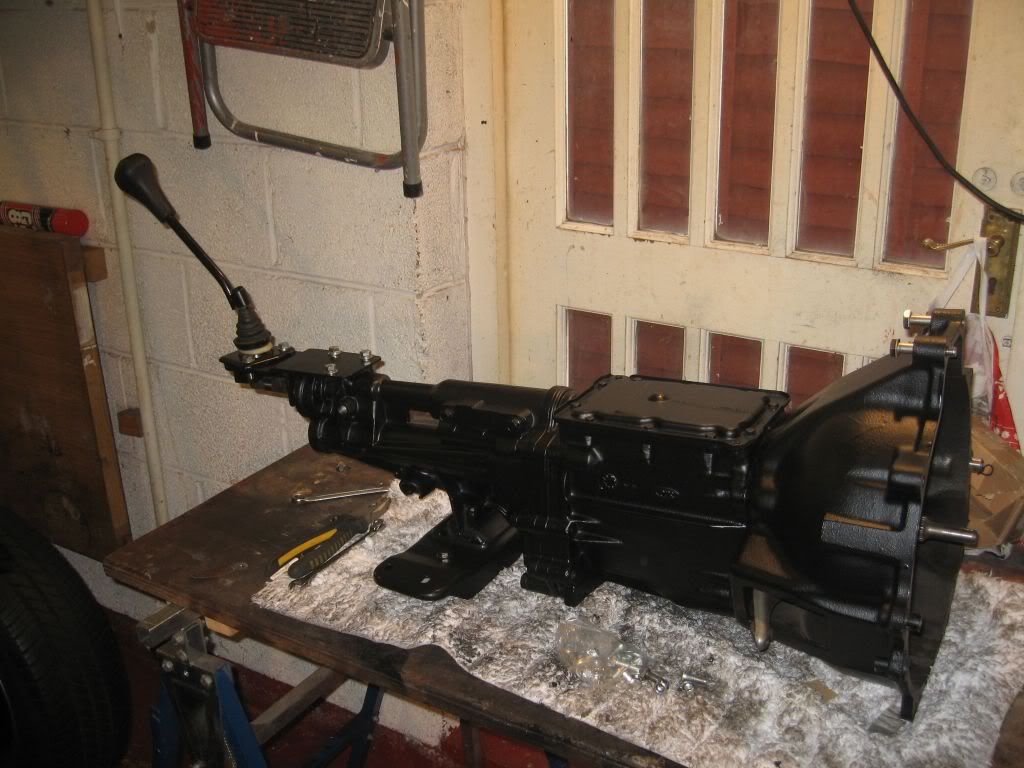
Tuesday, 12 June 2012

Fitting Exhaust & Carb

Hi
The last couple of days have been very productive and the end of the second stage is finally in sight.
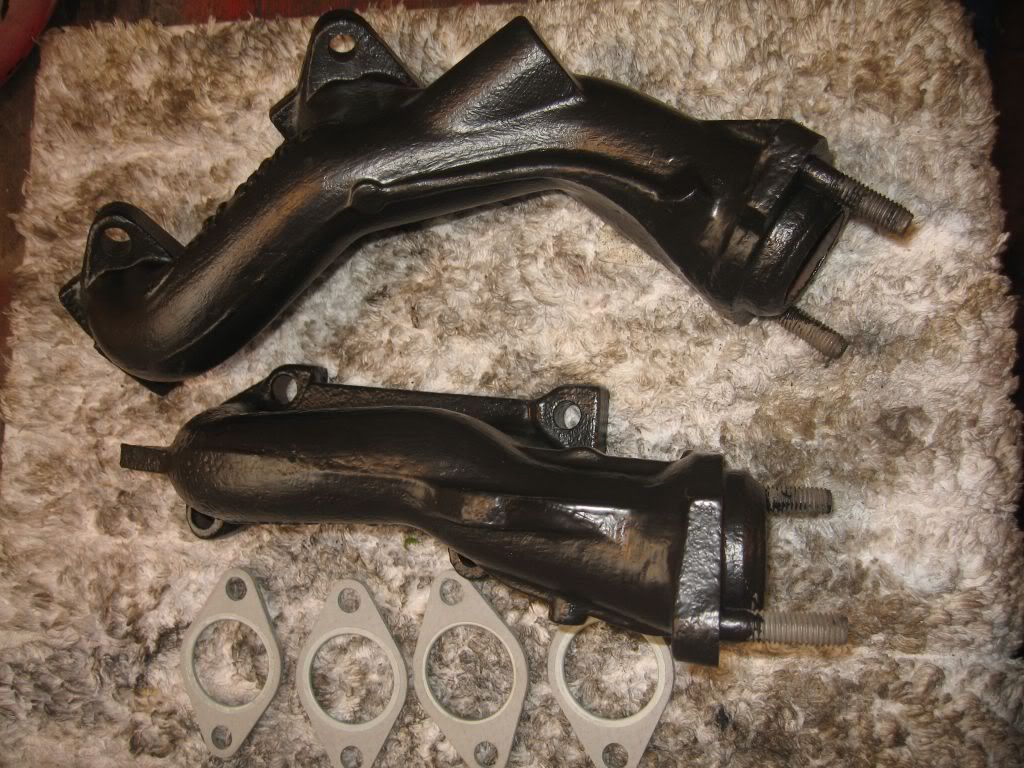
Yesterday was spent getting the underside mostly complete. I started with getting the exhaust prepped and was pleasantly surprised at how good the steel was under the surface rust, I had not really looked at them since removal I had just put the pieces in the shed. The wire brush on my angle grinder soon removed the surface rust 
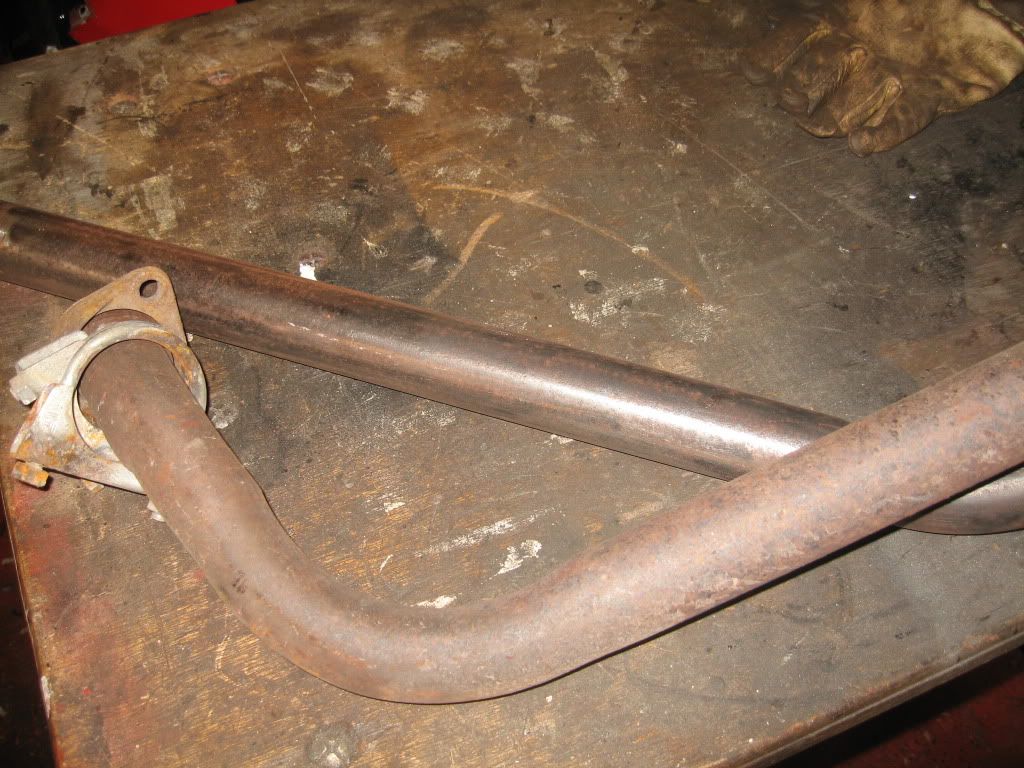
Before and after
then a coat of the same high temp paint I used on the manifolds.
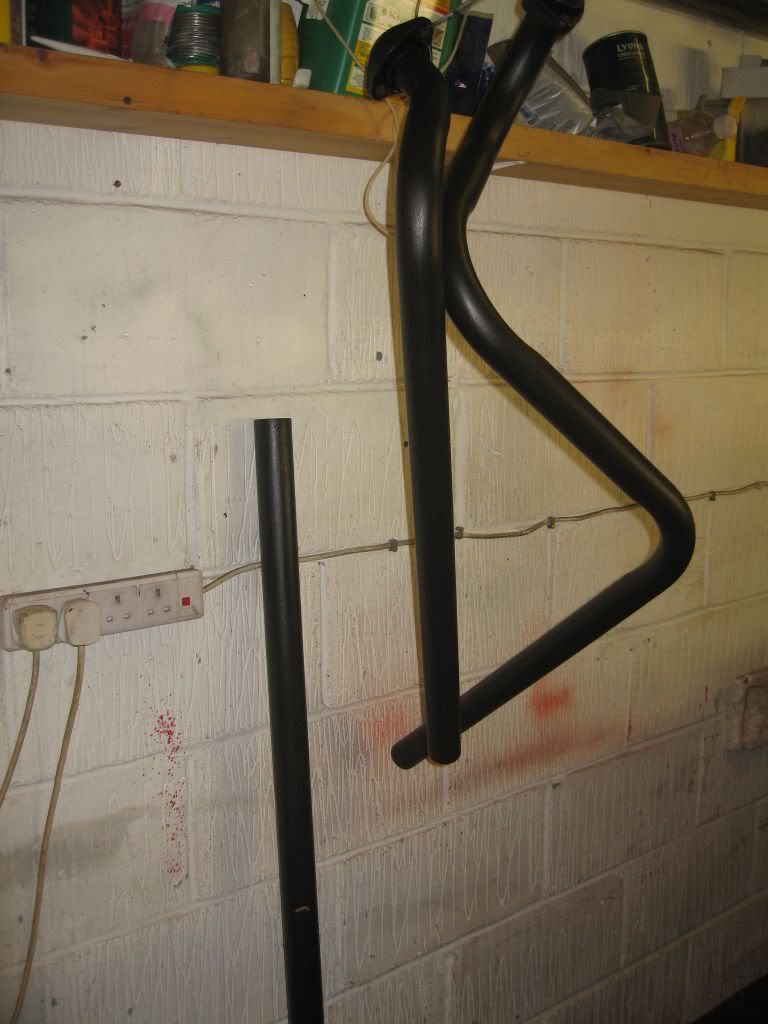
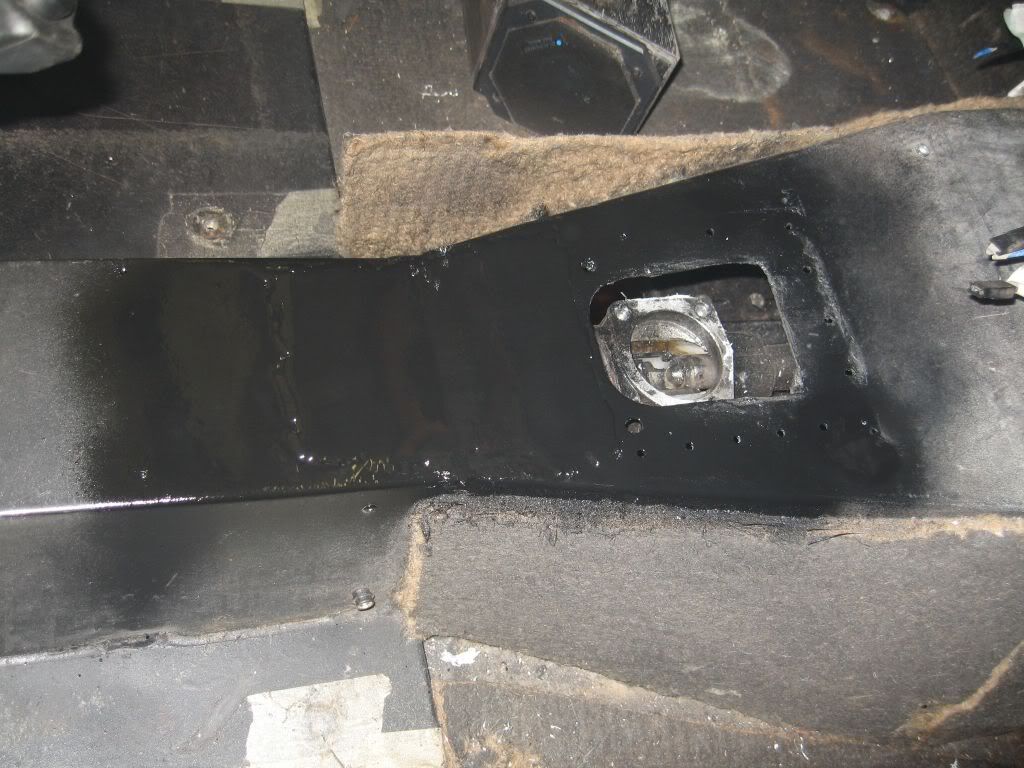
While waiting for the paint to dry I cut a blank to cover the hole I cut from the gearbox rear blanking plate, which I glued in place and fitted. The prop shaft was next, this just popped in then bolted up.
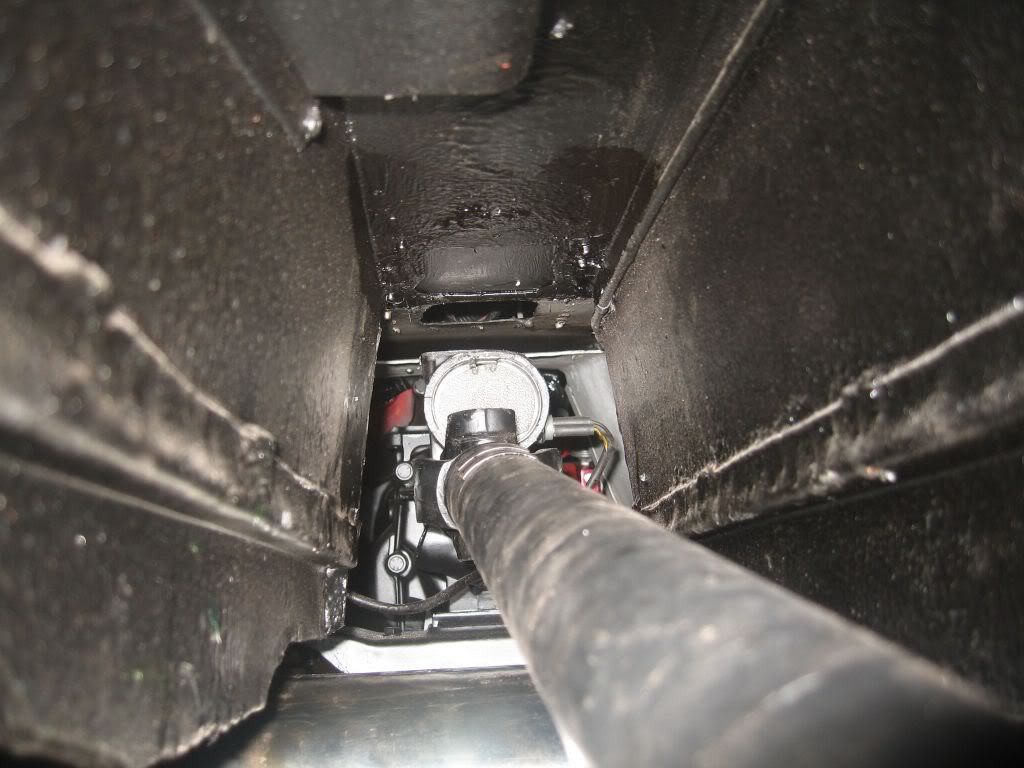
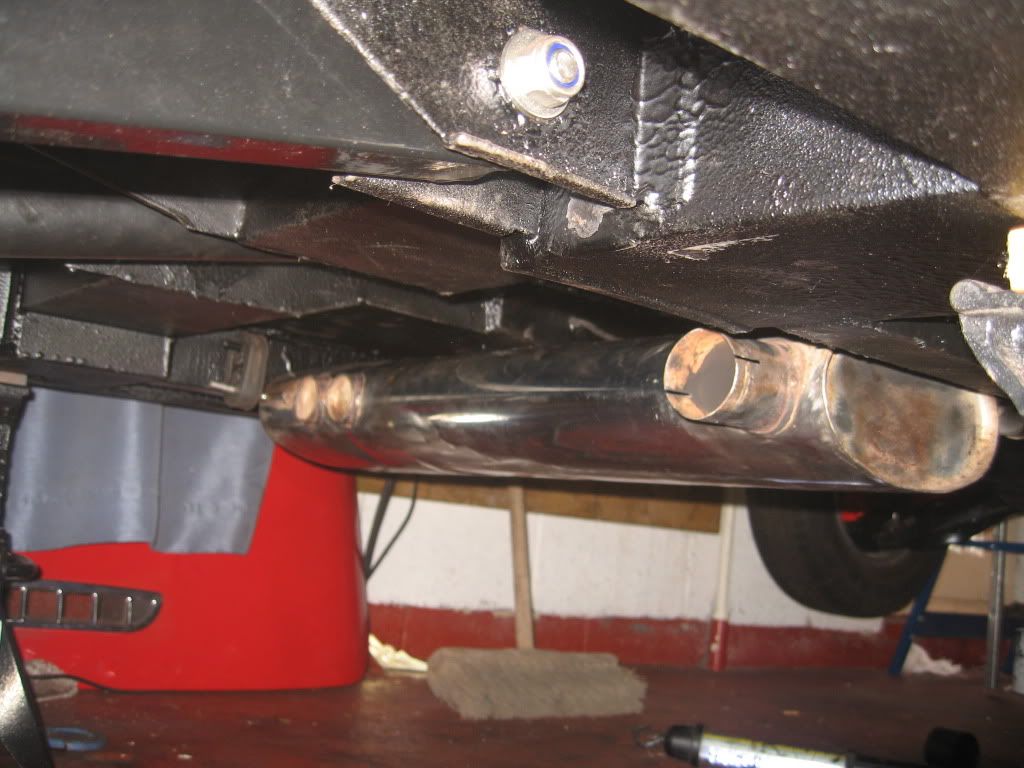
The stainless steel silencer looked a little worse for wear as it had made contact with quite a few speed bumps over the years but came up quite well with the rotary wire brush and this got hung on its hangers.
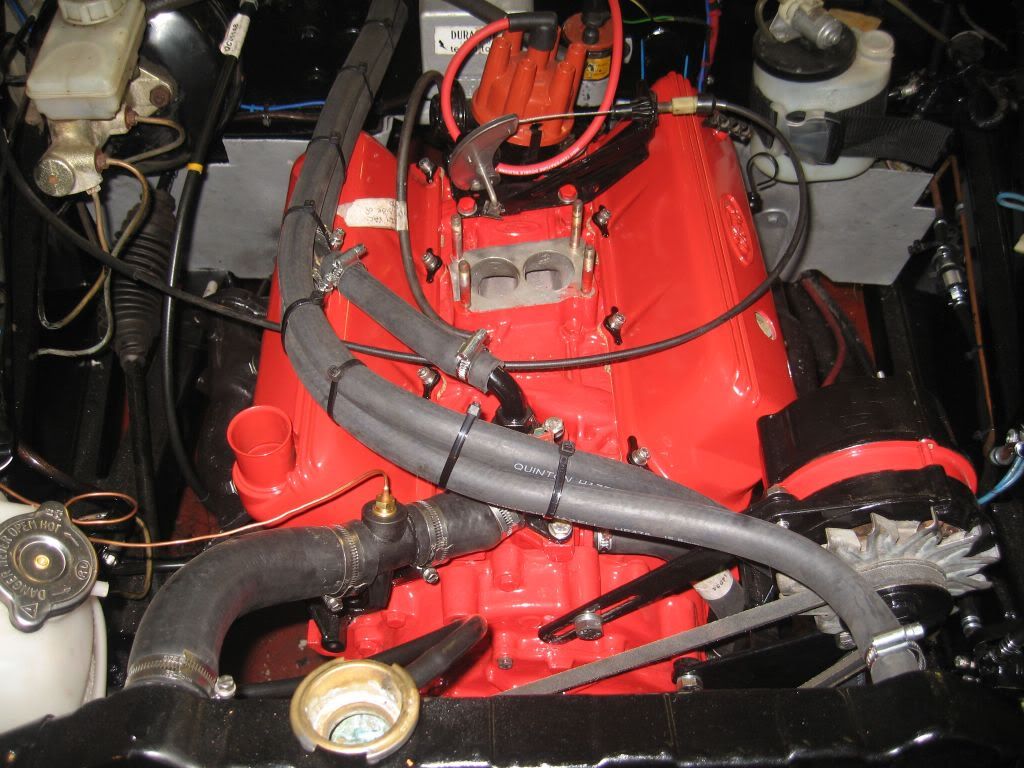
This really is quick drying paint, after only half an hour the pipes were ready to fit, I used Holts exhaust paste for the connections and tapped the pipes into the tube connectors.
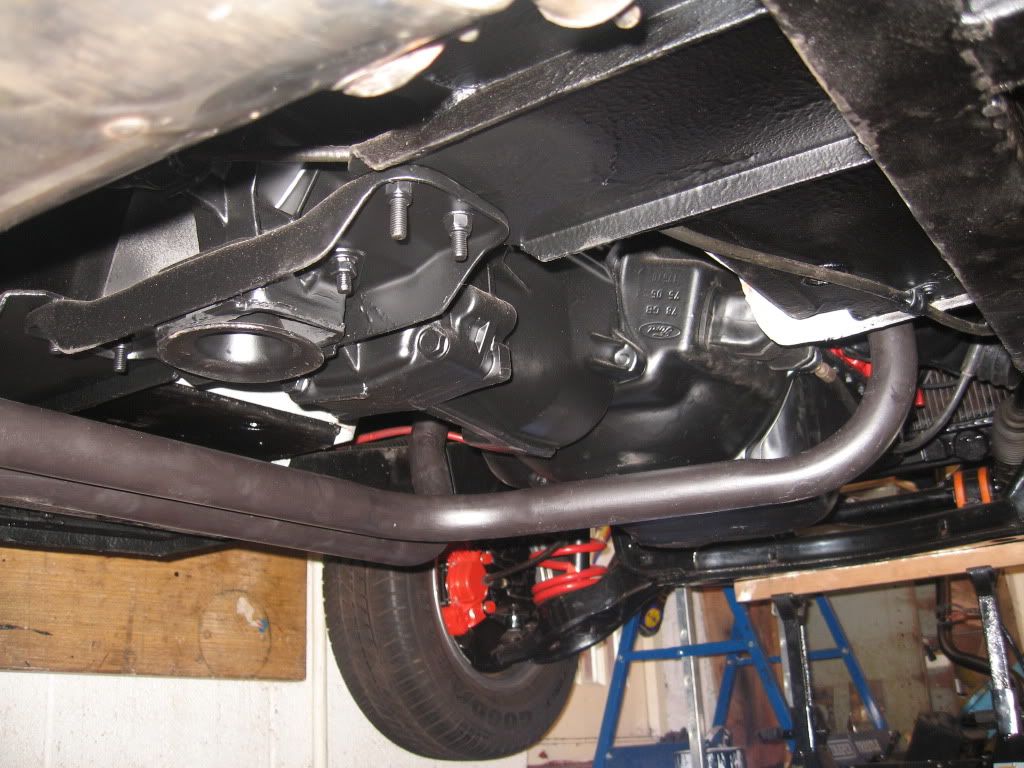
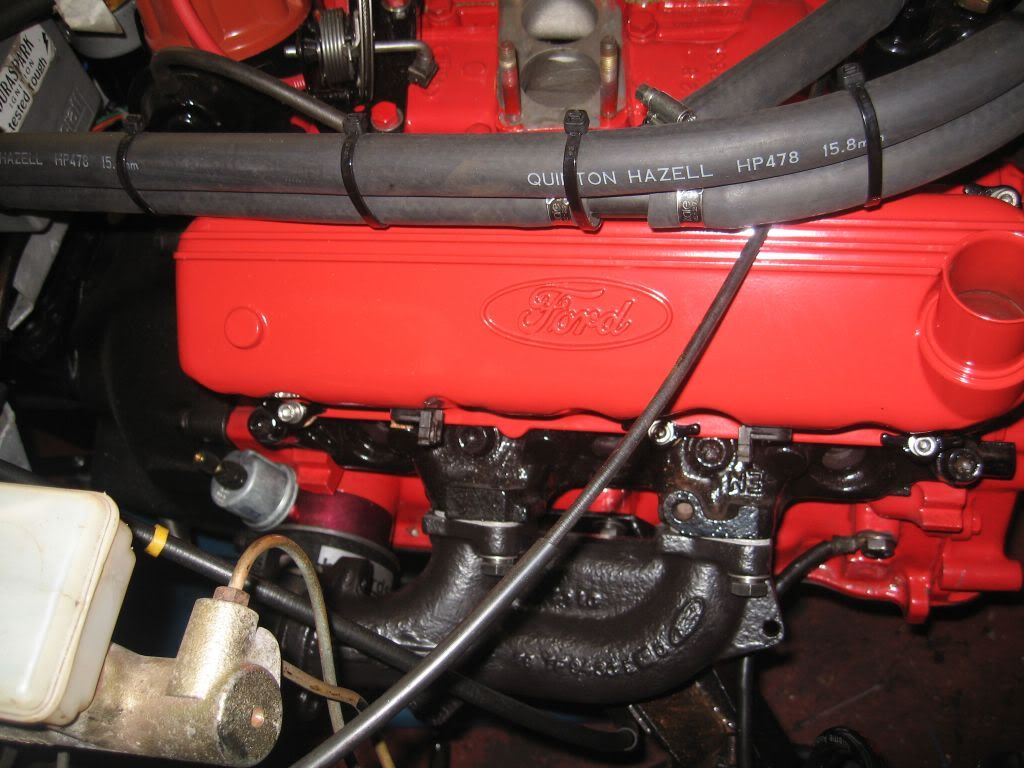
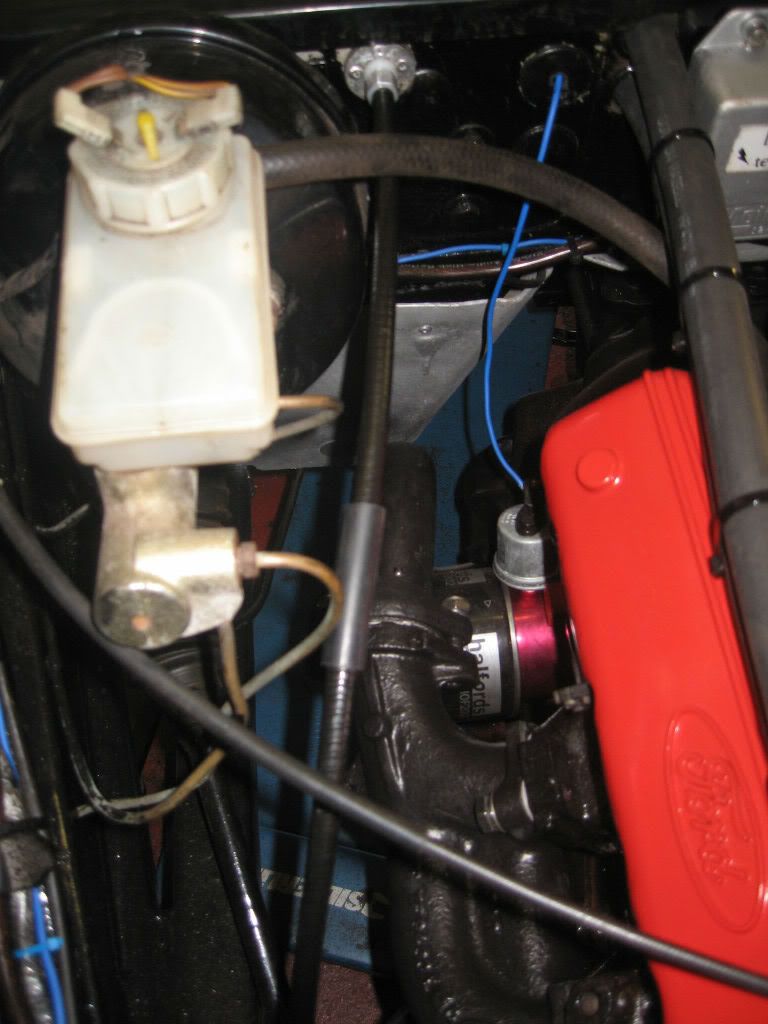
You can also see in this photo the clutch cable is fitted, I had altered the connection to take the Granada clutch cable I had bought but it was easy enough to change it back. I ordered the new cable from Bruno spares and it arrived the next day, only a 5 minute job to fit now that I know how its done.
The paint needs touching up but all done, I shall keep the old one as the emergency spare as there is still a good few miles in it.
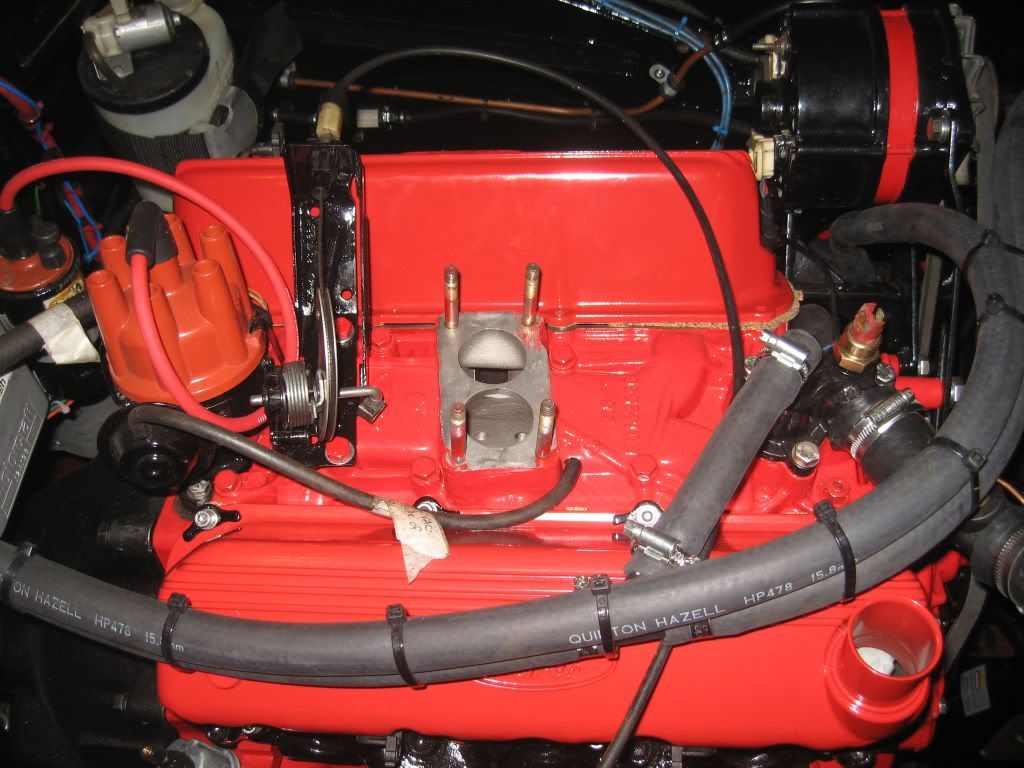
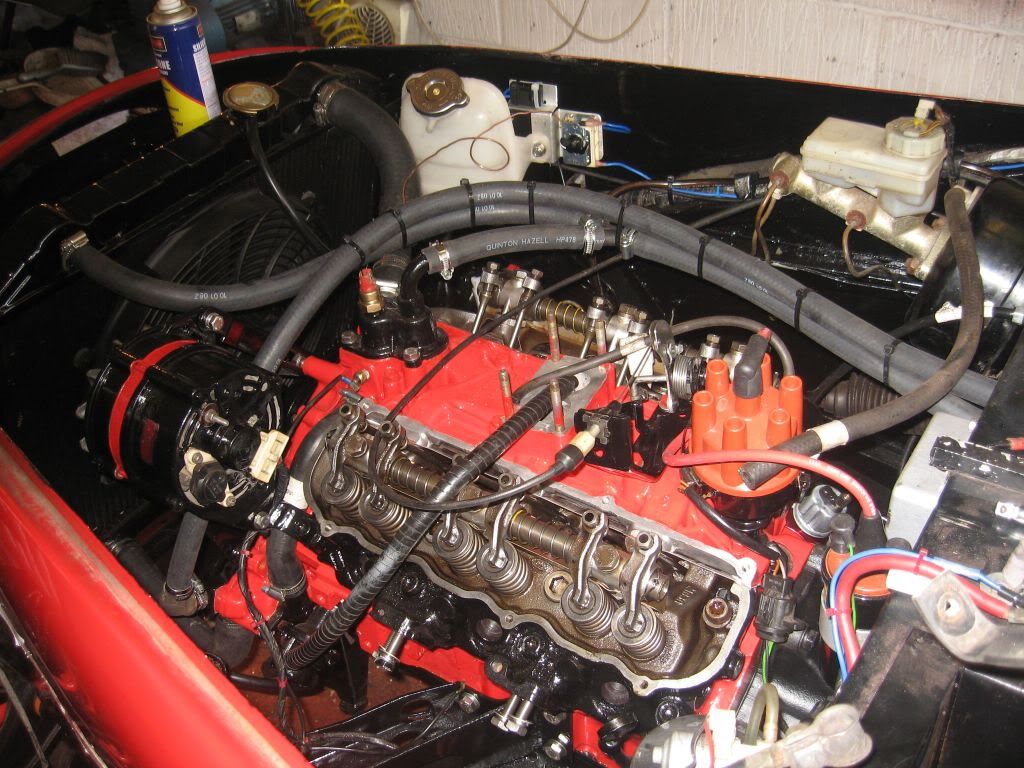
Now for the bit I have been waiting for the carburetor, this is my new one from John who has set it up for the Cologne. 
I started with the emissions plate and heat spacer then the gaskets and hoses.
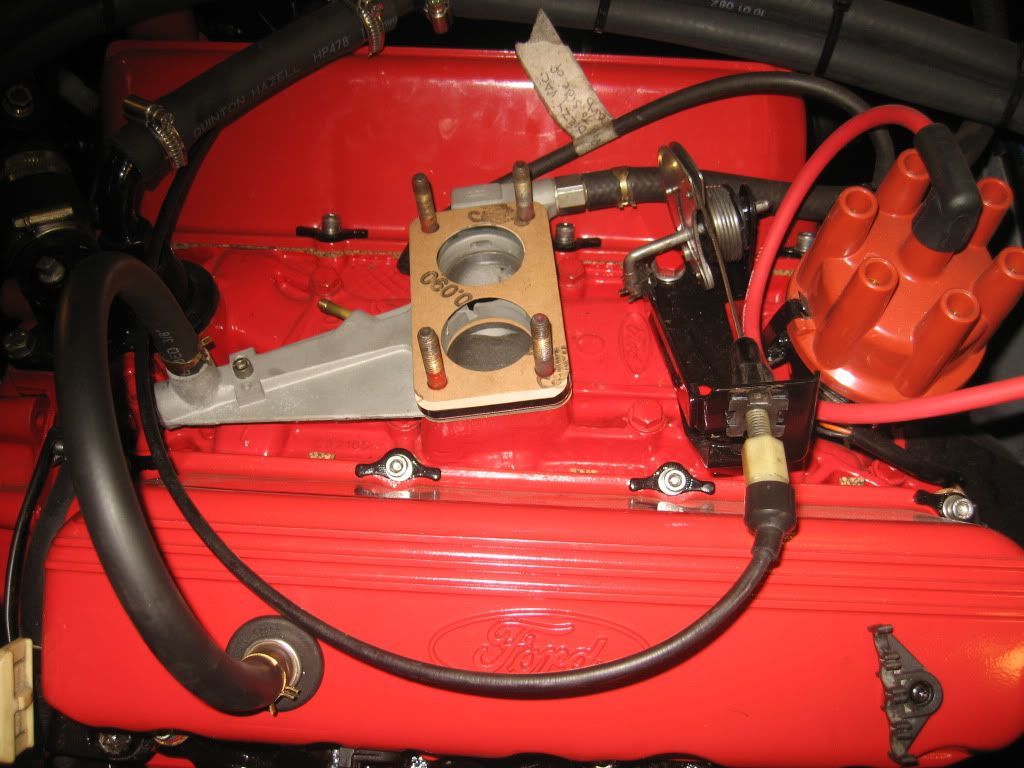
The far right top stud had to be cut which was done after this shot was taken as it impedes on part of the carb. The throttle mech was removed and the carb fitted in position
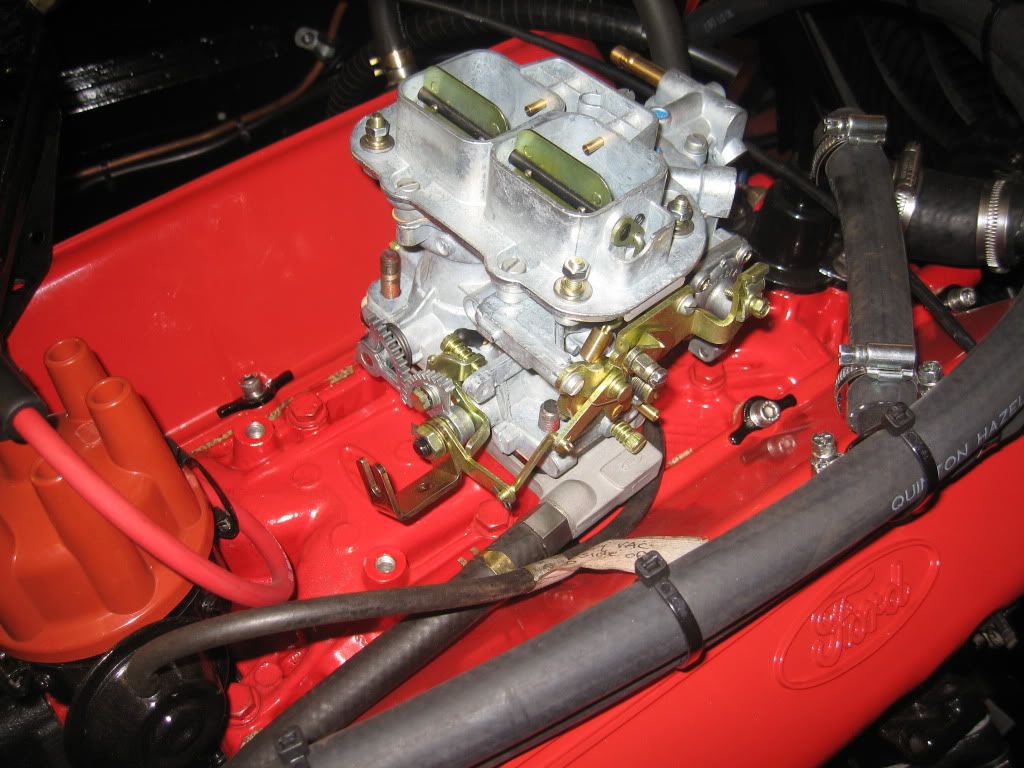
then the throttle mech replaced and the arm mech was positioned in its slot.
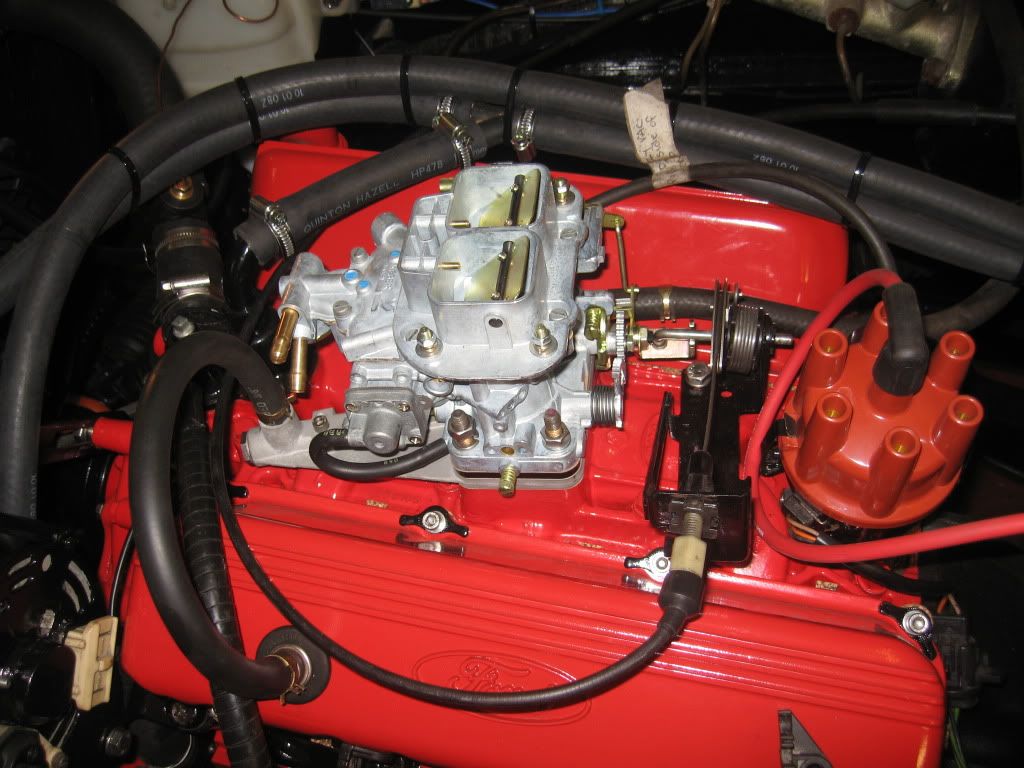
Once happy it was in the correct position I bolted everything down then got to the fuel pipes.
The original carb had no return fuel line and this one does, there is a tee piece supplied with the carb for this eventuality. There was also a fuel filter supplied, a large ugly plastic one which I did not fit, I already have a good quality glass filter fitted which should do the job if 2 are required I shall get a better inline one only 2 minutes to fit. The tee piece was fitted after the
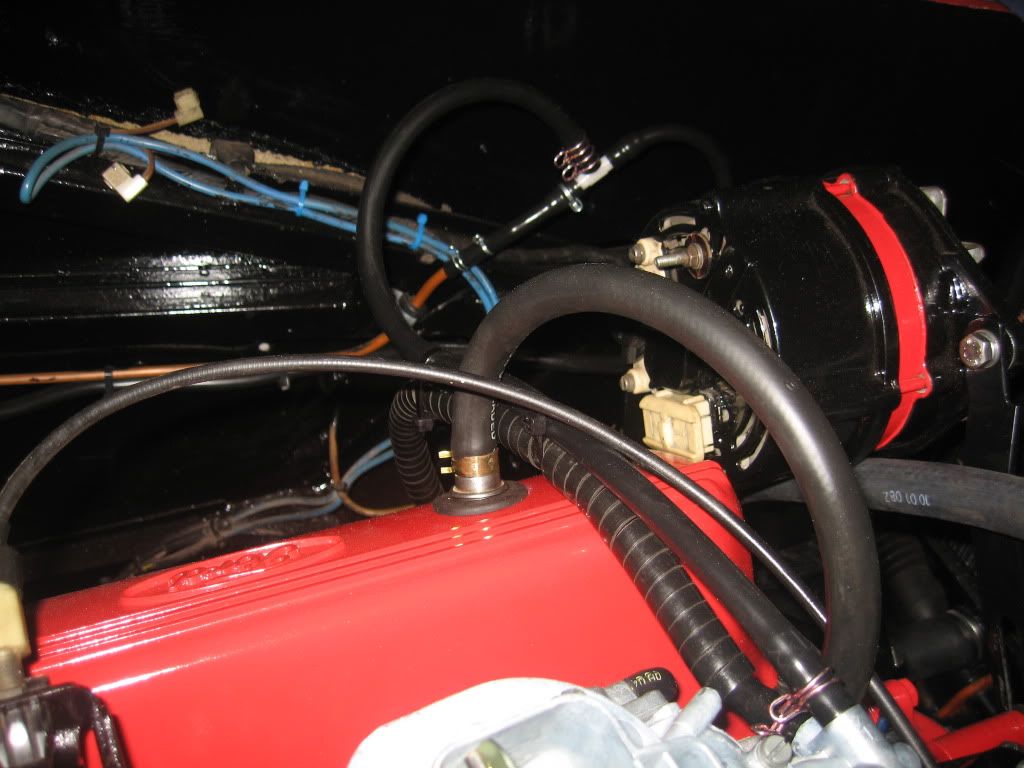
pressure return valve. You can see the tee at the back of the photo and the fuel lines in and out of the carb.
That was the carb fitted and just the manual choke to do.

While working on the choke under the dash I decided to also get the oil pressure gauge fitted, this proved to be far easier than I thought it would be. The gauge and the choke were to be fitted to the left of the steering wheel the gauge in the clock hole and the choke beside it, unfortunately this side was very flimsy as no bracket was fitted unlike the right hand side so a bracket was made first out of a piece of steel and riveted it in place
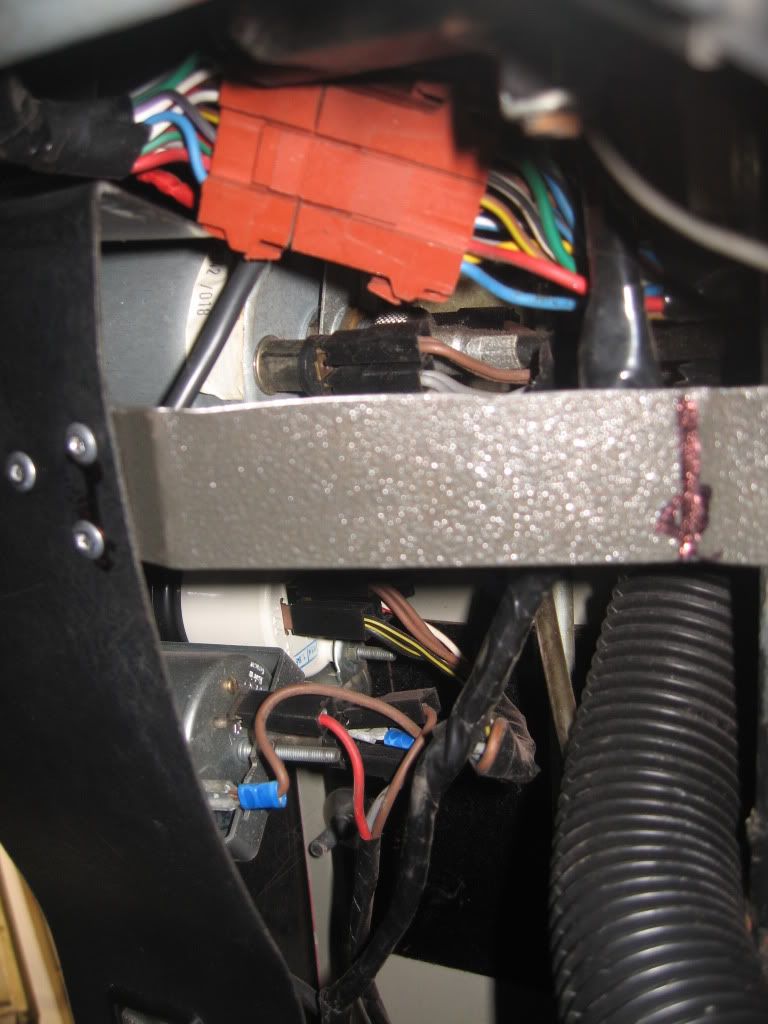
The power for the gauge came from the water temp gauge fitted just above which made it very convenient, I first removed the clock and replugged the wires in so I don't forget where they go, this will be fitted elsewhere. The bracket for the temp gauge was removed then I pulled it out to reveal the wires, it was a simple job then of fitting branch connectors from the temp power and earth to the oil pressure sensor and light then a wire from the sender to the gauge.
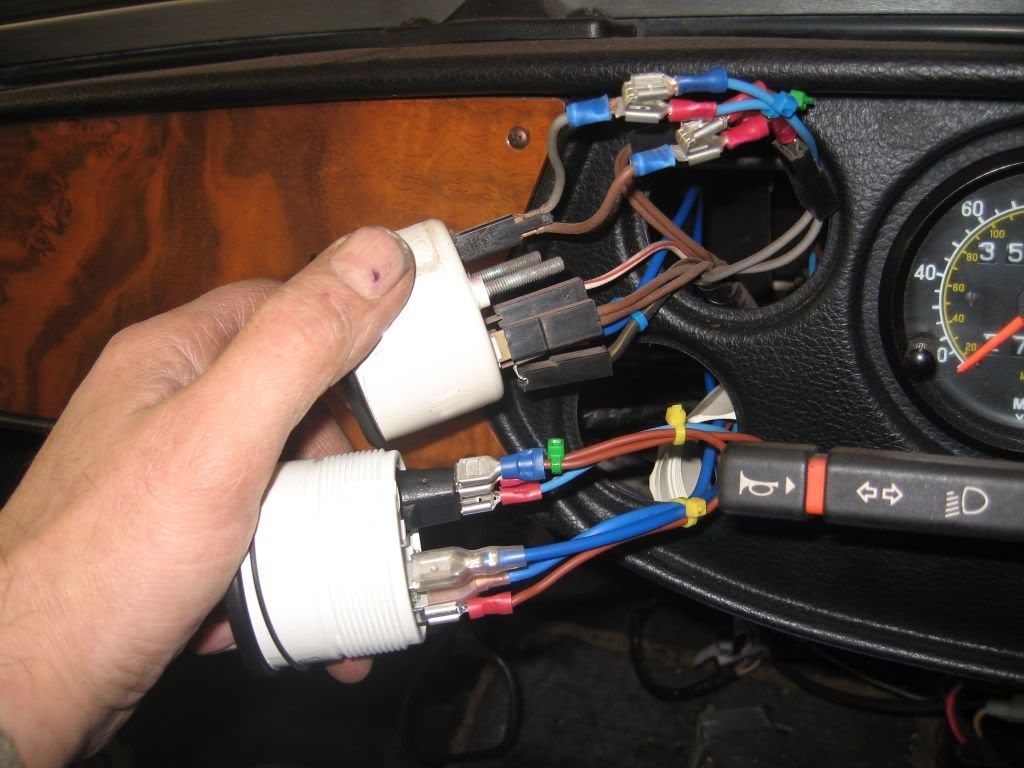
I taped up all of the bare connectors and put everything back.
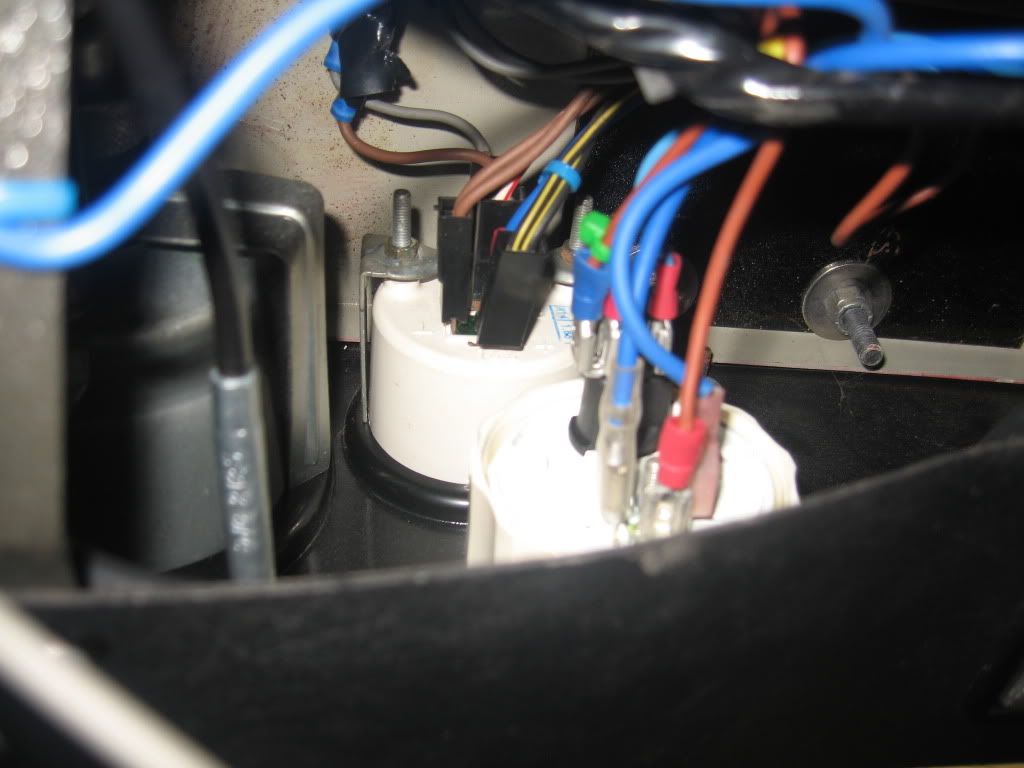
A view from under the dash.
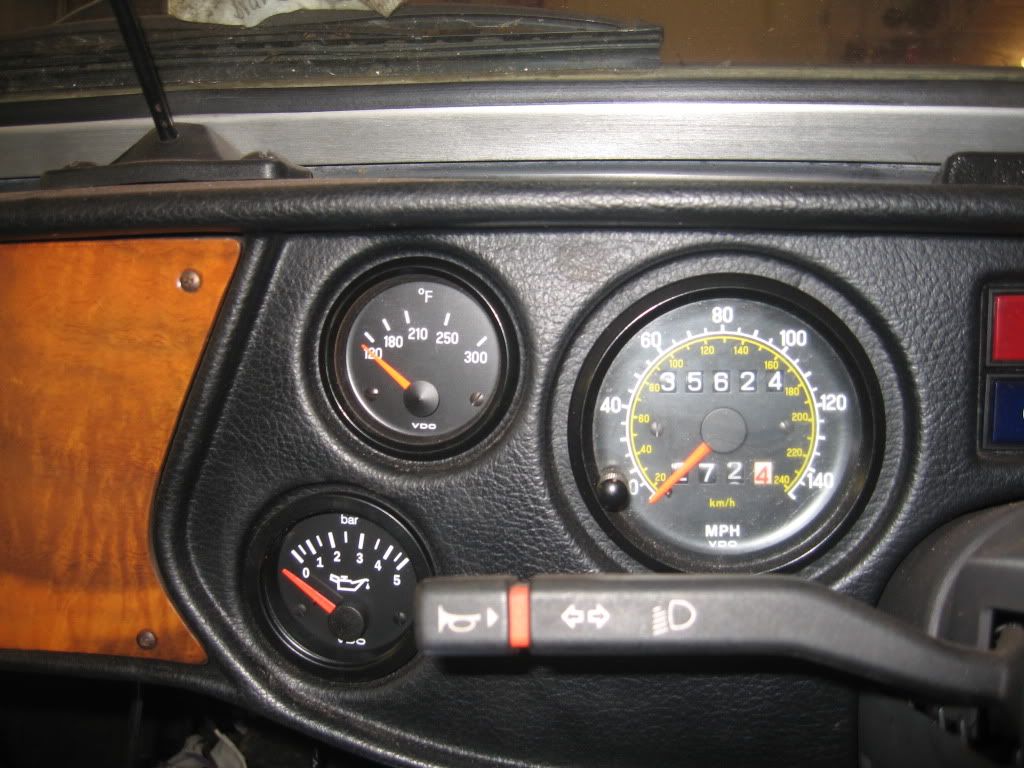
And a view from the front, I shall be fitting chrome bezels when I get around to sorting out the cabin. It was very disappointing that the gearbox extension did not fit as this throws my whole plans for the center console radio space out of the window. Re-design needed.
Next came the choke cable. 
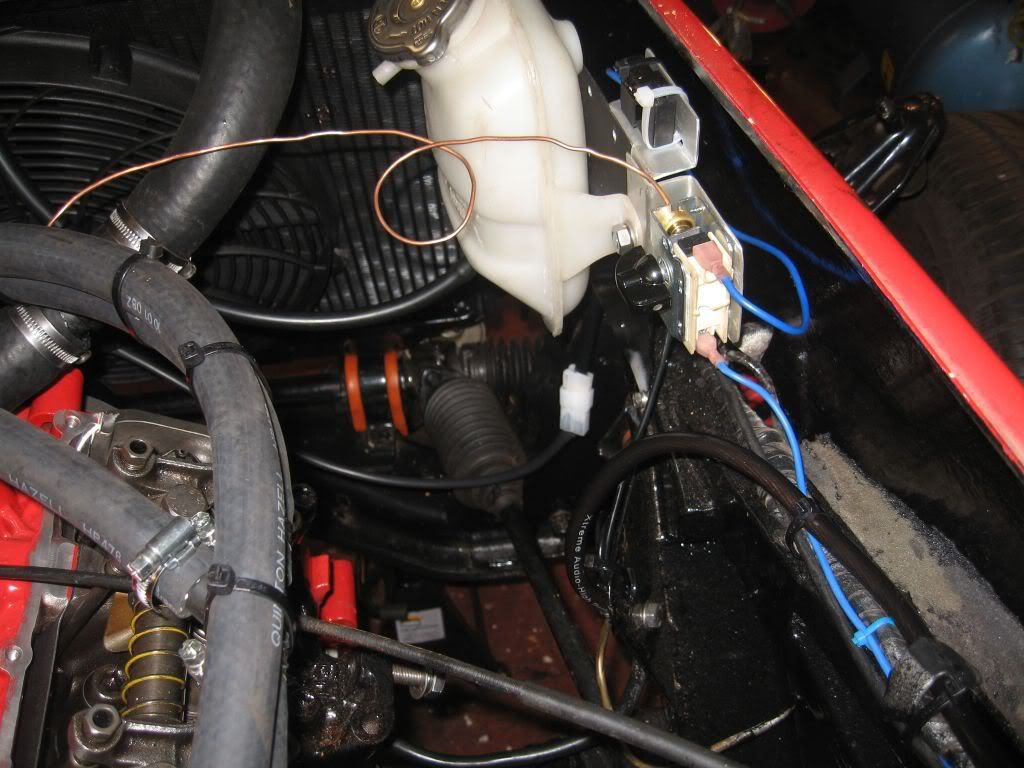
I had removed a grommet and punched out a hole for the oil pressure sender cable to go through (you can see this on the clutch cable photo)  and used this to take the choke cable, a hole was drilled through the dash and the cable threaded through and the pull handle nut tightened with a backing plate fitted.
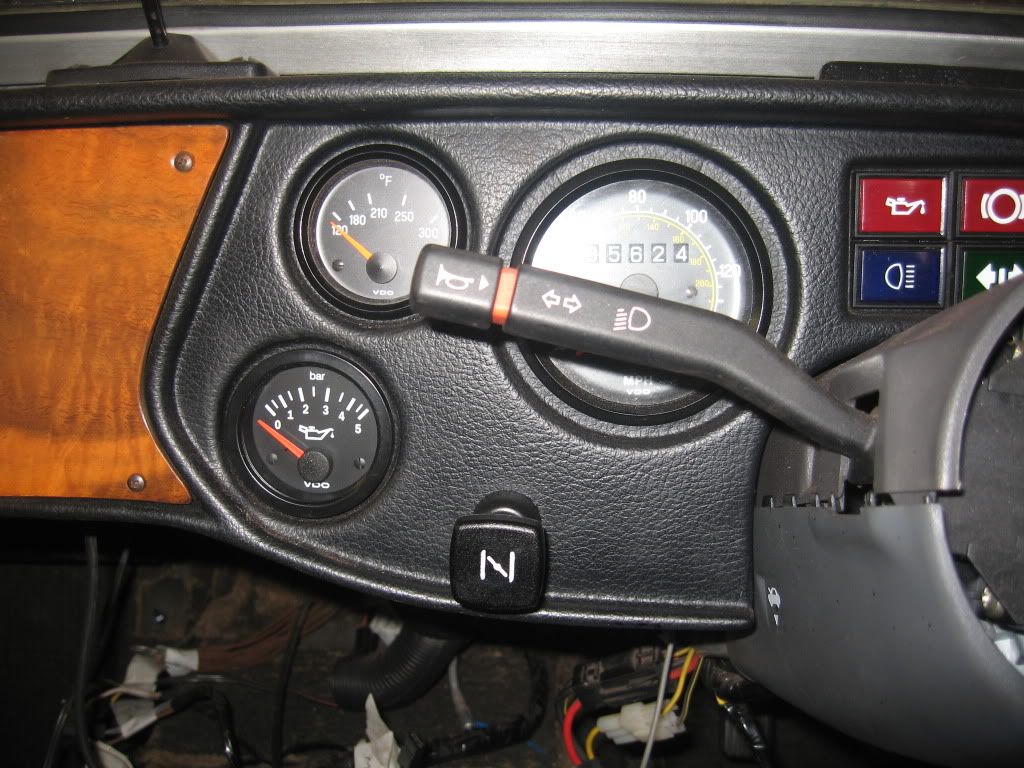
I could have fitted it a bit higher but on testing I found it impeded the indicator stalk if pulled out and switched on at the same time so I fitted it a little lower than center.
The cable was all clipped underneath then along the heater pipes to the carb connection, I have tightened where I think it should be positioned which does not mean it is correct so it may have to be tweaked a little.
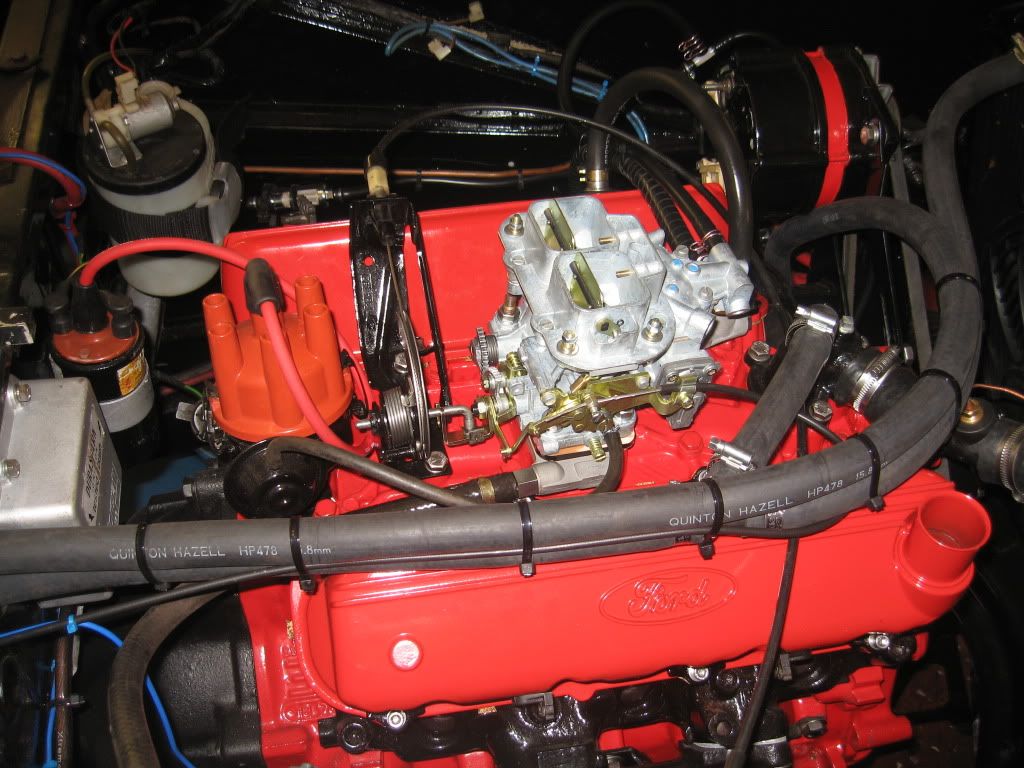
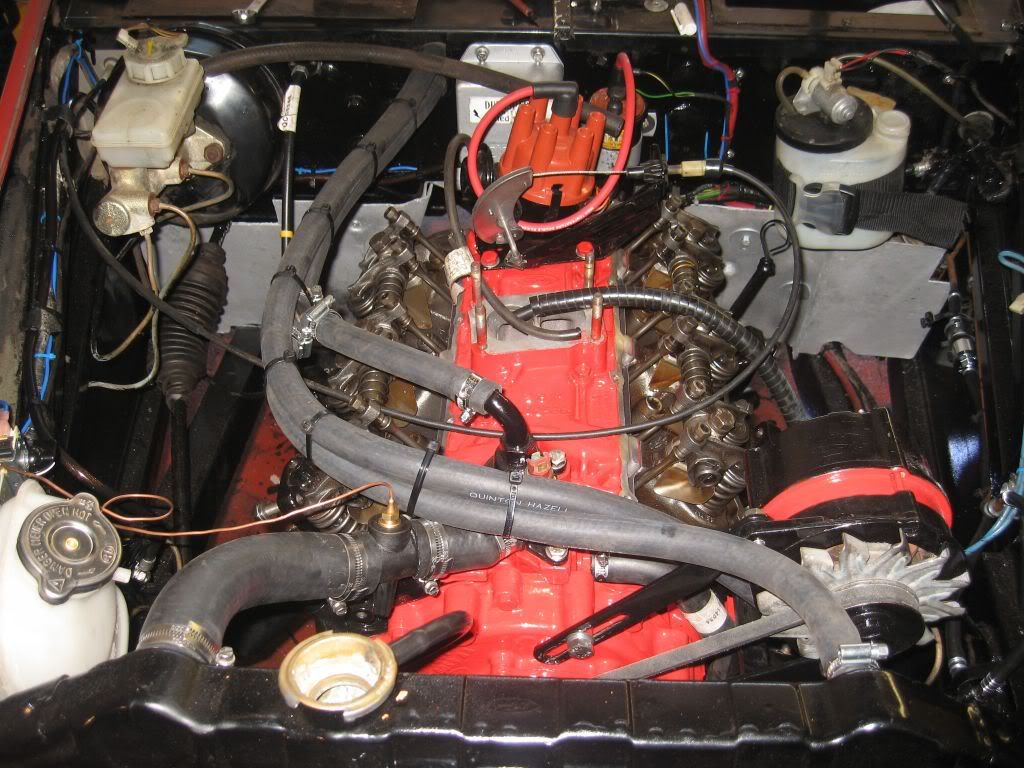
That I think is that for the carb just one more vac pipe to fit to the air intake, I have tried the original air intake but I think not. I have seen a large black one from Euro spares but it is around £100 so I may wait till next month for that.
I have also replaced the rubber fuel pipes on the fuel tank which I had forgotten about.

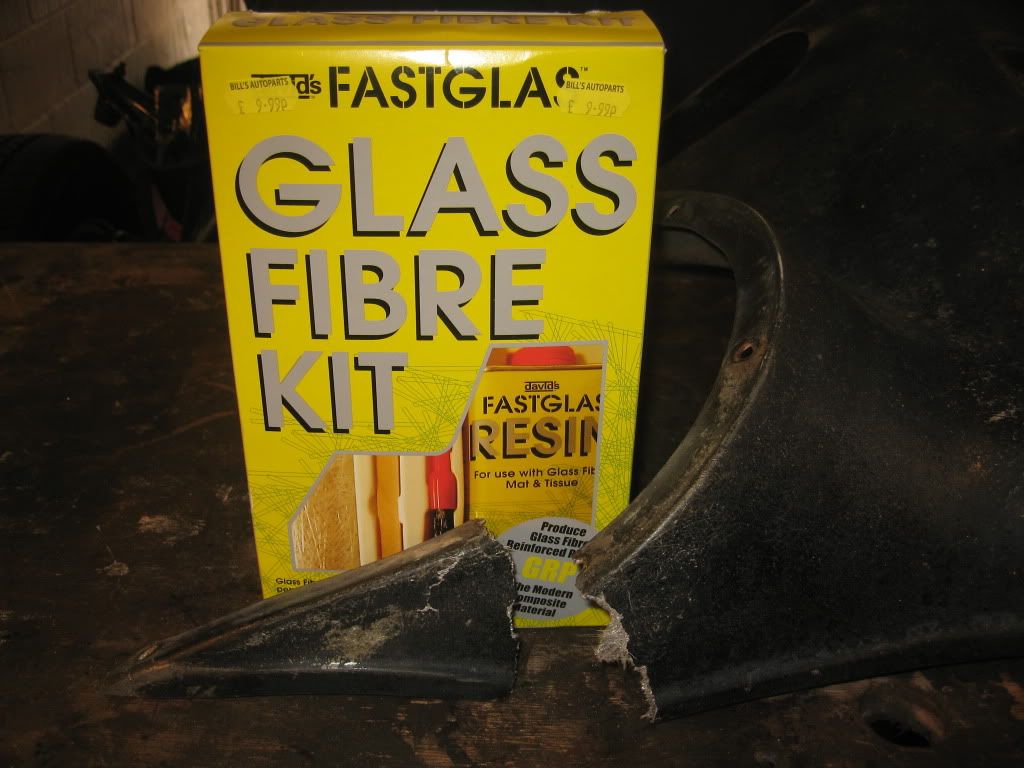
A while ago I mentioned that I would like to fit a snow plow spoiler but they are as rare as gearbox extensions that work, well not quite as Terry B came up trumps and found one for me. I picked it up from the post office on Thursday but unfortunately the royal mail didn't treat it with the respect it was due and broke it a little. Not a problem as its all part of the fun.
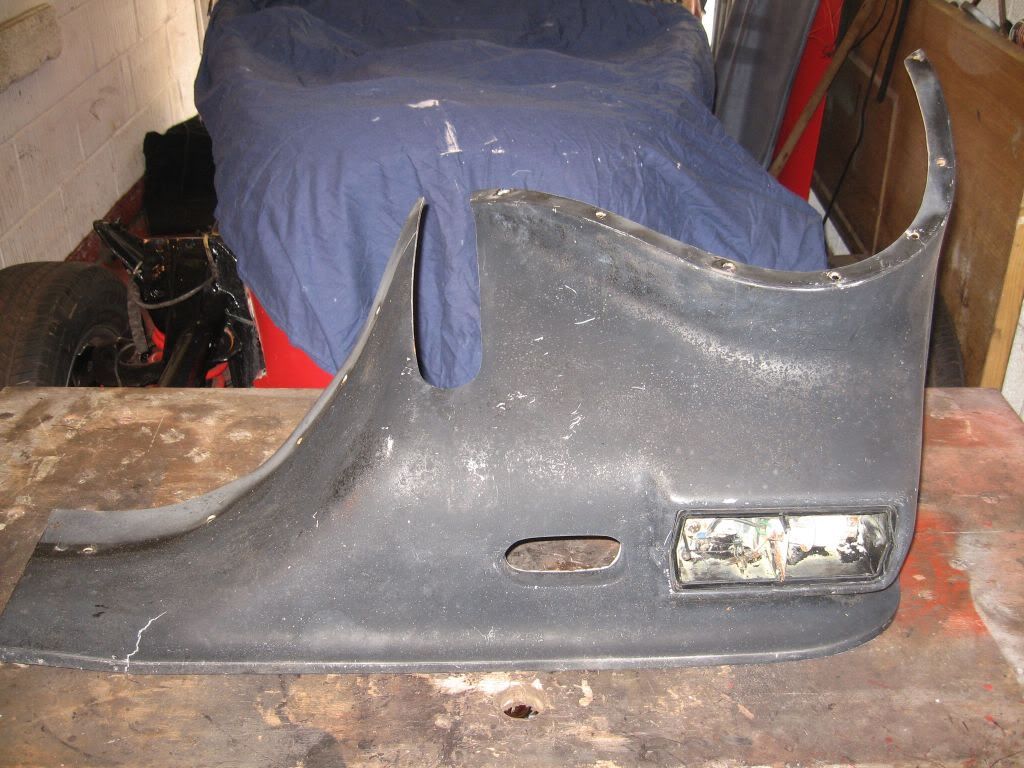
 Just a crack in this one.


This one had the corner fully broken off so down to Bills autoparts and I bought a repair kit.
It was not a clean break off but a bit more damage into the middle which had to be cut out, the area was sanded and tapered down then ready for the repair. I first stuck the two pieces together on one side with the glue gun just to hold it together then mixed the resin.
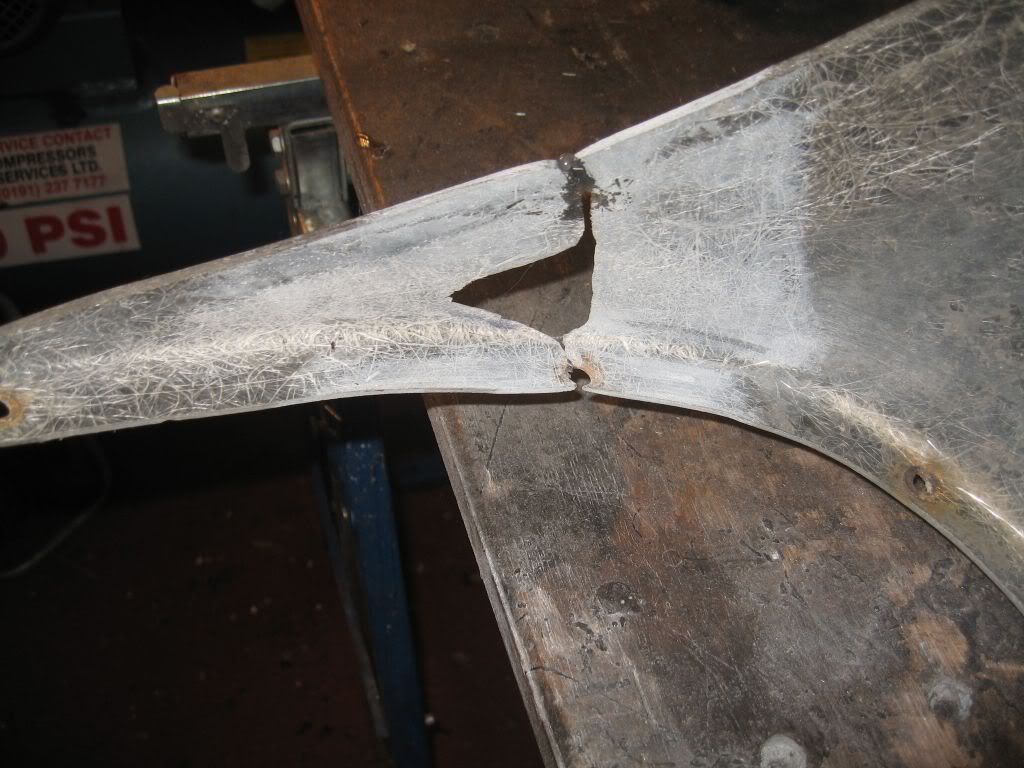
The only time I have used this resin system is on pipework at sea mostly thistlebond, very much the same as this. I cut the fibreglass first and a bit of steel plate then wet the area and laid on the fibreglass then the steel plate and another coat of fibreglass. I waited till it dried then did the other side.
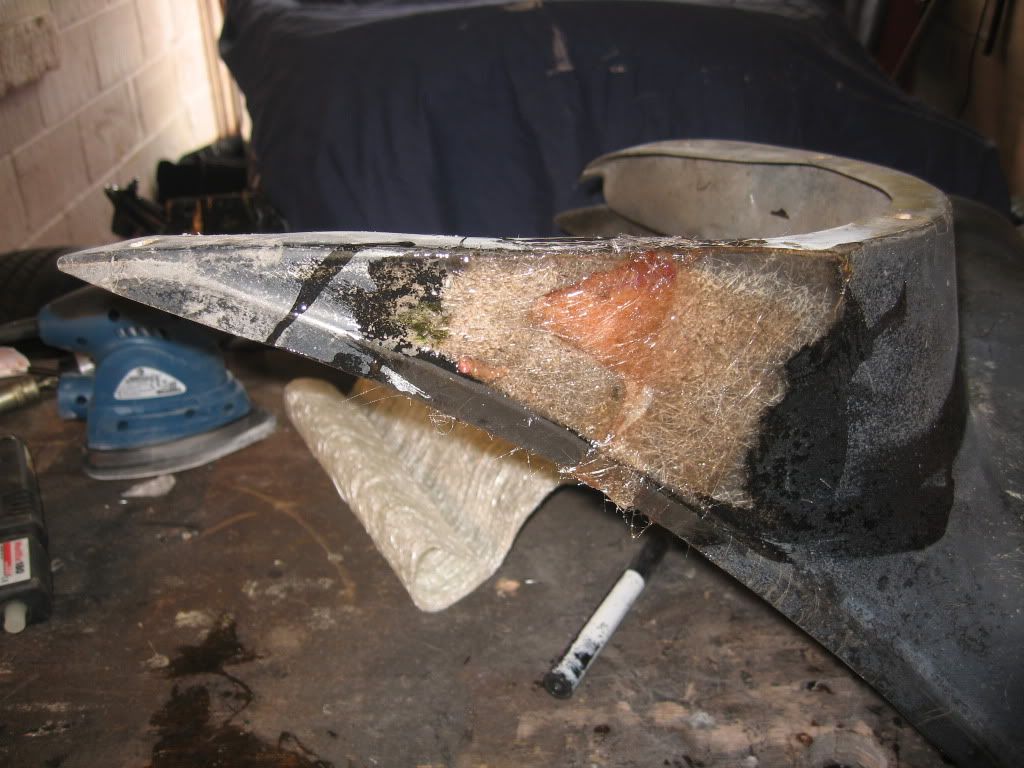
I shall wait until tomorrow so its nice and hard then sand it down with the rest of the spoiler before priming.
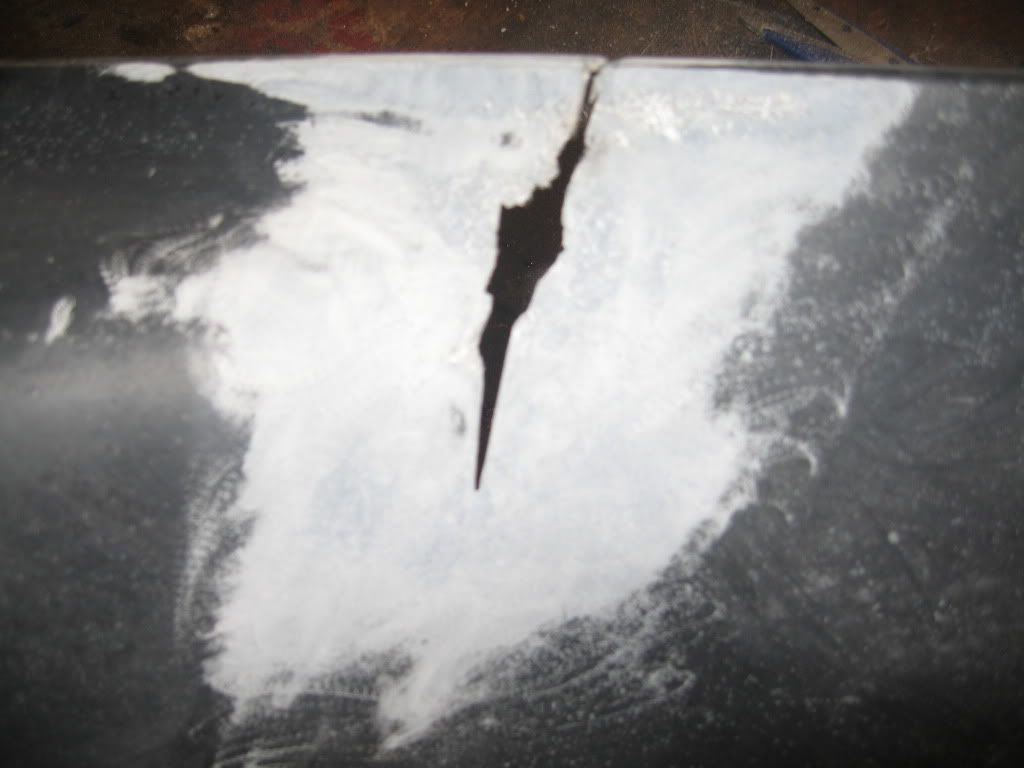
This is the crack on the other spoiler.
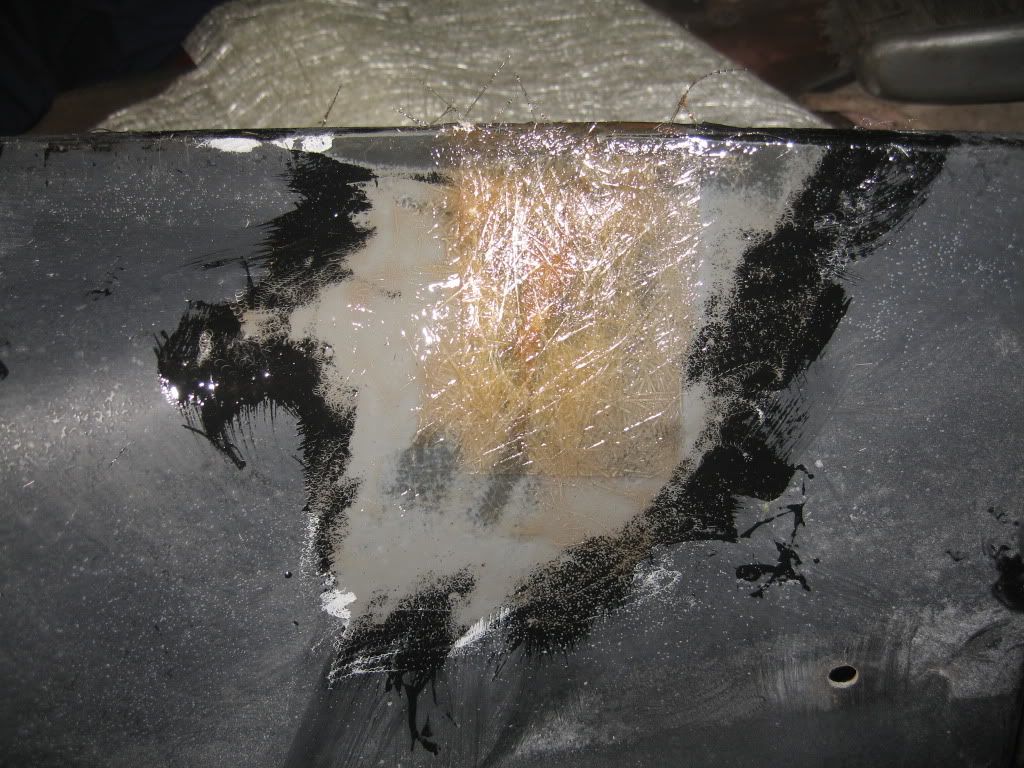
I did the same on this one and laminated a piece of steel in for extra strength.

Well a busy but good couple of days, look forward to tomorrow.

see ya Paul

Sunday, 10 June 2012

Gearbox extension not fitting

Hi
Well as the old saying goes: If you don't laugh you'll cry, well I've been laughing all afternoon.
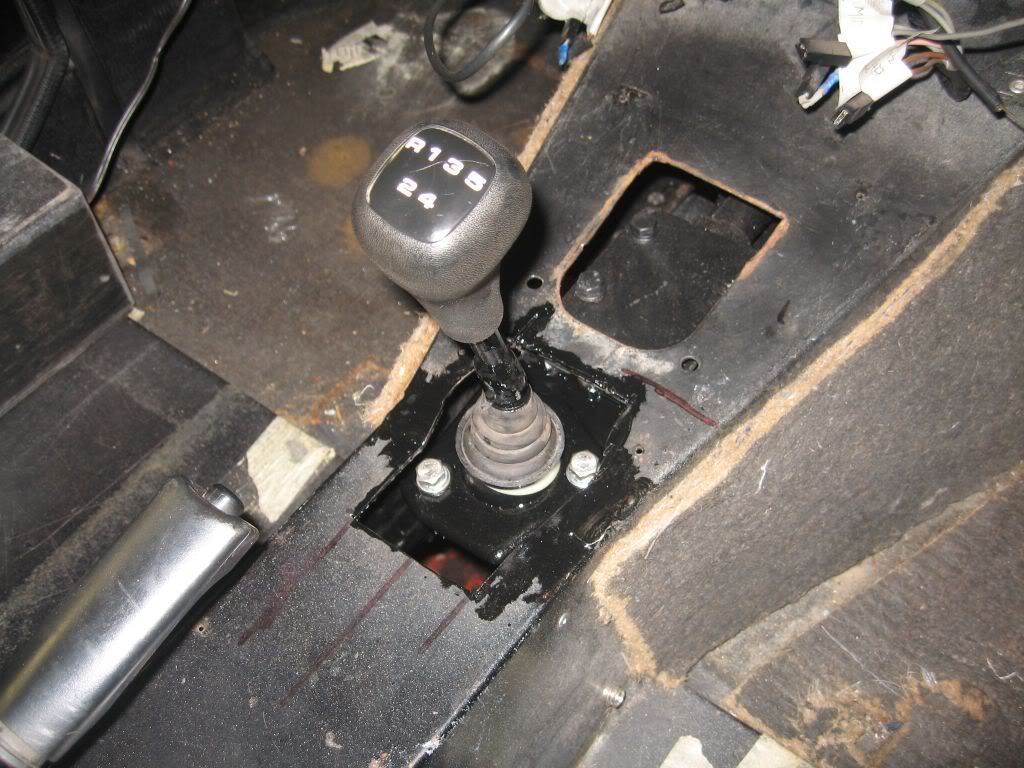
Yesterday afternoon was spent getting the gearstick shortened and a blanking cover made and did it work, off course it did; the stick moved lovely and was just the right height. 
I even had Lynne standing there making a video of how well it worked.
(I got a little carried away with the rivets)
Well that was yesterday, today was a different matter.
I decided to get a few jobs out of the way first, the exhaust manifolds had their second coat of high temp paint before we went out this morning and their were nice and dry to fit.

I have been a bit disappointed with the spray on high temp paint so I bought a tin of 600 degC paint from ebay and it went on well and dried quickly. I am still determined to build my own exhaust system, but I need to get the engine run up and tested so until I am all happy I shall stick with what I have, for the time being anyway.
The exhaust manifolds went on easily, only 4 bolts either side and they look quite good.
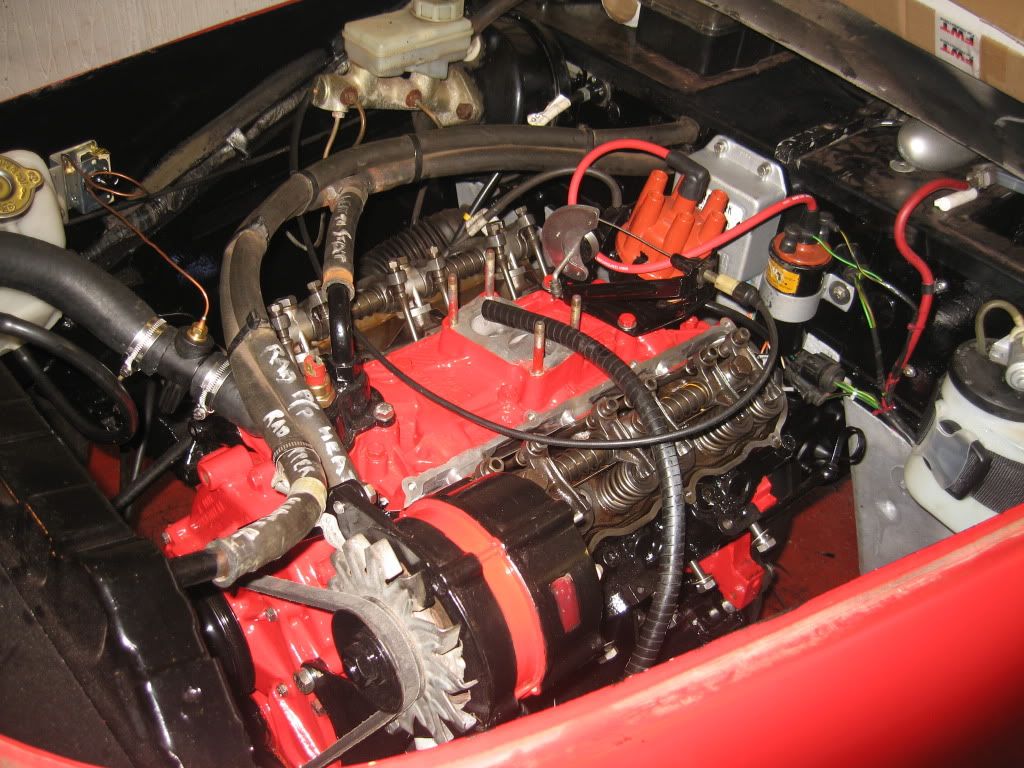
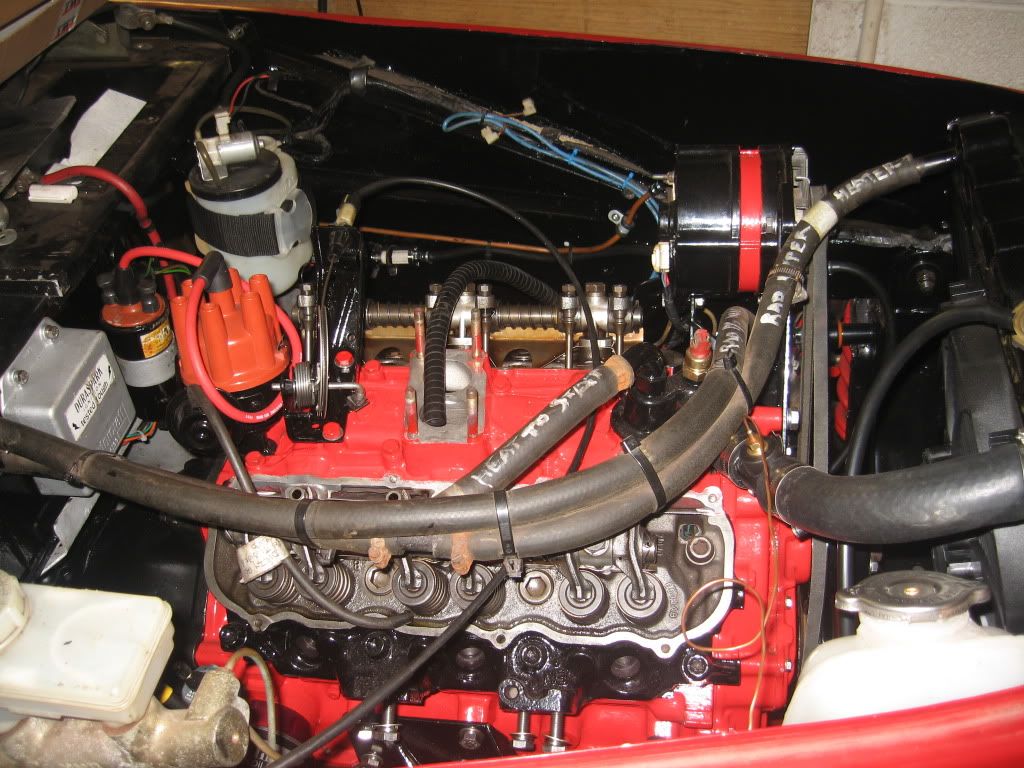
The next job was the rocker cover that would not fit because of the alternator being in the way, as I thought there was still plenty of movement in the slotted bracket. I simply slackened off all of the bolts and pushed the alternator further over and re-tightened, I had to torque down the cylinder head bracket, just hope it has not made the head gasket weaker in that area.
Both rocker covers on.

It was the third job I had planned that caused the problems.
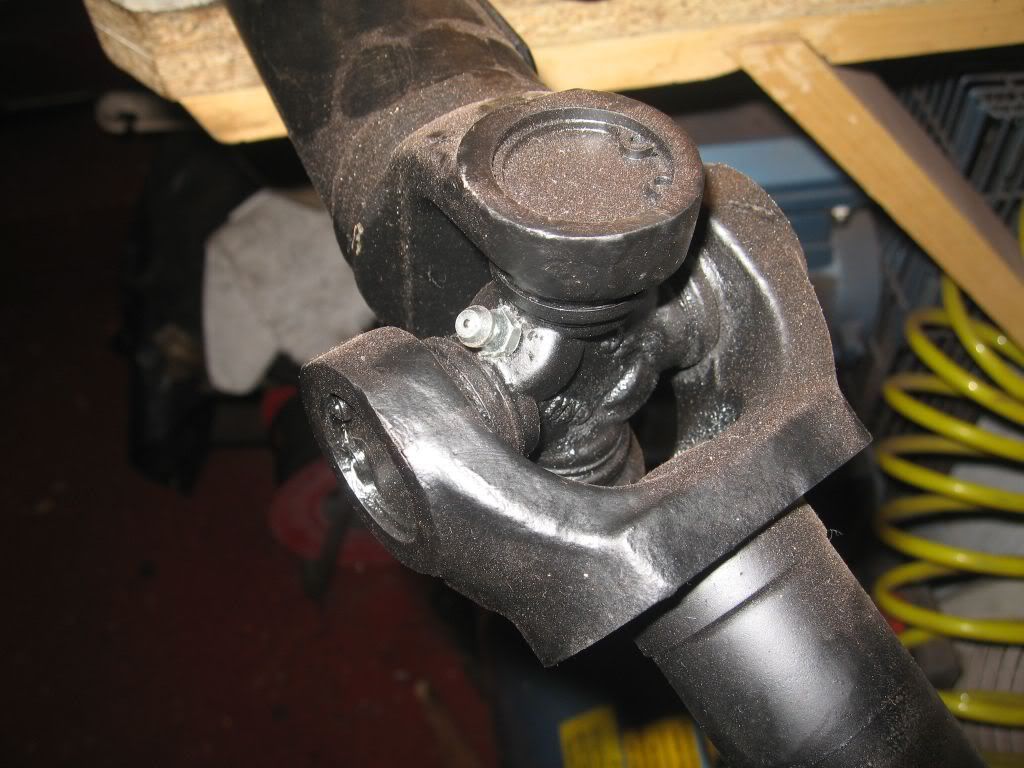
I had greased the drive shaft knuckle joints and got under the car with it when I realised I may have a problem, it did not cross my mind at any time when I decided on the extension and test fitted it on the bench to try the drive shaft in place to see if it would foul. 
Did it foul; of course it B*""#Y did, the knuckle joint on the shaft is perfectly positioned to just tap against the gear rod with every revolution.
Not much chance of making it work without re-designing the drive shaft so the knuckle was about an inch further back, so out it came and in the bin.
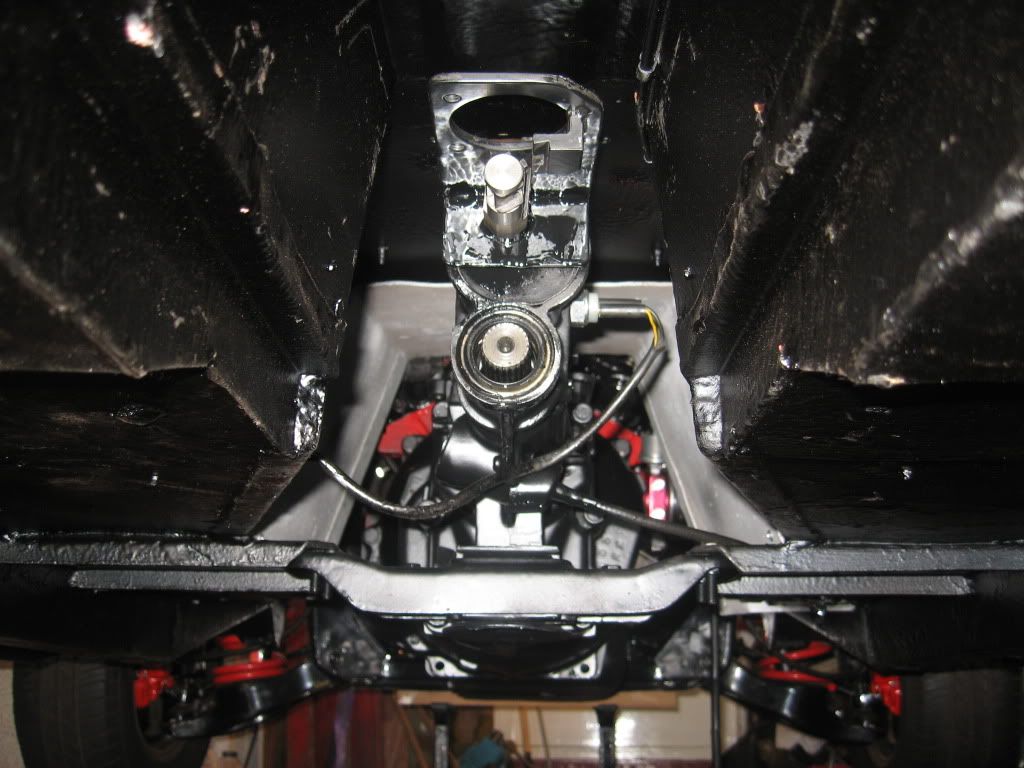
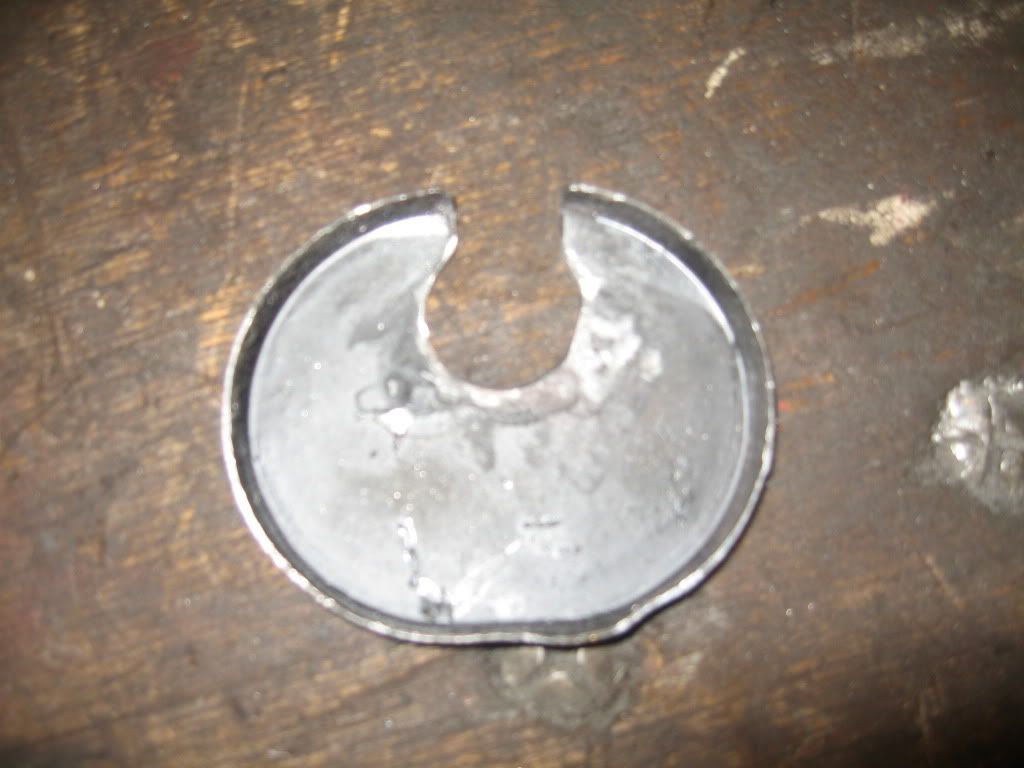
So it looks like it is back to the long arm gearstick again which means I shall have to re-modify the gearstick to fit, I shall take it to work and make a new section there. The only option I had now was to put everything back as it was so I made up a plate to fit over the hole and welded it on.                                                                                                                                                                                                                                                                                                     
I have been under and re-applied the burnt off underseal so that's as good as new.
Couple of days wasted here not to mention the £56 for the extension, I am a bit disappointed but still got to try these things.

Hopefully something good will happen tomorrow.

see ya Paul
Friday, 8 June 2012

Heater removal

Hi
Home again and back to work.

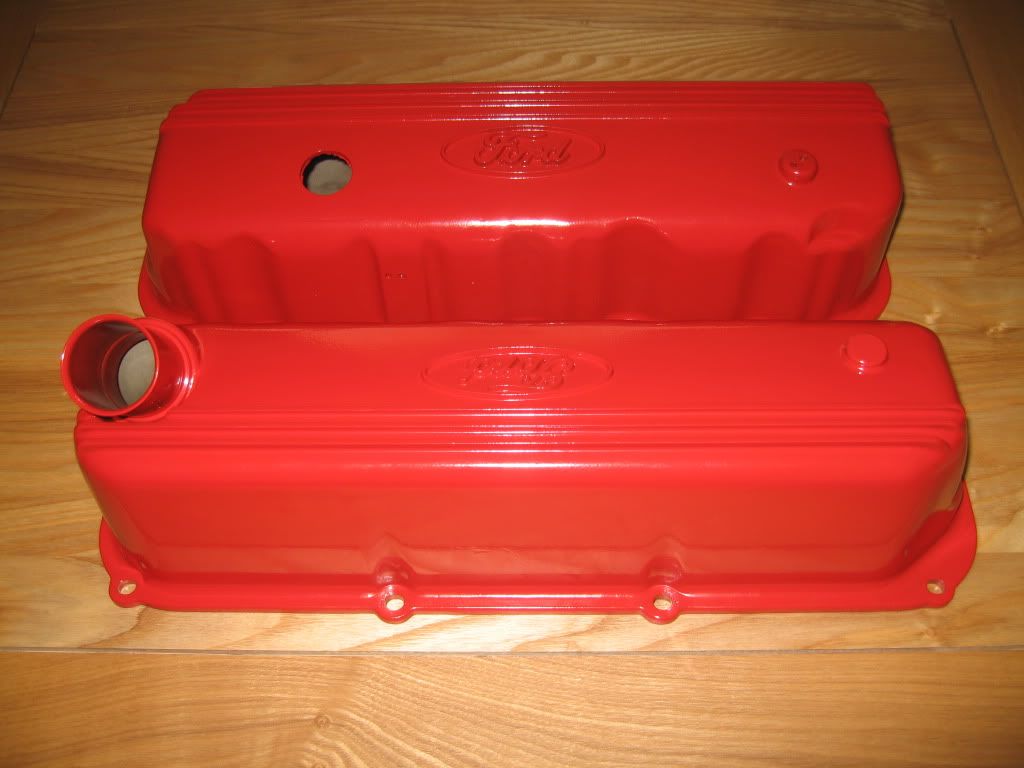
First job yesterday was to get the rocker covers to the powder coater's and today £30 lighter; I picked them up, and boy do they look nice.
I plan to either sand off the raised Ford and straight lines and polish or paint them black as highlight, a small job for the future.
I have re-fitted the the deflectors inside and the lead clips on the outside and tried to fit them, the reason for fitting is mostly to stop any dirt getting into the rockers. Unfortunately I have come across a small problem with the cover next to the alternator, it don't fit. The problem is the alternator power plug hitting the cover, I only need an extra 5mm or so which I may get by slackening off the bracket attached to the head bolt, the bracket has a slot hole and I may have a bit more play on it, if not I shall extend the slot and maybe gain the few mill I need.

When I started the suspension I thought that was going to be the difficult bit but no, when I worked on the engine / gearbox I thought that was going to be the difficult bit but no. So what is the difficult bit, taking out the damn carpet from the tunnel that is the most difficult bit of the whole restoration, (well so far anyway). 
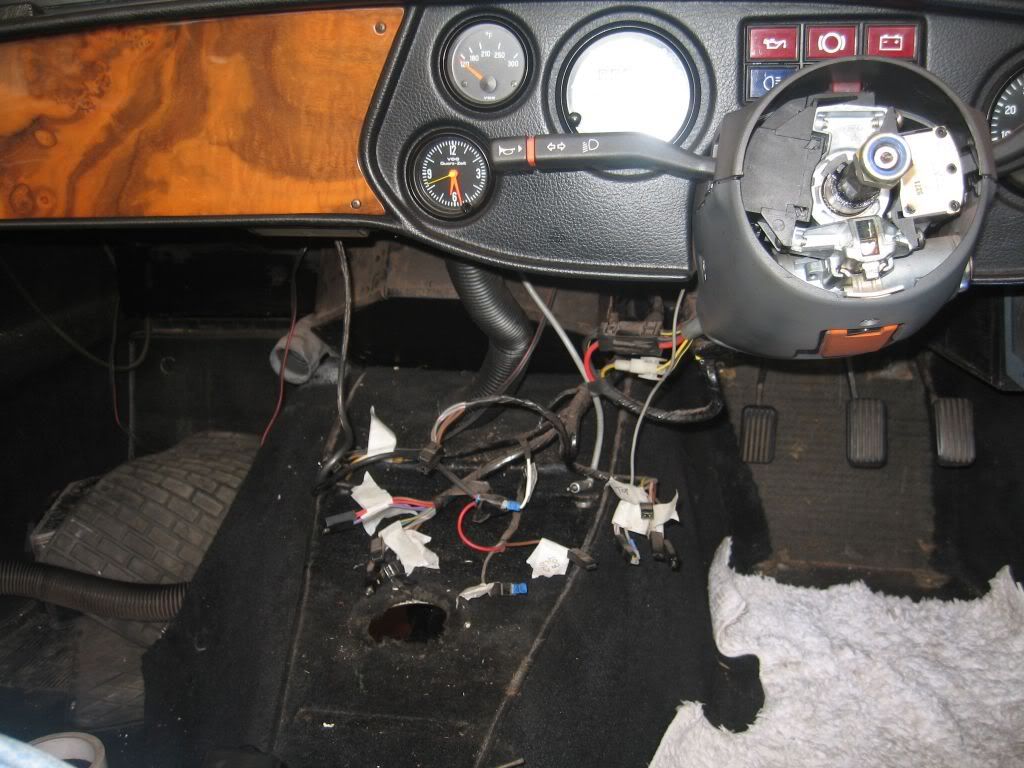
The interior is going to be the last stage of the restoration but because of the new extension to the gearbox I need to cut a new gear stick hole and blank off the old hole, so the tunnel carpet has to be removed for access. Easier said than done. First to go was the steering wheel and radio, unfortunately I did not have the radio removal tool so a little brute force and a whole load of ignorance and out it came. It was the original radio so no loss as I am hoping to have a Radio / Sat Nav system. Next came the center console; this was a bit of a work up as well, the upper bolts are mounted through the top frame and lower bolts go through rivnuts in the tunnel to the underside of the car. These took quite a bit of work to remove as the bolt heads are Phillips and are a bit inaccessible, fortunately the bolts were stainless so I was able to get under the car and clean the underseal from the threads and one of them came out relatively easy whereas the other would not budge. So out with the small cut off saw and no more rivnut, I shall replace both with hex head stainless bolts to make re-fitting easier. I unplugged and labeled all of the wiring and removed the clips keeping the vent operating cables in place, only now could the center console be removed. Believe me this is quite a work up and not for the faint hearted, you also need to be a contortionist to get your head under there to see what you are doing, not easy. With all this work done you would think the carpet would just pull out, ha ha nothing as easy as that. Next to come out is the heater
You maybe able to see the heater base jammed down into the carpet and it is a very very tight fit. The heater is held in place by 2 bolted brackets at the top and a bracket right behind, plus 2 very tight hoses and not forgetting the fan intake box sticking through into the engine bay. Not a lot really except it took over 3 hours of swearing to get it out.
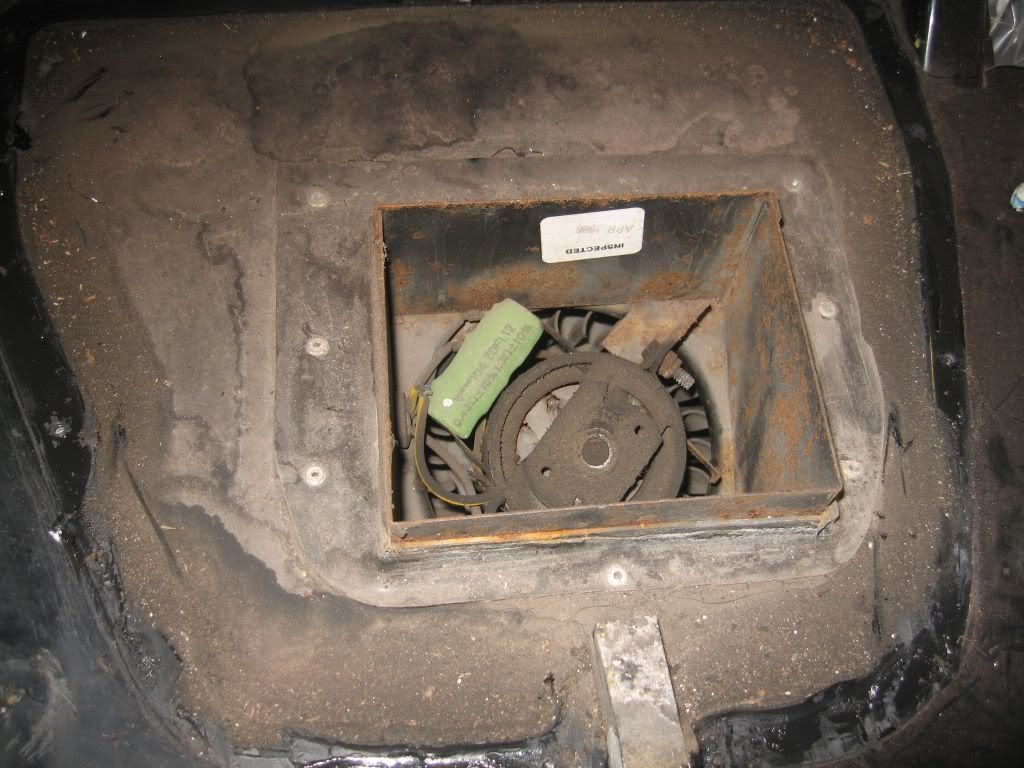
This is the fan with the surround removed, years of sucking dirt has made it rather cruddy so a bit of work and testing here.
The bolts for the upper brackets are captive and once the nuts were removed the brackets needed to be bent over to free them, the other attachments were the hoses which after 26 years refused to come off. One of these I had already changed so that was relatively easy, the other which is attached to the water valve needed to be cut for removal.
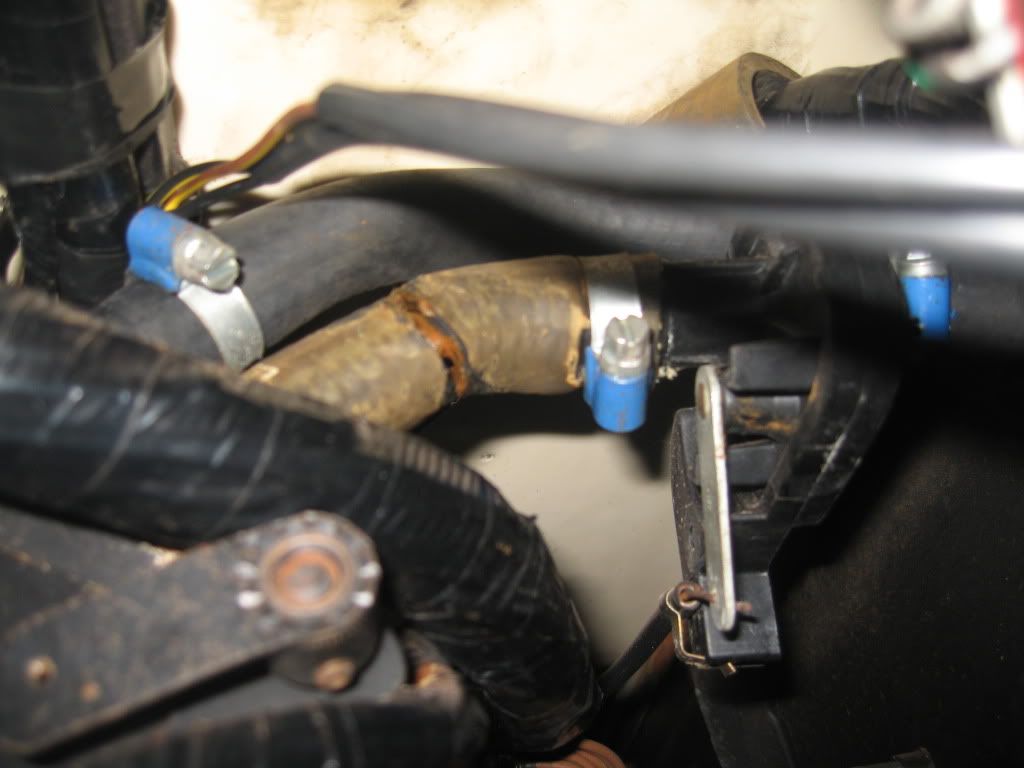
This shot was taken right at the back of the heater and you can see the cut I have made and the water valve with its open / close arm. Even with the hose disconnected the heater still refused to move as it needed to be pushed back and up to then pull down the fan box section protruding through, what was stopping it was a right angle bracket hidden under the soundproofing at the back, once I pulled the sound proofing out the bracket came away and I managed to wiggle the heater out.
This was a major workup but gives me good access to get underneath to fit the oil pressure gauge.
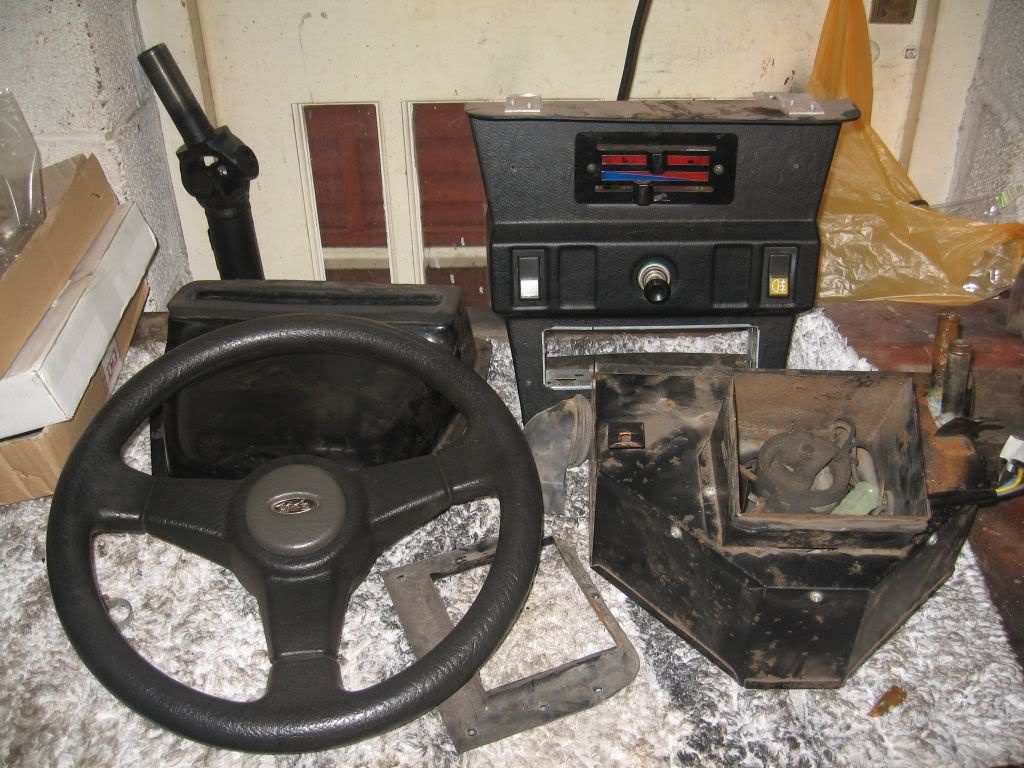
These are all the pieces removed just to get the carpet out of the way, I have taken lots of pictures of the wiring and heater mechanism so hopefully it will all go back together again.
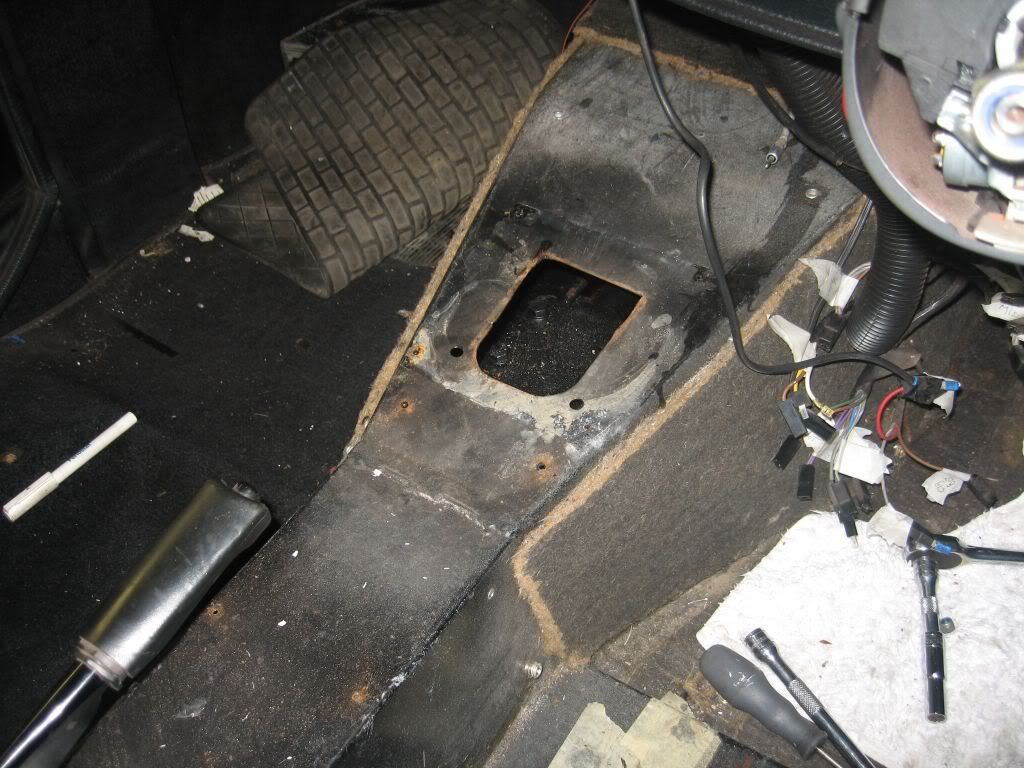
Now that I had the carpet out of the way I could get in to cut the new hole.
 I marked the new position and cut out the steel with a grinder.
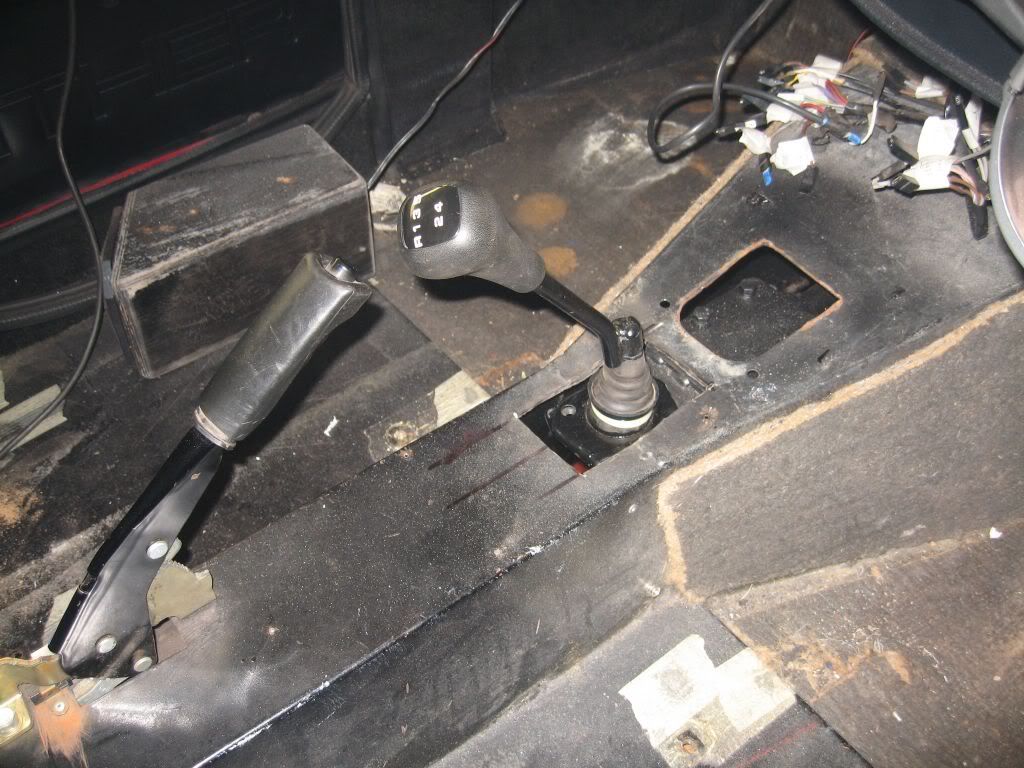
The gearstick as you can see is now to close to the handbrake, I thought this may be the case from the beginning due to the angle bent into the stick. This is easily solved by cutting out the bent and welding it back where it was manufactured, bit shorter but more sporty looking.
I have a piece of stainless to use as the cover and have decided to just rivet it in position instead of welding a plate over the hole, who knows I may have to change back to the original setup at some point.

Well that's for tomorrow

see ya Paul

Tuesday, 22 May 2012

Wiring electric fan

Hi
Last day home today so not a whole lot done as other jobs on but still managed to get some of the smaller jobs out of the way including a couple of mods suggested by Terry B.
First job was to get the fan wired up so a trip to Halfords to get a roll of 17amp wire and the other parts I needed for today's jobs. The instructions are pretty straight forward although I had a Electrician friend have a look at it with me and its only 2 wires so pretty easy. There is an option of either running the power directly from the battery terminal so when the ignition is switched off the fan stays on until the engine cools and the other option is to wire it in after the ignition so it is on and off with the ignition. I chose the battery option as I have been told that a lot of heat is generated by these engines and I shall be using this as a holiday car and am hoping for sunny hot days all the way. 
The fan can be used to suck or to blow by either having it before the radiator or after in the engine bay, if a sucker as I have it the live goes into the bottom terminal and for a blower then into the top terminal and this reverses the rotation of the fan so it is important to get it right. To test that it was sucking I put a piece of paper onto the front of the radiator and connected the fan switch to the battery then used the thermostat as a switch.
You can see the paper being sucked onto the radiator and even standing to the side like I was you can really feel the air blowing.
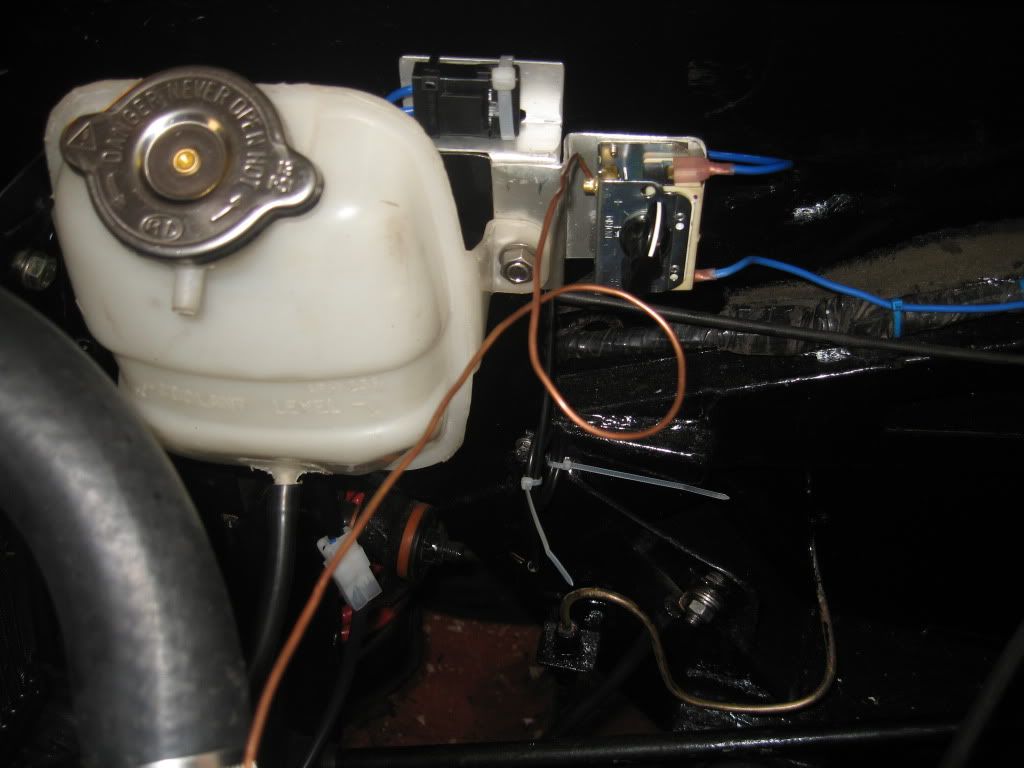
Once happy I made up a bracket and wired the switch up to the battery.

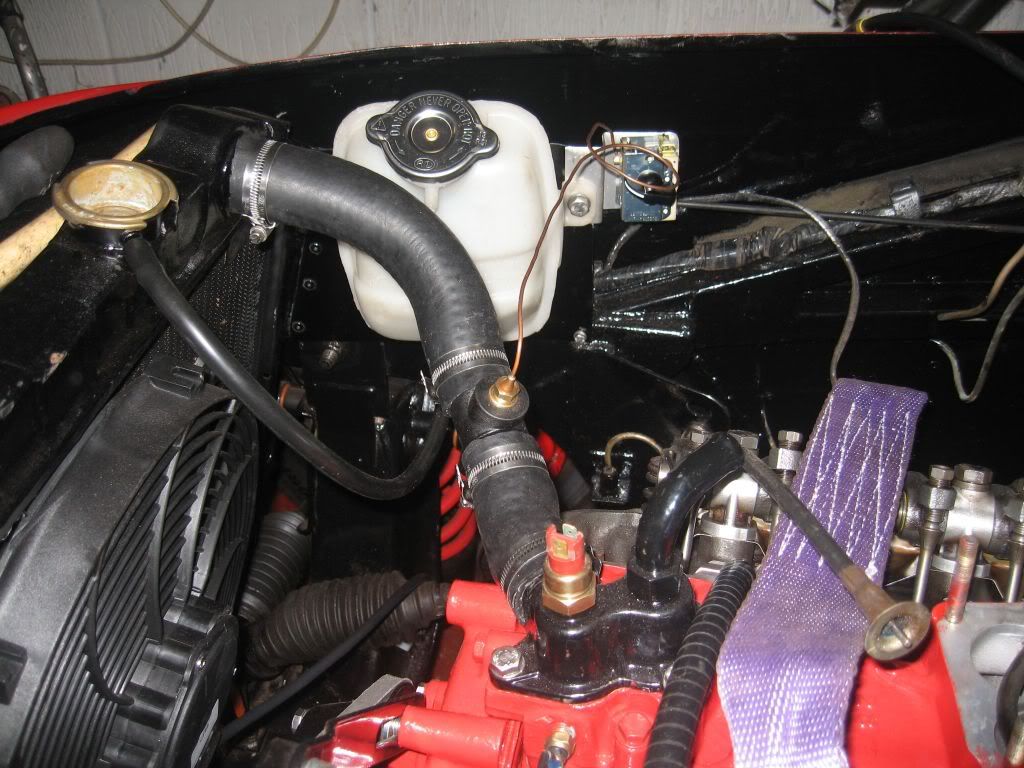
While at Halfords I also picked up 3mts of 15mm radiator hose and started removing the old hoses, it was a bit difficult getting to the worm clips under the dash section but I used a socket with an extension and a wobble end. The new hoses look good and I have slightly altered the run to bring them a little bit more away from the rocker covers.
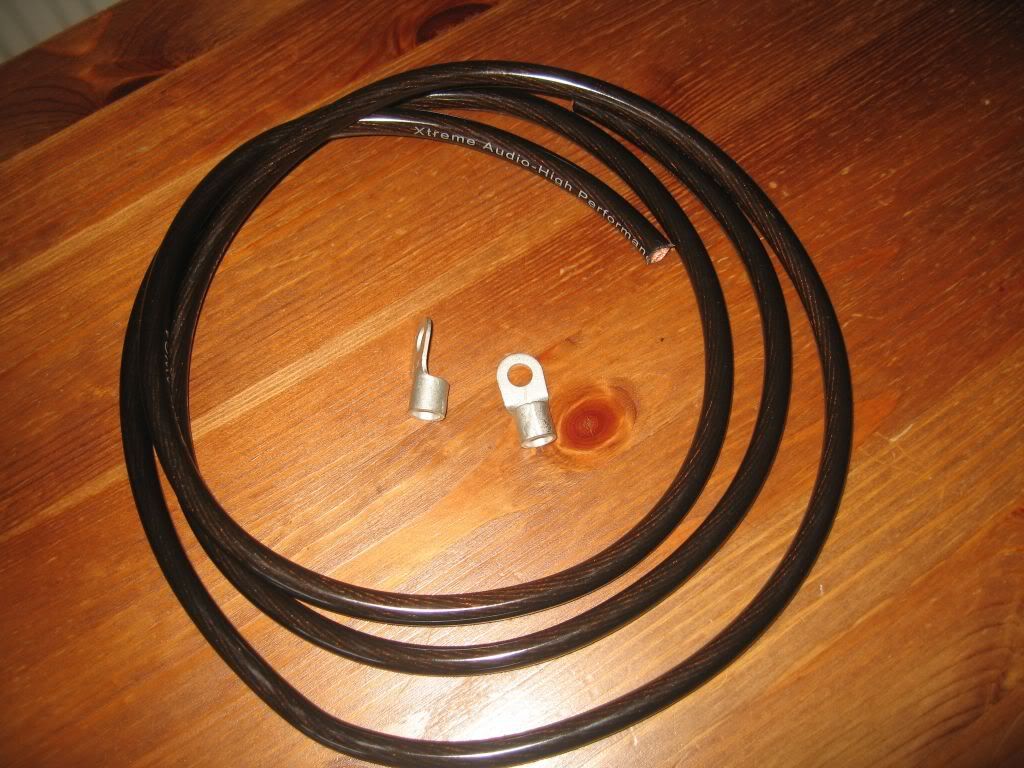
The other jobs I managed to get done where the mods suggested by Terry, the first was to add an extra earthing cable from the body to the battery earth wire so as not to rely on the earth going directly through the body.
I ordered 2 meters of heavy gauge cable and this was more than enough to go around to the battery cable, the connectors came from a local car electric supplier for a few penny's. I decided to solder the connections on instead of crimping and tie wrapped neatly all around.
The earth is at the bottom of the shot in the loop of the brake pipe, not the best shot as a bit dark down there.
The other job was a mod to the drive shaft, the mod is to fit grease nipples to the couplings to stop them running dry, I had a few grease nipples in my bits and bobs gathered over the years but didn't expect them to fit but they went straight in. The threads aren't metric but look to be about 1/4" BSW, I don't have a grease gun at present so was unable to grease but will acquire one next time home.
Well back in two weeks and hope to have the carb fitted and see what to do with the exhaust.

see ya Paul
Monday, 21 May 2012

Fitting Engine & Gear.box

Hi
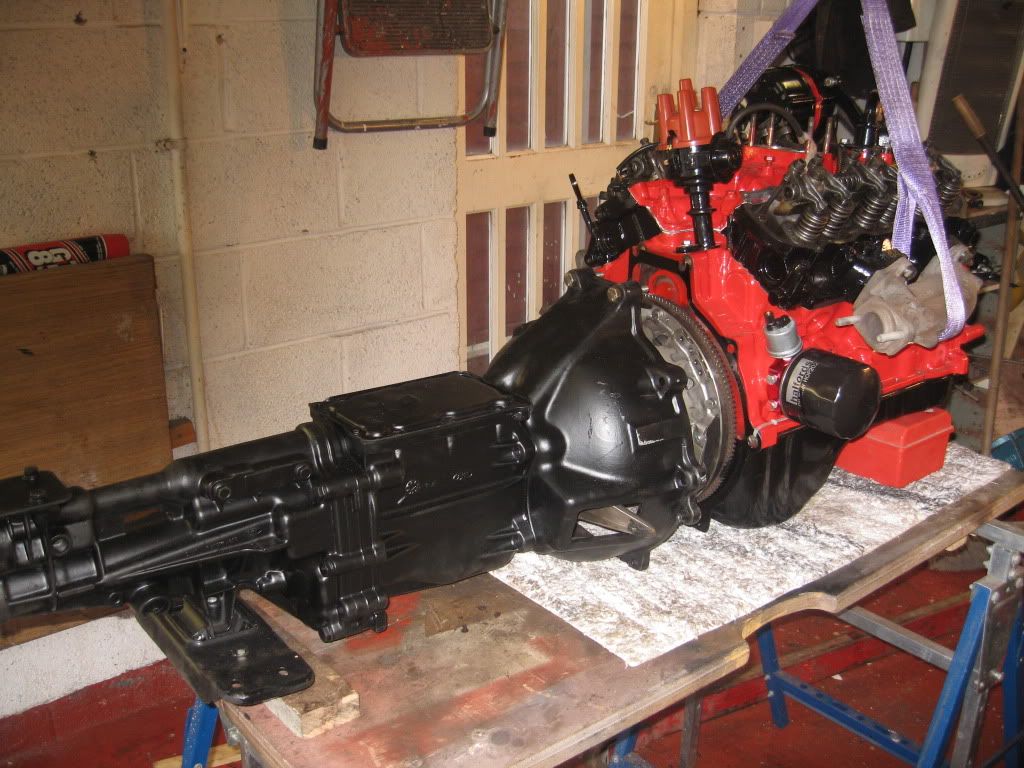
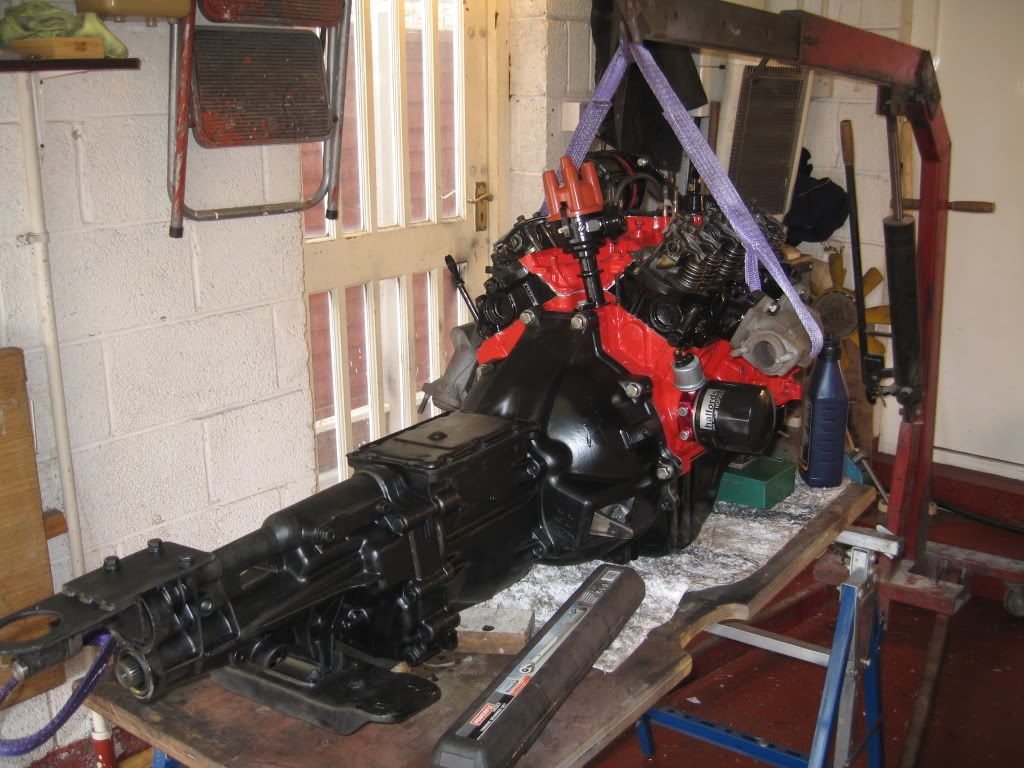
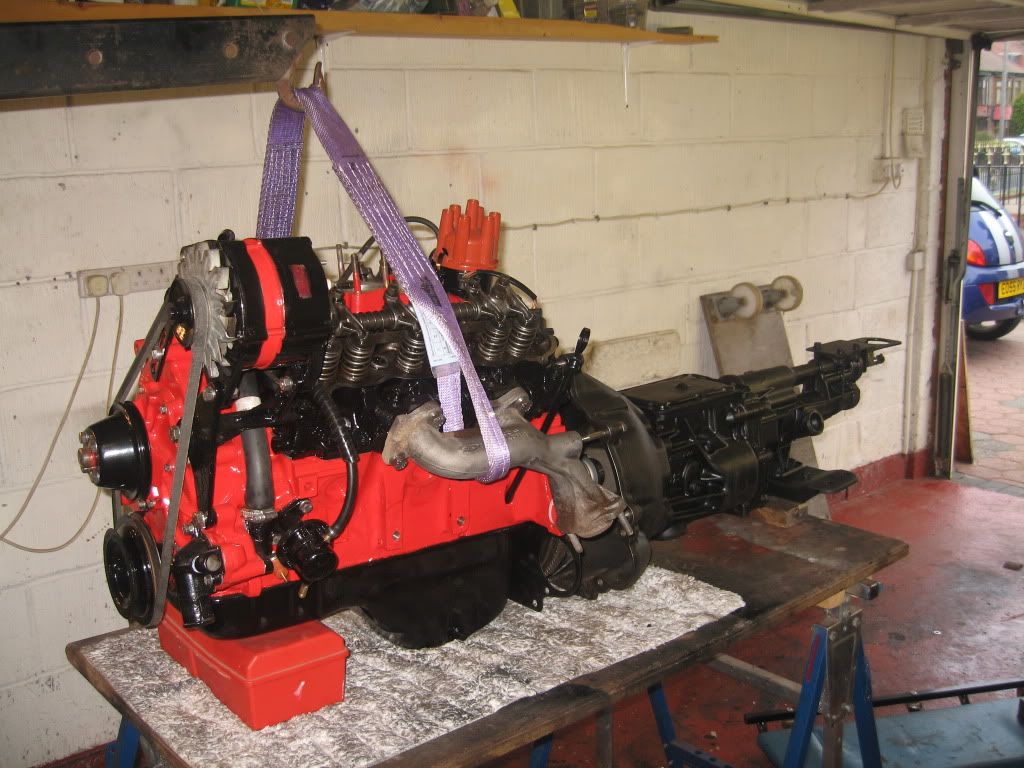
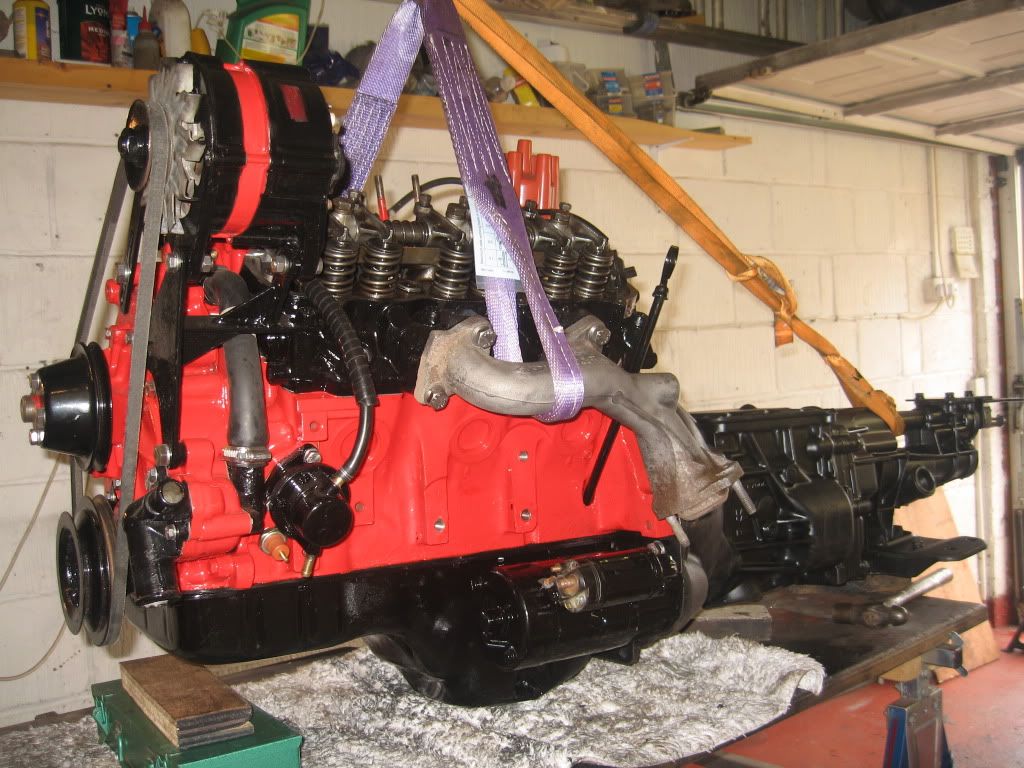
Well the engine and gearbox are finally in place and mated together, unfortunately the plans I had for getting the gearbox fitted did not go according to plan. 
I had already fitted the engine and had the gearbox mounted ready to fit to the engine but because I'm a bit weedy I could not do it by myself, so I had arranged for a friend to come round this morning to assist in lifting one side of the gearbox while I had the other side.
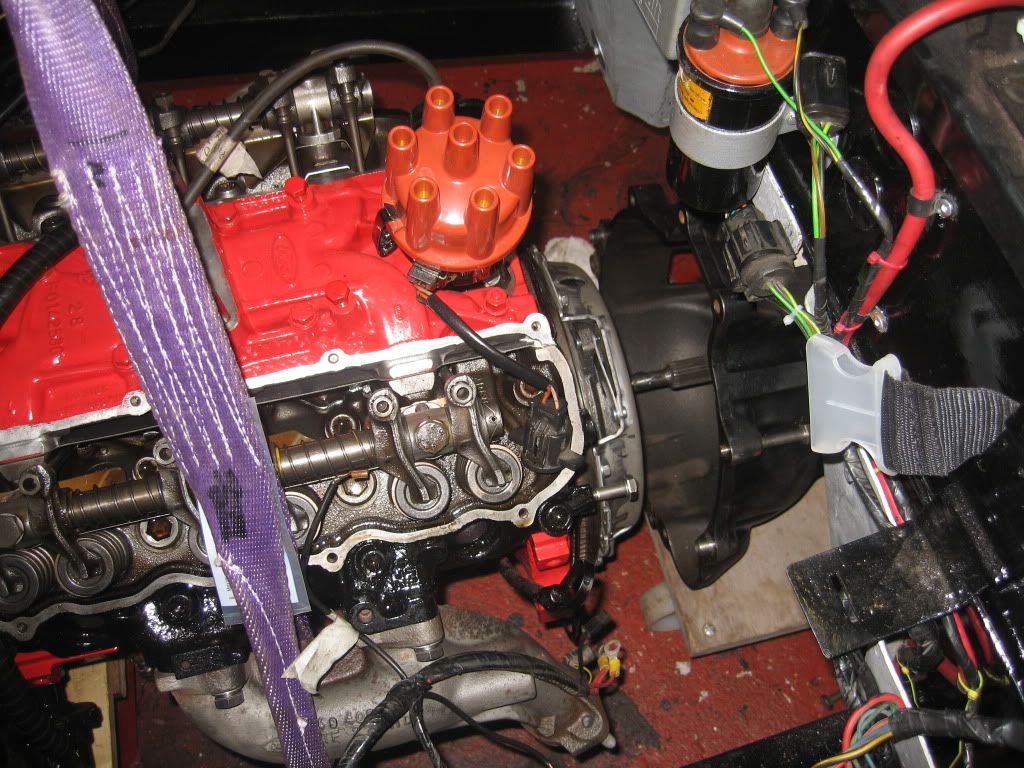
You can see in this photo just how close the bell housing is to the clutch plate, should have been easy.
Unfortunately my assistant did not turn up and at 1030 I gave him a call and woke him up, all I can say is it must have been a hell of a party. So I had no assistant and had to change my plans.
My new plan was to remove the engine and gearbox and mount them together on the work bench then lift the car and roll it under, easy.
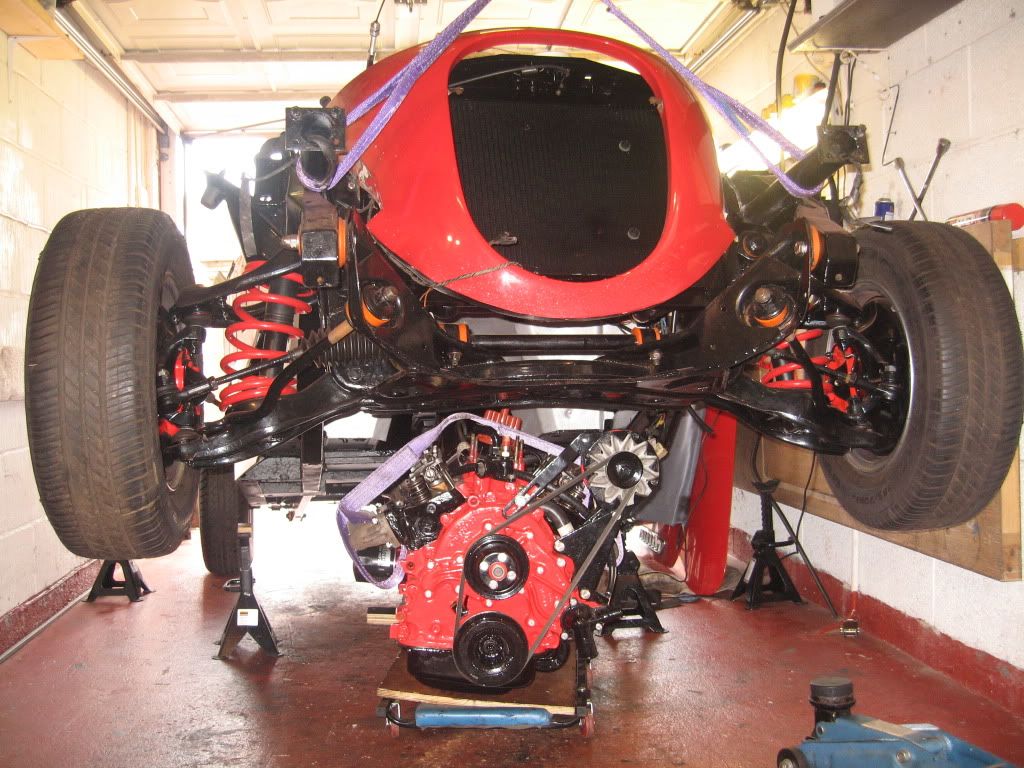
I started removing the wiring I had fitted then took the weight and removed the mounts then lifted the engine into the air. The gearbox was on the trolley and was rolled forward to where the chassis rises to give room to roll it out. The car was then rolled out of the garage and the engine dropped onto the work bench
The gearbox was put in position on the workbench but again I couldn't hold it in position so I had to dismantle the hoist and re-assemble around the other end of the bench to take the weight of the gearbox.
Once the weight was taken it was a simple job then of mating the two and with the bolts in just drawing the two together.
I looked in the Haynes manual for the correct torque for the bell housing but could not find a specific so it got a Paul torque, very tight.
While I had it on the bench I thought it would be a lot easier to fit the starter motor on the bench, only 2 bolts and 5 minutes to fit.
I had to support the gearbox with another strop to keep it level and prevent the oil draining out of the back end, I have had to top the oil up as I lost a bit when getting it up and down under the car.
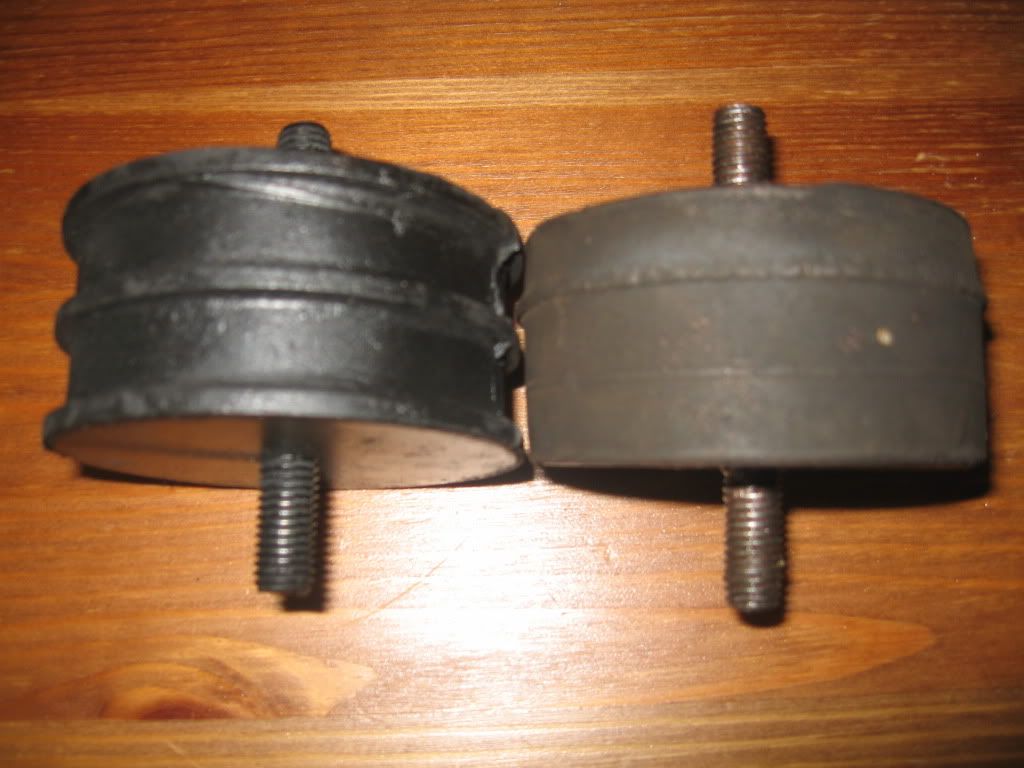
While I was in the middle of this the postman arrived with my new resilient mounts, these are from eBay and are for a Landrover. They are a lot better quality than the one's I had bought before and also a lot harder, they are around a mil in height smaller than the originals. I don't know if this will affect anything but I shall make some shims at work and if I find a problem I can always fit them.
Now time to attempt the fit.
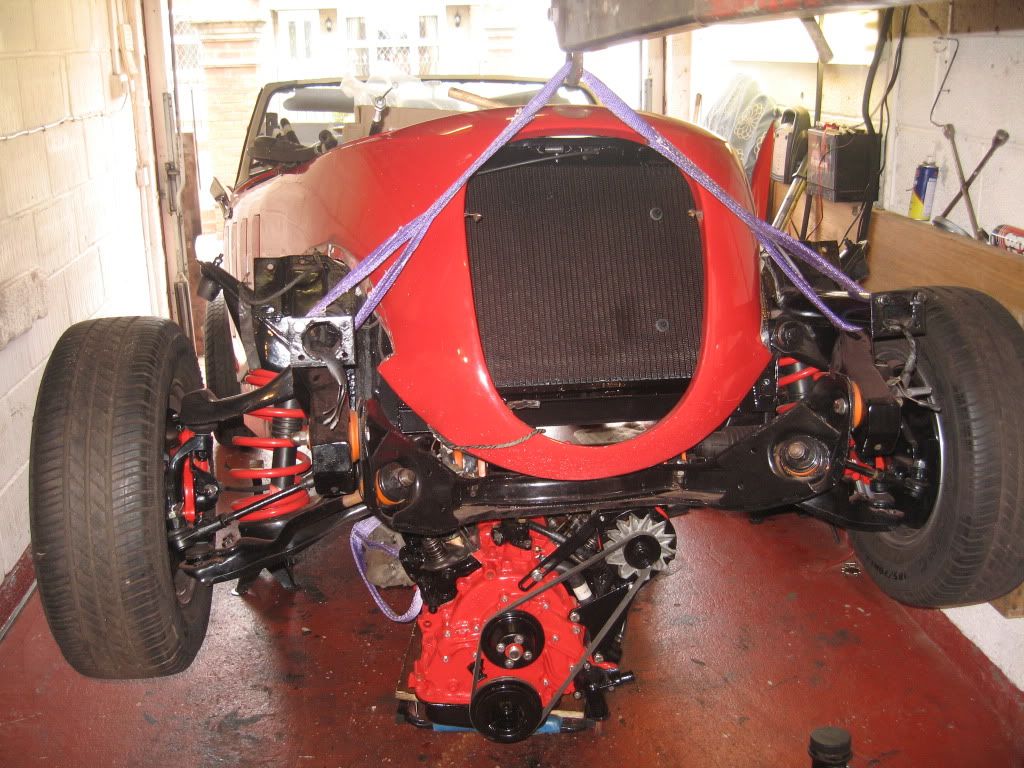
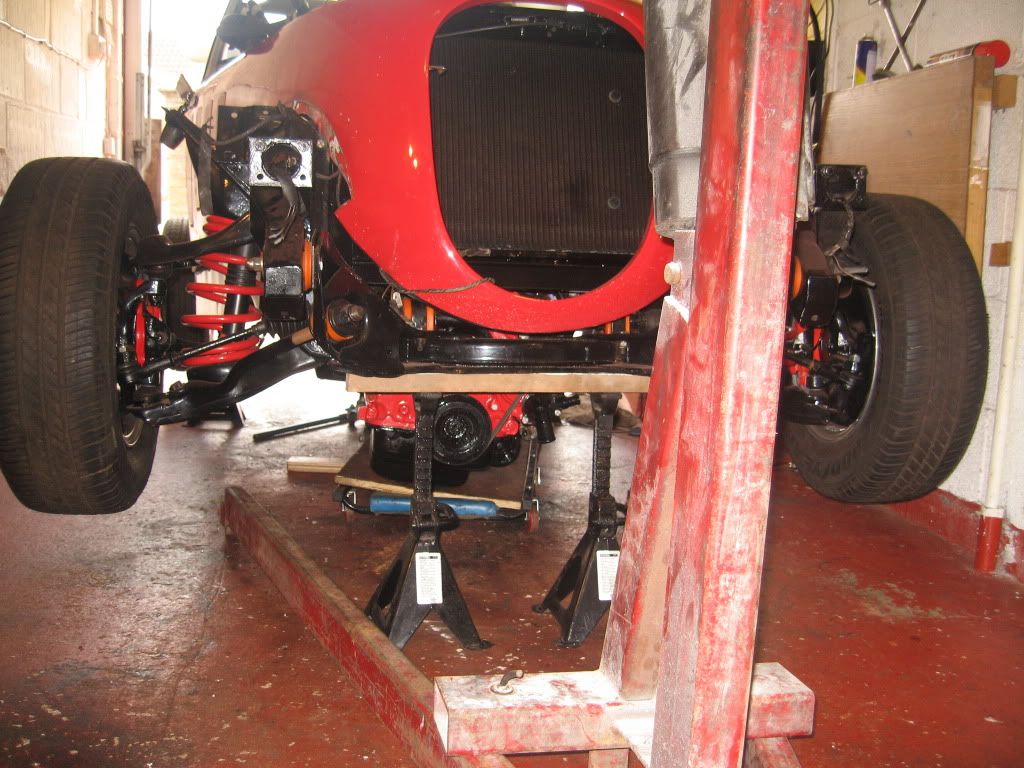
I covered my trolley in a piece of ply to take the weight and lowered the engine gearbox onto it, I don't think the wheels liked it but it did move with a bit of effort. The work bench was dismantled and the car rolled in and it was time to lift. I was a bit dubious about this but I really didn't have any option and there was no way I was going to lower the whole assembly down from the top and try to wiggle it into position.
The first problem I had was that the trolley had to be between the legs of the hoist which meant the hook of the hoist would not reach the lifting point because of the length of the engine/gearbox, so the gearbox would have to go under the front of the car as far as possible first. The front of the car had to be jacked as far as my jack would lift then the axle stands were put under the side frame and the jack removed. Once the gearbox was slide under the front the hook was attached and the front of the car lifted.
The engine was then pushed under and centered before lowering very carefully down.
I didn't take it all the way down as I still needed to get underneath to the gearbox, so the stands where put to there highest settings and the front lowered onto them, once down I then raised the rear and set the stands under the side frame to raise the whole car.
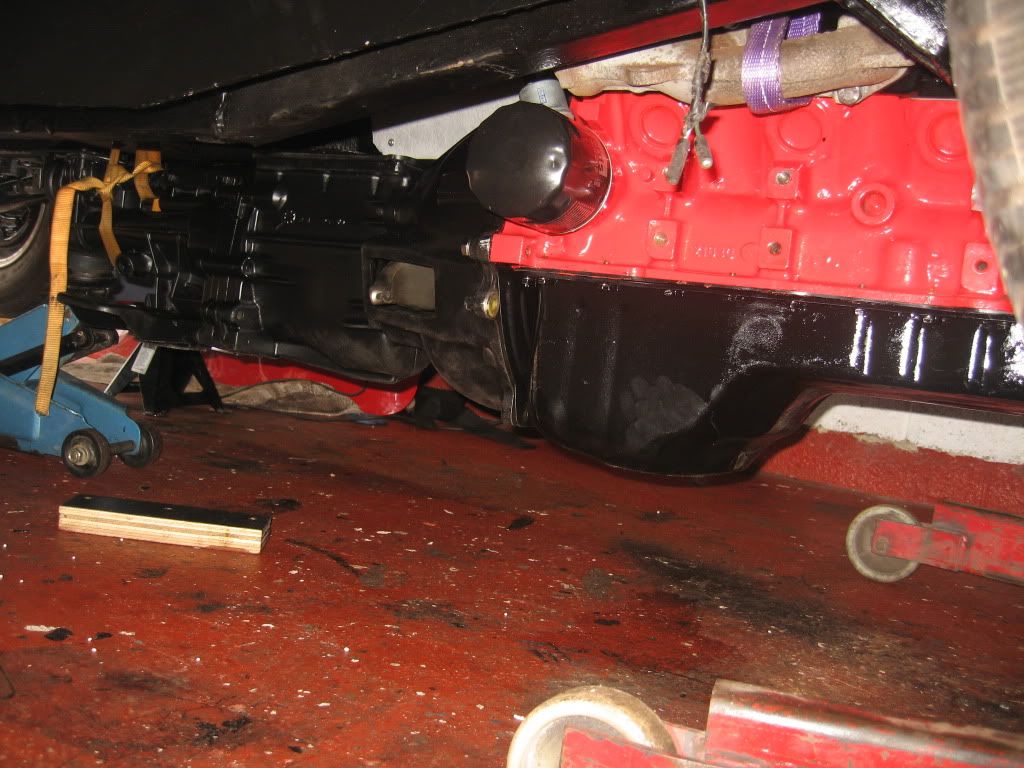
Now to lift and position the engine, the engine and gearbox had to come up together so the jack was put under the back of the gearbox and then a little lift on the hoist then a lift on the jack and I kept going like this until in position.

I then fitted the new rubber mounts to the engine mounts and both side's where bolted into position, then the gearbox mount was bolted on and that was it. No mistakes and no damage just slow and careful.
I now (again) started fitting the ancillaries, the starter motor and alternator got wired up, the radiator hoses got fitted, fuel pipes and I moved the heater hoses into position so I could measure them up and get some tomorrow from Halfords.
The gearbox reverse switch and the speedo cable went in, typically I could not find the circlip for the speedo so I have measured it, 25mm and will have to get a hold of a new one.
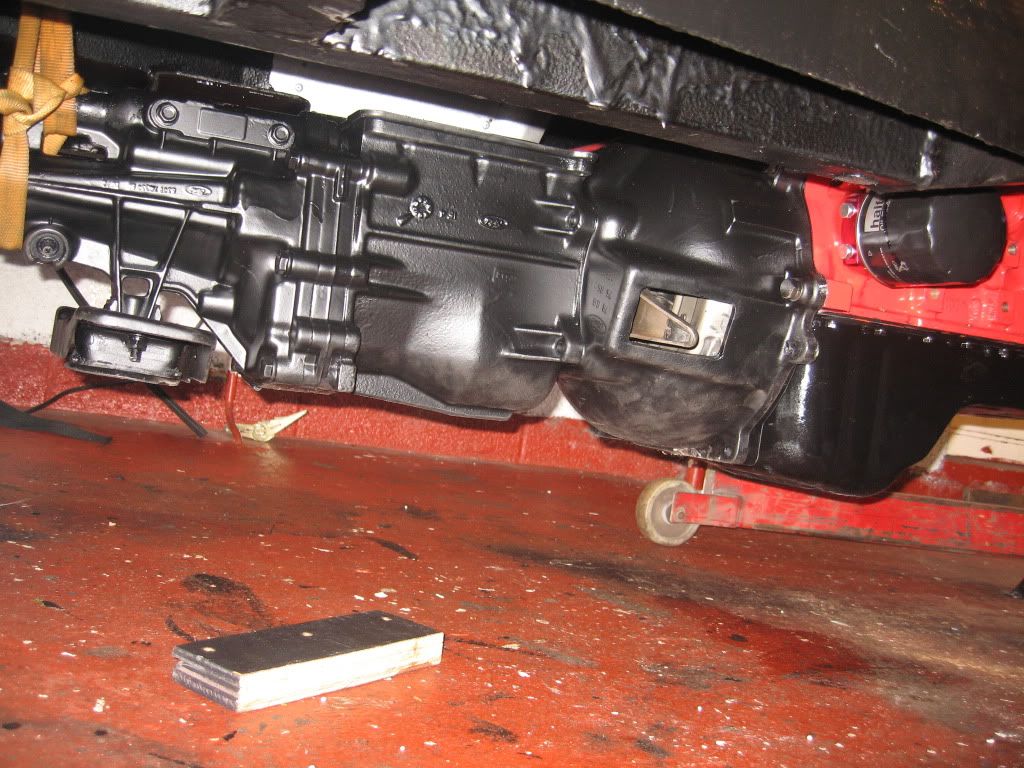
I managed to get more than a few scratches on the gearbox during all of this movement so the tin of stonechip came out again and I gave everything a good spraying.

Well a lot done today but still a number of jobs to do before this section of the re-build is finished.
The mystery of where part of my wiring loom has been solved, it is sitting in a box with the old carb as it was the carb loom that attaches to the temp pickup and alternator and is not required now so no need to fit now. (Thanks Terry)

See ya Paul
Friday, 18 May 2012

Gearbox Extension

Hi
Very pleased to get the engine fitted but now the work begins of getting all of the ancillaries fitted and finding them.
I also got an email from Terry B saying that the Land Rover engine mounts fit quite well, so I got straight on and ordered a set, will just have to wait for them and get them fitted.
Its strange but I have searched every wire in the engine bay and just can't find the part of the loom that fits to the thermostatic sensor which also contains the earth for the alternator, I have it in a photo of it with a label on each wire but I still can't find it, very strange, will sleep on it an look again tomorrow.
I have made a bracket for the fan controller, I had bought a tee connection to fit the thermostat into instead of slipping it into the hose and risking a leak.
I have also fitted the bottom hose and a number of the electrical connections including the engine earth, I sanded down to bare steel and when fitted coated with silicone grease for protection.

The gearbox extension arrived this morning and it fits great, there was no instructions with it but it didn't take long to figure it out.
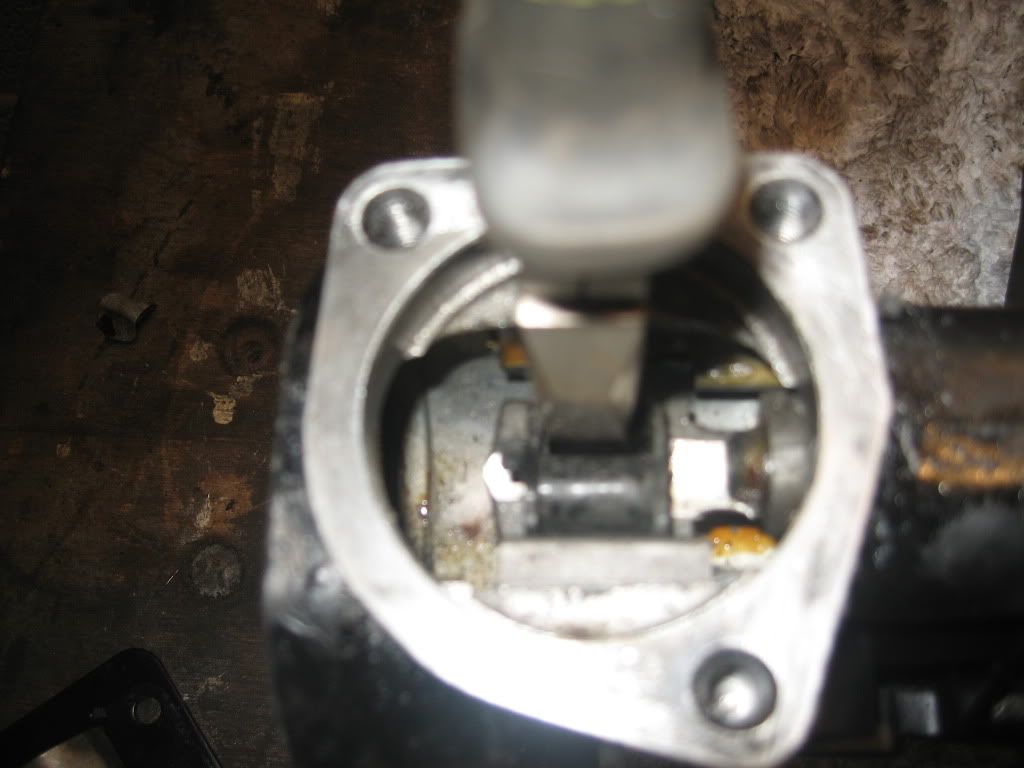
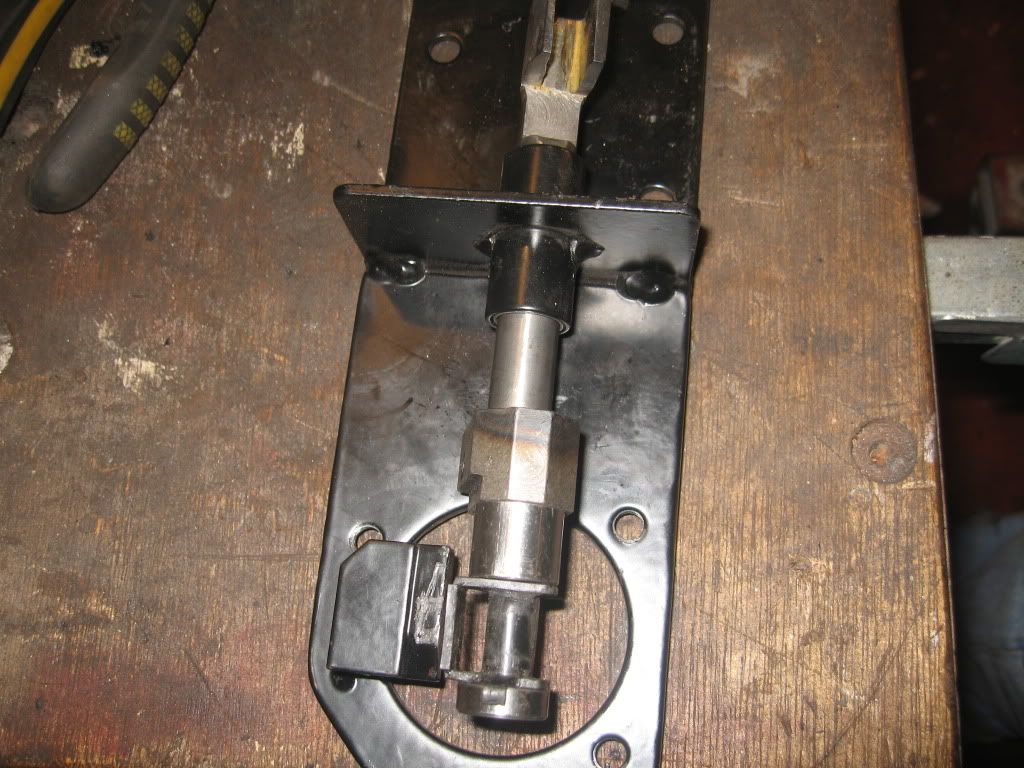
First was to remove the plastic sleeve that fits in the selector housing and to knock out the tin cover on the back of the housing.
A pair of pliers and it lifts straight out, this is then fitted to the same section but on the extension.
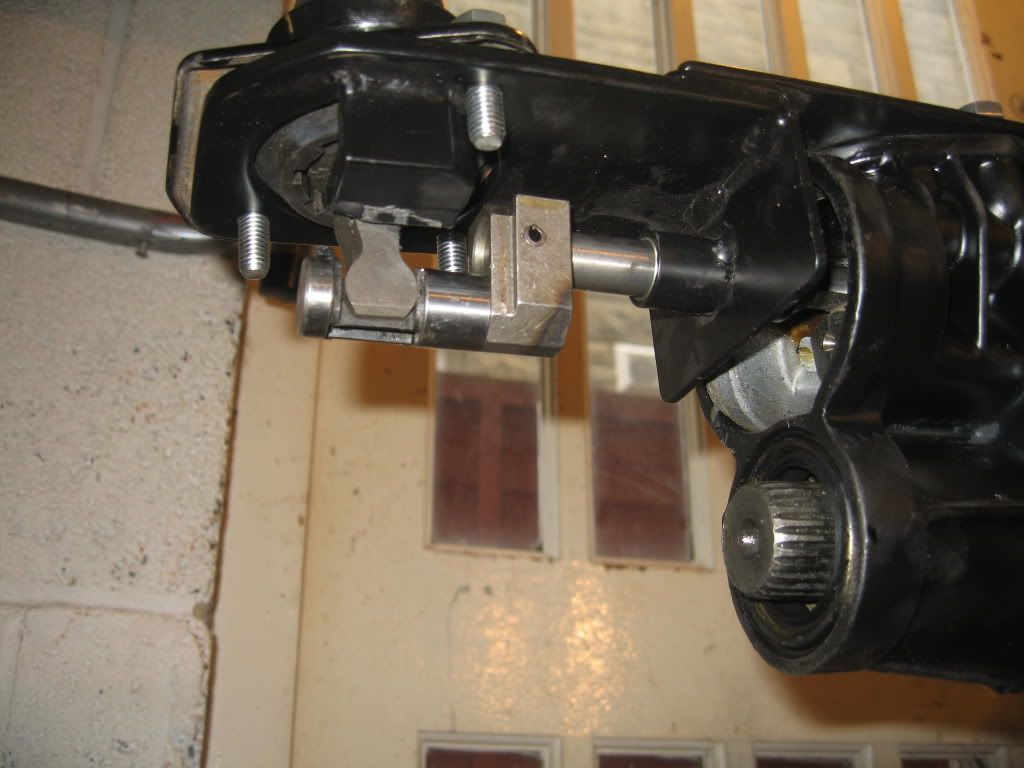
The rear cover can be left off but I wanted a little more protection from the weather so I have modified it to fit over the rod and into its original hole.


You can see in this photo the extension fitted with the gear lever in position but without the modified cap fitted (just above the output shaft), you can see the reason for modifying it as the whole area is open to the weather and would soon gunge up so I shall grease all of the exposed areas and keep them that way.
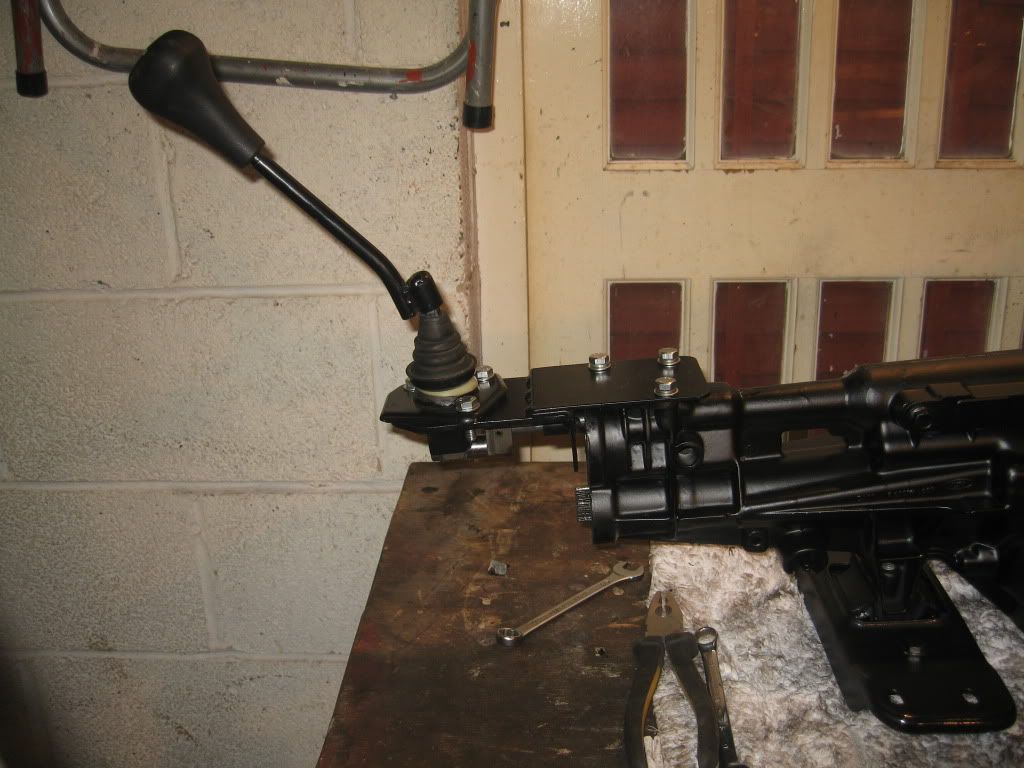
The extension has brought the stick 5" 125mm nearer to the driver and freed up a lot of space in front of the radio, I shall cut the new hole and weld or rivet a patch over the old hole next time home.
This is it fitted, I have sealed the join with silicon and thread locked the bolts and used spring washers as the last thing I want is it coming off while driving.
I was a bit worried about the freedom of movement in the selection of gears but as you can see in the video it nice and easy.
Just a reminder of what came out.

I also fitted the fork and the new release bearing that came with the clutch kit and yesterday gave it a coat of stonechip.
I have the gearbox under the car now and up in position, I used a jacking strap through the gearbox hole and lifted the gearbox until I could fit the car jack into the center and lifted and pushed it into position. I now have it sitting on stands as I quickly realised how foolish I was to try fitting it alone as I could damage the input shaft if it was to fall. So I have text a friend and hopefully he'll be round on Monday to help.

Well that's all for the weekend as I am off to my nephews wedding tomorrow and I am expecting a hangover on Sunday so no work on the car.

see ya Paul