
Got back to the freezing weather last night and a bit of a shock to the system after being sheltered in an engine room for 2 1/2 weeks and not seeing the sun or snow except from a cctv camera. Brrrr!
Been busy in my off watch time and have been patrolling eBay with some success, I have managed to get hold of most of the parts I needed all bar the nuts for the brake hoses, guess I'll have to do a more of a thorough search of the garage as I am not sure of the size they are. I have been reliably informed that they are metric but must be of a very fine thread as my set of dies are 1.5 pitch and are huge in comparison. The flea market is on tomorrow so I am going to search the tool stands and stock up on all imperial taps and dies I can find.
What did I manage to find.
Well I down marketed the E clips for the handbrake to steel instead of stainless, I found a pack of 20 mixed for around £2.50p I shall protect it with a smear of silicon grease and if it rusts I have 3 more.
Well I down marketed the E clips for the handbrake to steel instead of stainless, I found a pack of 20 mixed for around £2.50p I shall protect it with a smear of silicon grease and if it rusts I have 3 more.
 |
| E clip selection |
The correct size is the one showing 3 E clips
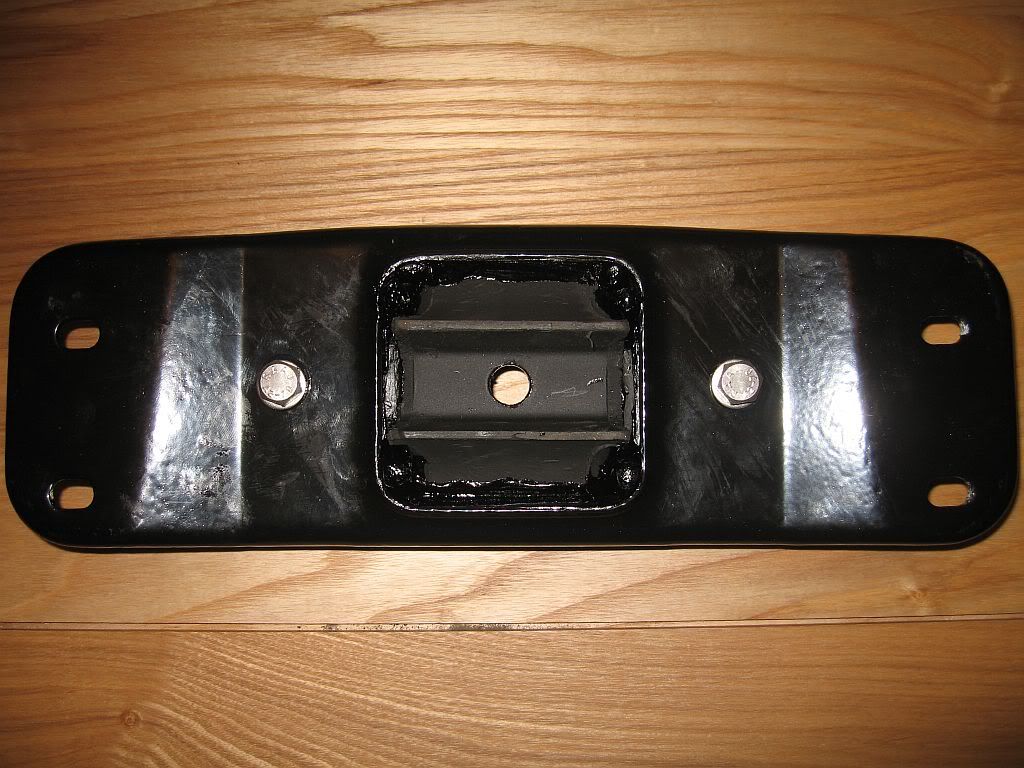
The gearbox mount was easy to source once I realised that Ford used the same mount on most every car fitted with the type 9 gearbox and probably a few others, so you just have to search for a Capri, Mk4 Cortina, Mk2 Granada and even I believe; a Transit van.
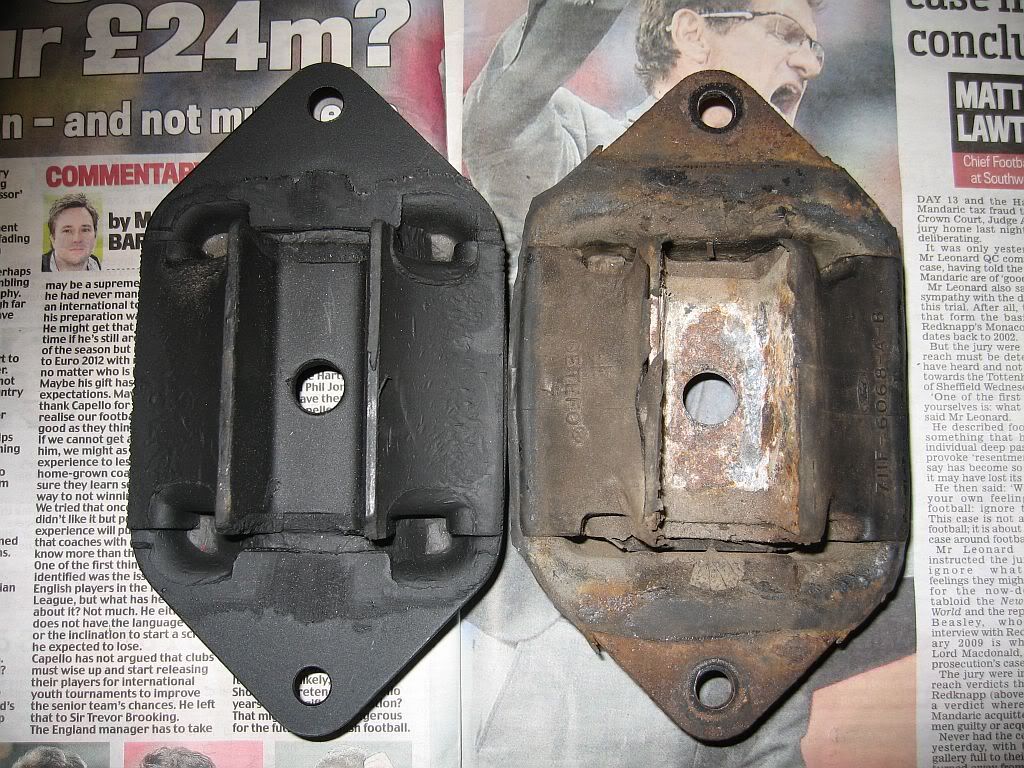 |
| Gearbox mount |
Here you can compare them both, lots of damage to the old one, the new one is not an original Ford, which is hardly surprising as they stopped making them years ago but still looks good quality.

You can see just how much damage has been done to this one considering it has only done 35,000 miles its ripped at the top and split down past the center hole. It is an easy item to change and at only £17.50 including postage it may be worth getting your hands dirty and checking out yours.
The other bits I have been after for a few months are Ally rocker covers, the original ones just don't do it for me and as I am going to fit a round K&N filter it just would not look right, so seeing as how I have worked an extra 5 weeks overtime since April last year to pay for these bits I thought I would splash out, I have seen these go for upwards of £160 so £130 for the pair was about average.
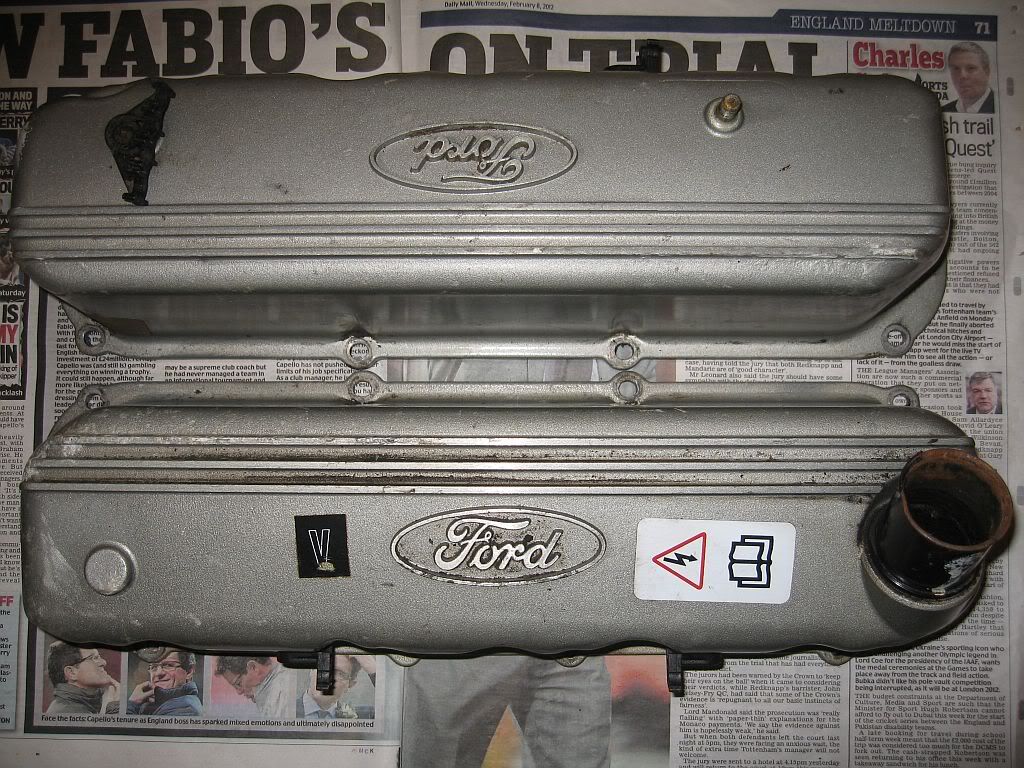 |
| Rocker covers |
I haven't decided on what colour to have the engine powder coated but have seen a set of rocker covers on the front page of http://www.peintureenpoudrepb.com/ that have been done the same colour as I plan for my paint job, so maybe plum with the Ford logo and bars polished natural.
The next and most surprising purchase was defiantly not what I was expecting to buy and blew my budget for the rest of the month, but seeing as how I planned to spend the money doing what this item comes already done I thought it would be well worth it.
What am I blathering about; in 1973 Ford came out with the Mk 2 Mustang and one of the optional extras was a 2.8 Cologne V6 engine, in total over a 4 year period over 1 million Mk2 Mustangs of various models where produced and within these million a good few thousand must have been fitted with the V6 Cologne engine option and maybe only a few hundred left in the world.
These Ford Cologne V6 being for the American market did not have the inconveniences of the European models and so were produced with hardened seats for unleaded fuel and even more importantly with the 6 exhaust ports instead of the siamesed exhaust ports of the european version.
On sale on eBay was the heads the matching inlet manifold and the matching exhausts manifolds (headers). You can see from the photos that the seperate items came from different engines or someone had a strange colour scheme but they all match up.
I bought these from a business called Tickover Retro Ford Parts and this was their write up on eBay.
Here we have a pair of Ford 2.8 V6 Cologne heads with a difference. These are the American Ford Mustang spec units, and as such have the full 6 port arrangement for the exhausts. This pattern was copied by a well known tuning company in the 80's and 90s in an effort to emulate the vastly superior flow characteristics these have over the European versions with the lame siamesed setup. Well these are the proper Ford ones, not a set that has been cut open and extra material welded in! Other advantage being that these come factory fitted with hardened seats so that can run properly on unleaded fuels. We have included the matching inlet manifold and exhaust manifolds, in this auction, so all the ports will line up correctly. These parts will fit onto any 2.8 or 2.8i Cologne V6 engine and work correctly with the existing camshaft and other hardware.
I have always planned to have my heads converted to un-leaded fuel and have searched out 2 firms in the North East that can do this with a price I believe of around £400, so it was a no brainer I get the unleaded conversion and a better exhaust flow and all for £313 plus £25 delivery. I am hoping to get the money together for stainless side exhaust so a lot of the weight (55Kg) will disappear with stainless piped headers.
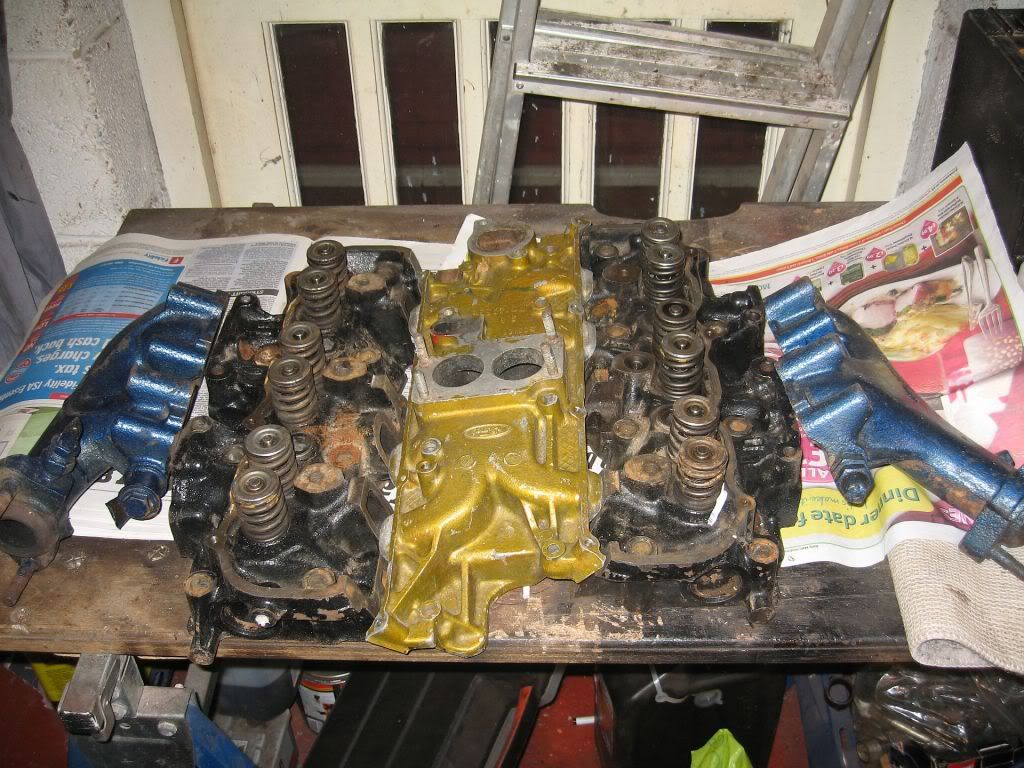 |
| Mustang Mk2 heads |
No way am I put of by a bit of rust and different paint jobs, I have had a good look and these will be great with a bit of work.
This is what its all about, the 3 port exhaust.
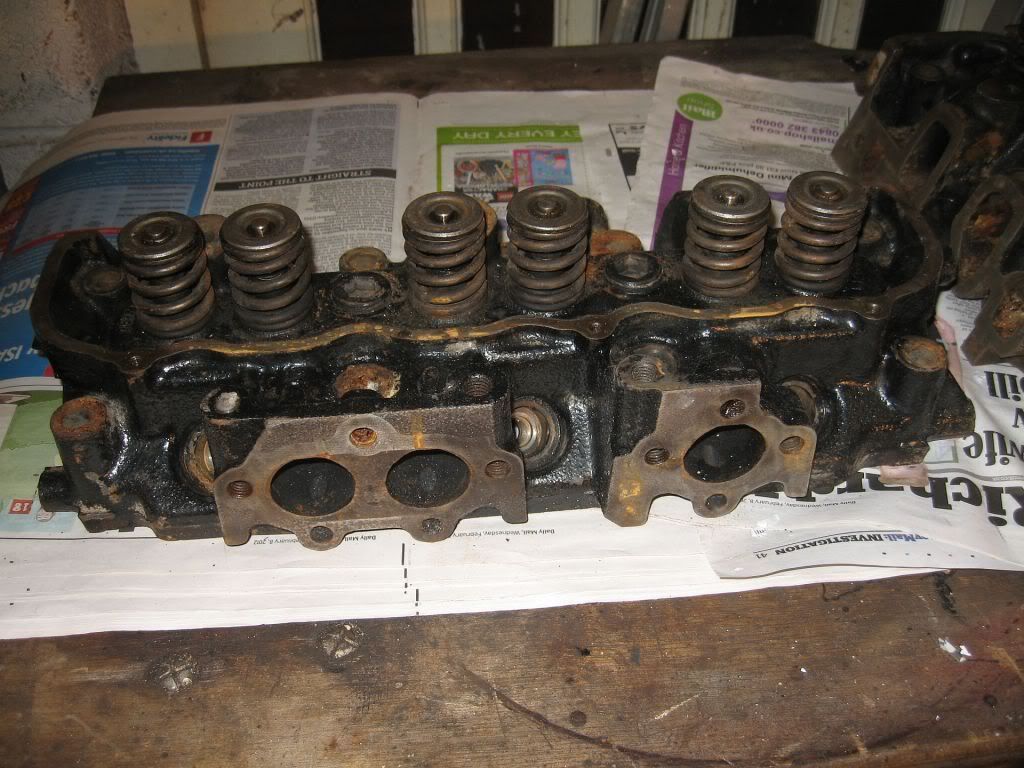 |
| 3 port exhaust |
One of the studs looks a little bent, not a problem.
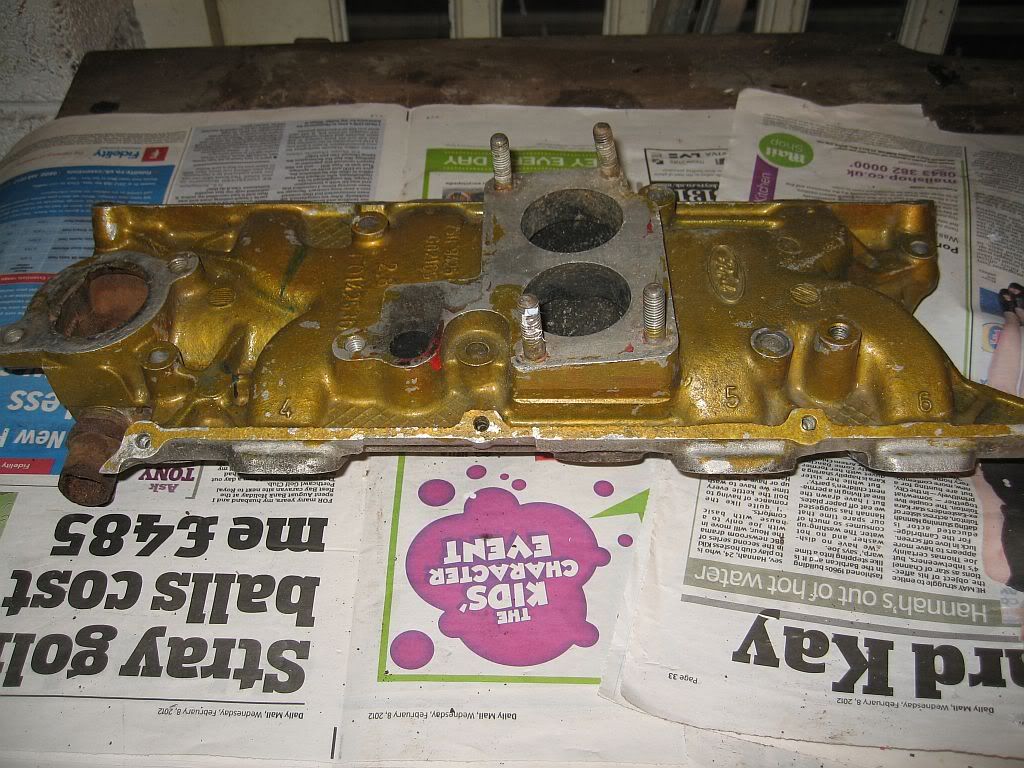 |
| Inlet manifold |
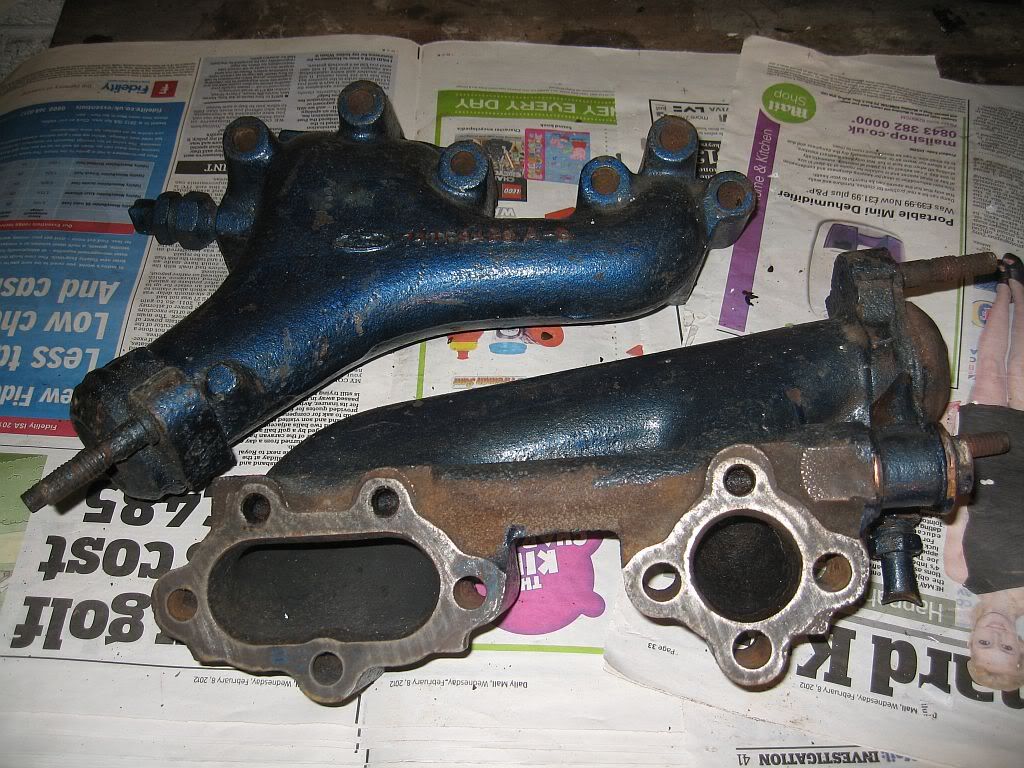 |
| Exhaust manifold |
So as you can see they show their age, I have already ordered a twizle stick and lapping paste just need a spring compressor. I shall remove the valves and get a little blasting done and see what they come up like, once the valves are lapped in and have had a smoke test or petrol test I shall be able to see if the valves need changing but if ok they will stay. I shall probably have the heads skimmed just in case of any warping over the years, but judging by the weight of these things it would take a dip in a volcano to warp them.
So a productive time and hopefully there will just fall on and work fine.
I have also managed to get a bit of work done today, the main job was to drop the axle to fit the upper arm on the nearside, I was hoping the new bushes I ordered from Floflex would come today and finish both sides but no such luck. Lynne has took Friday of and wants me to take her somewhere for the day which means missing the delivery, so unless I sweet talk her out of it I may have to wait till Monday for an alternate delivery date. So to get things moving along I swapped the upper arms over, I had fitted the offside arm last time home and all it took to fit to the nearside was to drop the lower arm and undo the damper. I just pulled the axle and the arm that was trapped dropped into place.
I had to do this as the upper arm would not fit in position as the Panhard rod brackets prevented it, I have made a little video to explain the problem.
I changed over the already sized bushes and the arm just slipped in nicely
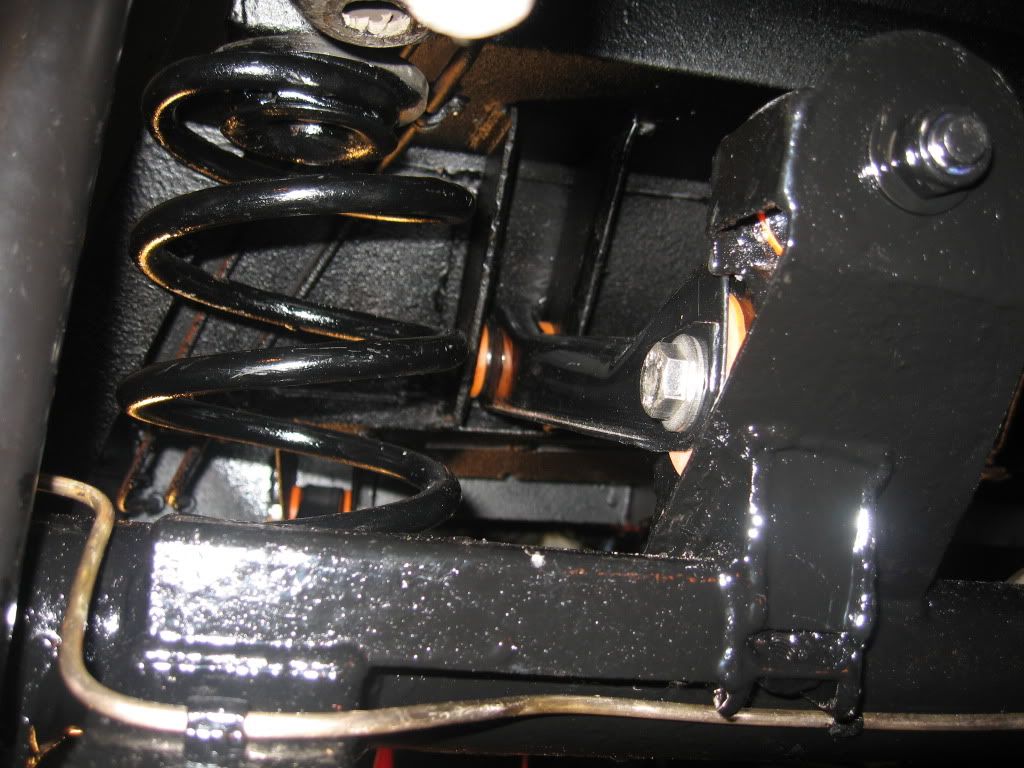 |
| Upper arm fitted |
The gearbox mount was an easy job, just bolting to the cross member, you can see straight away the reason for its failure. If you look at the photo you will see that each corner is a lovely little water trap, as no drainage has been incorporated. I have painted the underside with tetra shutze before bolting it on and filling the four corners with the tetra. I can't stop the water sitting in but I can slow down the rot.
I also re-fitted the hand brake bar which I had removed to paint the axle, the e clip just pushed into position, next came the brake pipe work which I also removed for the painting.
If you remember a few months ago I fitted the front sub-frame and got the steering out a few degrees and I hate driving a car with an un-centered wheel, I was going to wait until I was ready to fit the new wheel and try to re-align it with the boss. I decided not to wait as it may not have worked and I will have had the paint done by then so I thought I'd have a go. I had to center the front wheel hubs as best I could by eye then unbolt the track rod end on the steering side, out came the bolts holding the steering rack and I took out the linkage bolt from the uv joint and tapped it off. I centered the steering wheel and refitted the uv coupling, re-fitted the track rod end and checked the center. I was happy with the first fit so bolted everything tight again.
One other job that needed doing to progress was the testing of the petrol tank sender unit, this is a resistance test. As the float rises and falls the arm makes contact with a coil, the movement across the coil changes the resistance in the field and is measurable. This test measures the resistance in Ohms, using a multimeter set to 20k Ohms, connect the red lead to the spade connection and the black lead to an earth point, then simply move the arm up and down slowly and you should get a reading of zero at empty up to 20 at full. I only got 19 which doesn't really matter as with the price of petrol in this country I won't be able to afford a full tank.
I have lots of jobs planned for the next 2 weeks and hopefully a moving car.
see ya Paul
Hi, I have a couple of these cylinder heads, and have been thinking about taking them down a bit, you know how much you dare? 2-3mm?
ReplyDeletegrateful for the answers! / / Andreas