
Today been all about cleaning the engine and removing parts, I started at 0830 and finished at 1700 and I reckon there is still a day or 2 left.
I started with the oil pan, it was pretty thick down in the depth's but once the heavy was removed and a good spray with thinners soon had it all clean. They was also a fair amount of rust on the flange area which should not be there, I cleaned all of the rust from the flange with a wire wheel so it should seal well. I still need to remove the flange strength bar that runs under the flange and is kept in place with knock over tabs. I had already bought a set of upper and lower gaskets, but I can see by the quality of the one that's on that the ones I bought are not of sufficient quality to go back as the sump gasket is in 4 pieces as opposed to the 1 piece rubber that's fitted. I have seen the rubber one in the Burton's for around £25 plus p&p, I originally said no chance at that price, but I don't want to have to remove it again so I'll bite the bullet.
The sump pan went back on before I started cleaning as the inside's are bad enough and don't need any more dirt inside.
I think because of the state and the long time it been sitting in the gunk I may remove a couple of the bearing caps and check the shells as I remember on the tv program A Jag is reborn that the bearing were damaged by acids in the oil after sitting for a prolonged period.
I am very pleased with the engine stand and I now realise that there would have been now way of doing it without the stand although it is very hard to turn, I would have had a smear of grease on the turning part if I had of realised.
I started on one side and removed the exhaust manifold, I managed to remove 1 nut with just the impact wrench but the other 3 would not budge even with heat applied so I had to resort to a chisel to split the nuts, even then it took a lot of persuasion to get the manifold of its gaskets.
Once of I got stuck in with the rotary wire brushes.
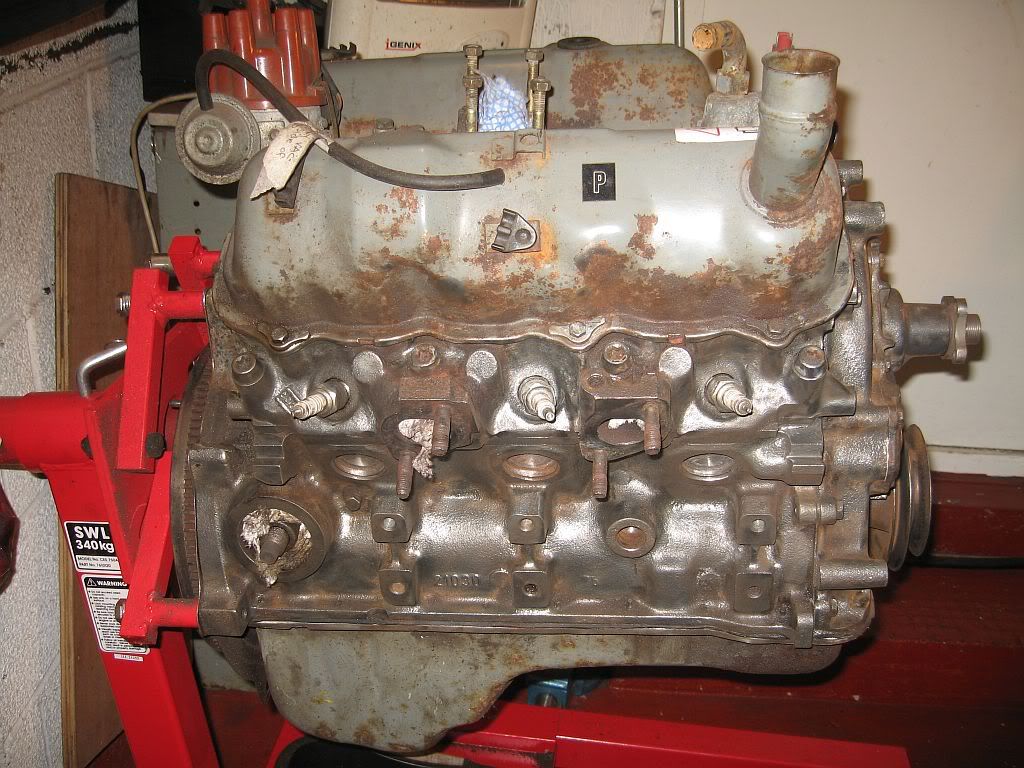
This was the really bad oily side and it is coming up very nice, when this was done I turned the engine and repeated on the other side.

The removal of the viscous fan took a bit of a effort, the Haynes manual for the Granada had every fan in apart from this model but I found it in the Capri manual, this fan has the temp controller fitted and instead of 4 bolts at the front, it has a concealed nut at the back. Unfortunately it is very difficult to get at without the correct spanner which is 32mm or 11/4" and only 5mm thick, you can fit an adjustable by removing 2 of the pulley bolts but the spanner still won't fit as the remaining 2 bolts won't let it slide in as the gap is to small. So I took my large adjustable to the grinder and made it fit, a couple of good whacks, remembering its a left hand thread and off it came.

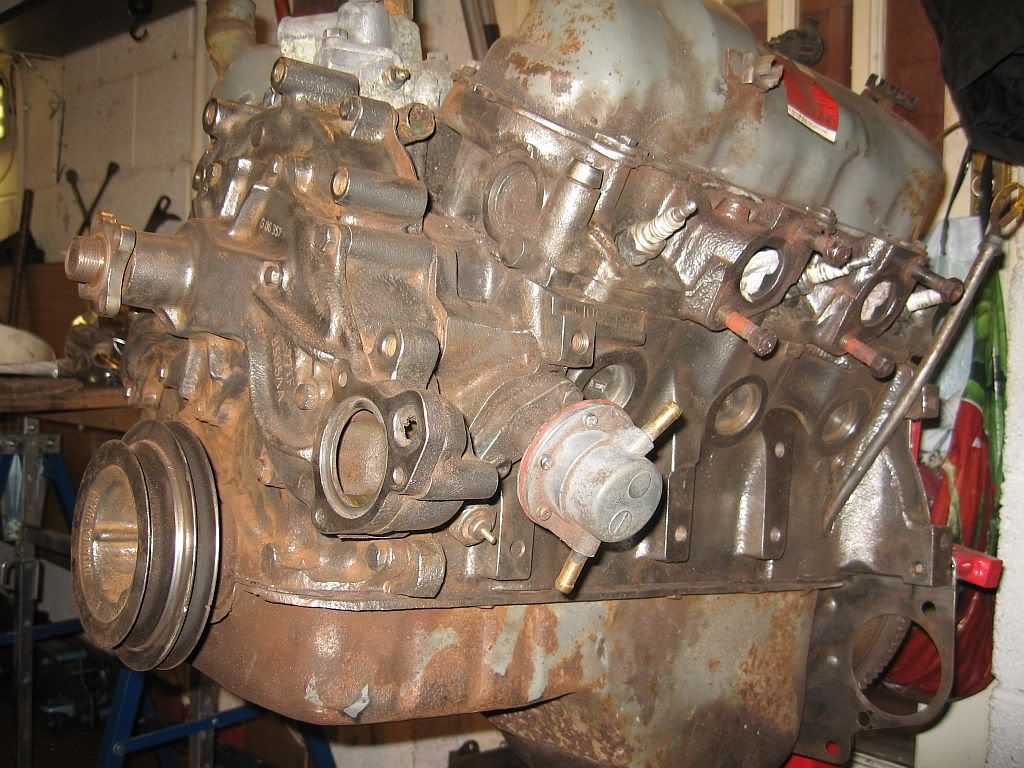
With the fan off I was able to clean up the front of the engine.
The water pump connection was removed and the thermostat housing, this was in a pretty bad state.
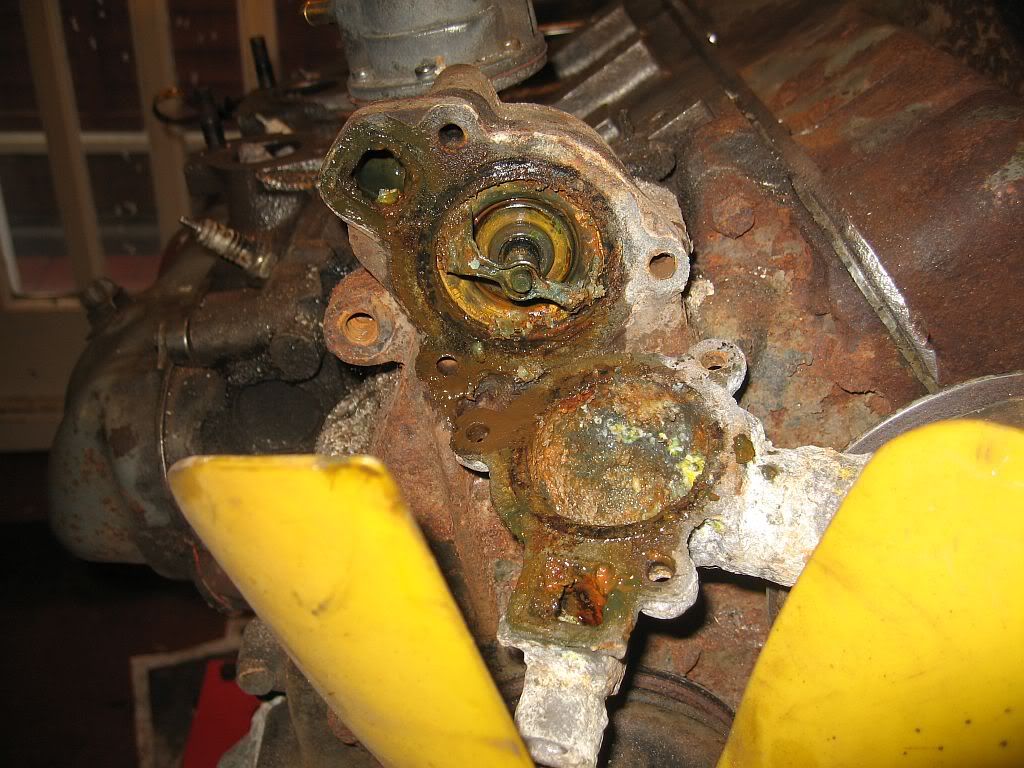
Somehow I don't thing this will have worked to its optimum performance, I need to look at the pump next and see what condition this is in, they are plenty of these available so no problem sourcing one.
Plenty to carry on with in the morning, especially the 3 sheared bolts that need drilling & tapping and who knows what else.
See ya
Paul
No comments:
Post a Comment