
Well back home for Christmas leave so hope to get some work done while I can, not much done yesterday as I had a MRI scan arranged; noisy things but still managed to fall asleep inside the machine.
Today's main task was getting the rear axle finished so it was mostly brakes, yesterday about all I managed to get in was the brake pipes polished up with wire wool and refitted plus a bit of wire wheel cleaning.
I have bought a new set of shoes and springs for the brakes, I was considering new pistons but after a turn on the wire wheel they came up like new, I think these where changed by the last owner and have no millage on them. The piston are from a 2.0lt Capri whereas the shoes and springs are from the 2.8 to get the front and rear braking balance correct, I hope I ordered the correct items as I discovered a problem with the adjuster springs. The problem I spotted is that there is a left and right hand spring fitted to the car but the spring pack contained 2 right hand springs, I suppose I could have fitted it ok but thought it safer to use the old one polished up.
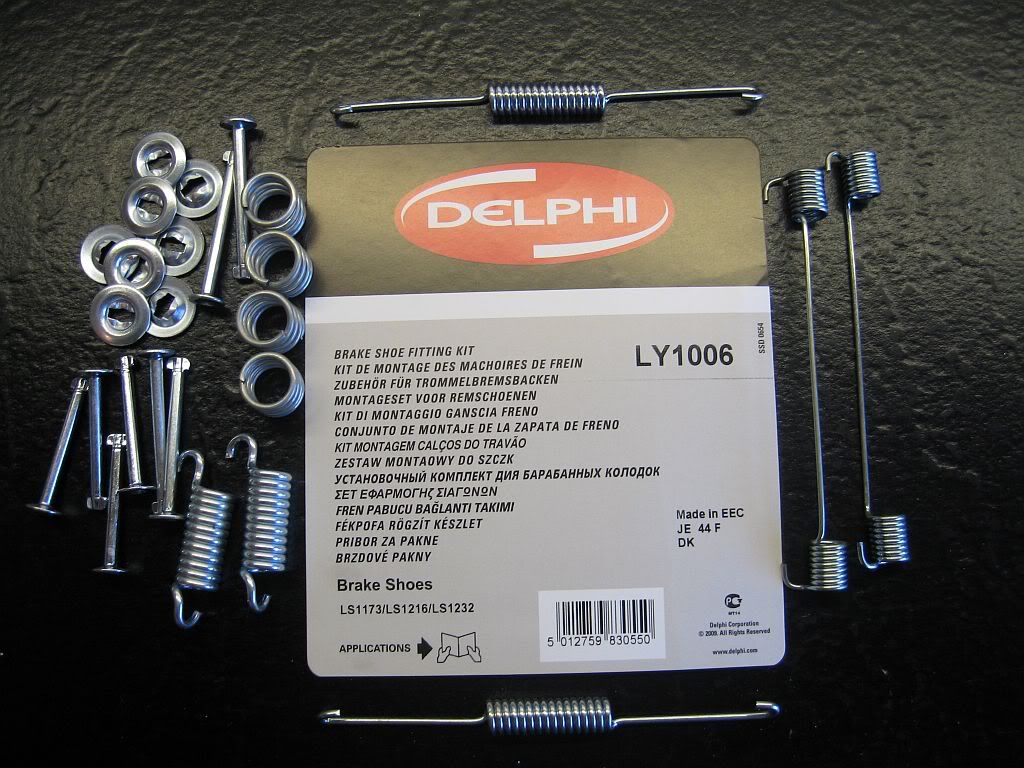 |
| Spring pack for 2.8 Capri |
You can see in the picture the 2 short springs are the same but should be left and right, not a problem as the rest are identical to what came off.
Ford Capri 2.8 Spring set Ebay £11 inc p+p
The brake shoes were also from Ebay, no problem this time as they matched and fit perfectly
Ford Capri Drum brake shoes Ebay £29.99 inc p+p
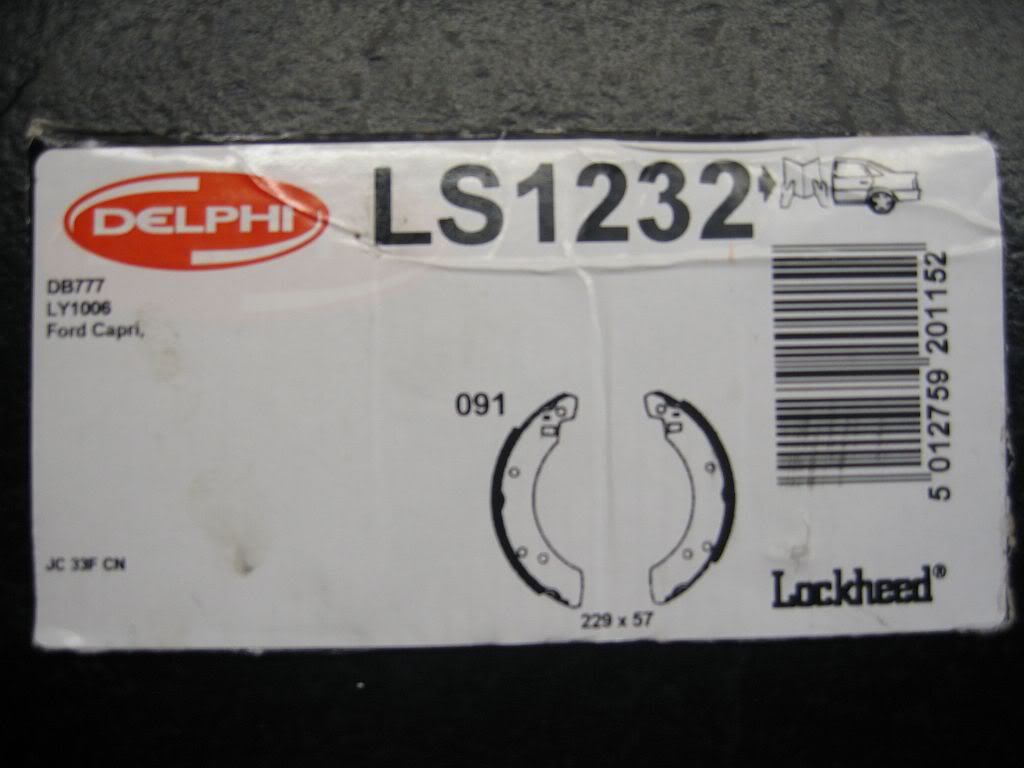 |
| Capri drum brake shoe number |
As I mentioned in a previous blog I have never had any dealings with drum brakes in the past and was a bit wary of them, I even had my Haynes book of brakes out and studied the different types. After looking at some of the others these are defiantly the easiest.
It took quite a few attempts this morning to fit the *^"* things until I discovered what I think is the easiest way for one person, never realised I was so kack handed until I tried balancing springs and shoes. This is the way I found best so hopefully if anyone out there wants to save some money by fitting there own then here is my attempt.
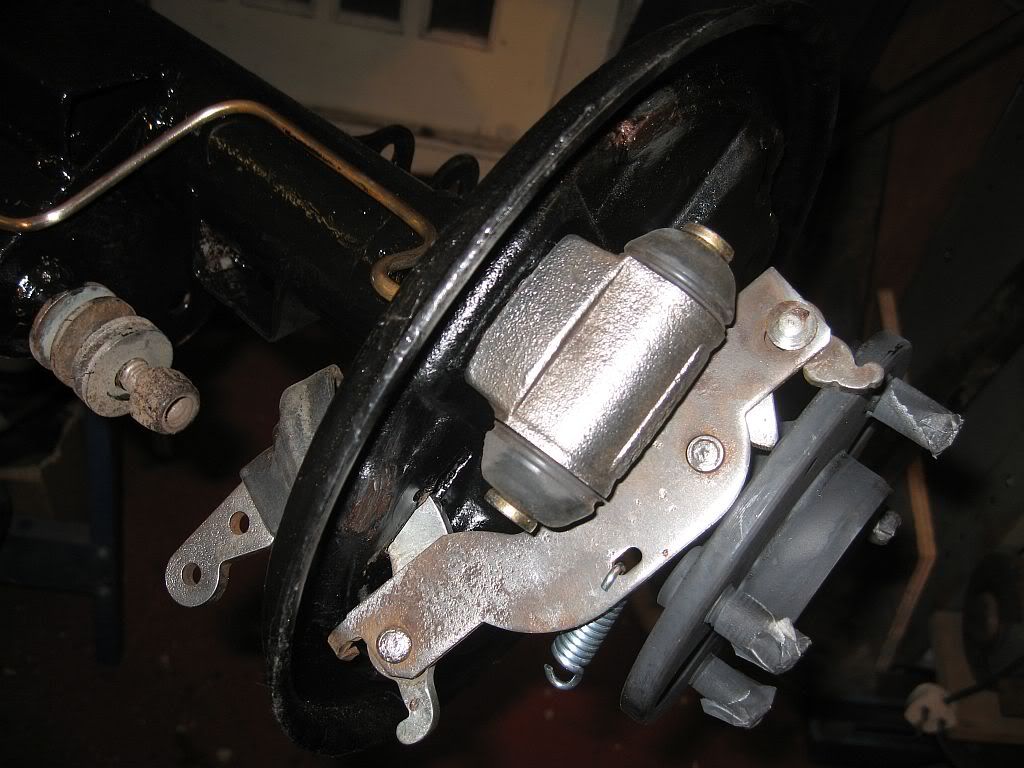
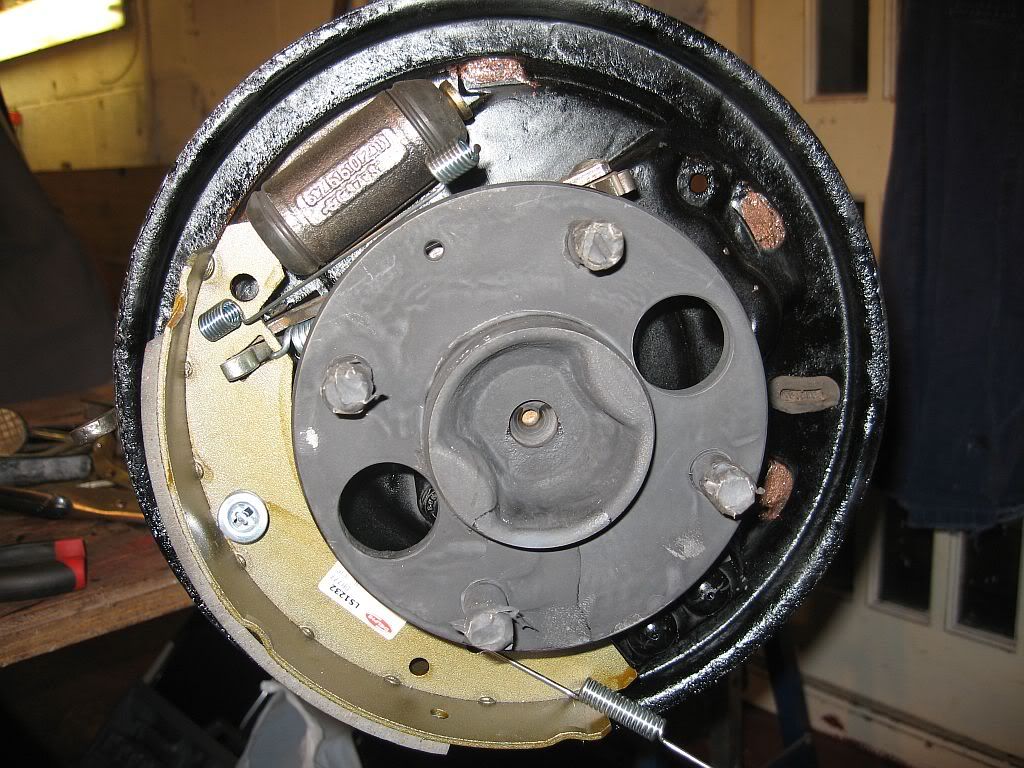
1, I found it easy to understand by laying the shoes and springs out on a table to see what goes where, of course I photographed everything before I removed them. It is also important to get the shoes the right way around, as you can see one side of the friction material is higher than the other
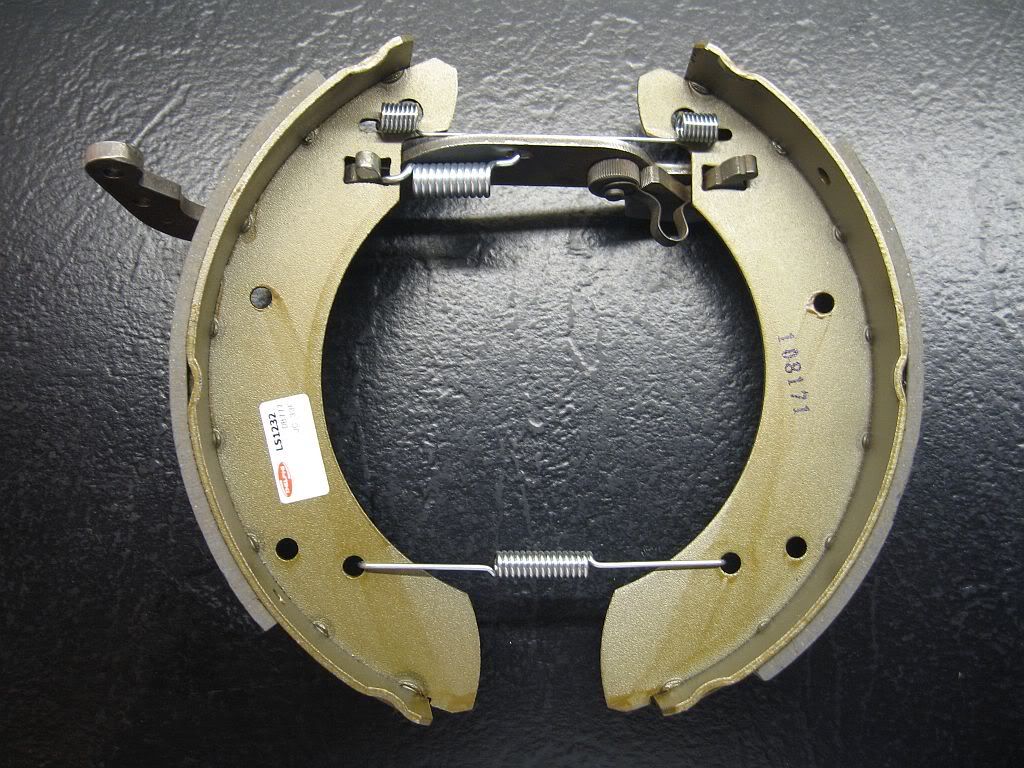 |
| Setup to understand |
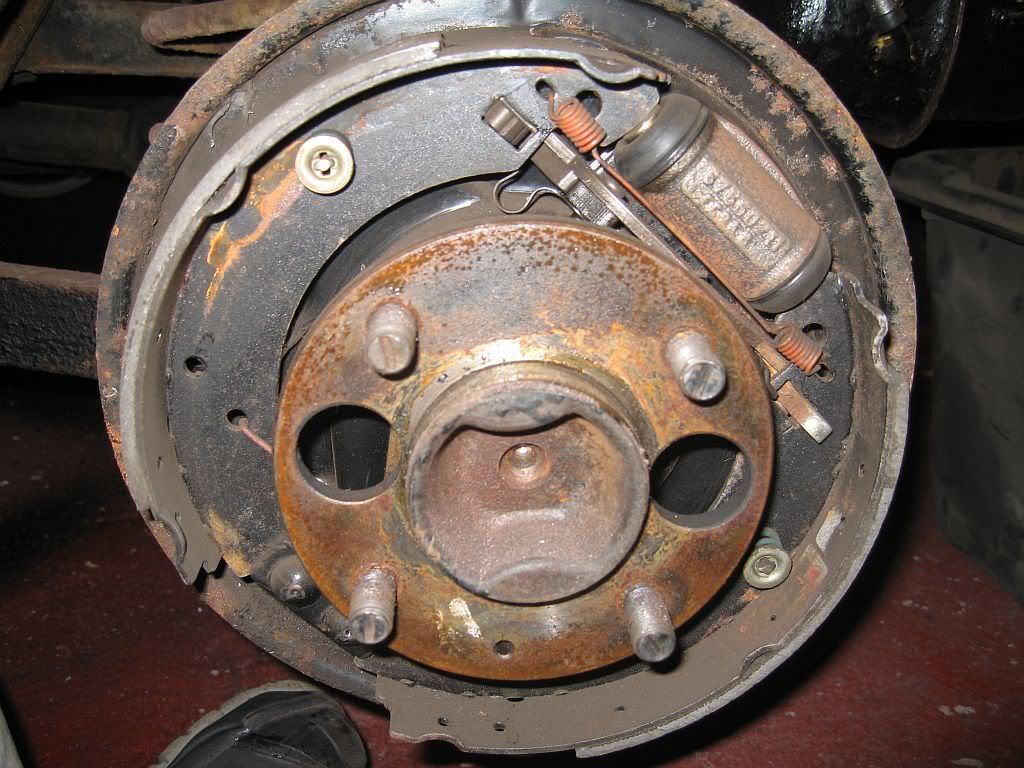 |
| Original setup |
This is the photo I had to work from, this was taken of the left hand side as you can see from the suspension spring. The friction material is lower down on the shoe facing the direction of travel. Typically I started fitting and photographing on the right hand side of the axle so the photo's show thing back to front with the direction of travel to the right of the fitting photograph's.
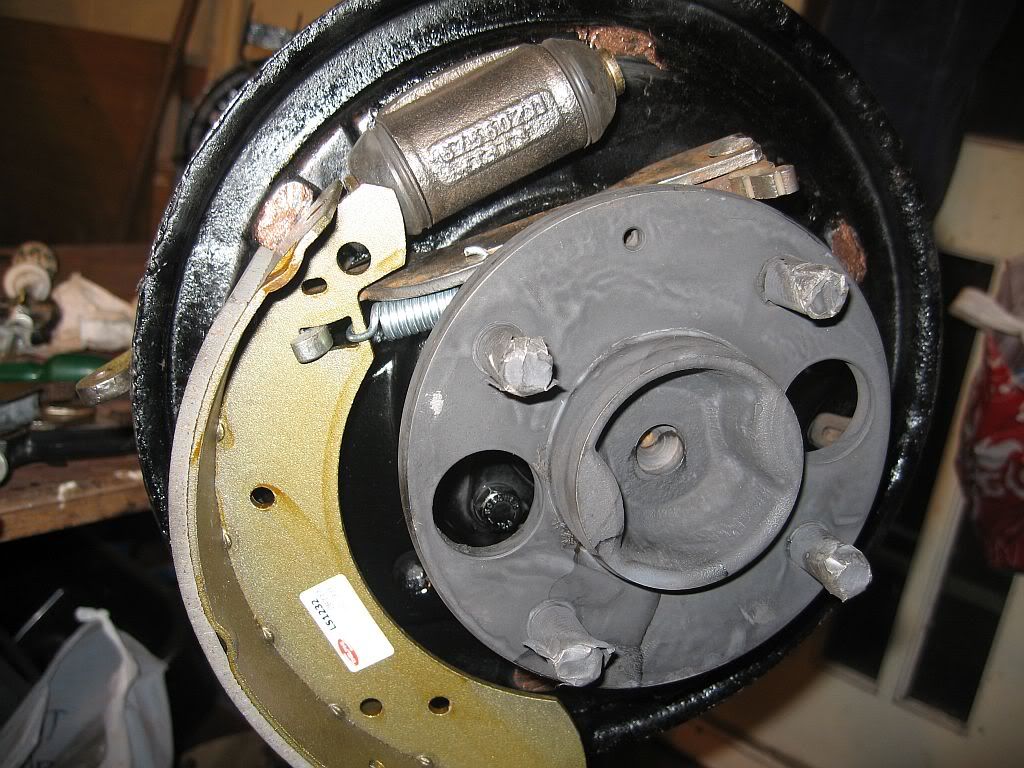
2, The first job is to lubricate the sliding plates on the back casing, I just used copper slip although proper brake grease is available. Then slide the handbrake / auto adjuster arm with the adjuster spring in place through the hole and fit the rubber boot on at the back, if this is forgotten it is rather difficult to fit after the spring tension is on the arm. (I found out on one of my attempts)
 |
| Handbrake lever/adjuster in place |
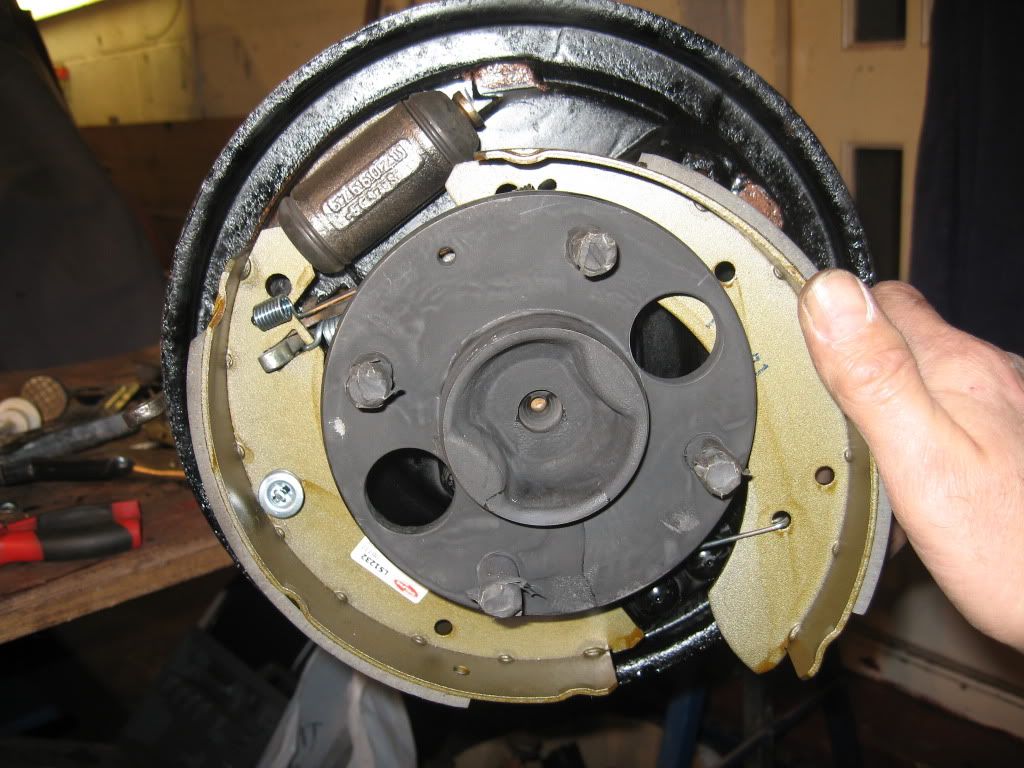
3, Fitting the left hand shoe, hold the adjuster and feed handbrake arm through the hole and attach the spring, a bit fiddly but it will fit easily enough.
4, The shoe now need to be held in place to fit the shoe retaining clip, first slide the bottom of the shoe into the anchor plate and the top of the shoe over the piston. Have a clamp ready to fit, then lock into position.
 |
| held by clamp |
5, The shoe retaining clip can now be fitted, I did not have the correct tool available but found a pair of pliers worked just as well. Insert the pin from the back and fit the spring, hold retaining clip at the end of the pliers, line up the cutout, push on and turn.
4, Now fit the upper and lower return springs
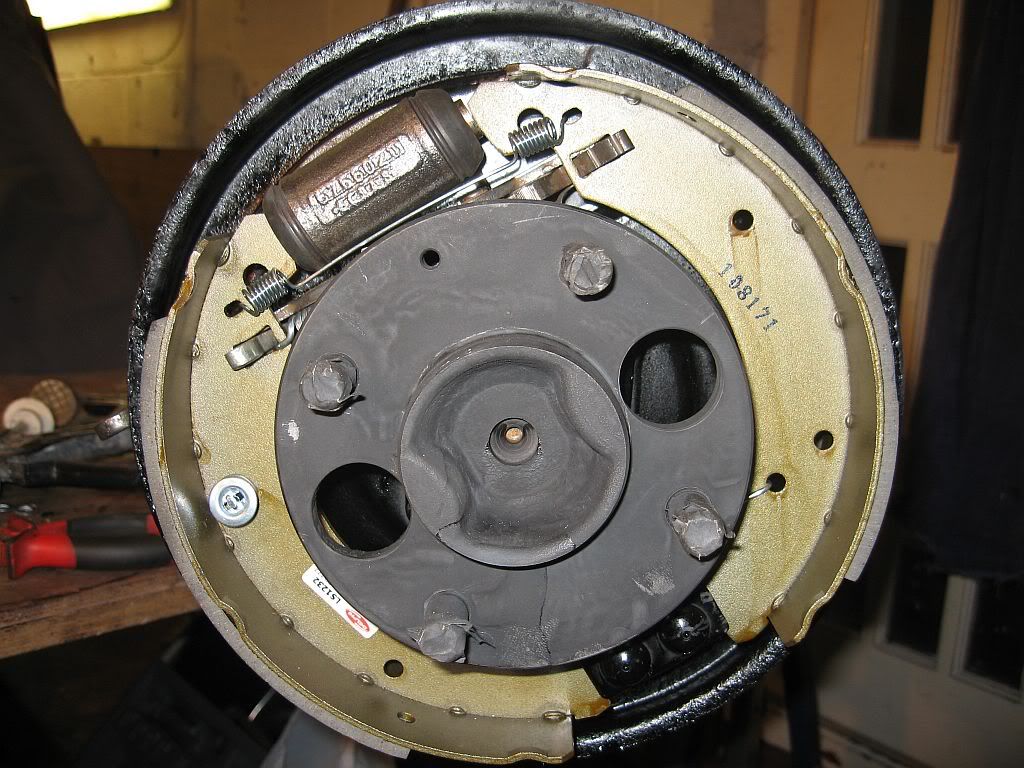
5, Take the other shoe and fit the auto adjuster arm thru its hole, then clip the upper and lower springs in place, doing it like this means that there is still a bit of play in the springs so no effort required trying to stretch them.
 |
| Other shoe attached to springs |
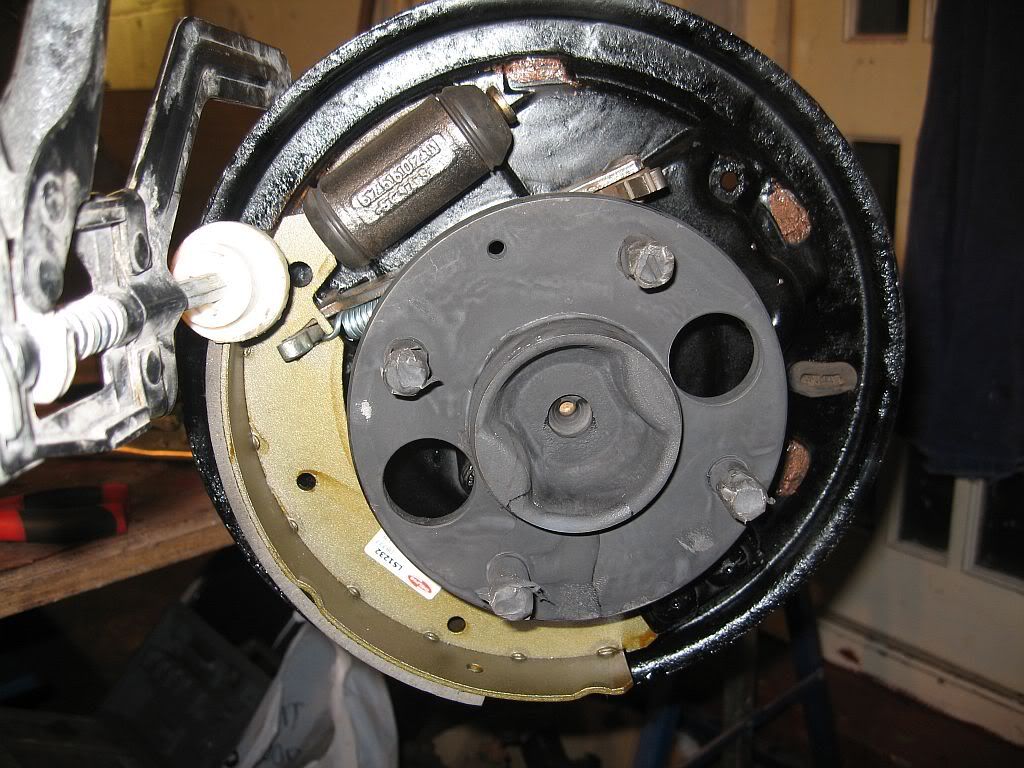
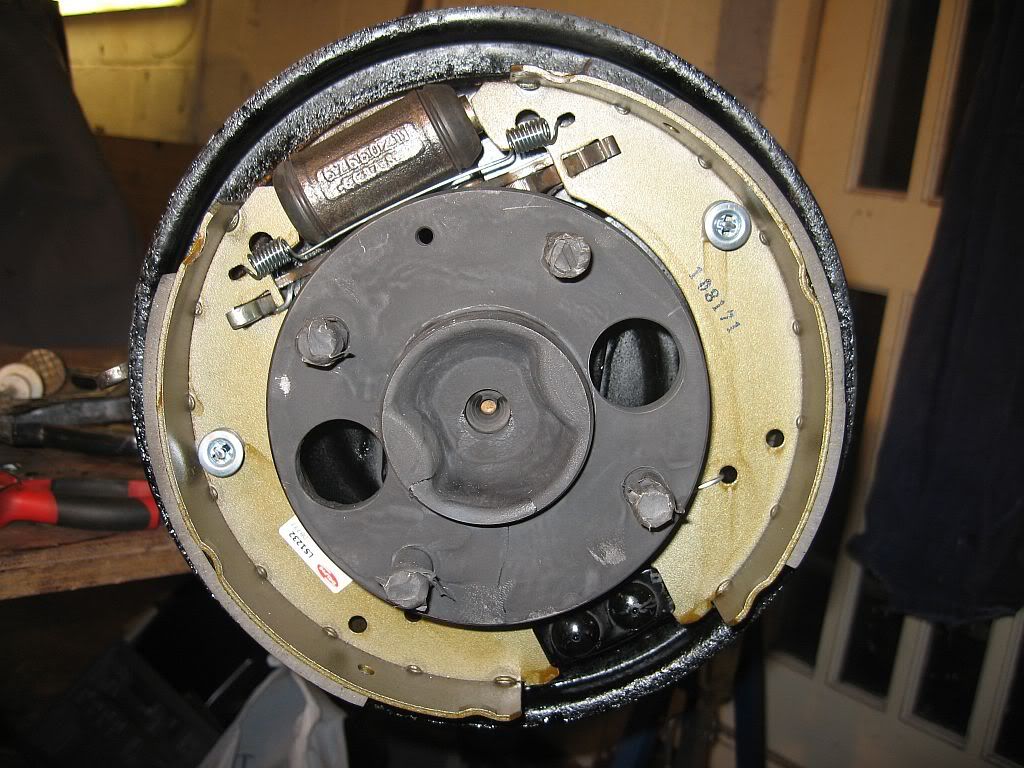
6, With the springs attached the bottom of the shoe can be pulled until it slips into the anchor point, now with a bit of force pull the top of the shoe until it slips over the piston then push onto the backing plate.
 |
| Shoe in place |
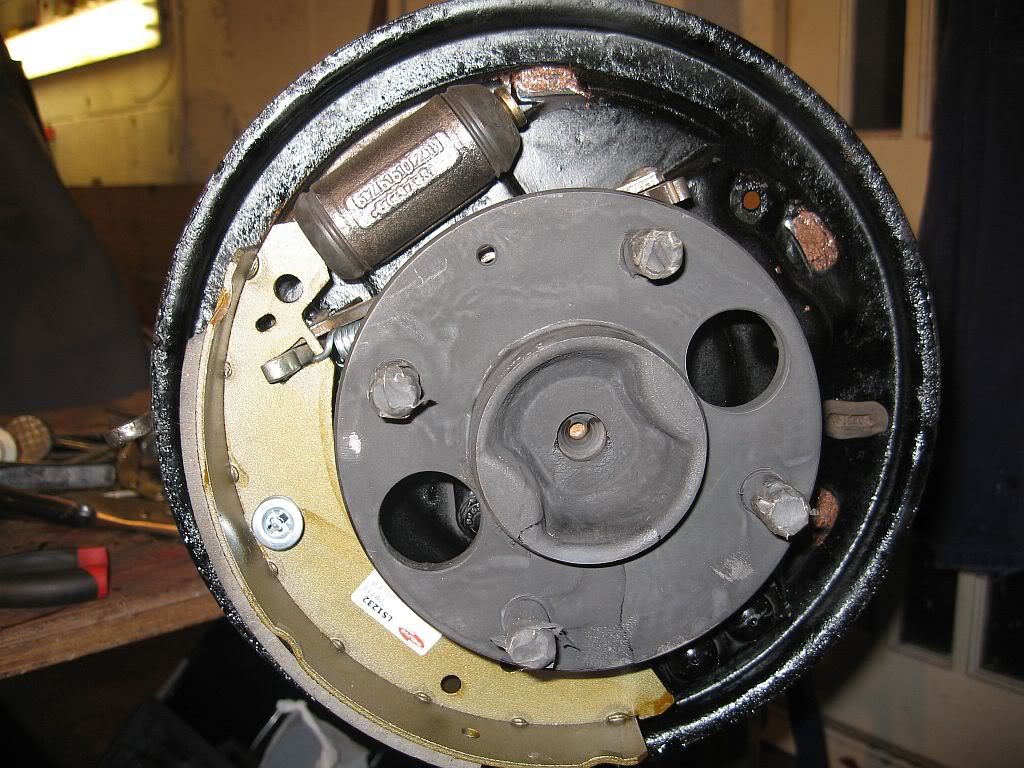
7, Now just a simple matter of fitting the other shoe retaining clip and all done. With all of the pulling the self adjuster will have pulled to its full extension, you just need to tap the edge of the serrated cam with a plastic hammer and it will drop back to its least position. It will then self adjust to the correct position when the drum is fitted.
 As with all published how too's, I cannot be held responsible for nipped fingers, dirty hands or any swearing, and of course your brakes not working after.
Once done I fitted the wheels and got the axle out of the way to make room, I still need to blast and paint the drums but that's for another day.
Next was the prop shaft, this just needed to be slid out of the drive. It appears to be in great condition just a bit of oily dirt around the gearbox end which appears to be from the oil seal on the gearbox leaking, as if I was surprised, I will have to ask Terry B what type of gearbox it is and order a seal. Once the shaft was cleaned and wire brushed a spray painting and good as new.
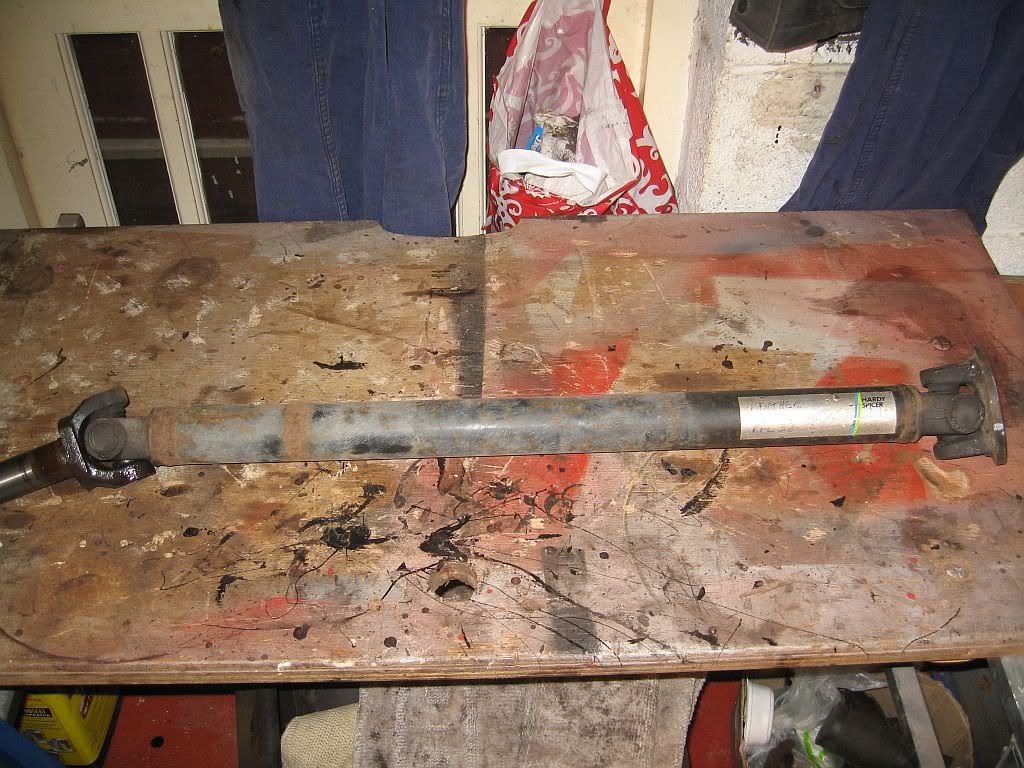 |
| Before |
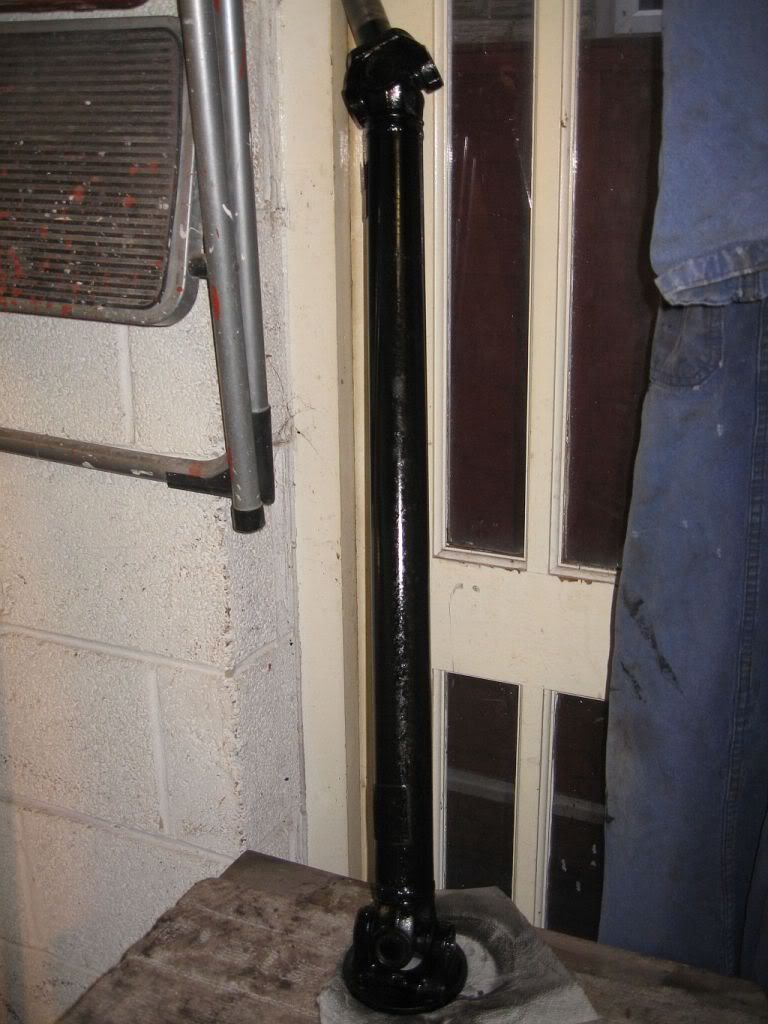 |
| After |
That was that for the day.
Bush's!!! nothing but problems, you would think that after all these years it would be easy to get a set, well it is for the front but the rear is a different matter all together. The void bushes no problem, I have been in contact with Floflex a number times and they can supply the poly version of the void from either the Capri or the Cortina as Ford used the same bushes. It is the bobbins fitted to the Panhard and the upper and lower trailing arms that are causing problems, I have been reliably informed that these are possibly from a Vauxhall Viva or suchlike. Terry B had an offer on through the club where Deflex supplied a close match and Terry modified these to suit, 50 sets were ordered and if Terry modified these then I bet they fit just fine.
The quandary I had was;
A, to modify a set like Terry B has done.
B, (of which was my favorite) was to say sod it and re-fit the originals, which would be a bit difficult for the 2 bobbins I removed for Floflex as they deformed a little and would be difficult to refit. or
C, Have a model of a correct size bush turned on a lathe then send of to Floflex for the correct mold to be made so as I and everyone in the future can just call Floflex and say I would like a rear poly bush set please.
So the decision was da da!
C, was the winner (at one point it was defiantly B but I won't be beaten on this) yesterday I dropped off the Panhard rod and a piece of Teflon rod with a Floflex stainless 12mm drilled center to an Engineering firm I have used in the past, I got a call today that it is ready to be picked up. Unfortunately I could not get there today so tomorrow I shall see what the guy has come up with, hopefully it will be spot on. There is only one small problem I foresee, not a problem for me but for some others; is that there is two different bolts sizes used, the upper arms and the Panhard are 1/2" BSF and the lower arms are 7/16" BSF. Where is the problem I here you say, well everything is metric these days so Floflex centre tubes will be in metric 12mm or 10mm, 12mm fits 1/2" perfectly whereas 10mm is much less than 7/16" and would have to much play through the bolt on sections. So my remedy is to have both the upper, lower arms and Panhard at 12mm, this is where a few people may have problems in that you will have to either file or drill the holes out to fit the 12mm bolts. Its only a little but some people are not that way inclined.
Anyway I will find out tomorrow, only £20 for the mock up and Floflex will let me know how much for the making of the mold by the amount of material used, so if they charge me for the mold I hope I get commission for each set they sell other than mine. I shall post a picture of the model tomorrow.
Well that's all for now
see ya Paul
No comments:
Post a Comment