Tuesday, 15 May 2012

Fitting non Panther clutch cable & Sump Pan

Hi
I have been waiting in all day for the sump pan to arrive and got on with some of the little jobs while I was waiting.
A few jobs on the back bulkhead needed finishing off, the fire boards that had the damaged holes came first. I had ordered a box of over 500 stainless steel self tapping screws and they were all to small for the 4mm holes drilled for the rivet so I tapped out the holes 5mm and used stainless bolts with penny washes to secure the boards.
I had also ordered a clutch cable from Burton Power which cost around £15, I ordered this when I was away and was unsure about the length although I new the one fitted was so excessively long that even if I ordered one to short it would still be ok. Not only was it short by 100mm but also the end that fits to the pedal mechanism was different, the one I ordered was for a Mk2 Granada but instead of a button on the end it had a ring which was to big for the connection. I have looked on eBay at cables for a Capri, Granada and Cortina and these all have the ring ends, so unless you know exactly which one to order you may also end up with a different cable than fitted.
It really wasn't a problem all I had to do was to modify the holder on the cable and file out the hole on the clip..
The original cable had some damage to the exterior, whether or not the inside was damaged was a chance I didn't want to take so it was on the list of replacement parts from the beginning.
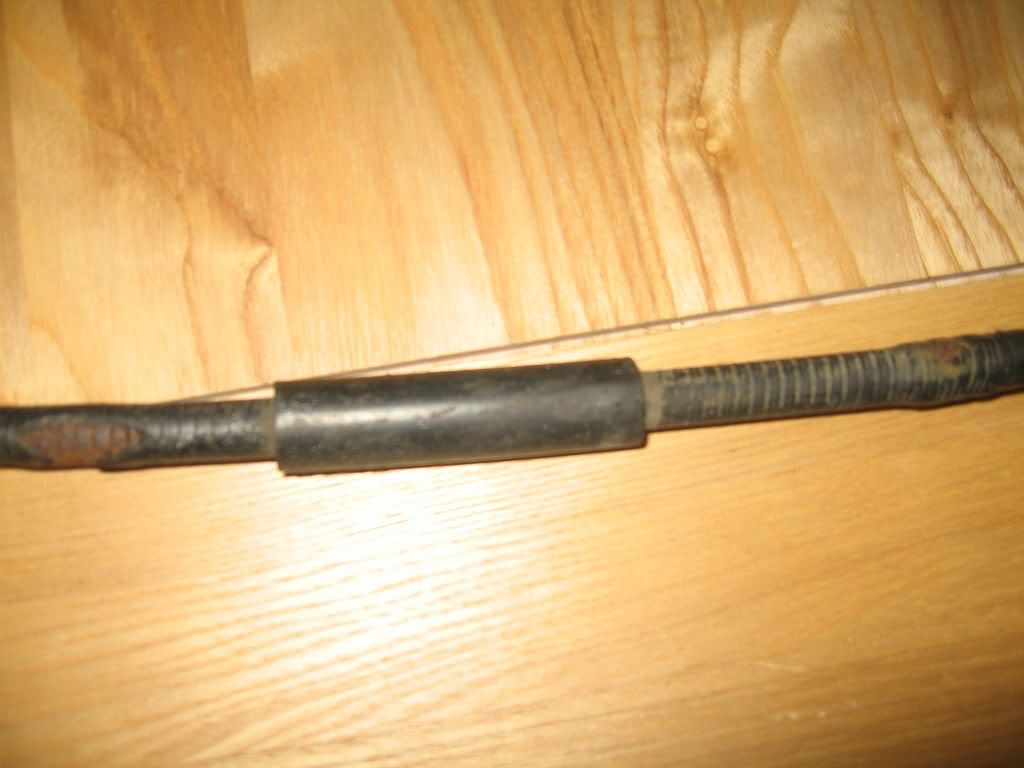
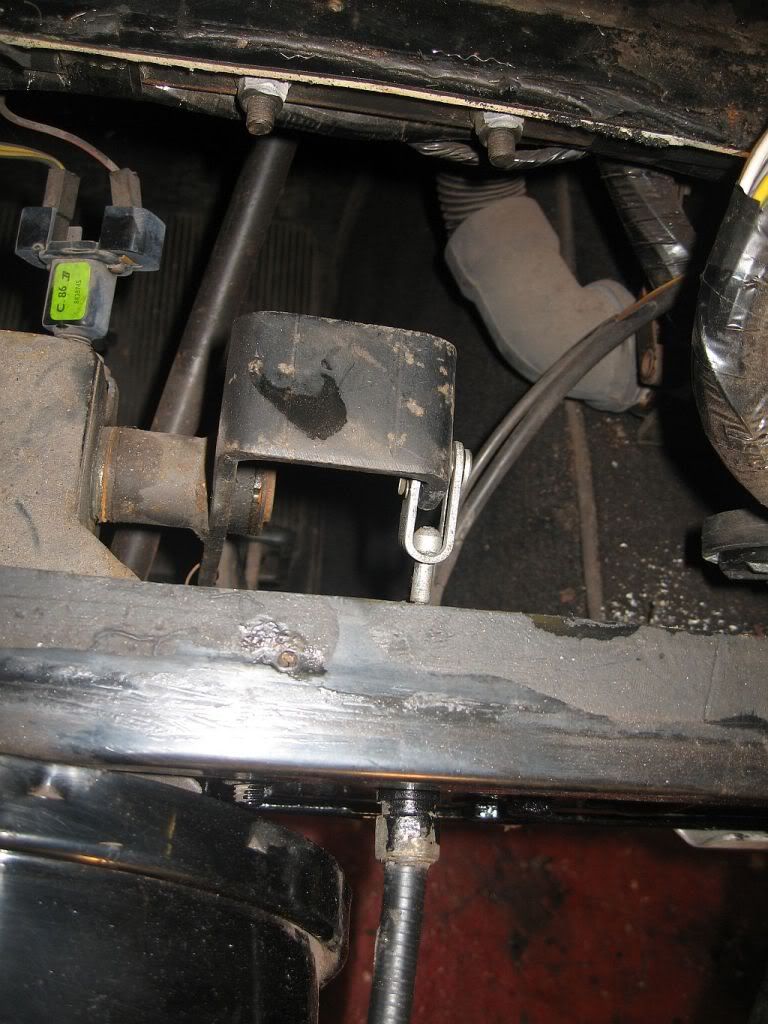
Just in case anyone is in the same boat I have taken a few photos of what I did
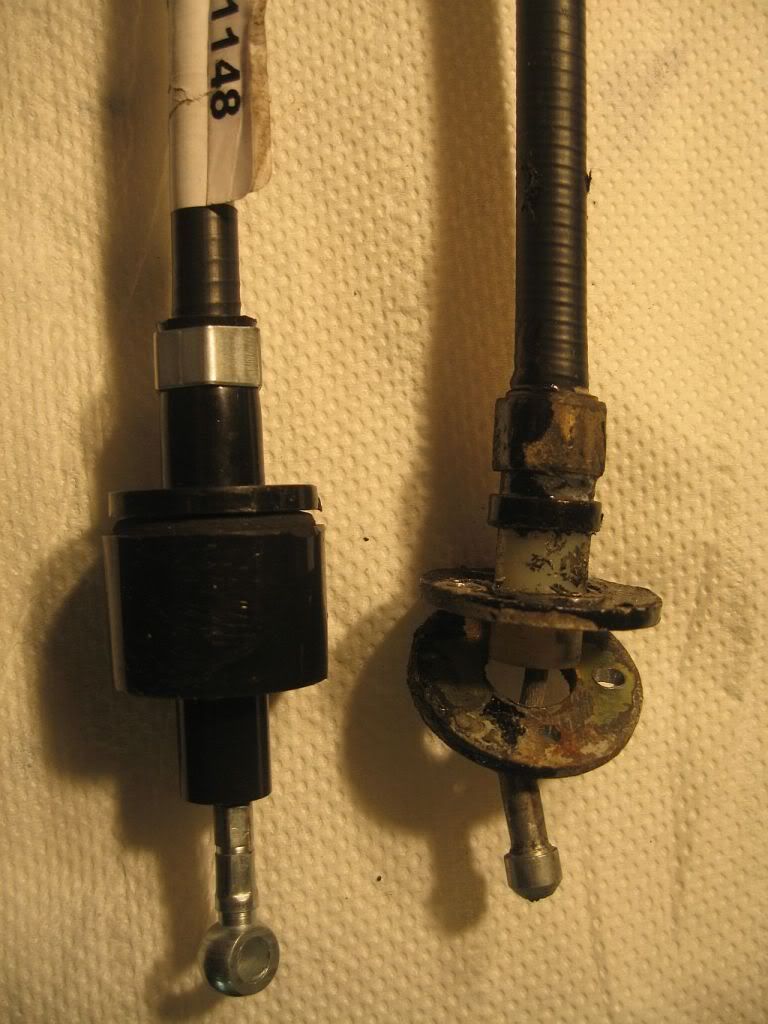
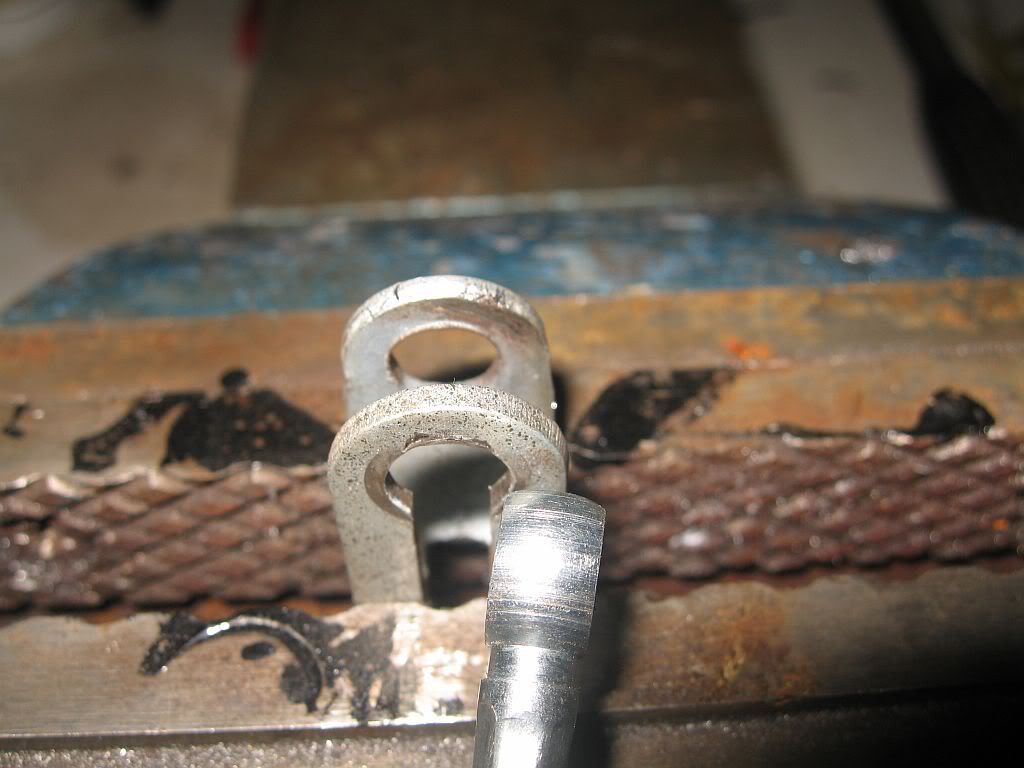
As you can see the ends have different stoppers fitted.
The flange ends also need to be altered, to remove the black tube end I used a small hacksaw to cut around the end and pulled it off.
The steel washer flange on the original needs to be re-fitted, this is for strength and also for the holes to be drilled through to match the holes in the bulkhead.
To remove the old one is a simple matter of drilling out the pop rivets and removing the clip, this can be done either by removing the screws from the fuse box plate and lifting for access or squeezing into the footwell and pulling the clip.
The rivets are drilled out.
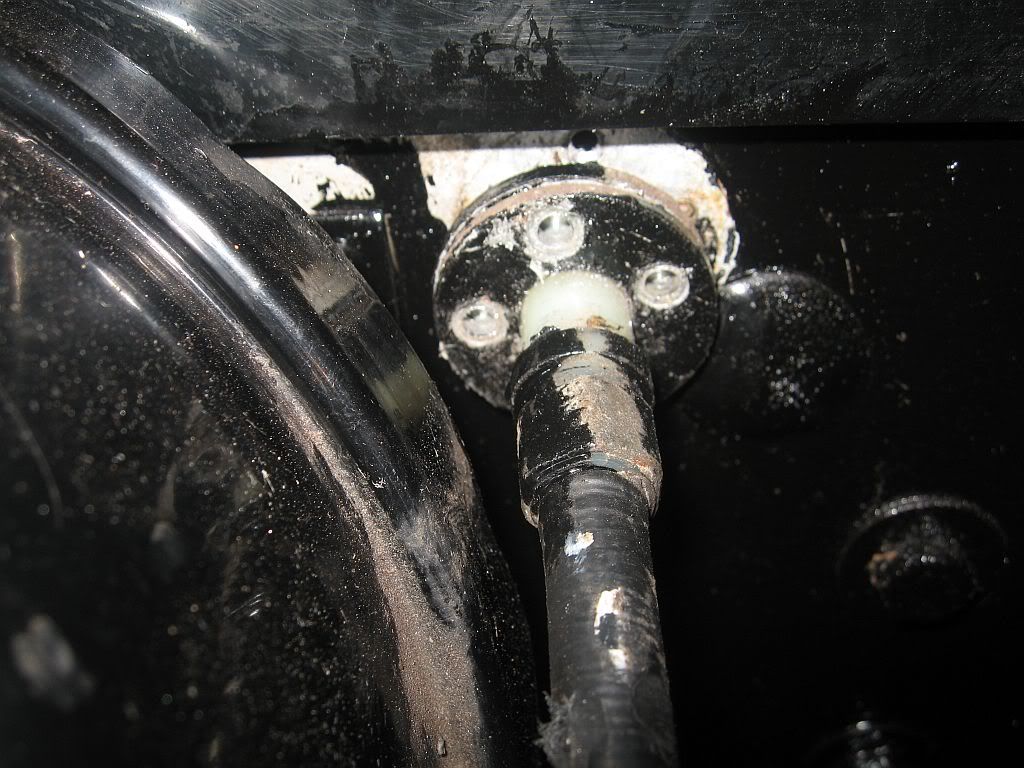
You can see that the ring of the new cable is larger than the hole in the clip.
A little bit of work with the file and it will just slip in nicely.
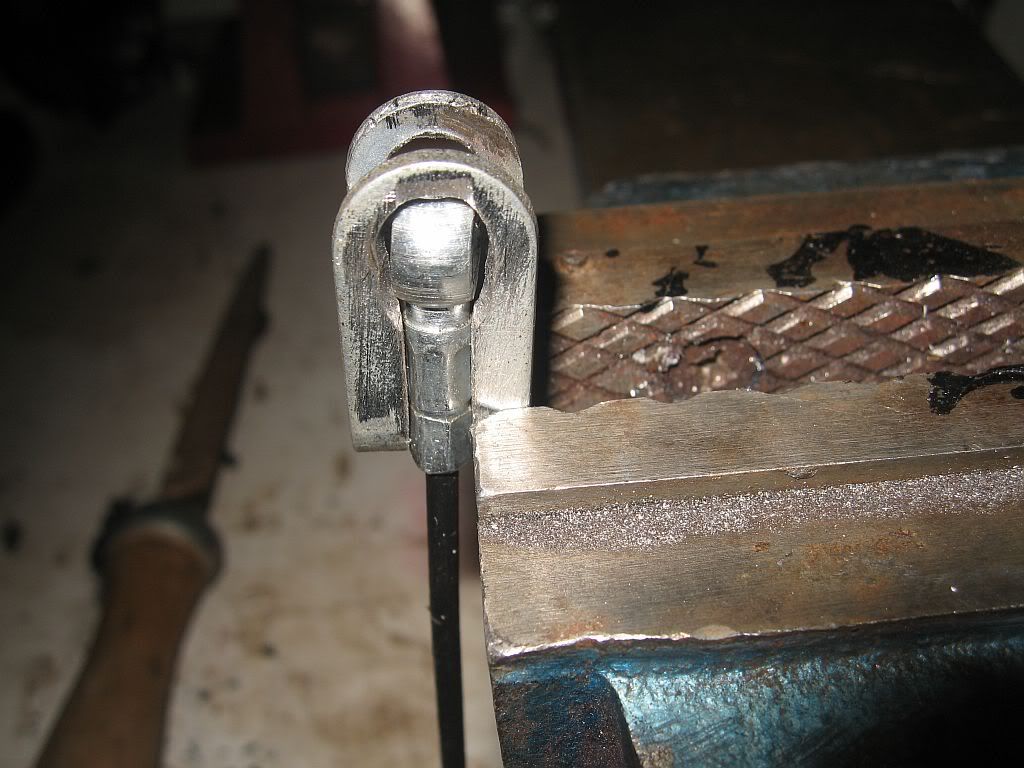
The cable can now be slipped through the hole, the clip can be connected to the ring and the pin positioned. The flange is attached to the bulkhead, I have used self tapping screws to do this instead of rivets for the easy removal and changing in the future.
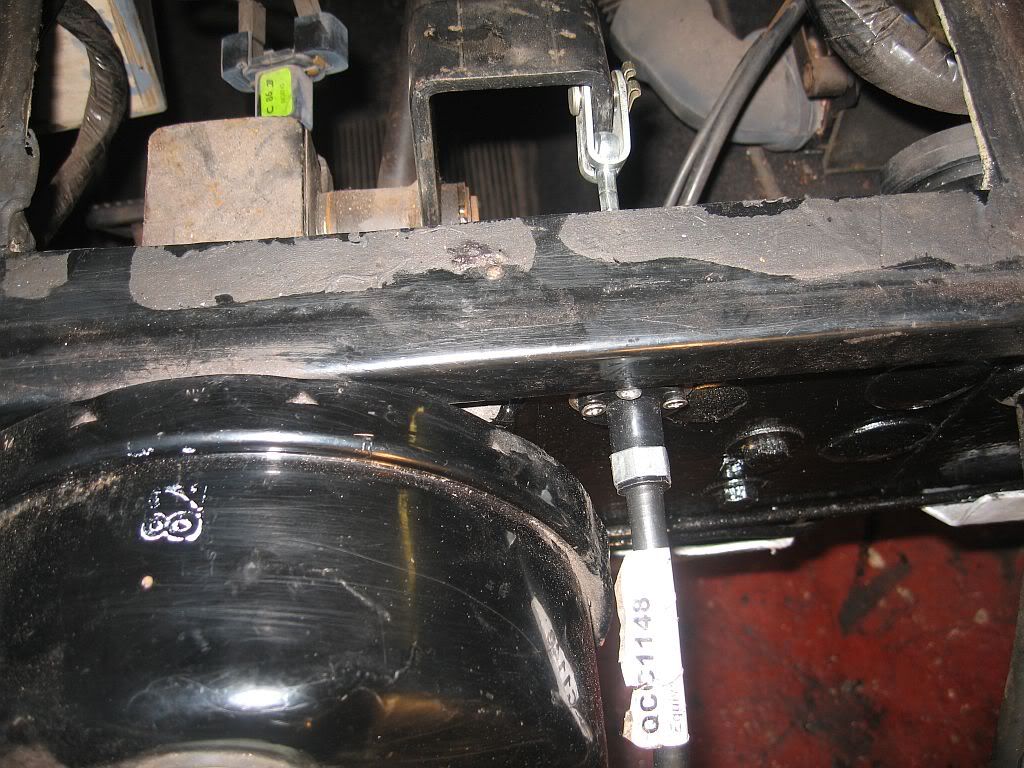
And that's about it
The sump arrived at around 1345 which is excellent service from Tickover as I only phoned around 1100 yesterday and here it is.
As you can imagine a sump pan from a 30 plus year old Capri would be in a bit of a state, it had a number of dings and dints from speed bumps and was very dirty inside, Clive at Tickover had bashed these dints out and carried out a water test, he assures me that it is water tight, soon see.
First job was in the blasting cabinet and it came out a different sump, a little sanding on the rough parts and then a test fit.
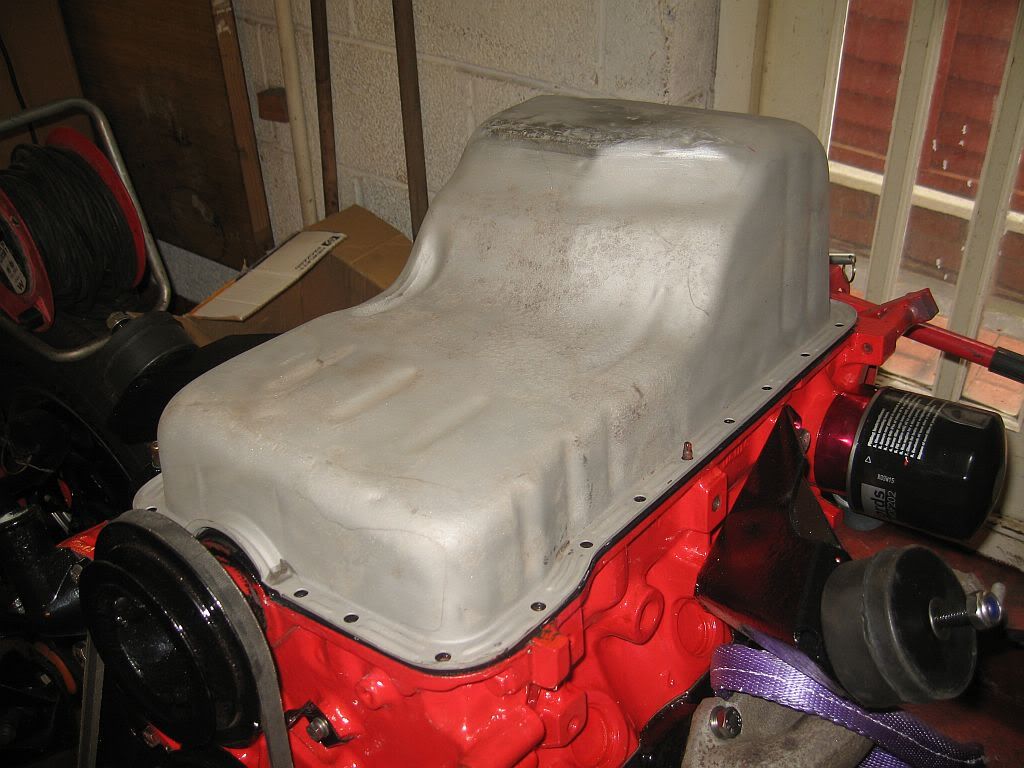
This is the early sump pan and is supposed to be fitted using a cork gasket set but as I have paid a lot for the later rubber gasket I am going to give it a chance. The reason for not fitting the rubber to these pans is that they don't have the buttons on the sump flange that fit into the gasket to prevent it squeezing out so I have used most of a tube of Hylomar on the flanges just to make sure. Before fitting I gave it a coat of etch primer then 2 coats of stone chip, I used a heat gun between coats as I am still hopefull of fitting the engine tomorrow or Thursday or Friday etc etc.
I bolted the pan down nice and evenly, I have also used the support flanges that were fitted to the original sump in the hope that it will spread the torque evenly and prevent to much squishing of the rubber gasket.
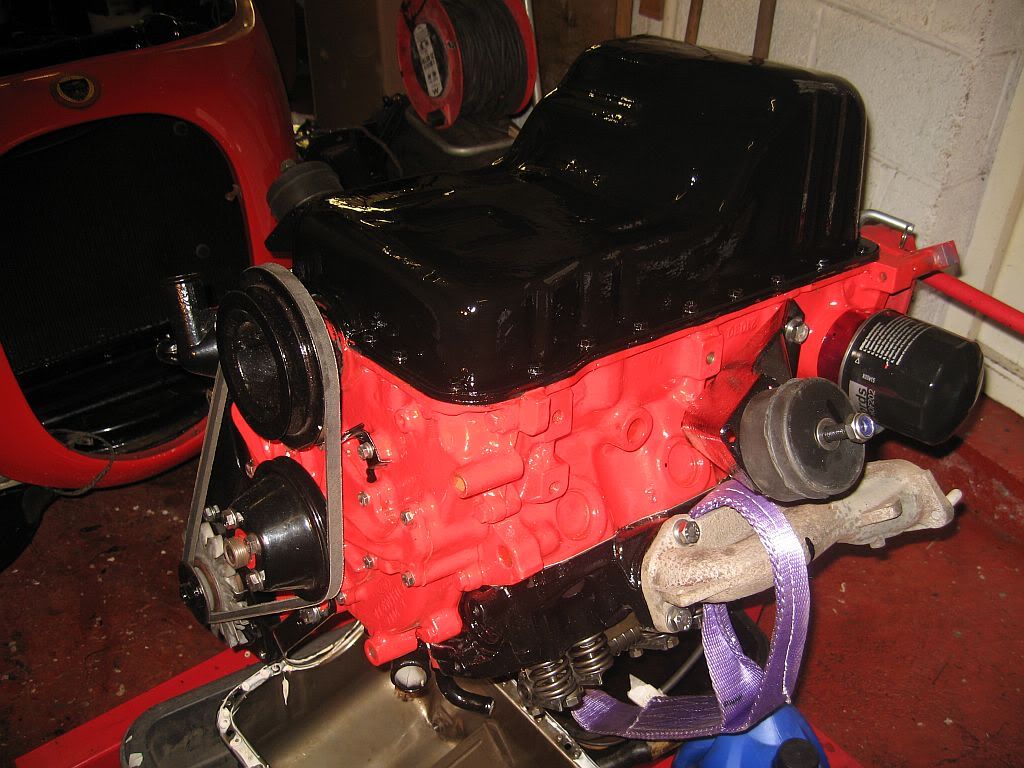
It only squeezed out a little so fingers crossed, Once all tight I have given it a coat of gloss black to match up with the other parts and a little more protection.

Well I'll see how far I get tomorrow.

see ya Paul

Monday, 14 May 2012

Bonnet catch & Pilot bearing removal

Well nobody said it was going to be easy.
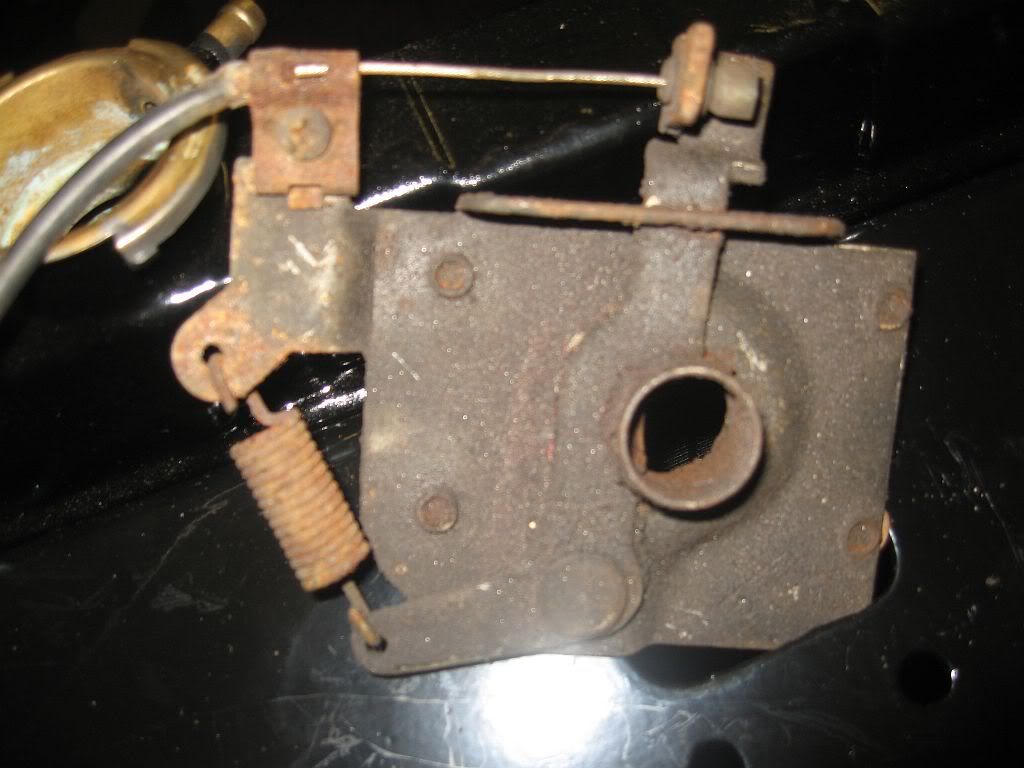
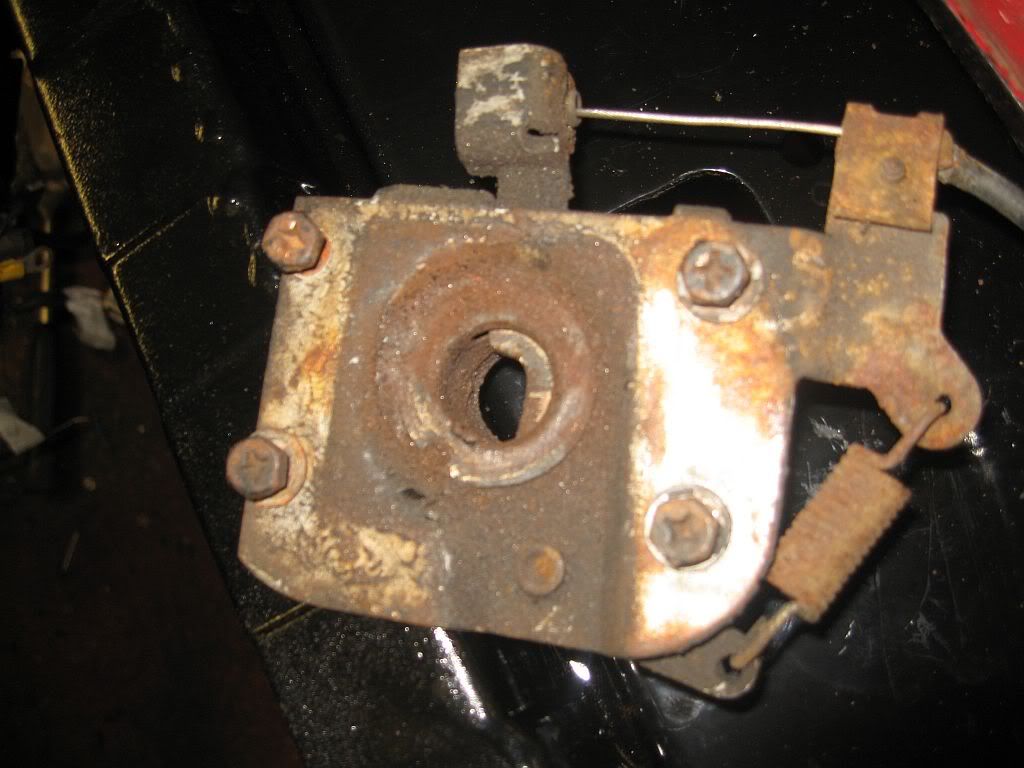
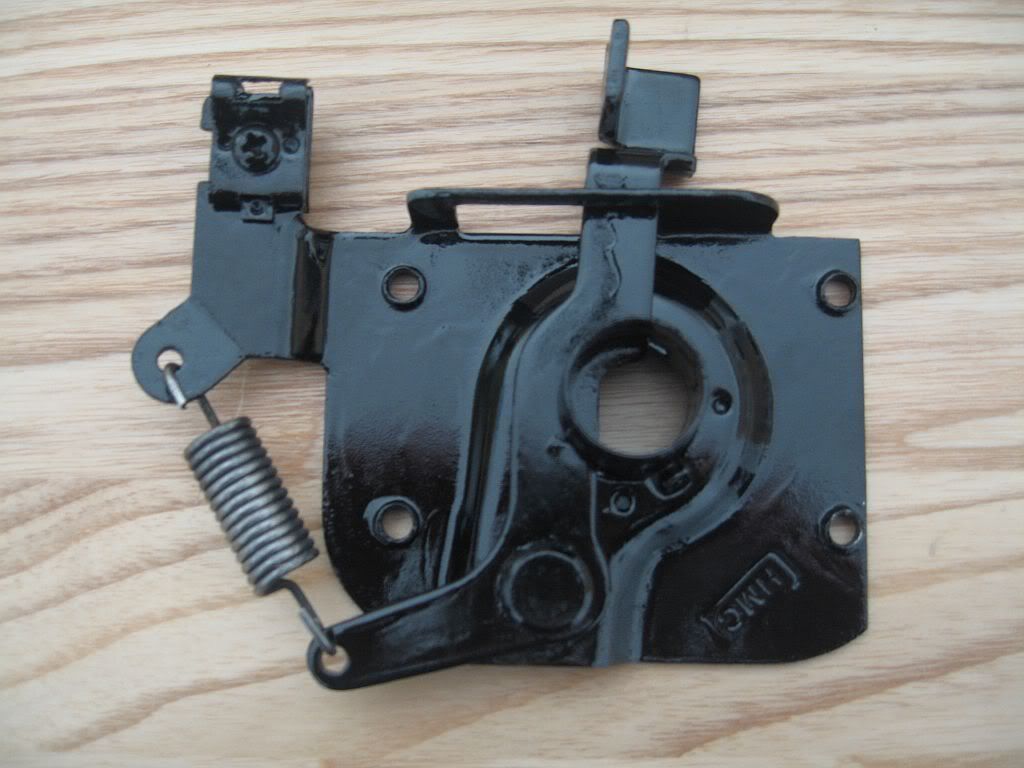
I think the only thing that went well these last few days was the bonnet catch
It was rusty and rather oily but overnight in a strong solution of Bilt Hamber and the rust and dirt just lifted off, all I needed to do was to run it under the tap and rub with a scouring pad.
I then gave it a spray of primer then hand painted and it looks as good as new.
The rocker covers on the other hand were a disaster, they were rubbed down and primed then rubbed down again then sprayed with red hammerite but no matter how light I sprayed it still ran, so I spent most of Saturday sand blasting it off. Maybe it was the primer I don't know but its a trip to the powder coater to get them done.
Sunday was a no work day although I had good intentions of getting some work done but I bought a new ipad and spent the rest of the day trying to figure out how to work it and of course watched the Grand Prix.

Today started a bit better, the plan was to get the engine of its stand, fit the pilot bearing, fit the flywheel, fit the clutch and finally fit the engine.
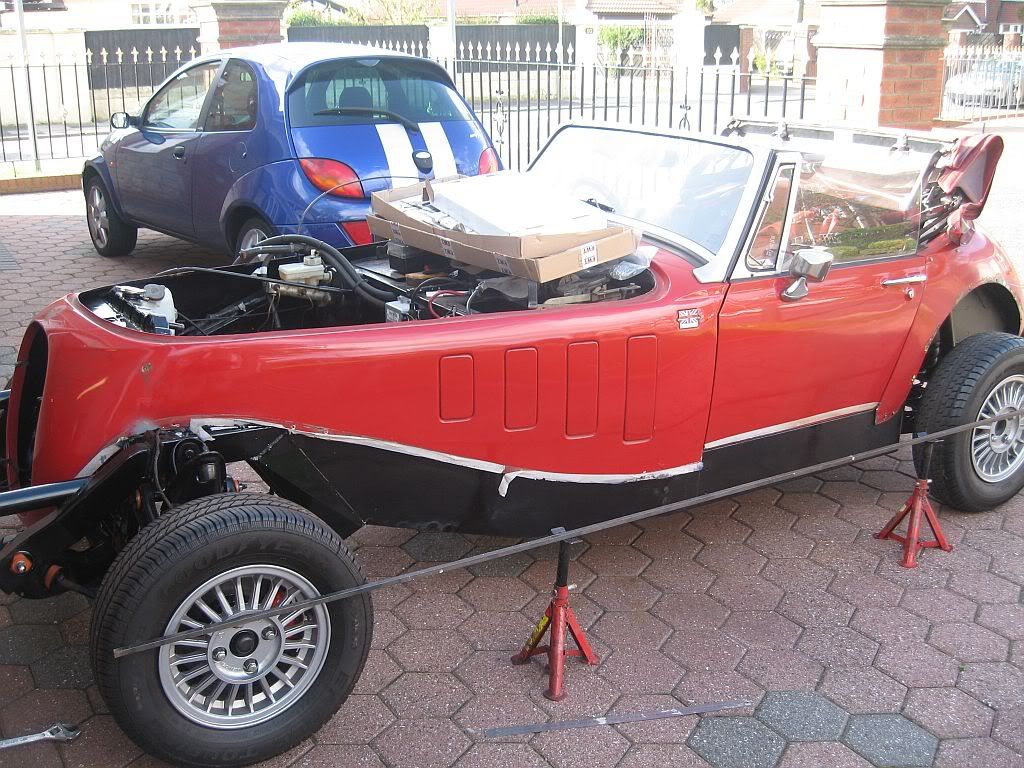
I got the car pushed out and decided to align the wheels a bit better, I had a long section of steel bar and set it up on stands to adjust the fronts.
I have managed to align both sides without a problem, this is just to get me to a garage to to have it done professionally.
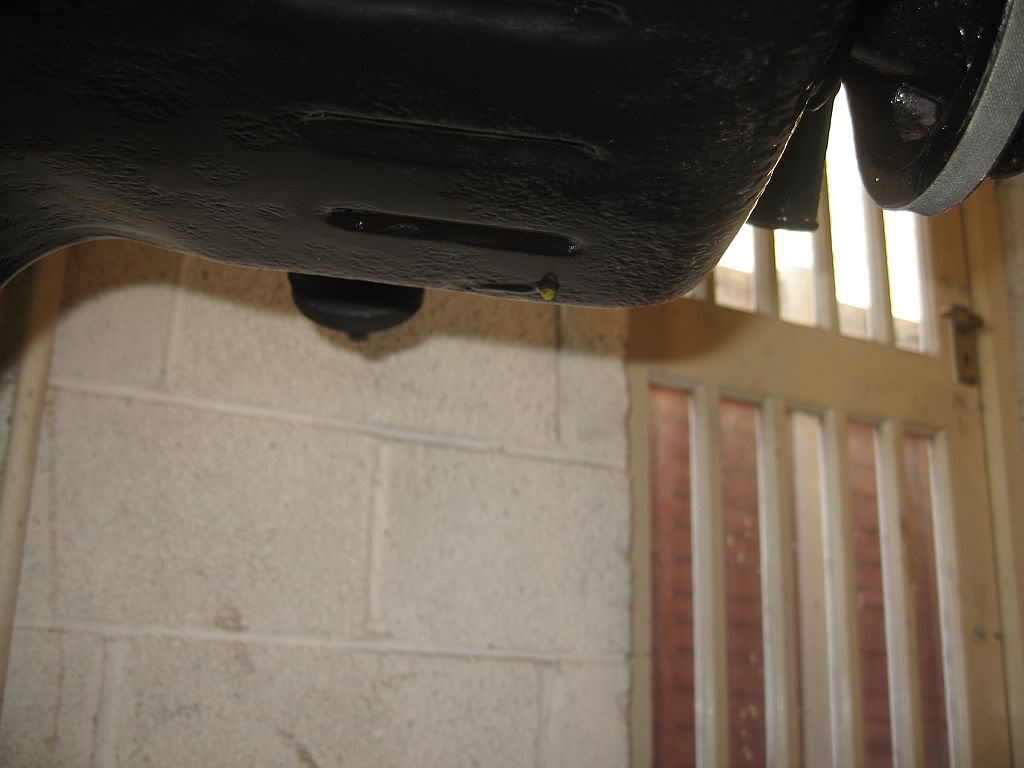
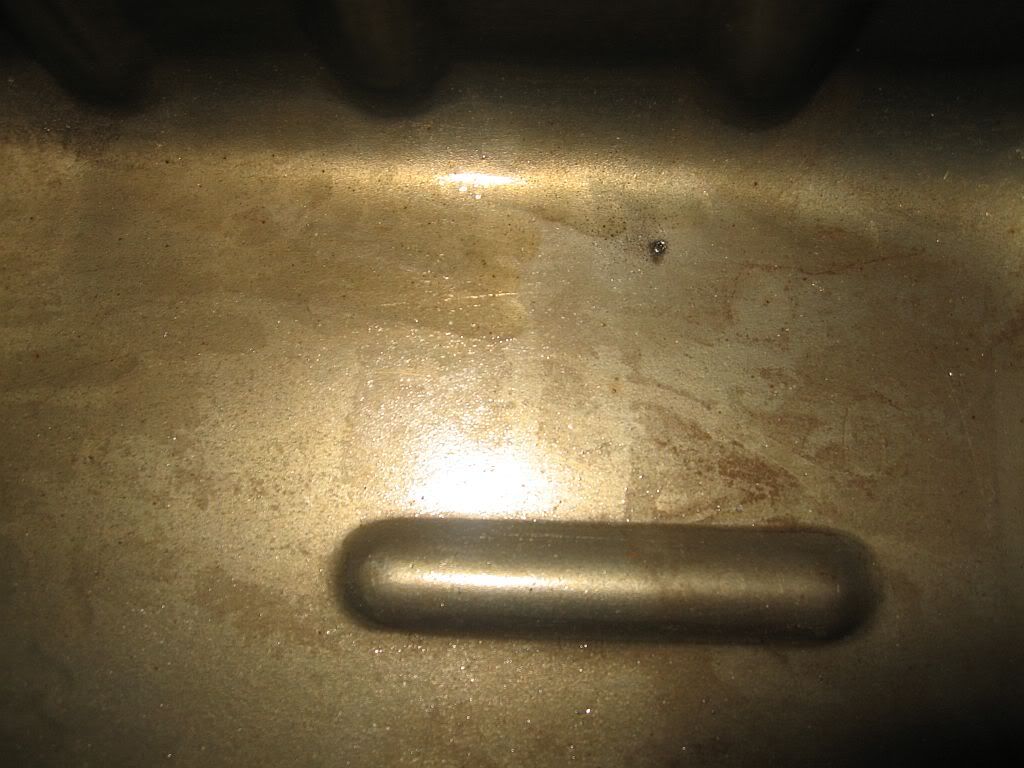
With some room in the garage I dragged the engine crane out from behind the shed and got it built up, I had bought new strops for a safer lift and looped these around the manifolds before bolting them to the engine. The engine lifted easily and I turned the crane to get the engine onto the bench when I noticed the drips of oil on the garage floor. I had noticed oil on the sump pan the other day and thought it was from the sump plug which I forgot to fully tighten and just cleaned it of. Unfortunately it was not the plug that was leaking, I'm afraid the shot blaster at the powder coaters got a little carried away and blew a hole through the sump which I never noticed.
You can see in this photo the oil dripping.
And in this one the internal hole.
I suppose I could have welded a patch on the outside or even better the inside but instead I gave Tickover a ring and they had a sump pan on the shelf for £24 plus p+p which should be here tomorrow. I don't know what condition it is in but it ain't going back to the powder coaters shot blaster I'll paint it myself. The only problem I foresee is that it is the old style using a cork gasket, I have a new cork gasket & bearing seals but will look at why you need a cork one and not re-use the rubber one I have fitted already. After all it was around £24 for that gasket.

The next problem was the fitting of the pilot bearing, I have watched lots of videos on the removal of the bearing which looks relatively easy
The idea is to use the hydraulic pressure of the grease being slammed behind the bearing pushing it  forward and out.

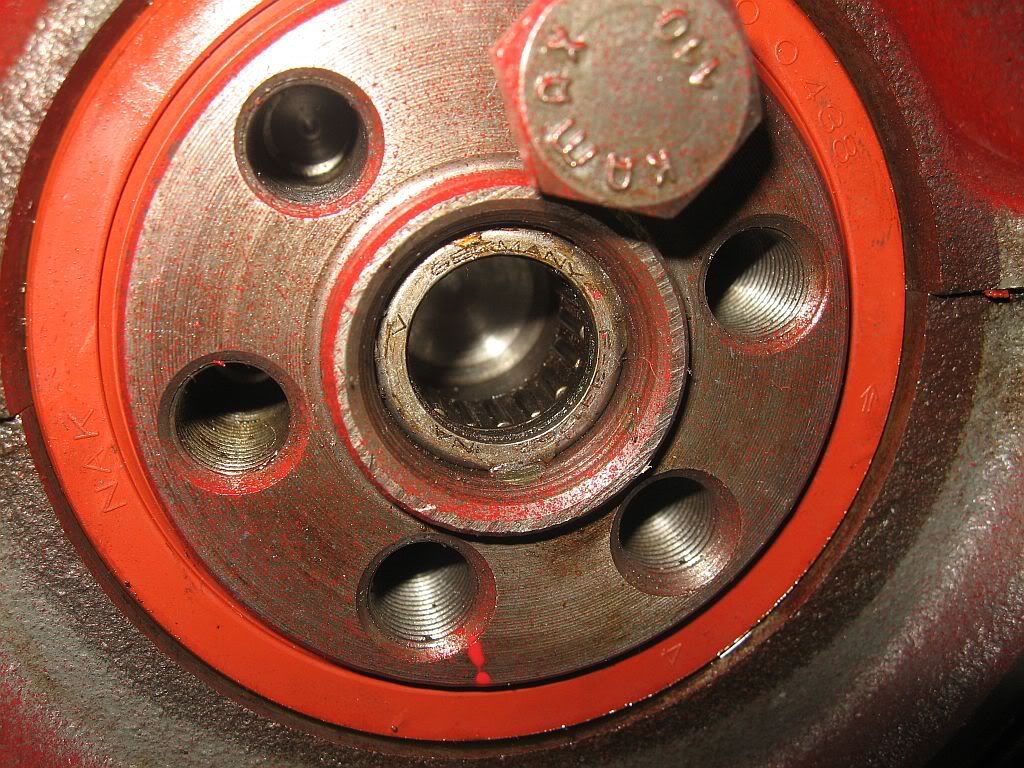
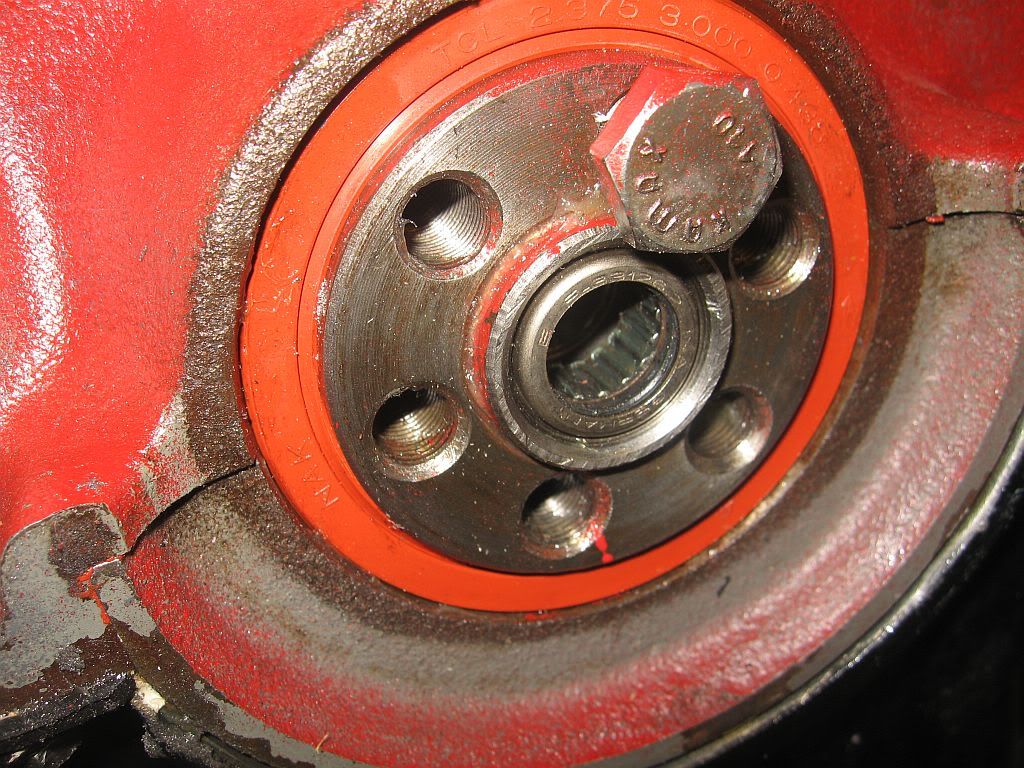
This is the original bearing in position, just in front of the rollers you may notice a black plastic ring, this keeps the rollers in position.

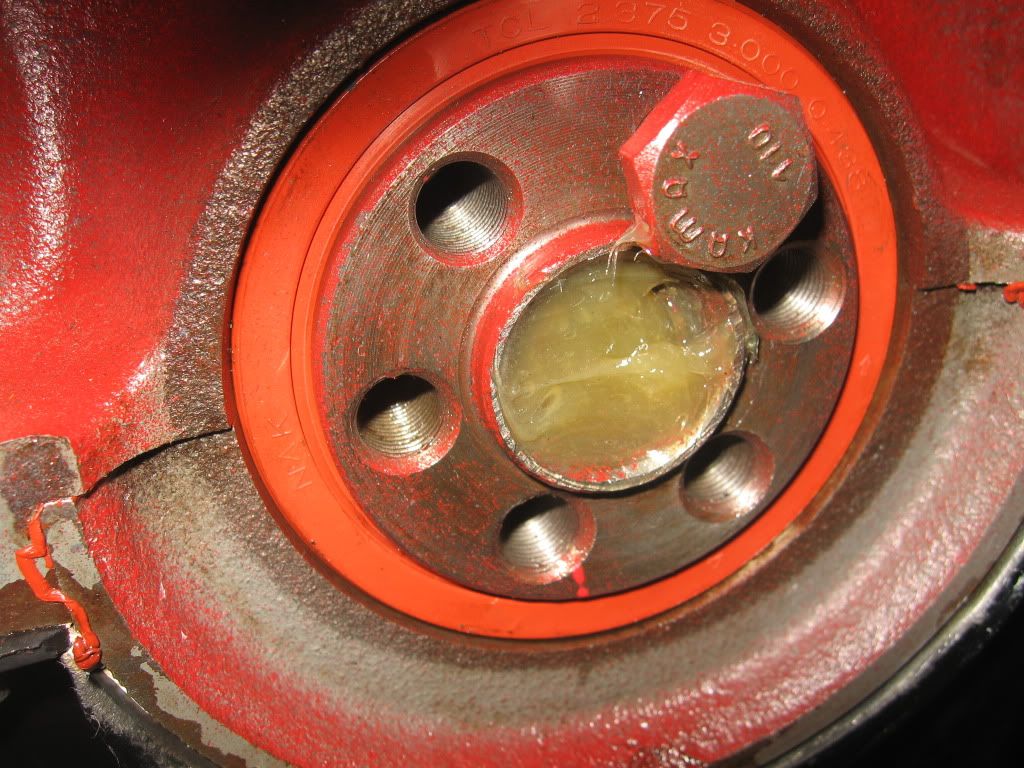
I have packed the inside with grease and used the pilot bearing locator from the clutch alignment tool to compress the grease. On the first hit the plastic roller location ring broke up into a half dozen pieces and squeezed out with the grease, so it really had to come out now. After around 30 mins of bashing the grease it still had not budged, I used around 3 different tools to hit the grease all perfectly fitting without any movement to show for the effort.
I was going to resort to a chisel but thought better of it so I got my dremmel out and with a long grinding bit I ground out one area until I was through. I did this with a great deal of care and only had a few scratches internally, it was then just a matter of cleaning out the grease and grinding swarf and popping in the new one.
I have knocked the bearing in to same position as the original (after photo taken) and shall grease it before fitting the gearbox.
The engine is once again mounted on the stand and all of the sealant cleaned of the block and gaskets at the ready, just have to await my new sump pan.
So all my plans have gone to nothing but I still hope to have the engine fitted this time home.

see ya Paul 
Friday, 11 May 2012

Granada Mk2 2.8 and is a LUX Repset 624 0526 00,

Hi
Another busy day with not much to show for it, I seem to have spent the whole day driving around looking for parts.
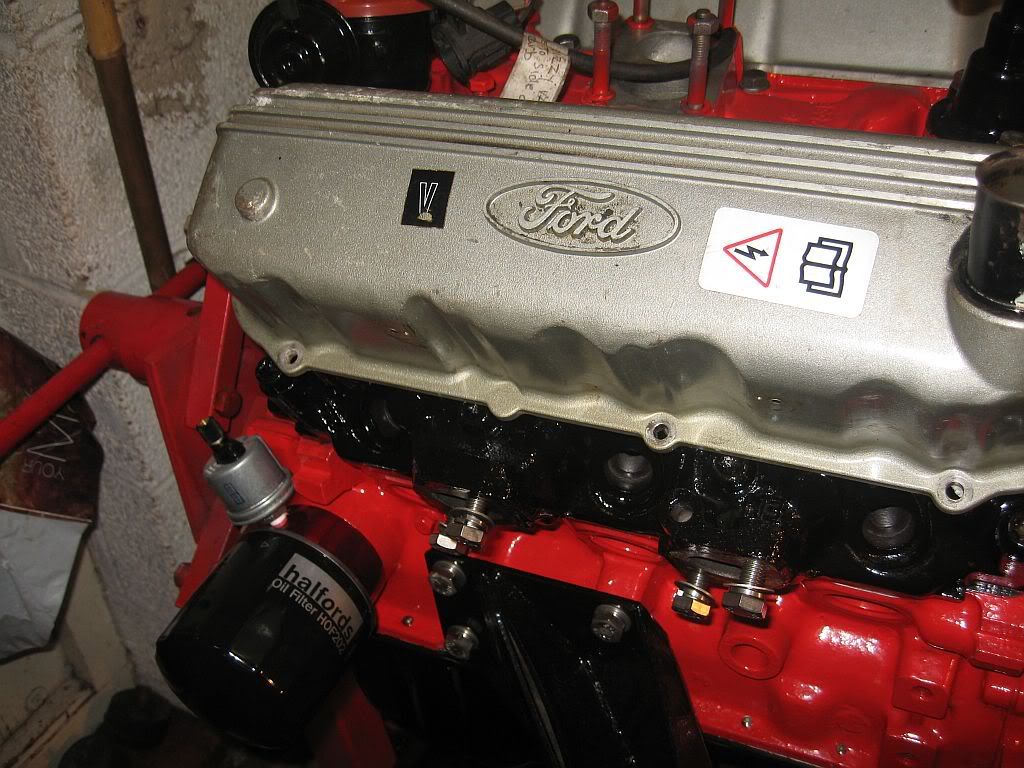
A lot of deliveries today and very happy with all of them, I only ordered the sandwich adapter yesterday and it was delivered at 0745 this morning. Luckily I had just returned home after dropping Lynne of at the metro.
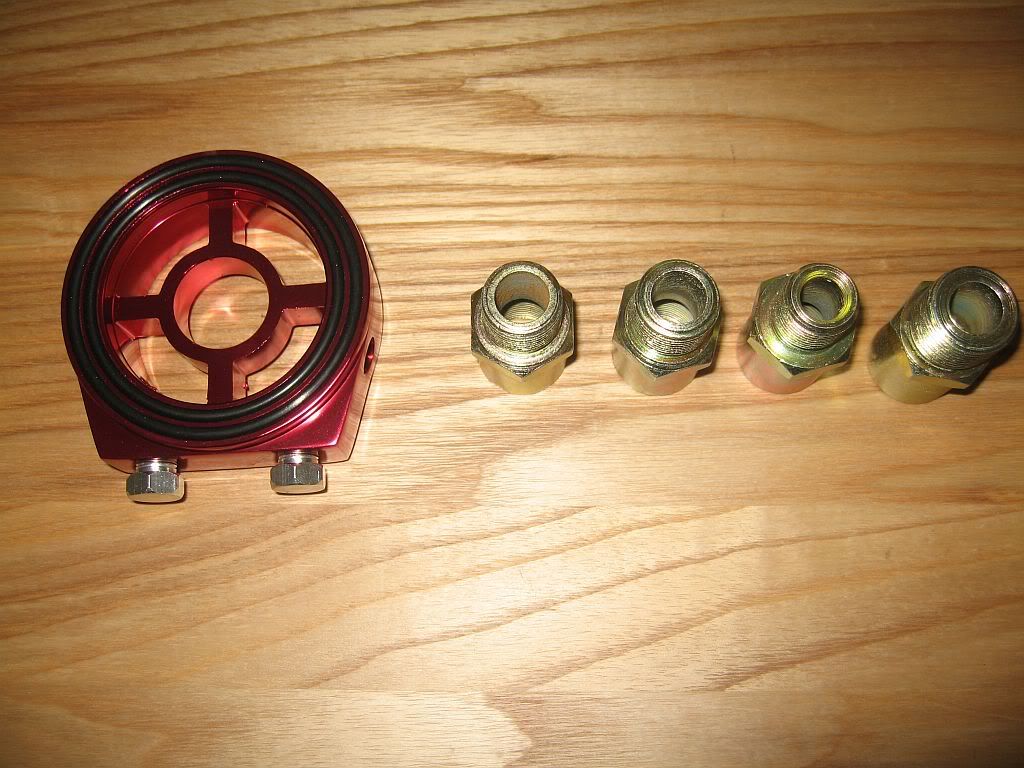
The threaded set that comes with the adapter allows it to fit to virtually any engine and it took only a few minutes to fit.
Although the sender clears the exhaust manifold I think I shall get hold of a couple of adapters and pipe it in behind the heads and out of the way of the heat.
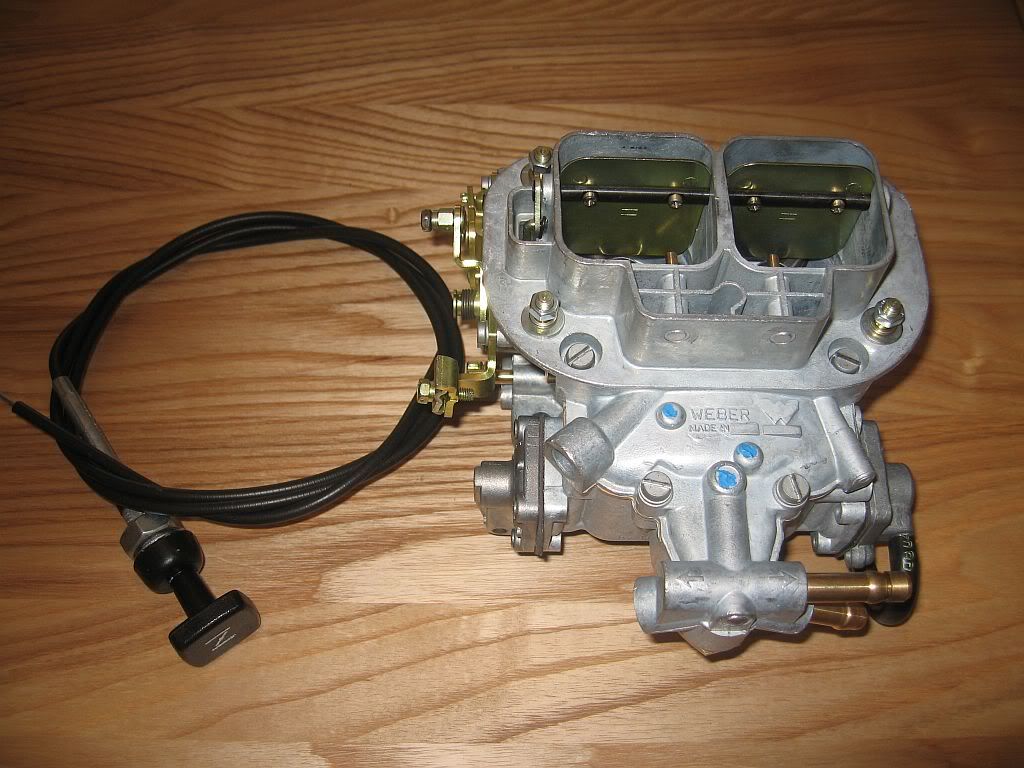
The part I have been looking forward to receiving has been my new Weber carburetor which arrived yesterday while I was out and went to a neighbor, so a nice surprise for me this morning. I ordered the carb from John at John Wade Developments 01902798303 and he has modified it to run my 2.8 Cologne straight out of the box, which for me being a learner is a great relief. The carb is a Weber DGAS 38 which was developed to replace a Granada 2.3 V6 1977 - 1986 Solex 35 EEIT or so it say's on the tin.
It is the manual choke model so a bit of work involved fitting this.

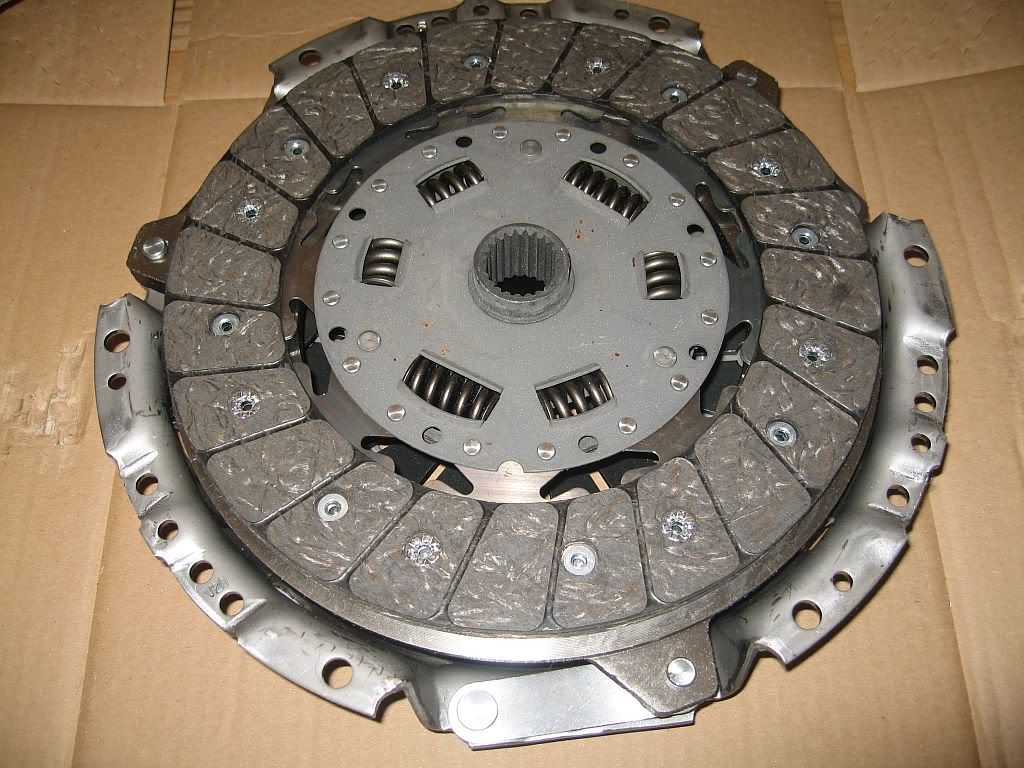
I also picked up my clutch kit from Bills Autoparts (wonder what they call the owner)
Its for a Granada Mk2 2.8 and is a LUX Repset 624 0526 00,
When I removed my old clutch I thought it looked hardly worn so I measured the thickness of the plates against the new clutch and could have saved £102 as there is only around 0.6mm wear on the plates. The new one measures 10mm whereas the old one measures 9.4mm. I think I shall keep it as a spare.
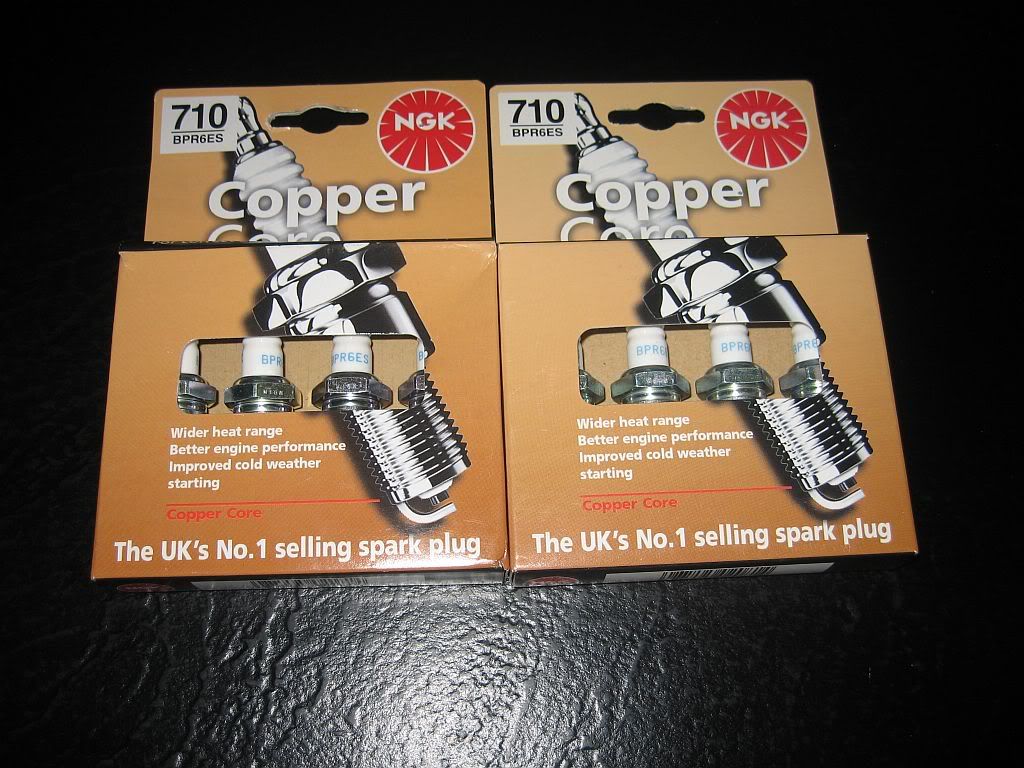
I also took a trip to Halfords as I needed a new fan belt and 6 new spark plugs, I also picked up a tin of red Hammerite spray paint for the rocker covers. Unfortunately I could not find a fan belt of the right length and as there is no number stamped on the old one it may prove a bit difficult. The spark plugs were a bargain as I used my trade card and instead of the £23 it should have been I only paid £9, bargain.

I did manage to get some actual work done.

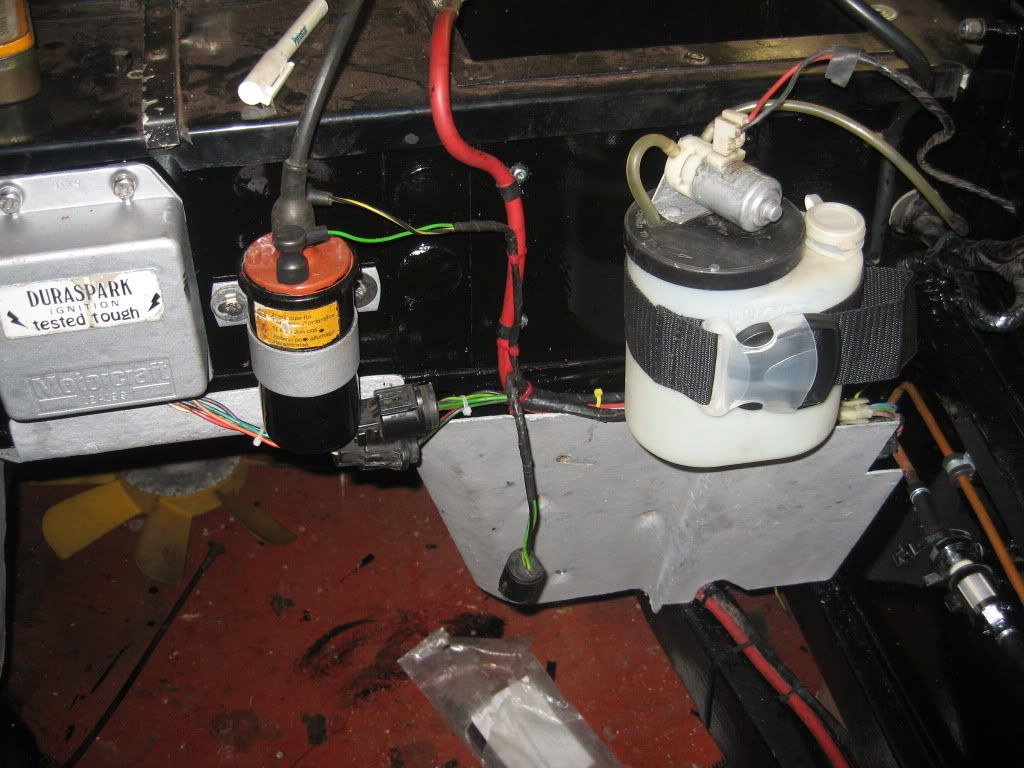
The washer bottle was in a bit of a state so I removed this and gave the bottle a good scrub, the small motor got the rust cleaned off and a coat of silver paint. I bought a black webbing suit case belt and cut it shorter to hold the bottle in.
Once I fit the self tappers I have ordered that will be the back bulkhead complete.
The bonnet catch has also been cleaned up, I have had this sitting in a bowl of Bilt Hamber acid overnight and it has cleaned up great, I have given it a coat of etch primer and shall paint it tomorrow.

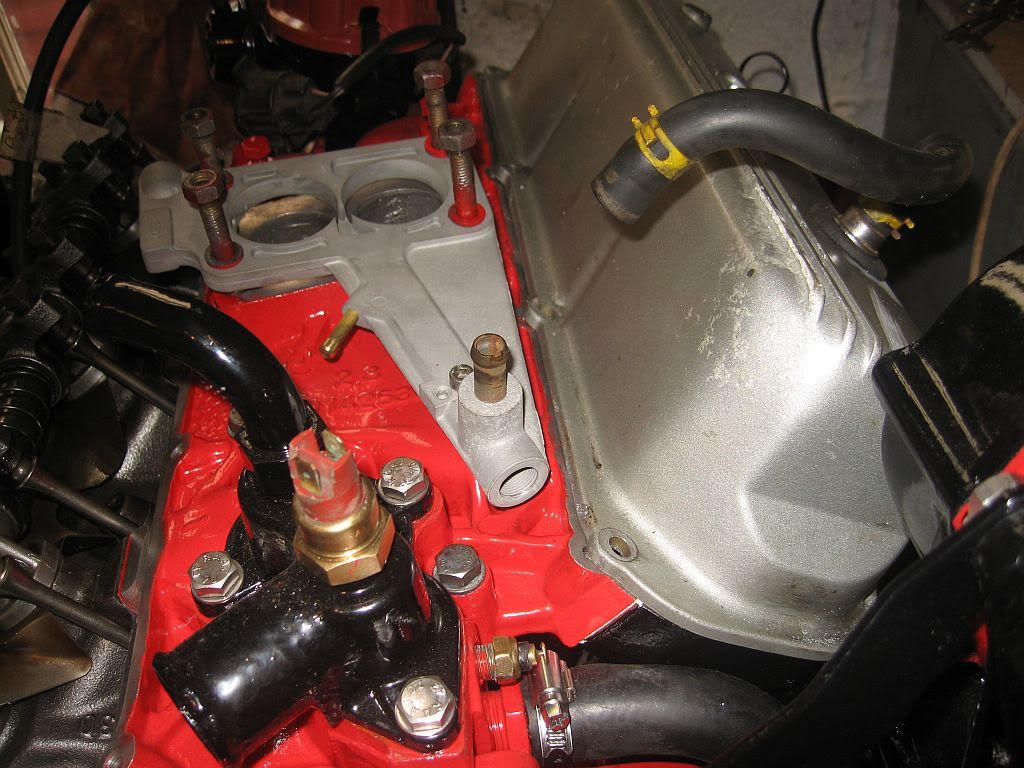
The modification of the rocker cover has been decided, I have drilled through the pin section where the deflector is situated and fitted the grommet, the underside of the grommet is a bit perished although it still gives a very tight fit.
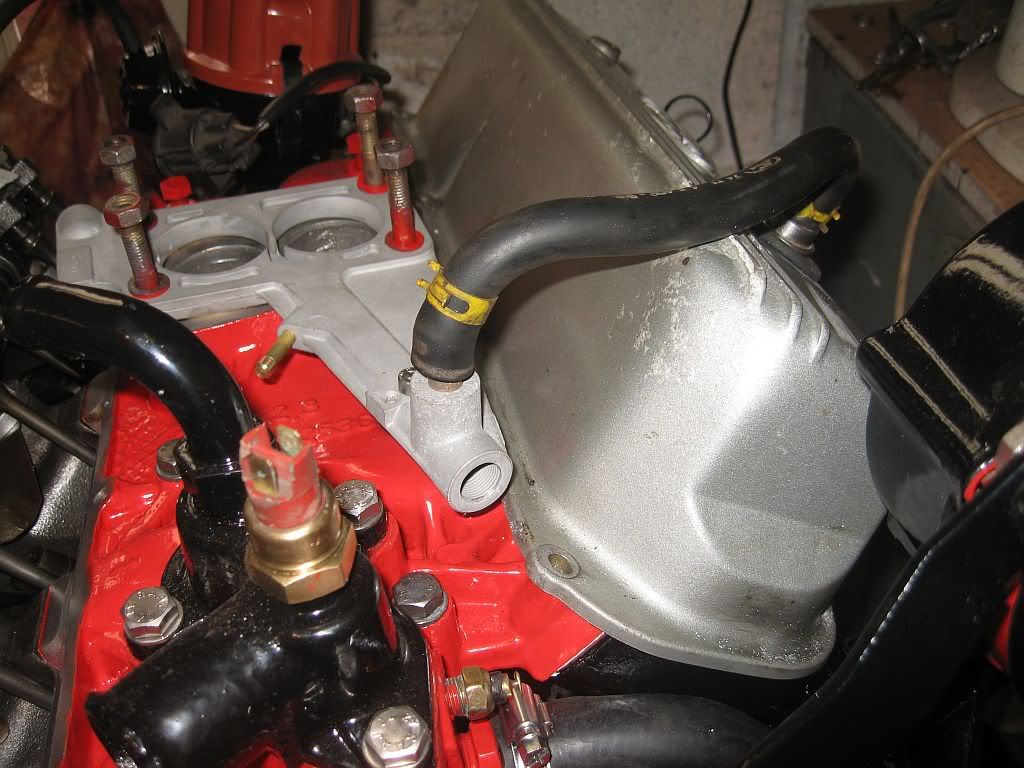
I have fitted the carb emission plate to see if the pipe would stretch to fit, and yes it does but unfortunately it put to much stress on the grommet which may get more damaged.
This is the hose in the un-stressed position, I shall get a piece of new hose and fit it with a joiner.
I have started the spraying of the rockers but even though I am doing many thin coats instead of a couple of thick coats I am still getting runs, so it looks like a sand down start again.

Well back to work again tomorrow

see ya Paul
Thursday, 10 May 2012

Fitting Electric fan

Hi
Back home and back to work.
I hopefully plan to get the engine and gearbox in this time home but then that was the plan last time so fingers crossed.
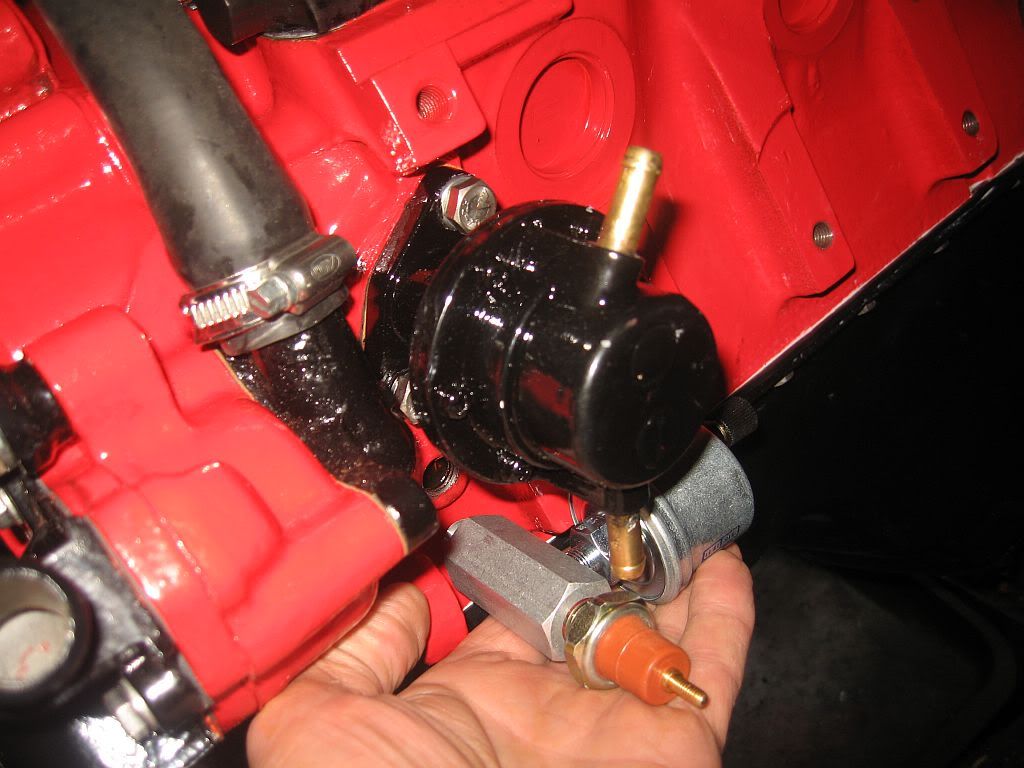
Lots of things bought this time and a few changes to my plans, the elbow arrived to fit the oil pressure sender under the fuel pump which I thought at the time would solve the problem I had of it hitting against the pump. I tried it in position this morning and although it fits it looks cramped and wrong so I have found an alternative which is a sandwich adapter, to fit this you remove the oil filter and screw this in its place then refit the filter sandwiching it between the filter and the block. The sender then screws into the side, much neater.

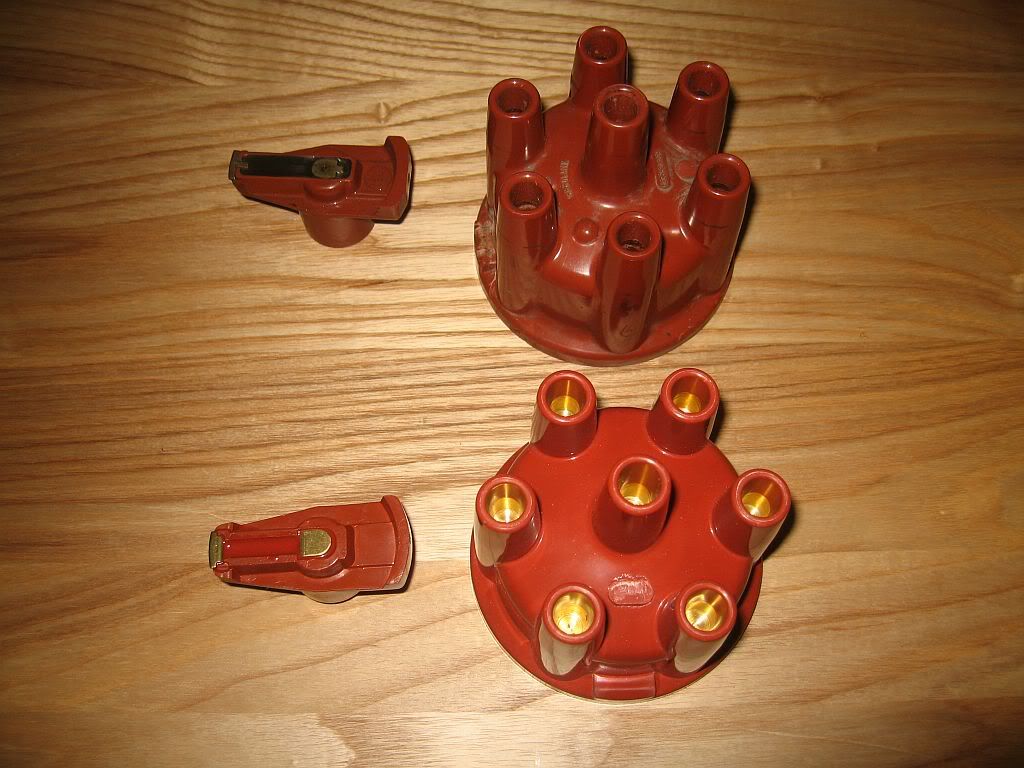
The Distributor cap and Rotor Arm arrived and although they are not original Bosch parts they are still good quality and went straight on.

I was also advised that it is good practice when replacing a clutch to also replace the Spigot or Pilot bearing that takes the end of the input shaft, at only around £10 inc p+p I thought I'd best get one. 
I have also ordered a clutch kit, the old clutch gives the size at 242mm which was not to difficult to find although most I have looked at are sized at 241 or 240mm for the Granada mk2 2.8 but a search on Euro Car Parts came up with it straight away. I gave the part number to my local autoparts and he beat the price. £102
I have also won on eBay a timing light in preparation for the eventual start up, the light is by a company called C Z Sincro of which I had never heard of until I gave the name a search on Google and found out that they also make timing lights for Snap on so I put a bid in and got it for £13 plus p+p its only a basic one but it will do the job.

For a while now I have been thinking about modifying the reach of the gearstick by fitting a Remote gear link extension, this will have 2 advantage mainly that I will not have to stretch to reach the gearstick and that it will free up space in front of the radio. The work involved is pretty straight forward and will require cutting a new hole into the tunnel and blanking off the old one, bolting the extension onto the gearbox then just fitting the stick. I would imagine that after all of these years I will not be the first to fit one of these extensions, the main problem I can see is that the extension is fully exposed to all of the weather and dust getting into the sliding parts. I have not received it yet but shall look into modifying it to fit rubber boots over the sliding parts and pack with grease. Will soon see, it cost £55 plus p+p so I hope it works.

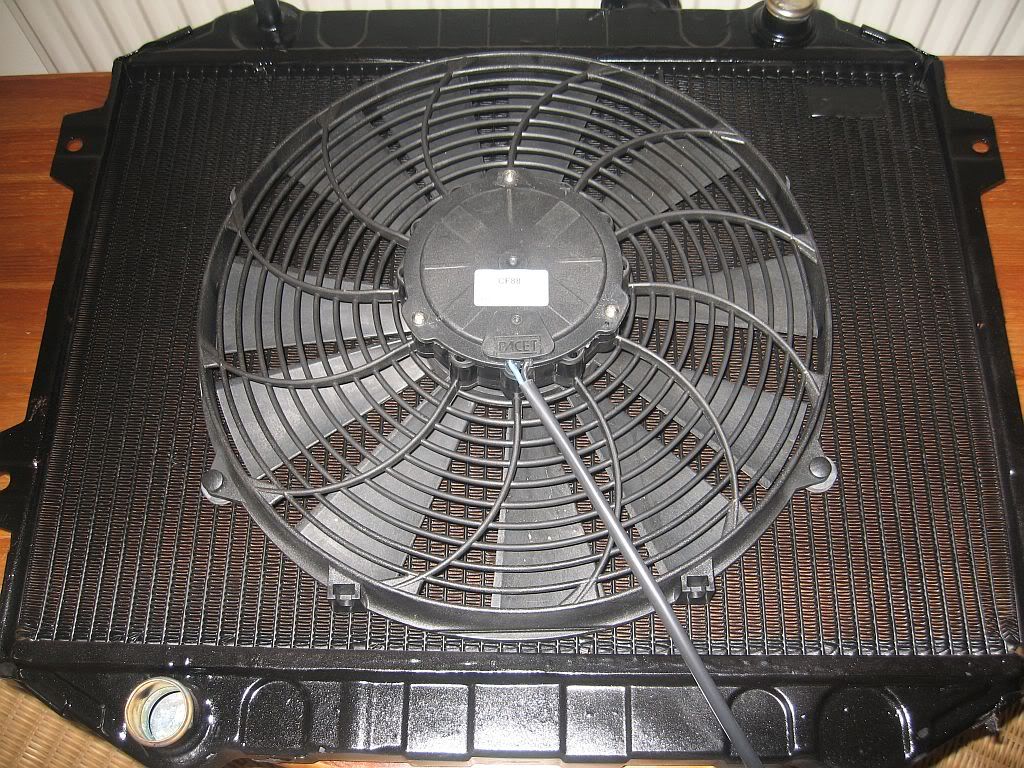
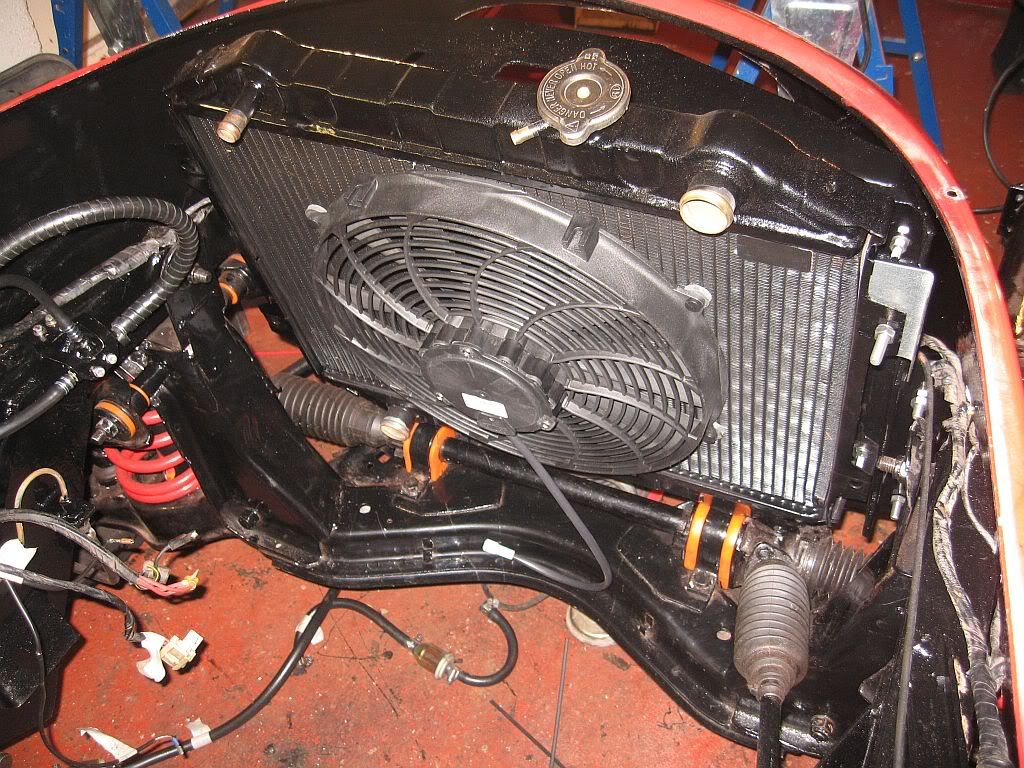
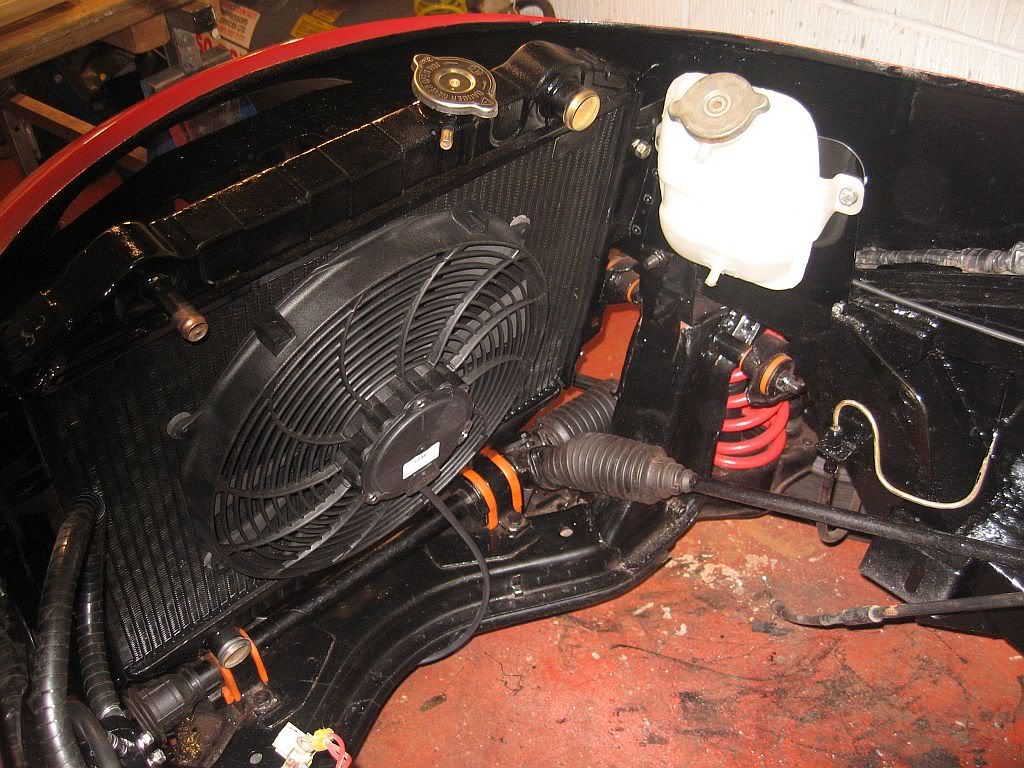
I got back in the engine bay today and started with the radiator and fan, the fitting kit was very good and the quick fit pins went straight through the fins and pulled up nice and tight. The fan is the 14" model and fits perfect covering around 70% of the area.
I bolted the radiator to the frame and have fitted it to the car, I may have to remove it again when I refit the engine but needed it in place to make the bracket for the expansion bottle modification.
I hope to make a pressurized system which depends upon me finding a blanking cap for the radiator of which I have not found as yet, if I can't find one then I shall just fit 2 pressure caps.
The bottle is a plastic one although I have a brass one I want to see the level until I have it set up and working. I have used one of the old cowling bolt holes to connect the new bracket which I made this morning out of a piece of angle iron and a square of aluminum riveted on. I don't know if I have the height correct as I have no reference to work from so I have made the bracket hole slotted so as to raise it if necessary.
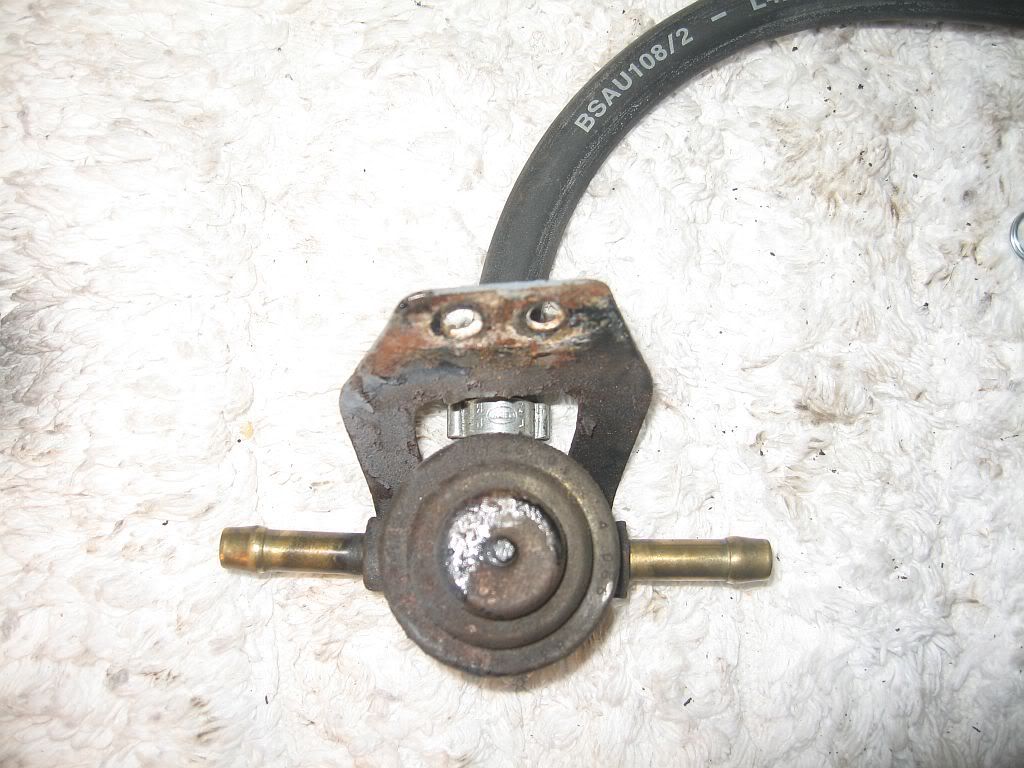
When this was done I got on with the fuel pipes, I had removed and painted the fuel return valve which was a bit rusty.
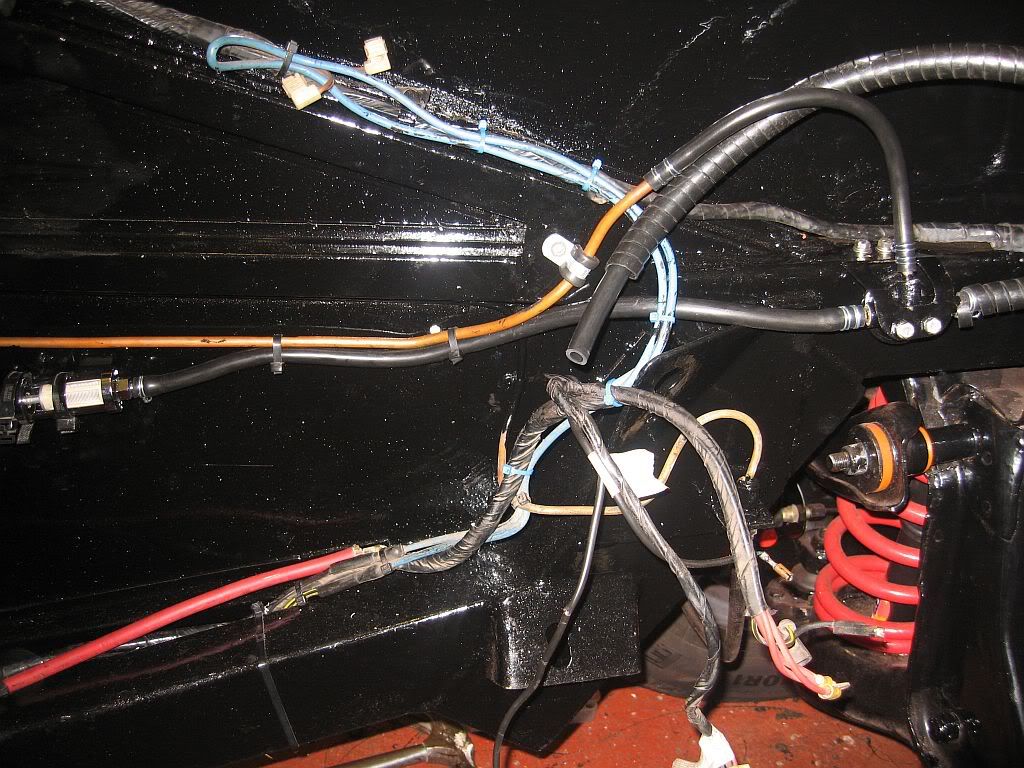
All cleaned and painted, then a simple job to refit the valve and cut the new nitrile pipe to fit, the filter looks good but will have to be lightly coated in silicone grease as it won't last 5 minutes with the salt on our roads.
A bit difficult to make out with the black pipe on black background

I have also bought a tin of black engine enamel, although I had sprayed the heads with 4 coats of VHT black paint I was still not happy with the finish. Now with a coat of black enamel it looks as good as the block and as its high temp paint I shall also use it on the exhaust manifolds.

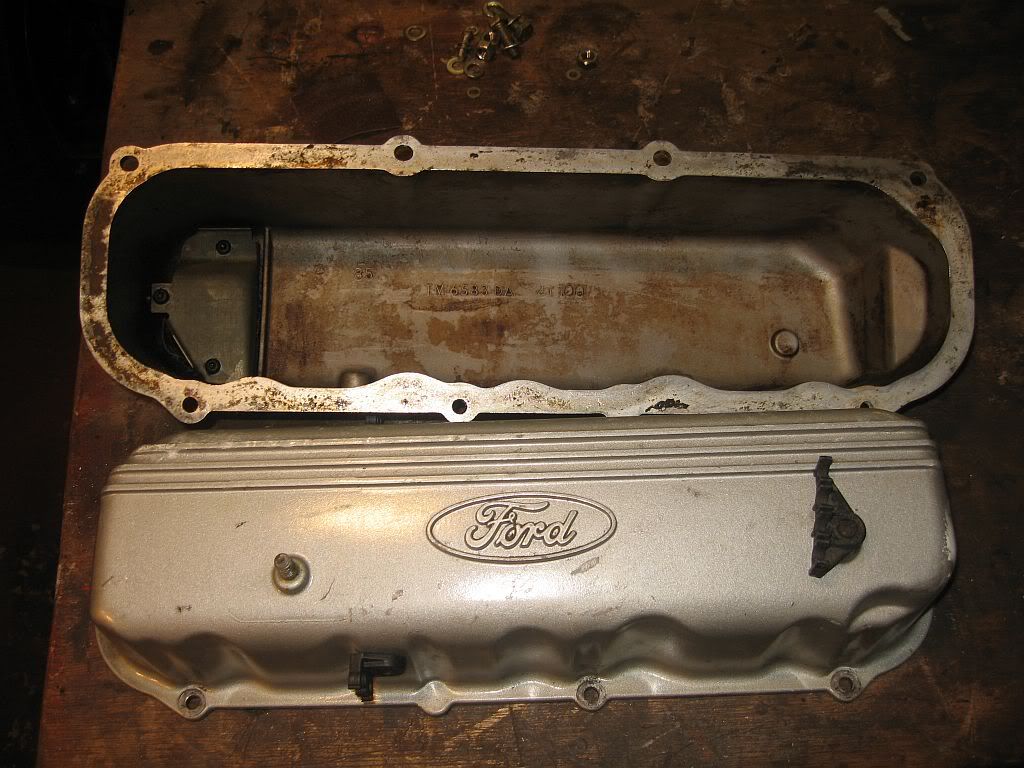
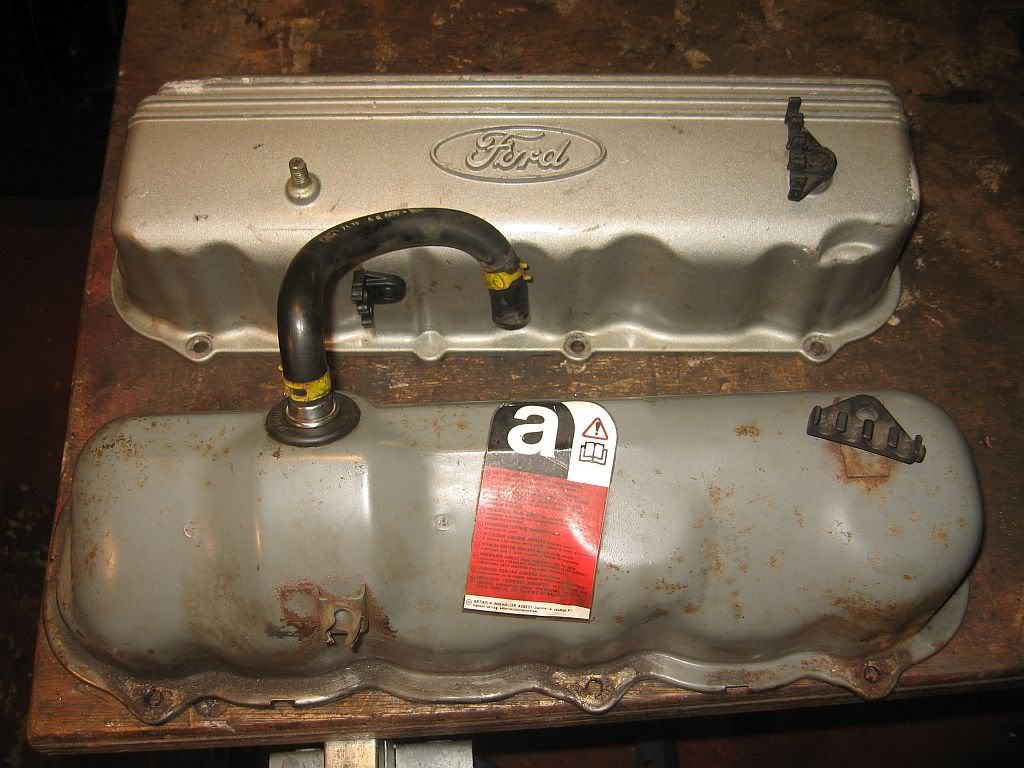
The rocker covers also need a fair bit of work before fitting, firstly I have given them a good cleaning as there was a lot of old oil residue staining the inside and dried flaky oil under the deflector plates.
 All nice and clean now, I shall sand them down and paint them red and highlight the letters and lines in black. The main problem is that these rockers don't have a breather hole to connect to the carb for the removal of the crank oil vapour's.
You can see the difference between the two, the deflector plate on the alloy rocker is situated under the pin which if drilled through there makes the hose to short.
I have a couple of options here, either to:-
Not to bother fitting the hose but drilling through where the pin and deflector plate is and fitting a K&N crankcase breather filter which will require the blanking of the carb plate.
or
Drilling through in the same place and fitting the hose which will make it around 50mm short then cutting the hose and fitting a piece in.
or
Drilling a hole in the same place as the original is and modifying the deflector plate underneath, which will also mean cutting out a section of the cast lines to get the rubber grommet to fit flush.
Yes confusing ain't it.
Don't know what to do yet, but will decide over night.
See ya Paul
Monday, 23 April 2012

Engine bay

Hi
Not much done yesterday with it being a Sunday, just shopping, visiting and the Grand Prix but still managed an hours work.
With the sump pan finally on I wanted to get some oil in and try to get it circulated into the oil ways, a bit of a high hope seeing as I can only crank it round with a ratchet but I gave it ago anyway. As this is just going to be the flushing oil I went for the cheapest 10W40 semi synthetic from Asda I could find, I also poured in a tin of Wyn's engine flush so hopefully when I get the engine running it will clean all of those areas I was unable to get to. I also took a trip to Halfords for a couple of oil filter, I bought Halfords own brand HOF220 at £4.95 each but with my trade card I got them both for £3.60. I have mentioned this before; if anyone reading this has an engineering qualification just take it down and ask the manager for a trade card, it can be in any engineering background and some of the discounts make it worth while shopping there. I spent a good 10 mins cranking the engine and hopefully some of the oil will have found its way into some of the areas that need it.
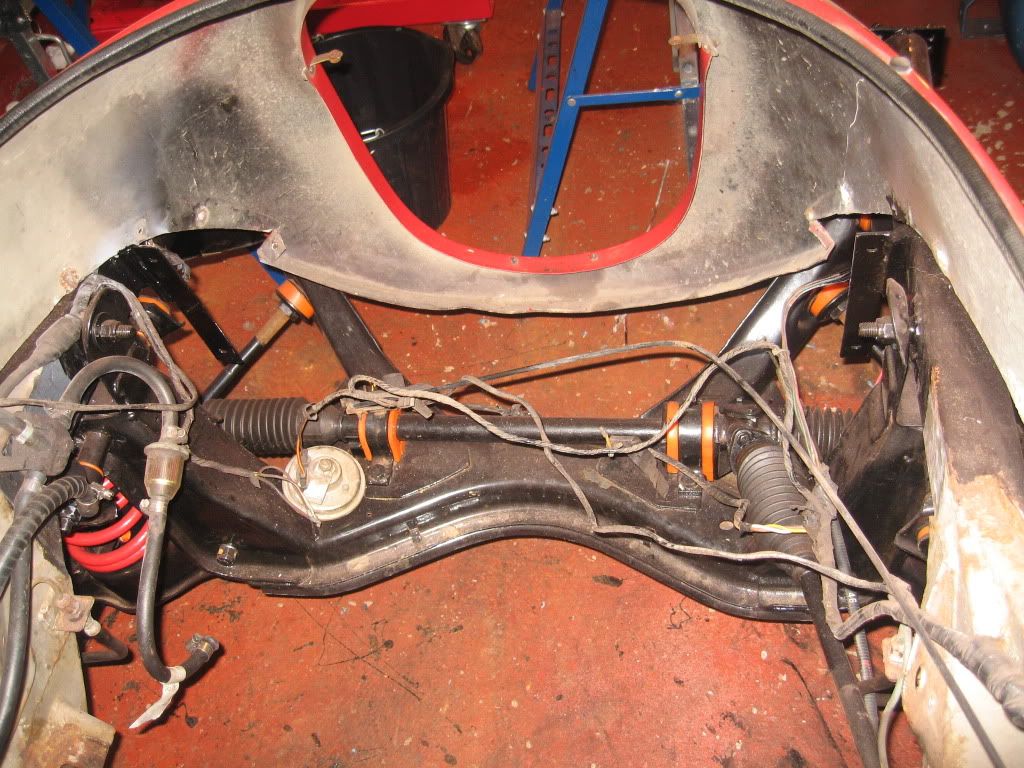
Today has been back to the dirty jobs, inside the bonnet this time.
Not so much dirty more rusty dust.
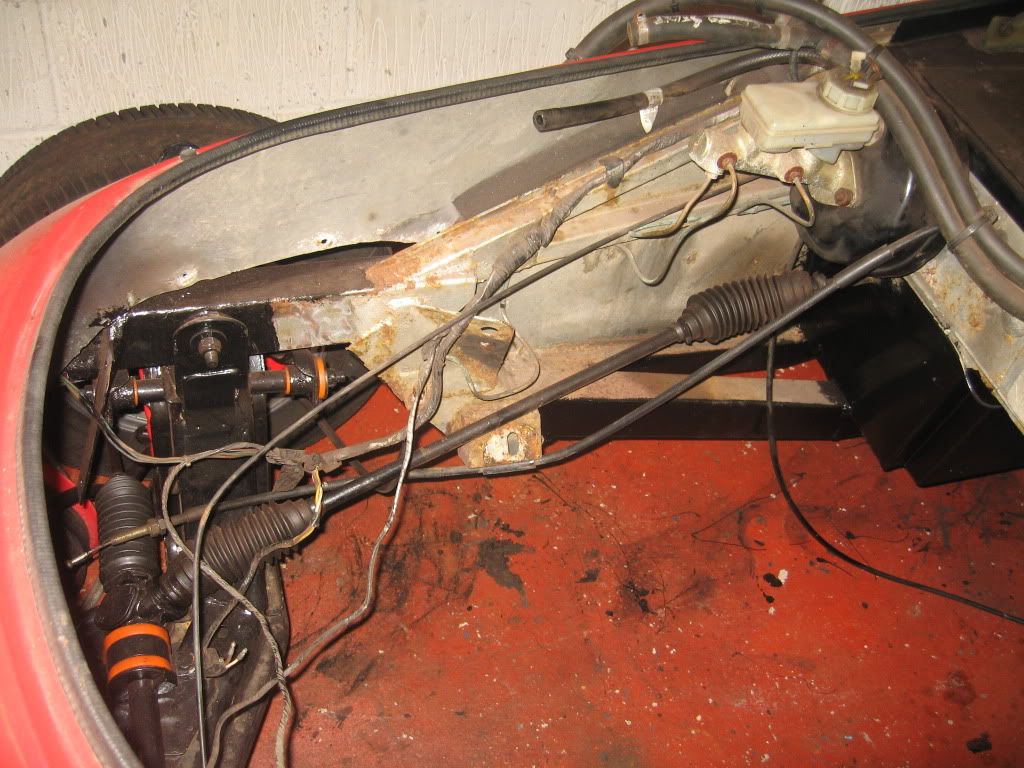
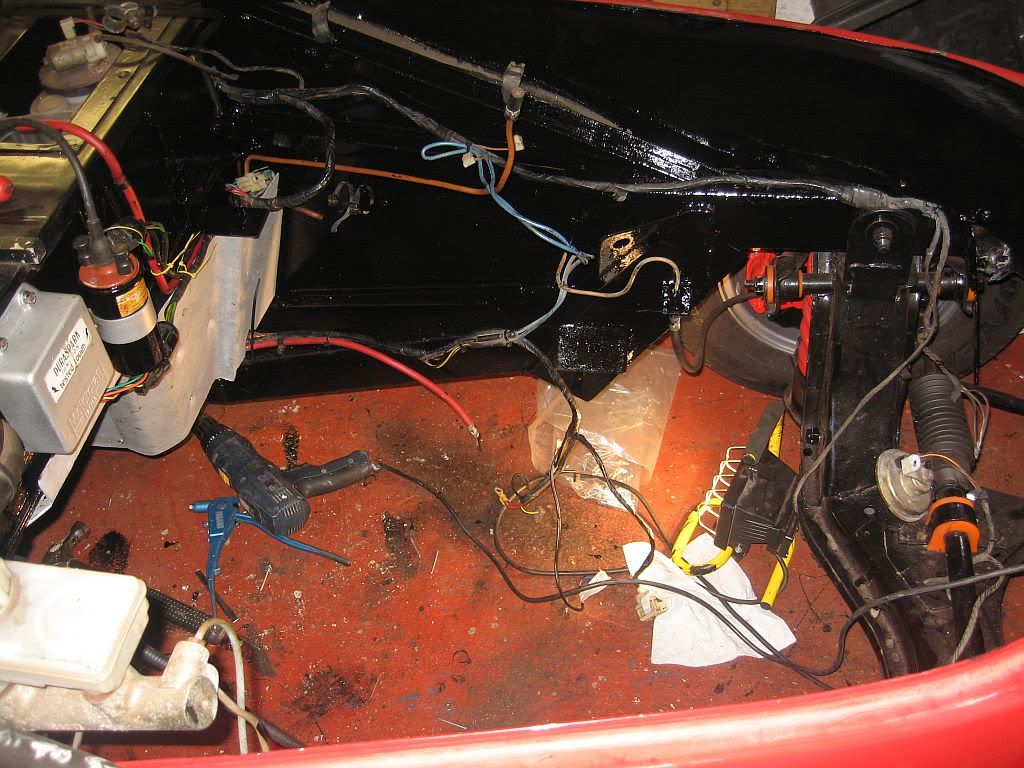
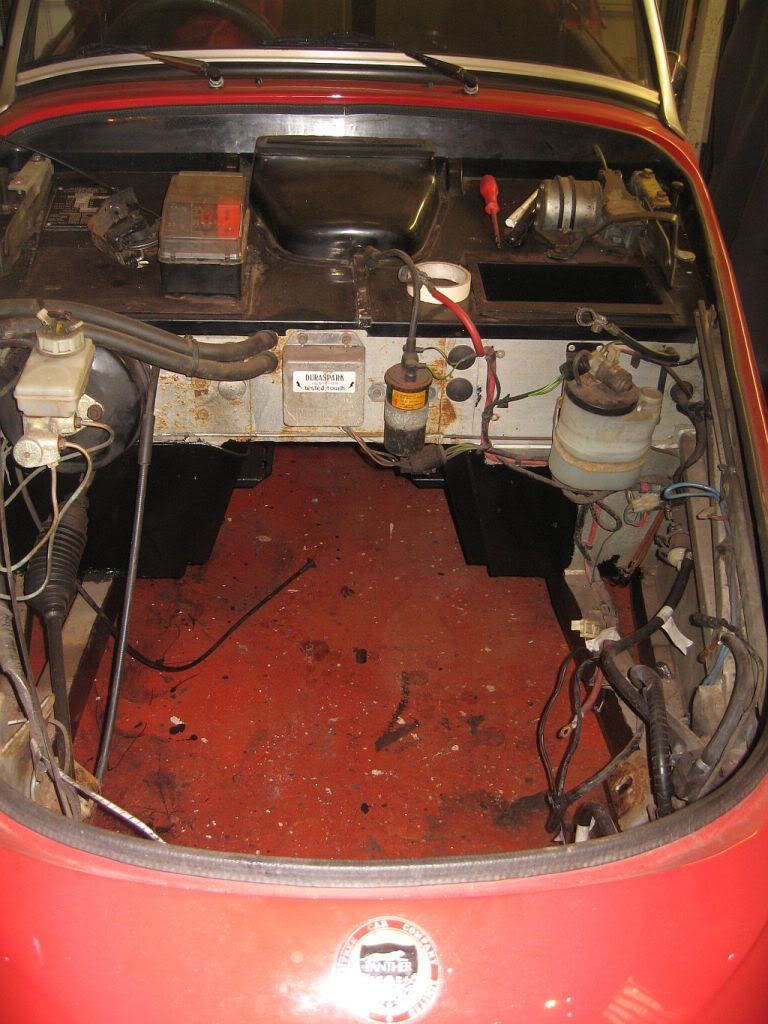
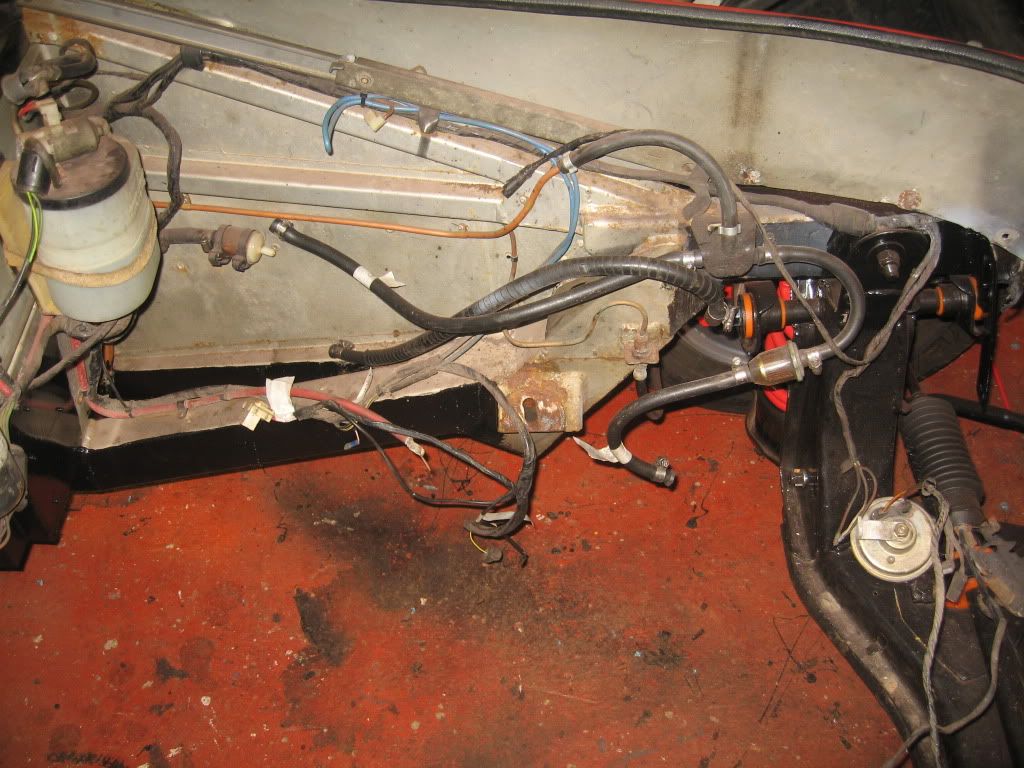
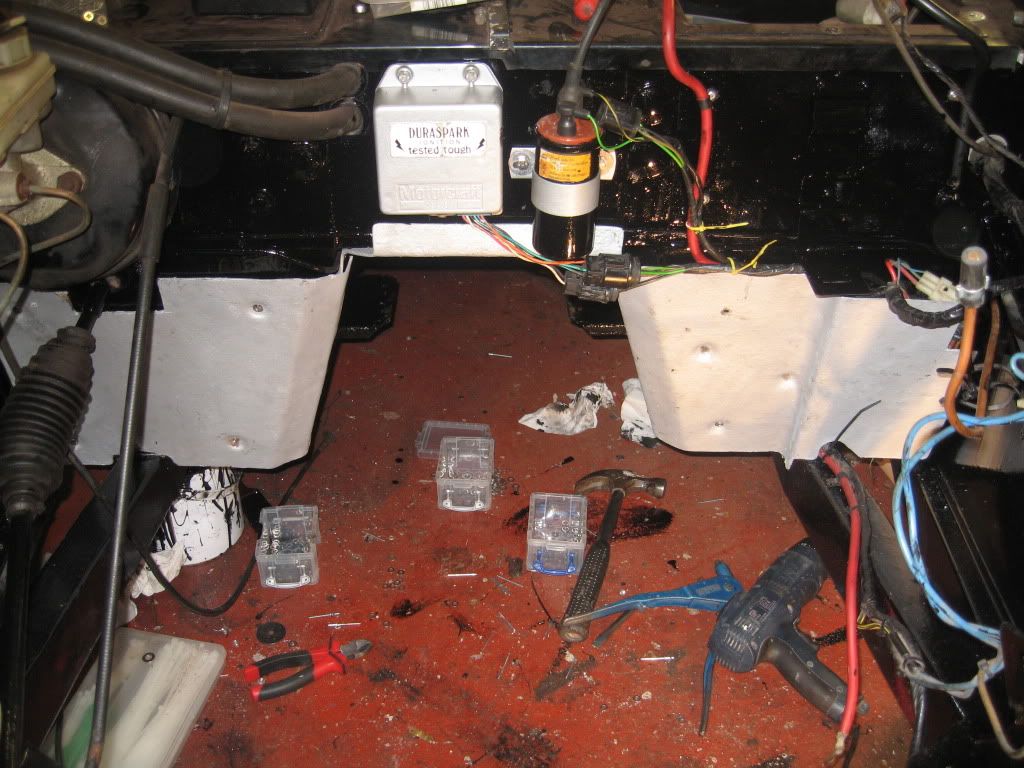
A lot of wires and pipes in the way of the painting so I had to remove them or move them, the fuel pipes are all perished so they came out in one piece so I would be able to remember how to re-fit with the new nitrile pipe I bought. The only thing I have not removed is the brake servo and have just painted around this, the Duraspark electronic ignition box, the coil and the wiper bottle came out to access the back bulkhead. All of the rivets for the wiring bracket were drilled out and the wiring pulled out of the way and tied back.
Now came the dirty part which was rotary and hand wire brushing clean all of the loose rust, white aluminum oxide and paint, the areas that I was unable to get to were treated with corrosion converter but there wasn't many areas I could not reach. Then it was just a matter of painting every part I could get to.
The Duraspark system and the coil got cleaned and painted separately and weren't in to bad a condition the washer bottle bracket was a bit worse and this required a good grinding and priming before a coat of paint, the rubber band for the bottle was perished so I will see what old leather belt I have in the wardrobe to replace it.
I had to wait a while for the paint to dry off but I got a bit impatient and decided to fit the heat shields while the paint was still wet. These were originally riveted on and where I could I have re-riveted, unfortunately a few of the holes have broken through so I shall have to get a hold of some self tappers and penny washers.
I also fitted the Duraspark unit and coil as they were dry but it still looks a bit of a mess with all of the wires loose. There is still a lot of work to do here before the engine goes in, especially the radiator and new fan unit, I also have an expansion bottle to fit so the radiator needs to be in to get the correct height for the bracket, the horn, the bonnet catch etc etc. I am off at midnight tomorrow for a long drive to Dover for a 0700 start on Wednesday so not much will be done tomorrow.
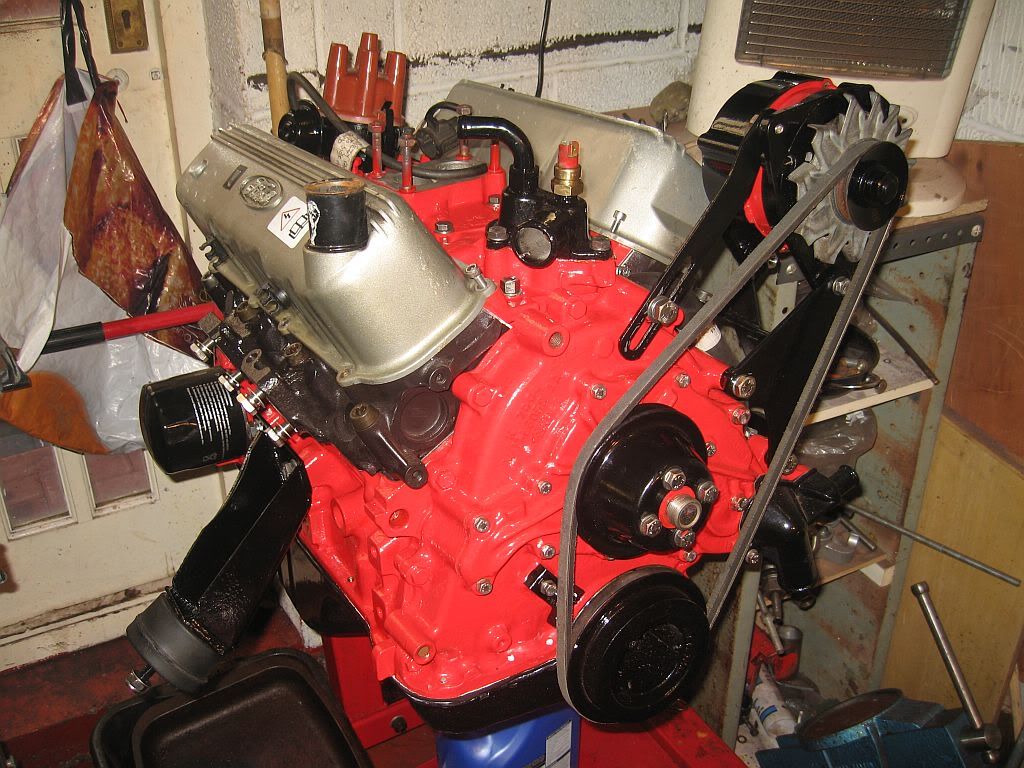
While I was waiting for the paint to dry I could not help tinkering with the engine again so I had a drive out and bought the 10mm bolts required for the mounts and the exhaust manifolds, the manifold holes required tapping out and I have loosely fitted the bolts ready. The mounts went on easily enough and I have positioned the ally rocker covers, still have to decided whether to have them powder coated red, black or chrome coated.
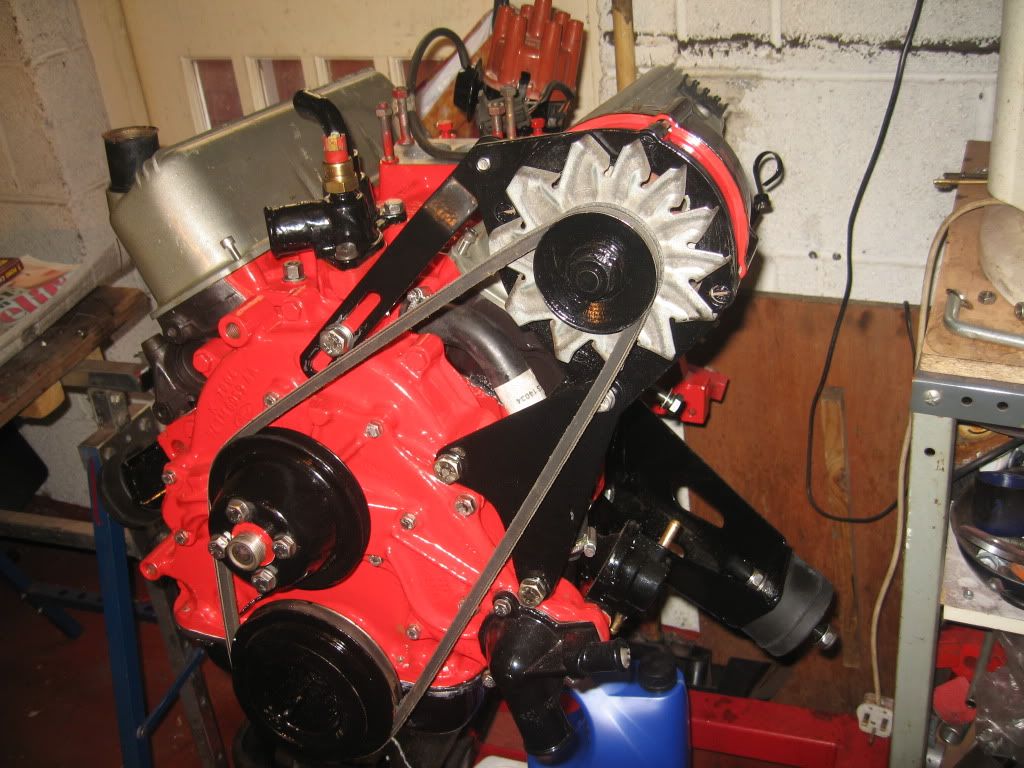
The alternator and belt went on mostly to get a look at the finished article and to make sure I get it right, still need to get a hold of a fan belt when I figure out what car its from.

Well I hope to get some more done tomorrow, if not then I'll be back in 2 weeks.
See ya
Paul
Saturday, 21 April 2012
Air intake gasket & Tappets

Hi
Got back late Wednesday and have spent Thursday and Friday decorating, the living room was first and it looks nice and fresh, dining room and hall next time home.

As always I have been busy getting bits and pieces ordered, some of the parts I have already mentioned in my last blog and these have arrived. 
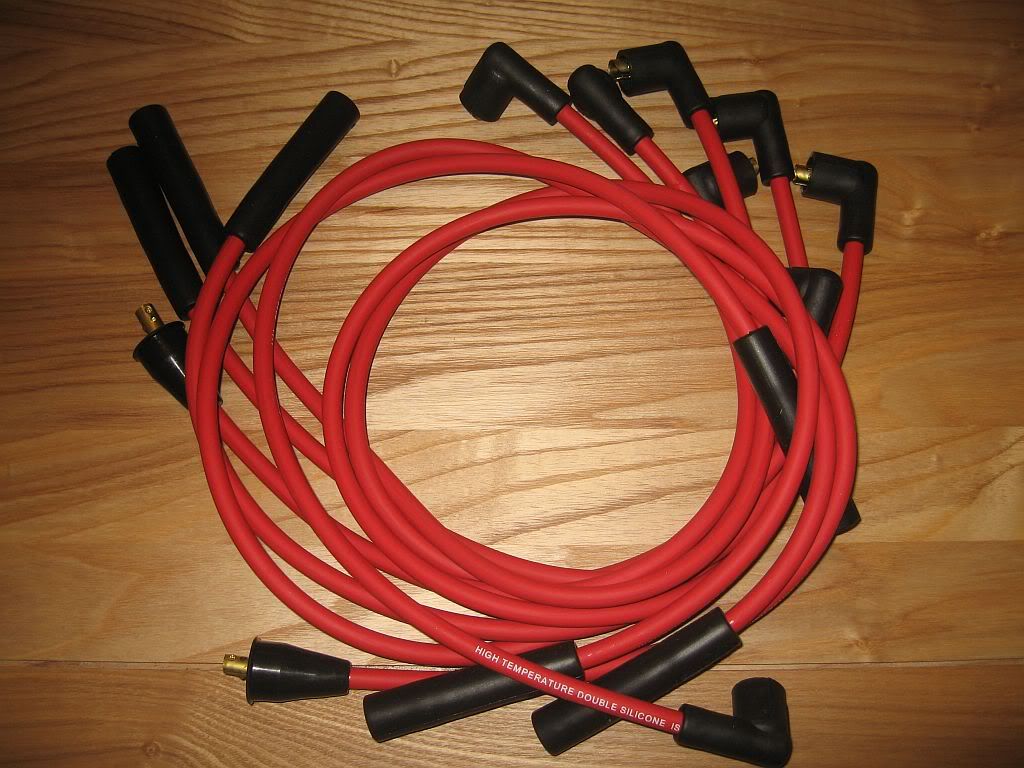
First a new set of Red HT leads.
I have a set of Magnecor leads on my MX5 which I bought on eBay as a used item for around £50 and were as new but a new set for the Panther would be nearly £100 so I have bought a cheaper set for £30 which are still 8mm silicon and look and feel good quality. I have also ordered a new Distributor cap for £17 and a Rotor at £4.50, there is probably nothing wrong with the ones I have apart from being rather old.
I have also got hold of a Ford clutch alignment tool for £5, a Unipart old new item on eBay.

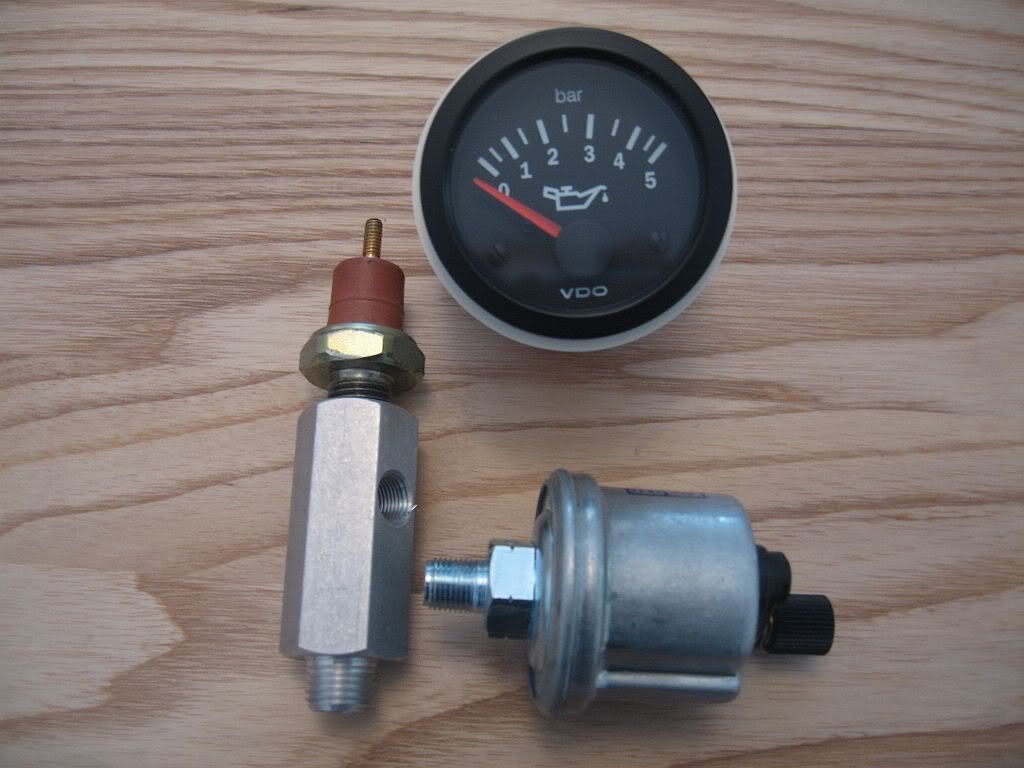
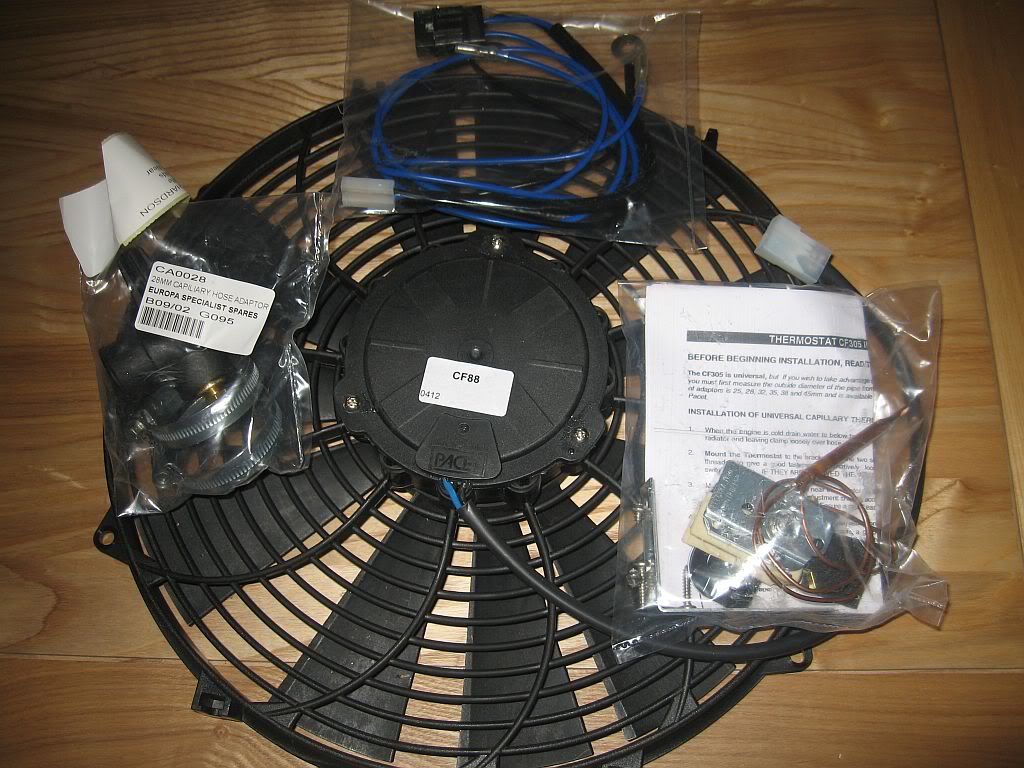
Two of the bigger items to arrive are the Pacet fan and the VDO gauge.
I bought these from Europaspares and they arrived yesterday and are looking good, unfortunately they won't fit and this is because the sender and warning sensor need to both fit into the tee piece which sticks out right into the fuel inlet for the fuel pump.
Still; not a problem as I have ordered a brass 1/4" male / female elbow to bring it to the side of the engine avoiding the fuel pump. I never asked the price of the sender unit when I phoned in my order; there are a number of different senders in the older catalogue I had but not VDO, I thought it would cost around £30 but got a shock at finding it was £50 especially expensive when you consider the oil gauge was only £35, still needs must.
I will have to get onto Europaspares as there is no wiring diagram with the gauge as promised and without it I would struggle a bit to get it right, and they did promise me one.
The Pacet fan arrived and that looks a very well made and heavy fan, I never realised that Pacet is the only British maker of these fans, every other one Kenlowe etc are made abroad. (Buy British).
Included in the photo are the capillary controller and the tee piece to take the capillary sensor plus wiring loom.

I got started today by fitting the inlet manifold, I have been given a lot of advise in the fitting of this part and have followed the advise closely. I gave all of the surfaces a good clean again making sure there was no paint carried over to the faces, which there was. 
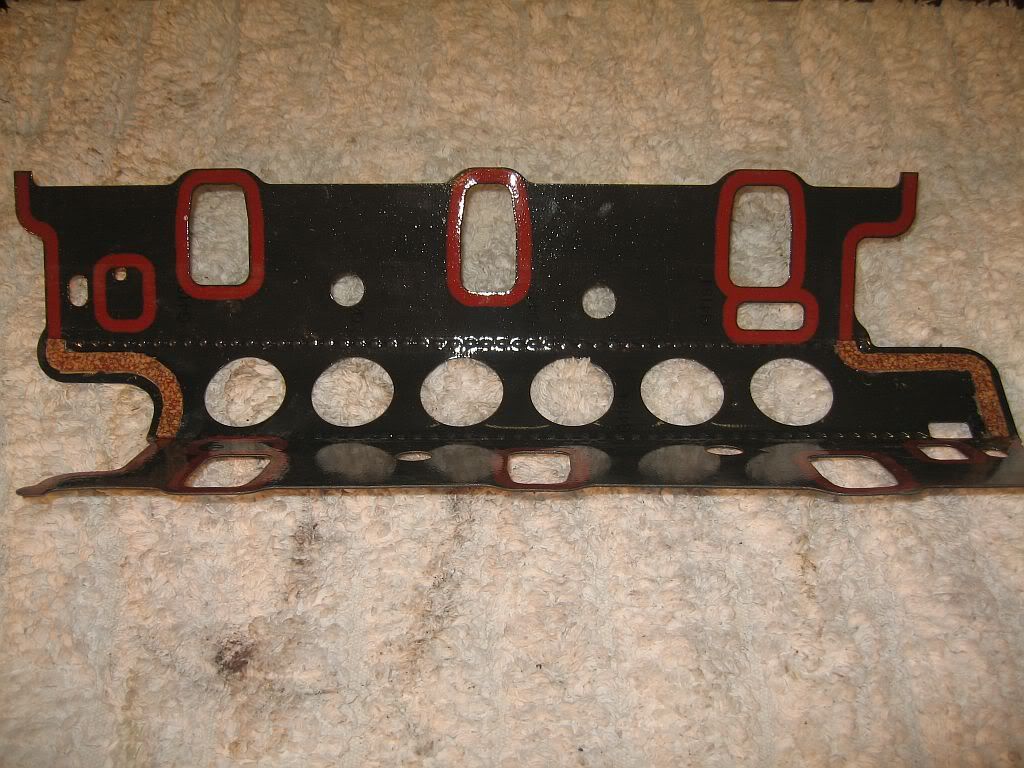
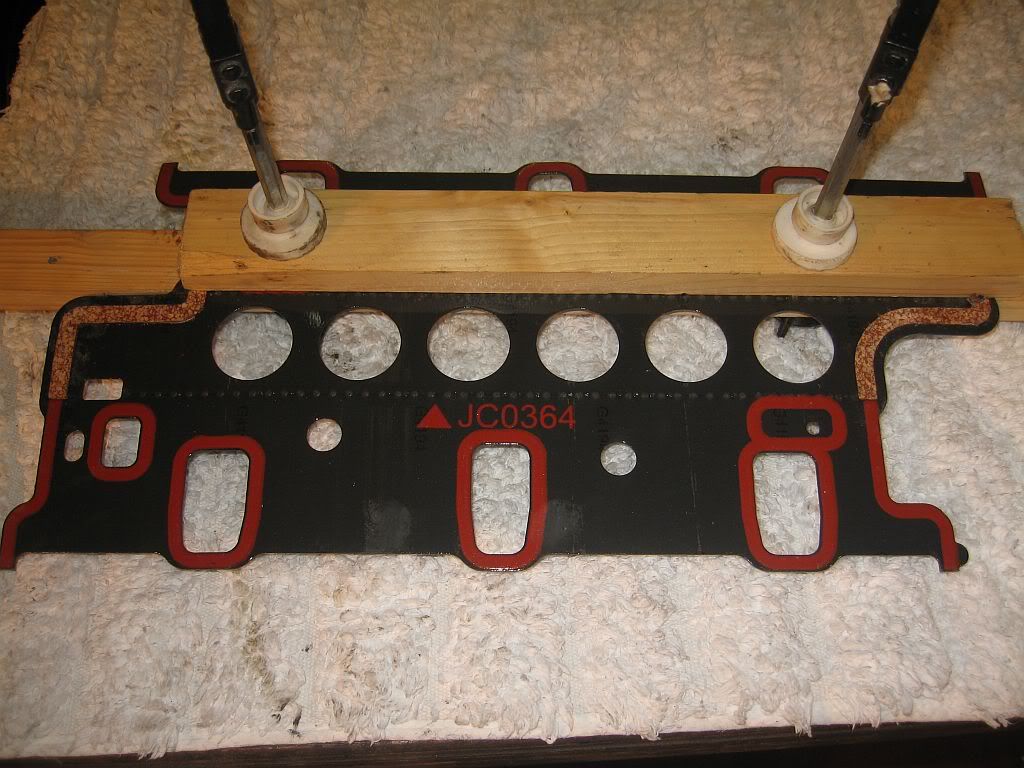
The gasket comes in the flat and needs to be bent to fit, it is of course important to bend it in the right direction so I spent a few minutes on test fitting plus I still had the original and double checked against this. The gasket needs to be bent along the correct line so as to fit into the corners where the heads join onto the block, to do this 2 pieces of wood are put front and back and clamped into position.
then using a straight edge to hold it flat the gasket can be bent and then repeated on the other side.
Test fit the gasket to make sure the angles are correct.
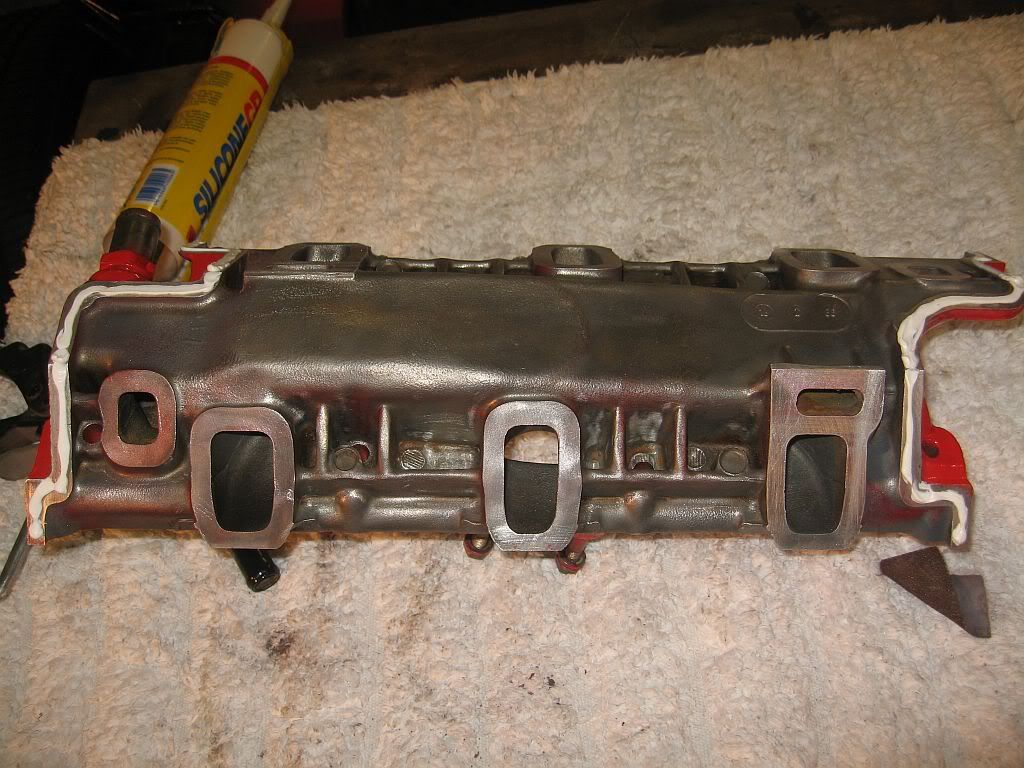
It is important to seal the corners were the gasket sits with silicon both top and bottom, but me being me decided that if you are supposed to seal the corners then why not seal all around.
So I have.
The gasket is put into position then the manifold positioned carefully on top, I had already cleaned all of the bolts and the nuts and gently tightened down evenly before torquing. The inlet manifold has 4 stages of torquing unfortunately my torque wrench starts at 44 Nm before that its basically guesswork so I started where it clicked very easily then added a quarter turn until I got to the fourth stage. The sequence is  7Nm / 11Nm / 18Nm / 23Nm, part of the advice I have been given is to repeat the final torque for three days as the gasket settles into position. Just wish I had spent more money on the torque wrench and got a lower setting one.
Once the inlet manifold was in position I refitted the Distributor, I had made sure that #1 unit was at TDC before fitting the heads, the Distributor was still setup to its original #1 position that I had marked on the cap and it dropped straight in, I had practiced this a number of times to ensure I got it correct. Once clamped down I checked that the oil pump rotated by removing the pump cover and turning the engine.
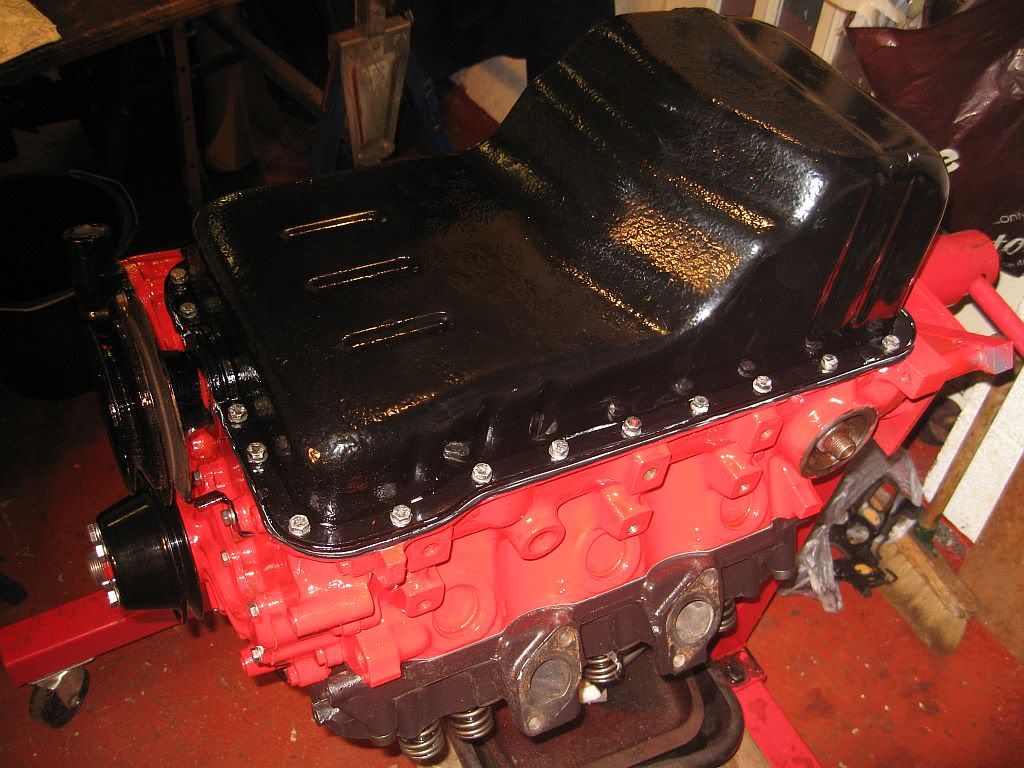
Once all happy with the fit I got started on the sump pan, I had a lot of carry over from the powder coating on the sump face which had to be cleaned off with the rotary brush which gave it a good clean finish. The face of the block got another good clean as it was now very oily and I needed to silicon seal around the edges where the tabs entered the block. Once I started sealing I decided to carry on and seal the whole gasket, just in case.
The flanges went on and the clips knocked over, I fitted new 6mm stainless bolts and washers and tightened down evenly although in some places the gasket squeezed out a little due to a little over zealousness.
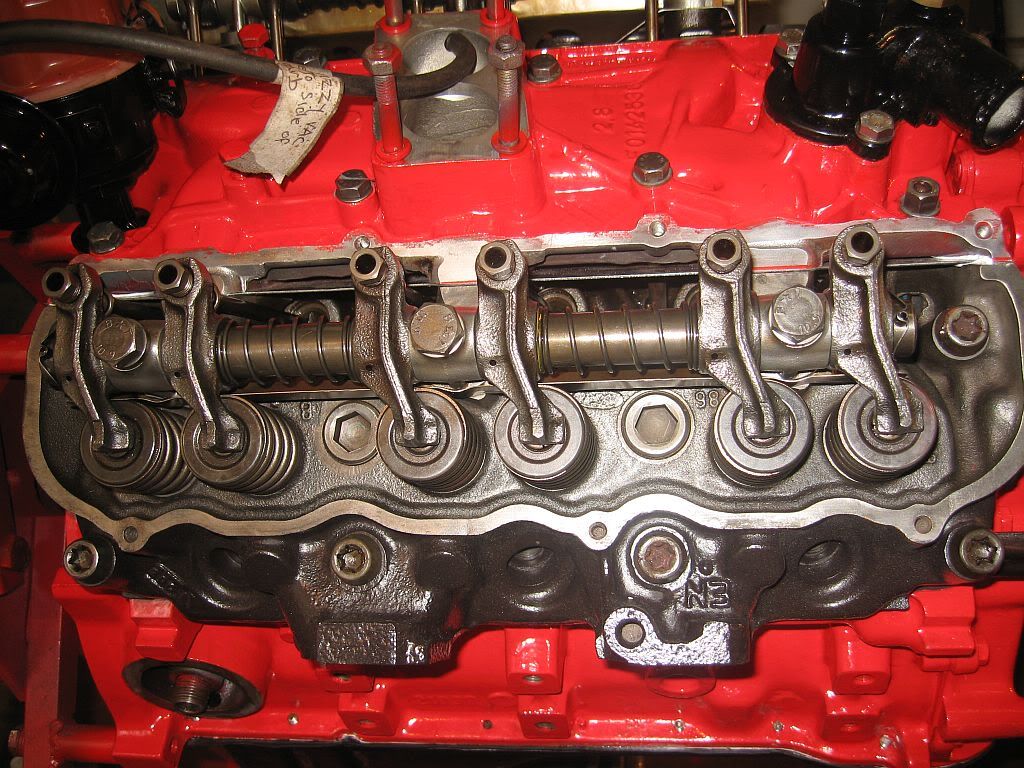
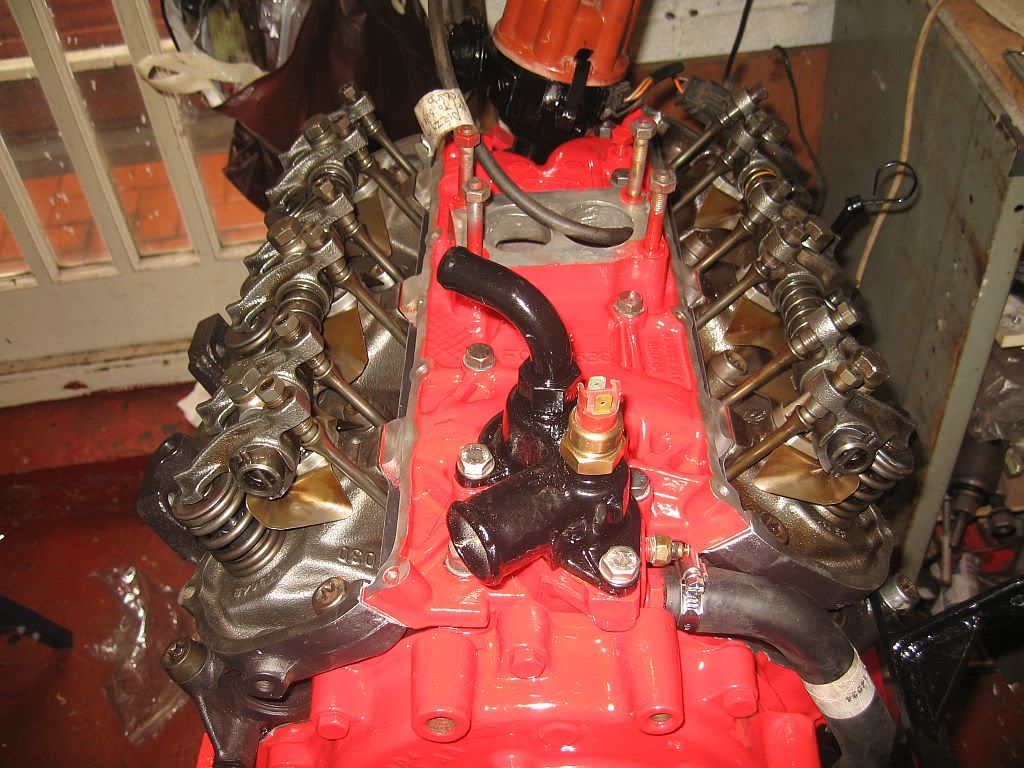
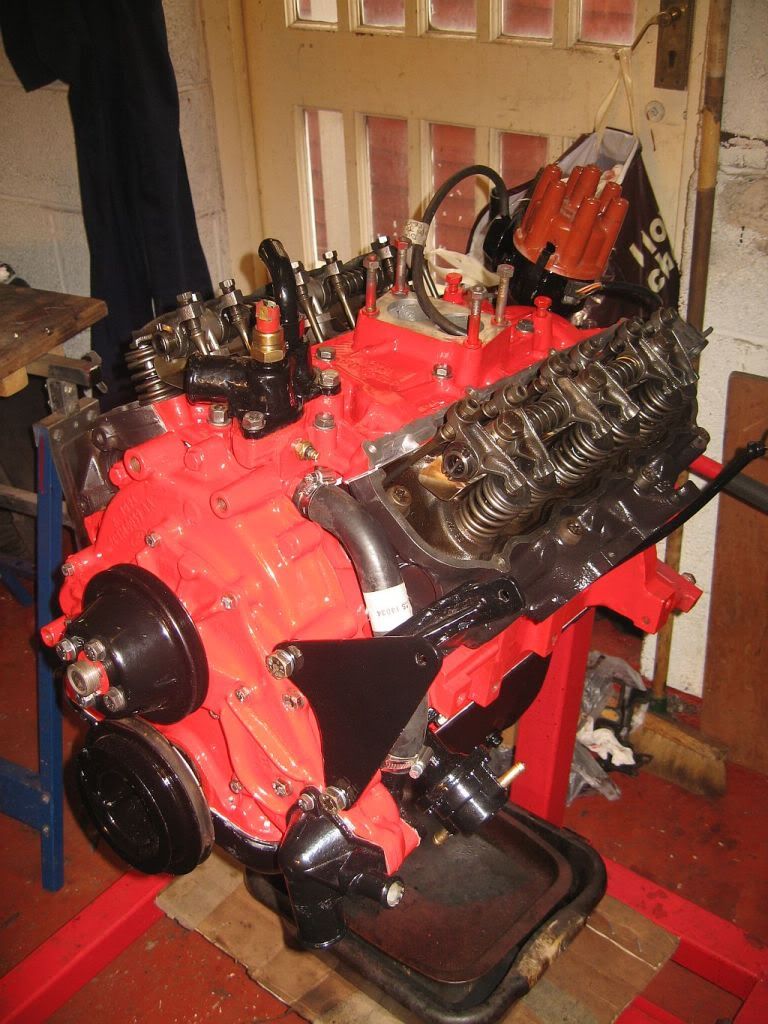
Next was the rockers, these had been all cleaned and were ready to fit straight on, I only tightened partway before slipping in the push rods and positioning them under the rockers, I found that putting them in before the rockers are partially down allows the rods to flop about and out of position. The rockers then tightened down to 63Nm, I then turned the engine to ensure that everything was free and it was nice to see the arms moving up and down.
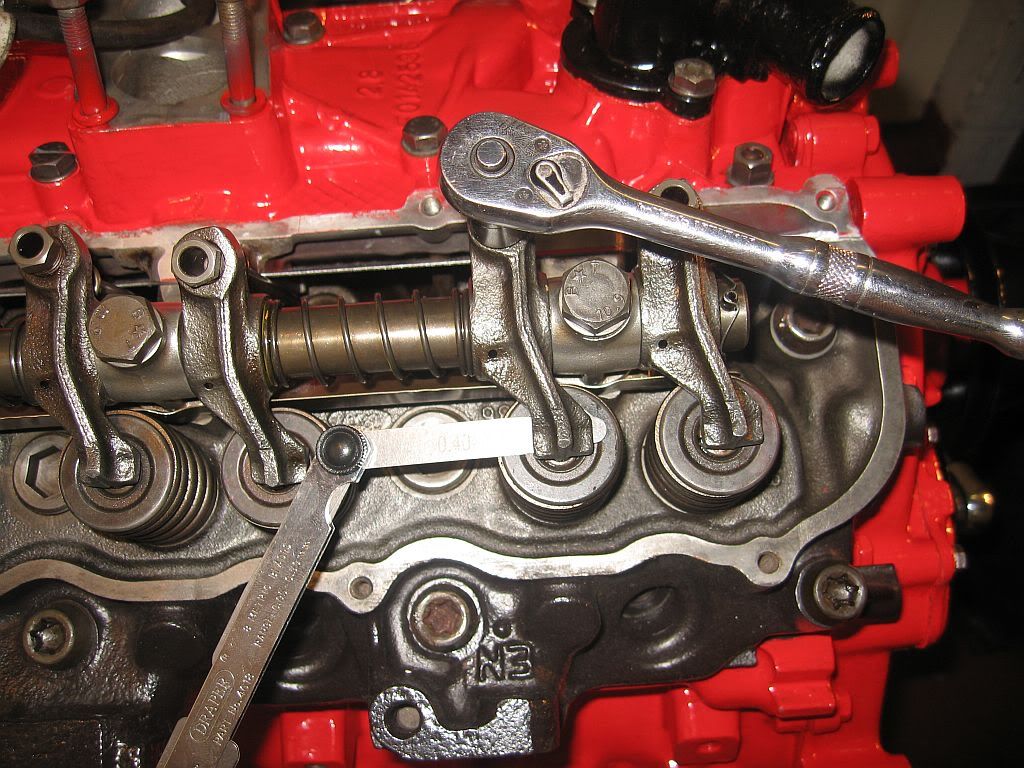
Once the rockers were tight I then got the book out on setting the valve clearances, I have done this many times on ships main engines and on generator engines which are really quite simple when you get used to it, only just on a much much bigger scale. 
The clearances are 0.014" or 0.35mm for the inlet and 0.016" or 0.40mm for the exhaust.
I have followed the instructions in the Haynes manual and hopefully have set them correctly, I shall check them again tomorrow just to make sure It is right.
Basically; the engine needs to be cold and you follow the sequence of steps laid down in the Haynes manual, when one set is rocking you then adjust the clearance on the corresponding set. Turning the engine each time until they are complete.
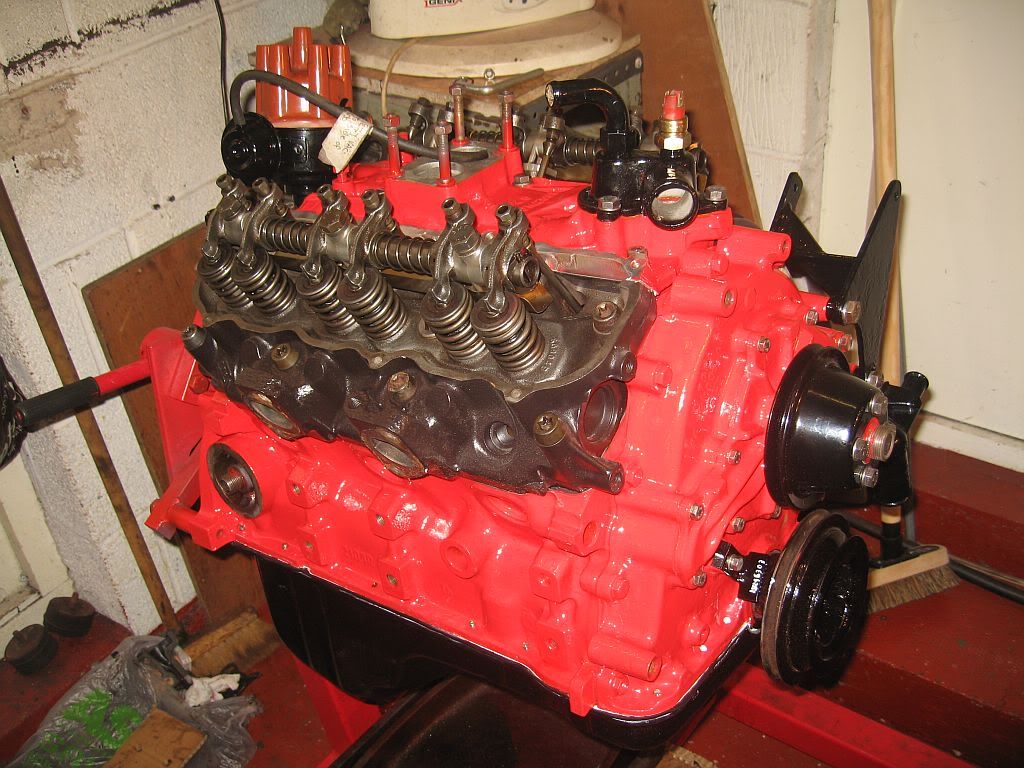
Well that's the engine finished, just the mounting brackets, flywheel and clutch to fit then its ready to go in. I have the alloy rocker covers which need modifying to take the vent pipe from the carb but that's another day first I need to get the engine bay cleaned and painted.
see ya
Paul