
Finally a full day to get some work done, unfortunately it will be the last for a few days as tomorrow afternoon we are on a guided walk off Hadrian's wall which I am looking forward to.
There was a lot of overspray on the underside where the valance was to sit and also a bit of polishing required, I had been given a bottle of Farcla G12 fine cutting compound by Ant when I brought the car home as there is still a lot of polishing to do and while away I bought a bottle of Meguiars Glaze for finishing off.

I gave the lower half a polish and glaze then tapped out all of the threads then got out the black paint, the back underside had been painted and coated in underseal but was now a little oversprayed so that got painted first.

I also sprayed waxoil up the bumper tubes before fitting the bumper, now on looking at the picture I think I have the bumper a little low. Will rectify tomorrow.

Next to go on was the valance, after one attempt to fit by lying on my back and trying to bolt it on I gave up and removed the lights which gives easy access to the brackets and bolted it on.

I then refitted the lights.
I had bought the new LED rear combination indicators last month,
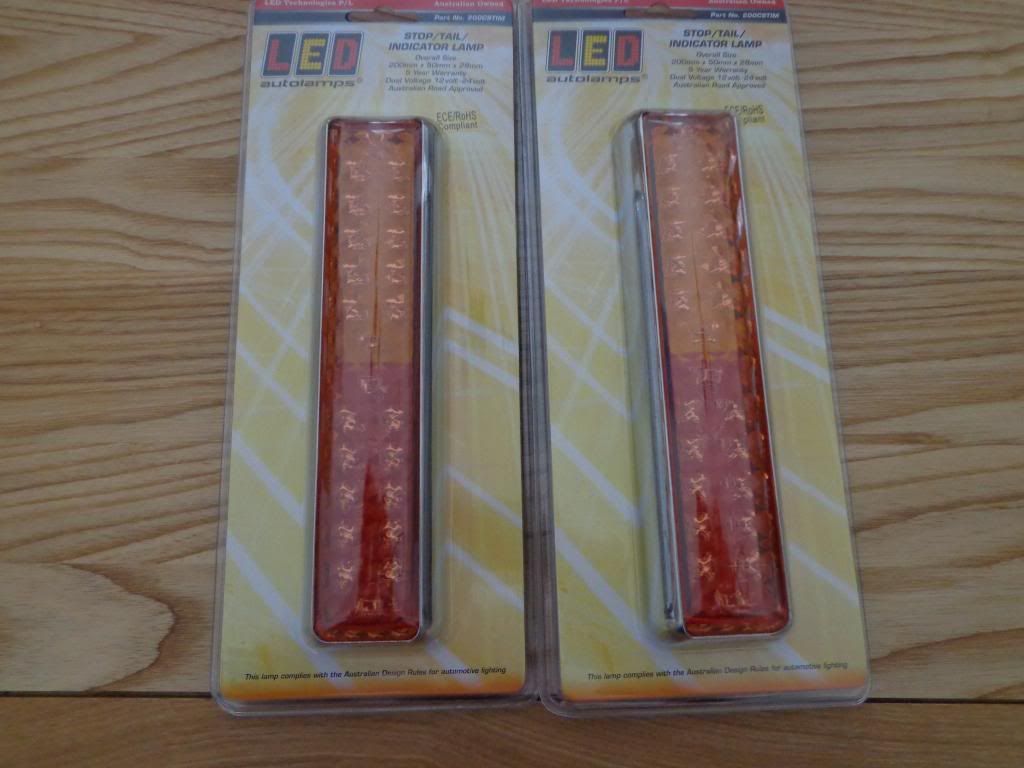
but unfortunately the bracket holes were of a different width. I started to make a stainless plate to mount them but was unable to remove the back of the indicator to bolt it on as I had to lever the lens out and I was sure I would break it so I scrapped that idea. I then came up with the idea of using double sided tape, I first cut some standoffs and stuck them on as the original mountings stuck out.

Then with a bit more tape I stuck them on, this is proper automotive tape and ain't coming off again.

Yes; now that I look at it I realise it is too low. 10 mins work in the morning.
I have bolted on the number plate although that will come of again when I get the proper black capped bolts, I have had no joy with a replica number plate and may keep it as it is one of the only original pieces left on the car.
Once finished on the rear end I finished of the mod to the filler cap drain, I had already fitted the drain pipe.
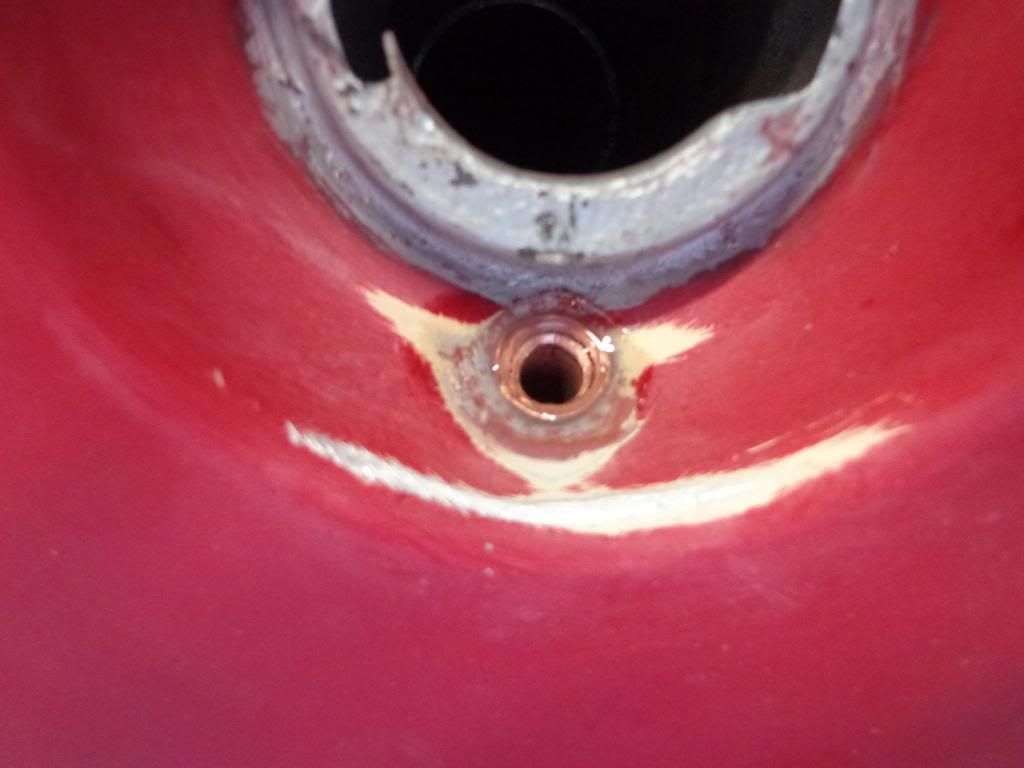
and had ordered the 10mm tube a while ago and now had a chance to fit it, I jubille clipped it to the pipe inside and fed the tube past the filling tube and it emerged down the side of the fuel tank.

The tube was trimmed it of and tie wrapped in place.
Next in line was the step treads, these were all ready to go on, the step needed a little polish as there was some overspray around the edges from the touch ups but that soon came off.

The passenger side door catch was fitted next, the paint on the passenger side catch had reacted so I have rubbed it down and primed ready for another attempt.

I went back down to the paint shop to see what parts were ready for collection and picked up the grill, it still needs a little polishing but looks fantastic in position, I will try and fit in the morning.

I also picked up the headlights, to think I was going to throw these away.

They are better now than when new, I have fitted the new bolts I bought from SVC but unfortunately the locking tab on both lamps have broke off, this may cause a few problems when setting the headlights, I will try and rivet them on again.
While away I bought what was advertised as chrome rims for 7" headlights under the assumption that 7" headlights where 7". Thats not what arrived.

Mine are the ones with the lamp and the rule says 7", the one's that arrive are nearly 81/4" so I have had to return them.
I tried this morning to clean the rust of my old ones with the idea of colour coding them.

They were a little on the rusty side.

So I thought a little sandblasting.

'O' what a bad idea, bloody big hole.
I have called SVC and he knew exactly what type of rims I require, unfortunately he has none and said they are not made anymore but if I was to remove the clips from mine and rivet them on the new ones they should fit ok. Fingers crossed.
Till tomorrow
see ya Paul
No comments:
Post a Comment