
Got back late Wednesday and have spent Thursday and Friday decorating, the living room was first and it looks nice and fresh, dining room and hall next time home.
As always I have been busy getting bits and pieces ordered, some of the parts I have already mentioned in my last blog and these have arrived.
First a new set of Red HT leads.
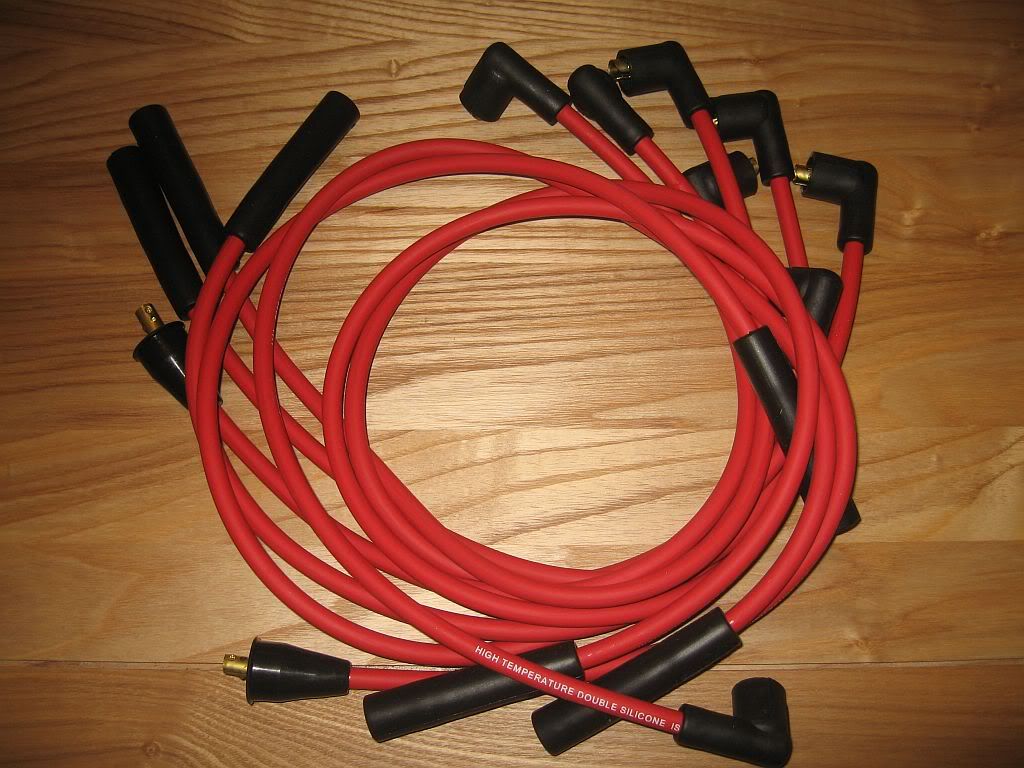
I have a set of Magnecor leads on my MX5 which I bought on eBay as a used item for around £50 and were as new but a new set for the Panther would be nearly £100 so I have bought a cheaper set for £30 which are still 8mm silicon and look and feel good quality. I have also ordered a new Distributor cap for £17 and a Rotor at £4.50, there is probably nothing wrong with the ones I have apart from being rather old.
I have also got hold of a Ford clutch alignment tool for £5, a Unipart old new item on eBay.
Two of the bigger items to arrive are the Pacet fan and the VDO gauge.
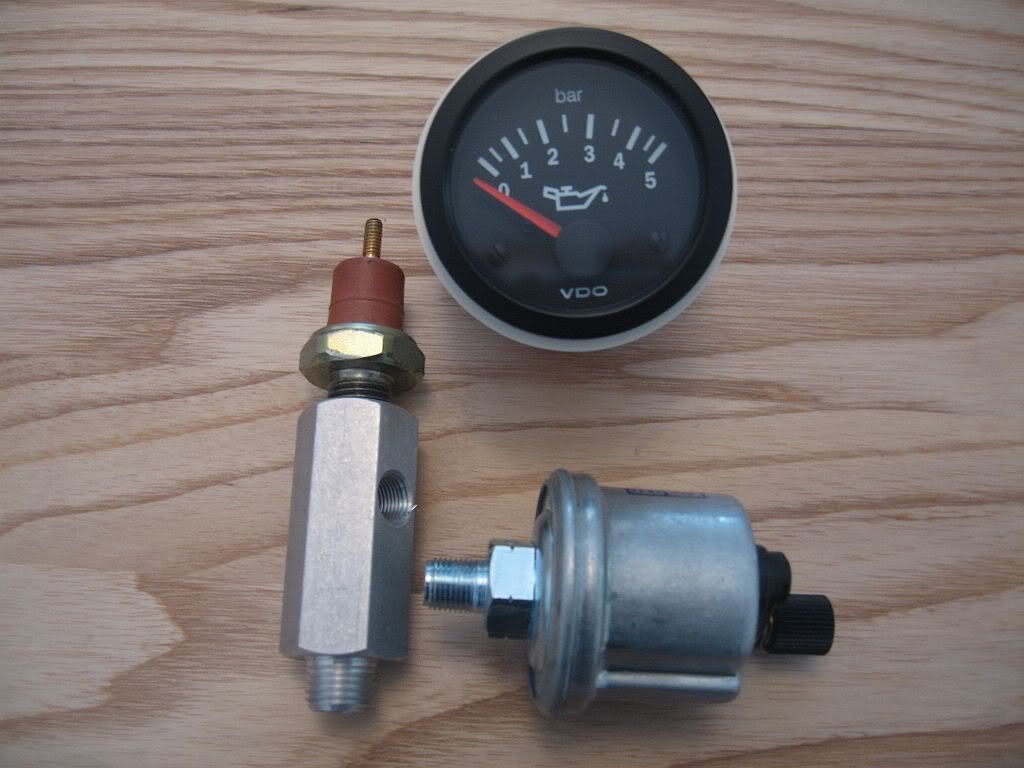
I bought these from Europaspares and they arrived yesterday and are looking good, unfortunately they won't fit and this is because the sender and warning sensor need to both fit into the tee piece which sticks out right into the fuel inlet for the fuel pump.
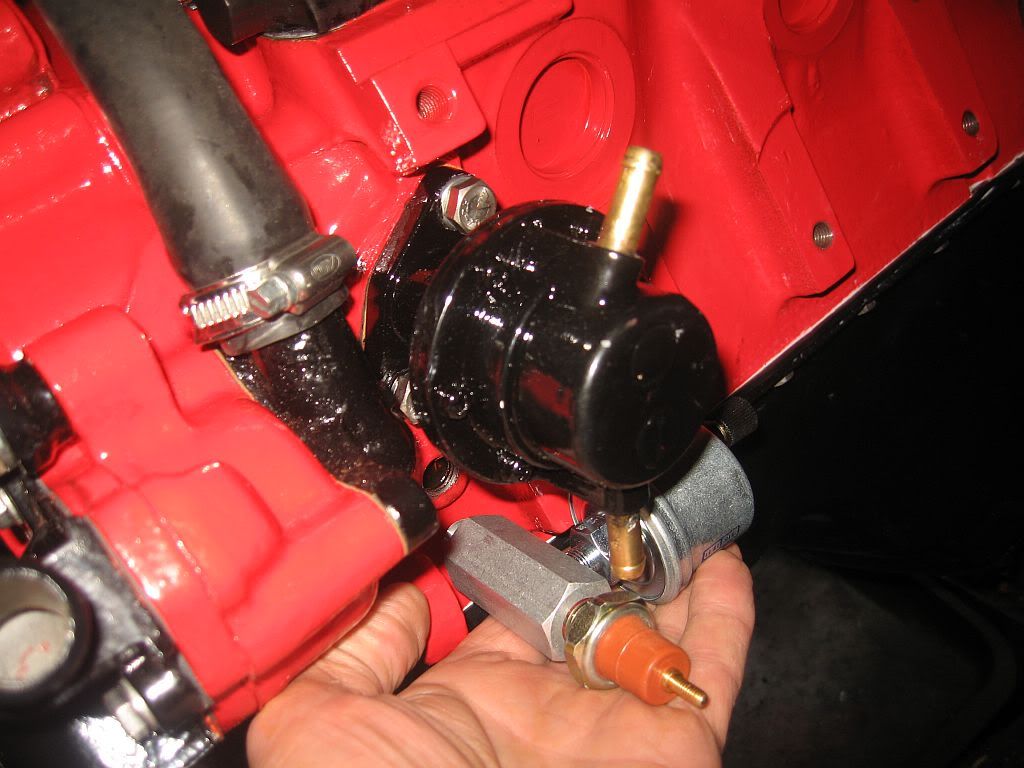
Still; not a problem as I have ordered a brass 1/4" male / female elbow to bring it to the side of the engine avoiding the fuel pump. I never asked the price of the sender unit when I phoned in my order; there are a number of different senders in the older catalogue I had but not VDO, I thought it would cost around £30 but got a shock at finding it was £50 especially expensive when you consider the oil gauge was only £35, still needs must.
I will have to get onto Europaspares as there is no wiring diagram with the gauge as promised and without it I would struggle a bit to get it right, and they did promise me one.
The Pacet fan arrived and that looks a very well made and heavy fan, I never realised that Pacet is the only British maker of these fans, every other one Kenlowe etc are made abroad. (Buy British).
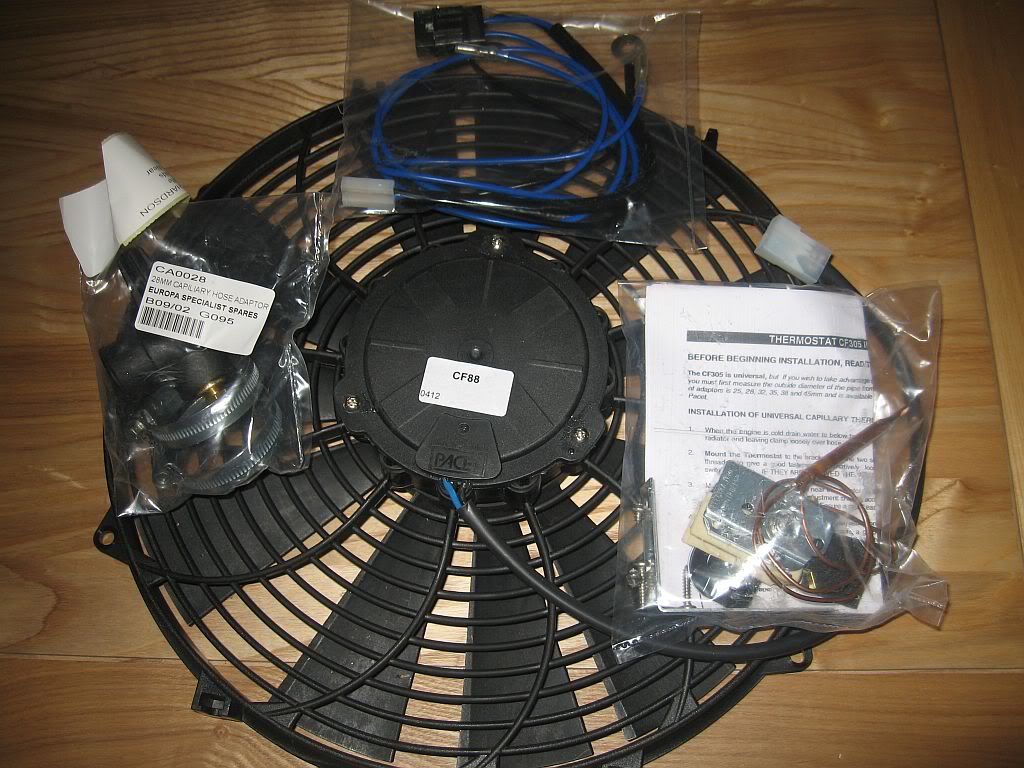
Included in the photo are the capillary controller and the tee piece to take the capillary sensor plus wiring loom.
I got started today by fitting the inlet manifold, I have been given a lot of advise in the fitting of this part and have followed the advise closely. I gave all of the surfaces a good clean again making sure there was no paint carried over to the faces, which there was.
The gasket comes in the flat and needs to be bent to fit, it is of course important to bend it in the right direction so I spent a few minutes on test fitting plus I still had the original and double checked against this. The gasket needs to be bent along the correct line so as to fit into the corners where the heads join onto the block, to do this 2 pieces of wood are put front and back and clamped into position.
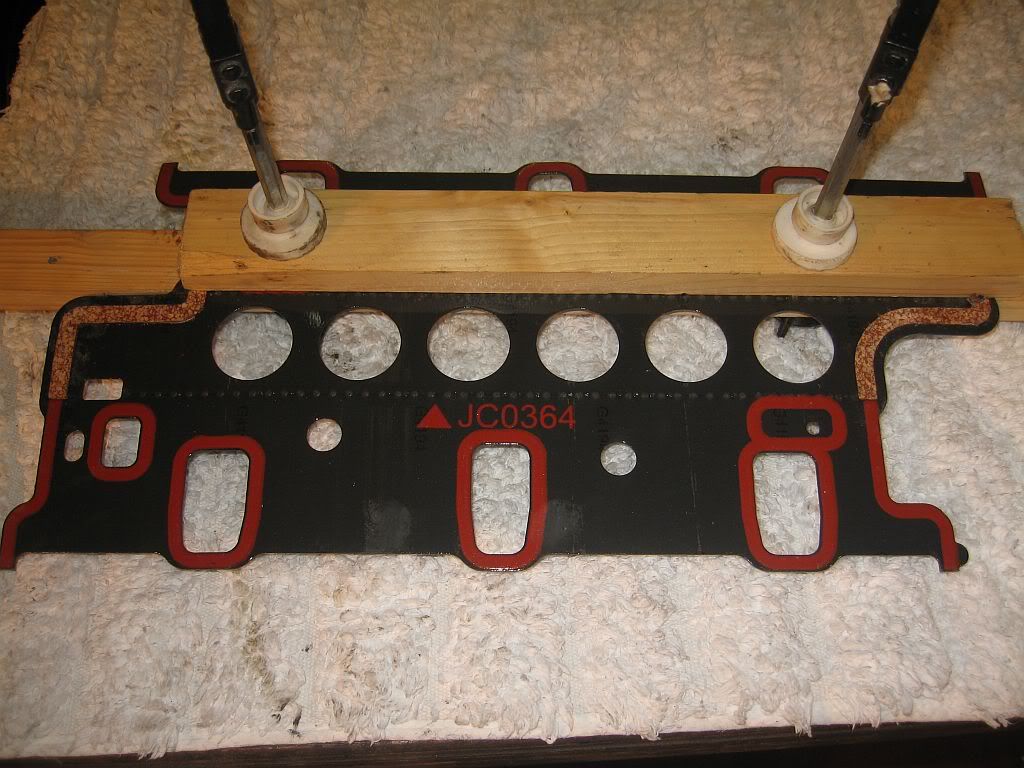
then using a straight edge to hold it flat the gasket can be bent and then repeated on the other side.
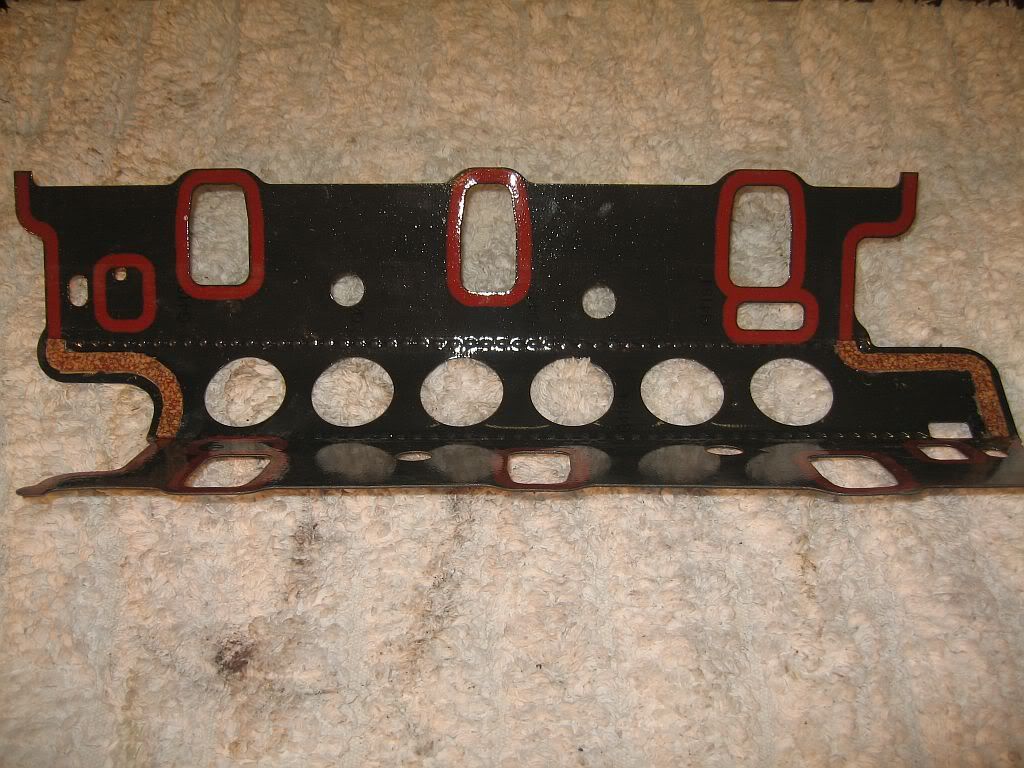
Test fit the gasket to make sure the angles are correct.
It is important to seal the corners were the gasket sits with silicon both top and bottom, but me being me decided that if you are supposed to seal the corners then why not seal all around.
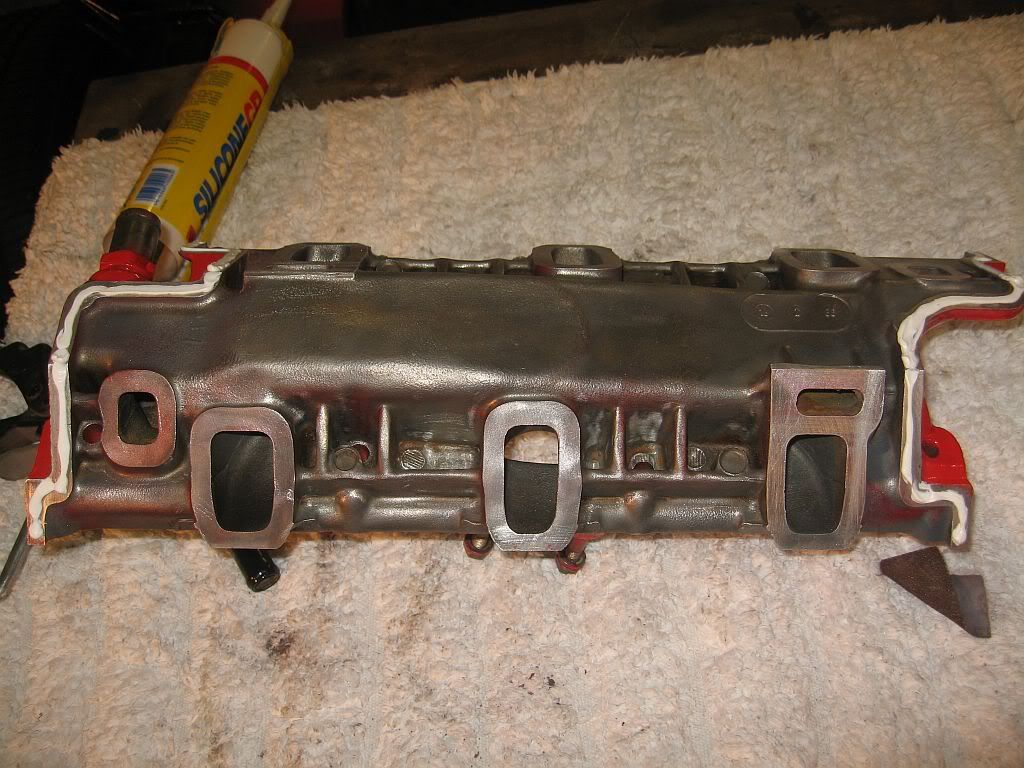
So I have.
The gasket is put into position then the manifold positioned carefully on top, I had already cleaned all of the bolts and the nuts and gently tightened down evenly before torquing. The inlet manifold has 4 stages of torquing unfortunately my torque wrench starts at 44 Nm before that its basically guesswork so I started where it clicked very easily then added a quarter turn until I got to the fourth stage. The sequence is 7Nm / 11Nm / 18Nm / 23Nm, part of the advice I have been given is to repeat the final torque for three days as the gasket settles into position. Just wish I had spent more money on the torque wrench and got a lower setting one.
Once the inlet manifold was in position I refitted the Distributor, I had made sure that #1 unit was at TDC before fitting the heads, the Distributor was still setup to its original #1 position that I had marked on the cap and it dropped straight in, I had practiced this a number of times to ensure I got it correct. Once clamped down I checked that the oil pump rotated by removing the pump cover and turning the engine.
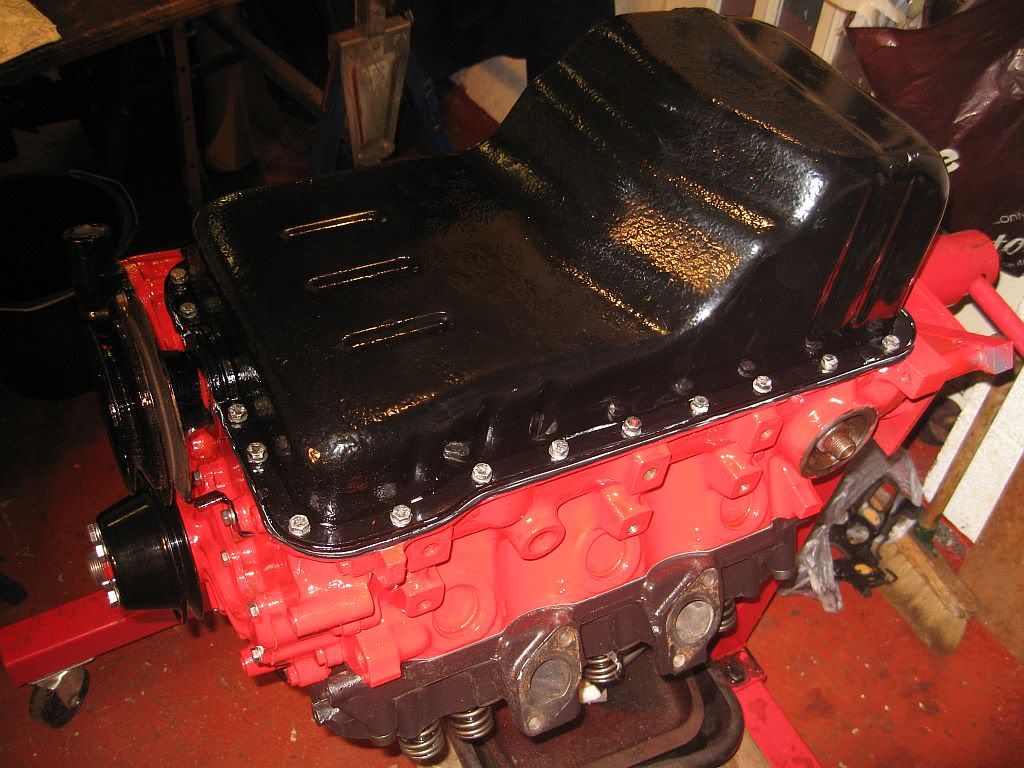
Once all happy with the fit I got started on the sump pan, I had a lot of carry over from the powder coating on the sump face which had to be cleaned off with the rotary brush which gave it a good clean finish. The face of the block got another good clean as it was now very oily and I needed to silicon seal around the edges where the tabs entered the block. Once I started sealing I decided to carry on and seal the whole gasket, just in case.
The flanges went on and the clips knocked over, I fitted new 6mm stainless bolts and washers and tightened down evenly although in some places the gasket squeezed out a little due to a little over zealousness.
Next was the rockers, these had been all cleaned and were ready to fit straight on, I only tightened partway before slipping in the push rods and positioning them under the rockers, I found that putting them in before the rockers are partially down allows the rods to flop about and out of position. The rockers then tightened down to 63Nm, I then turned the engine to ensure that everything was free and it was nice to see the arms moving up and down.
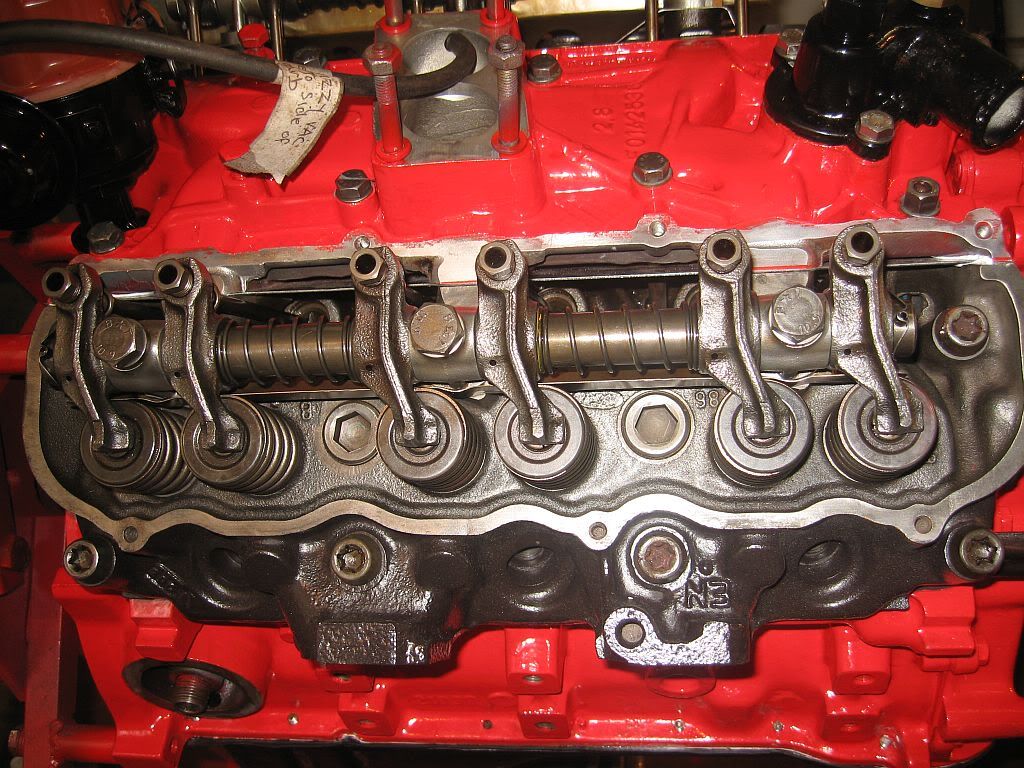
Once the rockers were tight I then got the book out on setting the valve clearances, I have done this many times on ships main engines and on generator engines which are really quite simple when you get used to it, only just on a much much bigger scale.
The clearances are 0.014" or 0.35mm for the inlet and 0.016" or 0.40mm for the exhaust.
I have followed the instructions in the Haynes manual and hopefully have set them correctly, I shall check them again tomorrow just to make sure It is right.
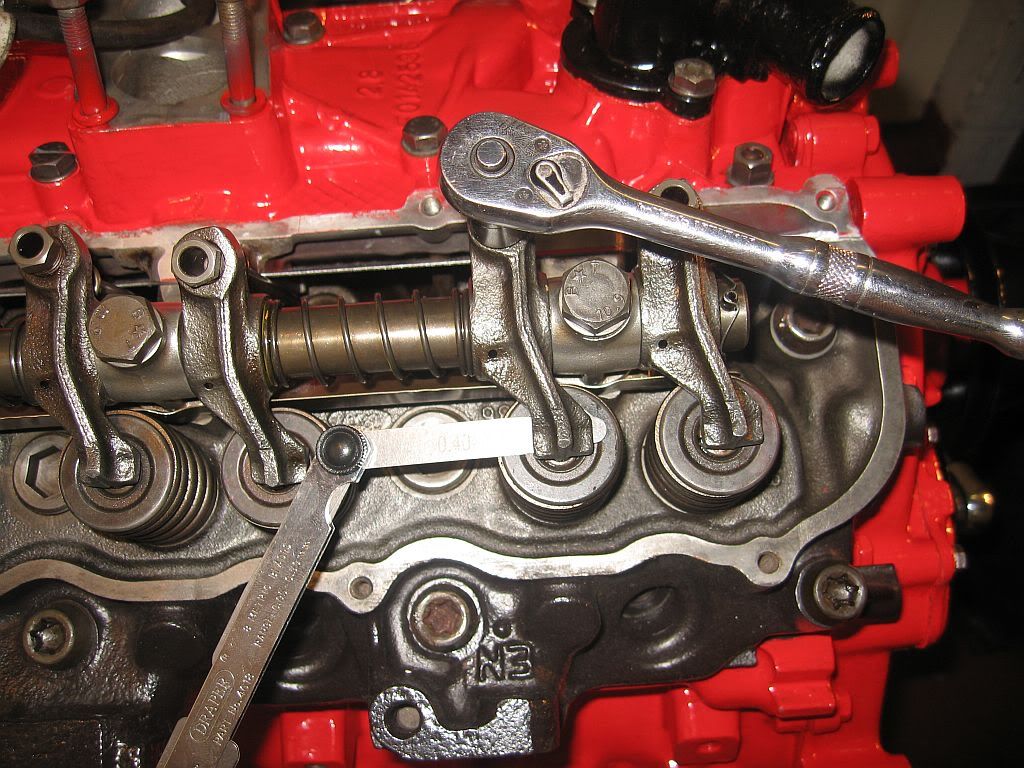
Basically; the engine needs to be cold and you follow the sequence of steps laid down in the Haynes manual, when one set is rocking you then adjust the clearance on the corresponding set. Turning the engine each time until they are complete.
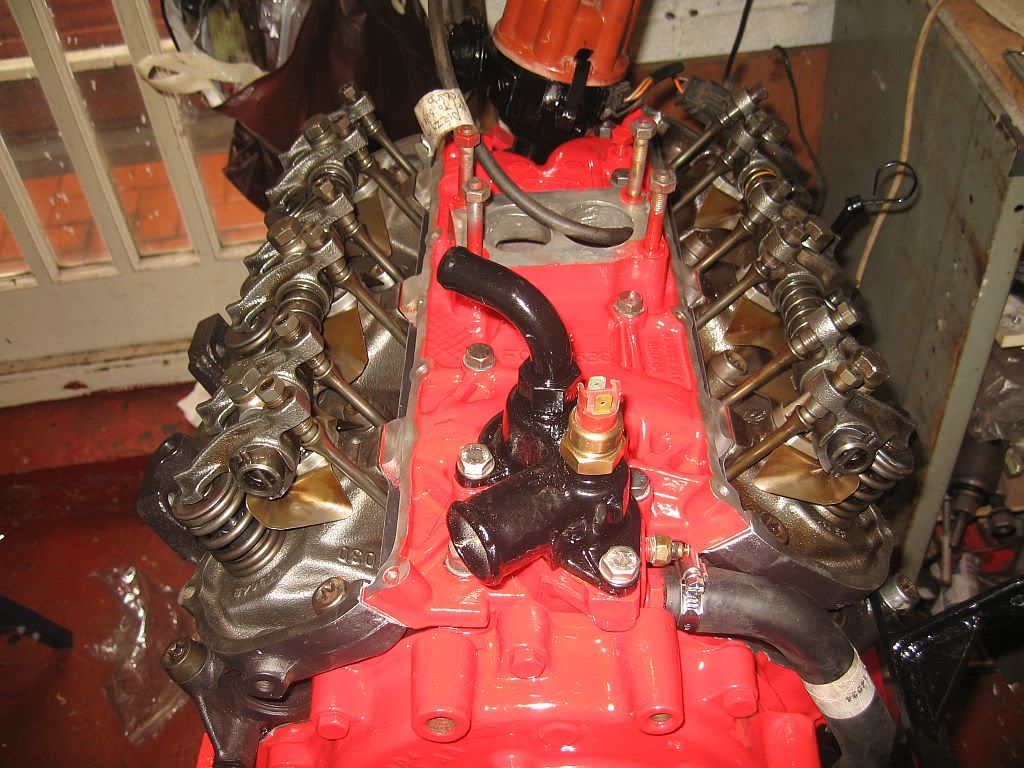
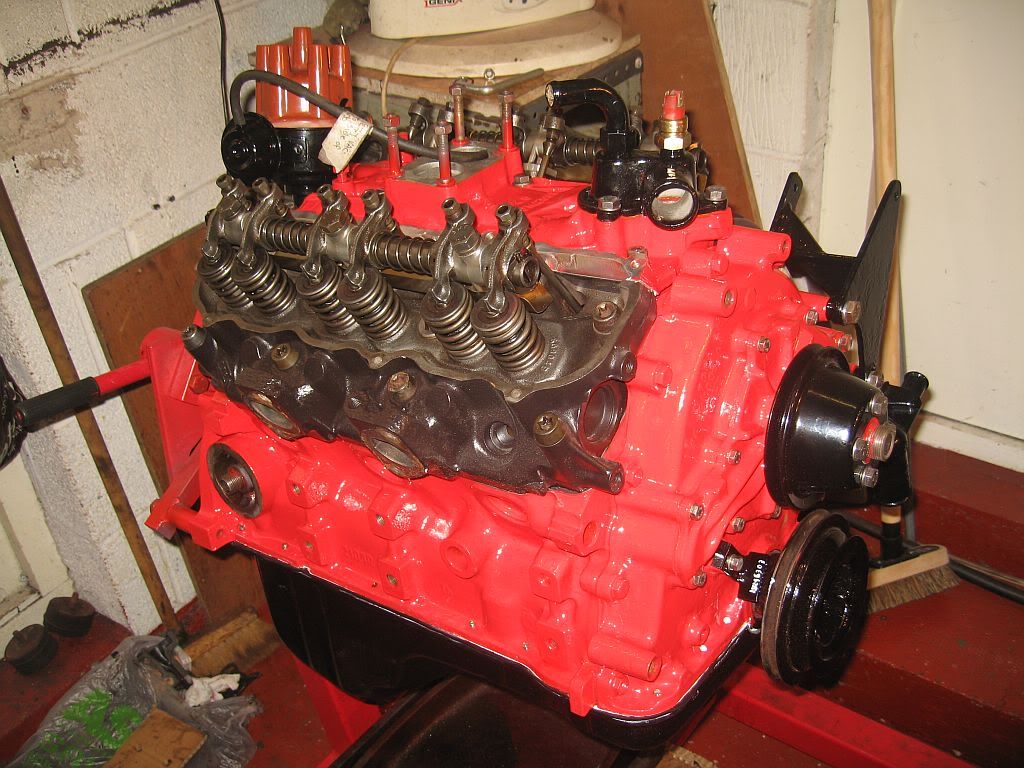
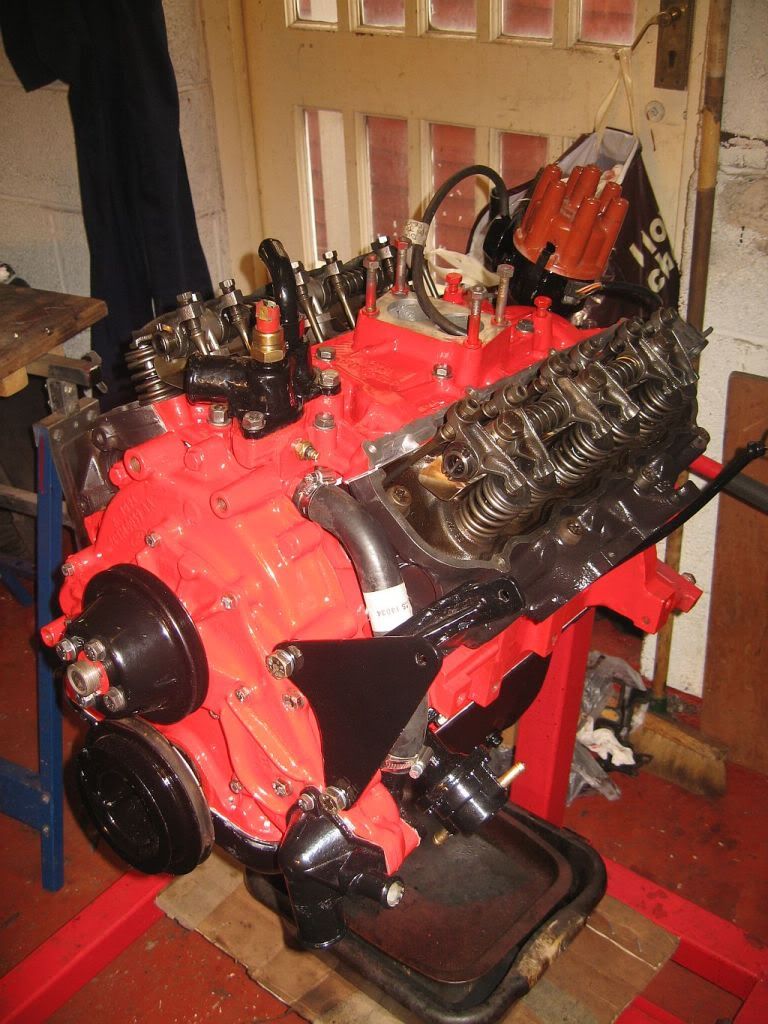
Well that's the engine finished, just the mounting brackets, flywheel and clutch to fit then its ready to go in. I have the alloy rocker covers which need modifying to take the vent pipe from the carb but that's another day first I need to get the engine bay cleaned and painted.
see yaPaul
No comments:
Post a Comment